
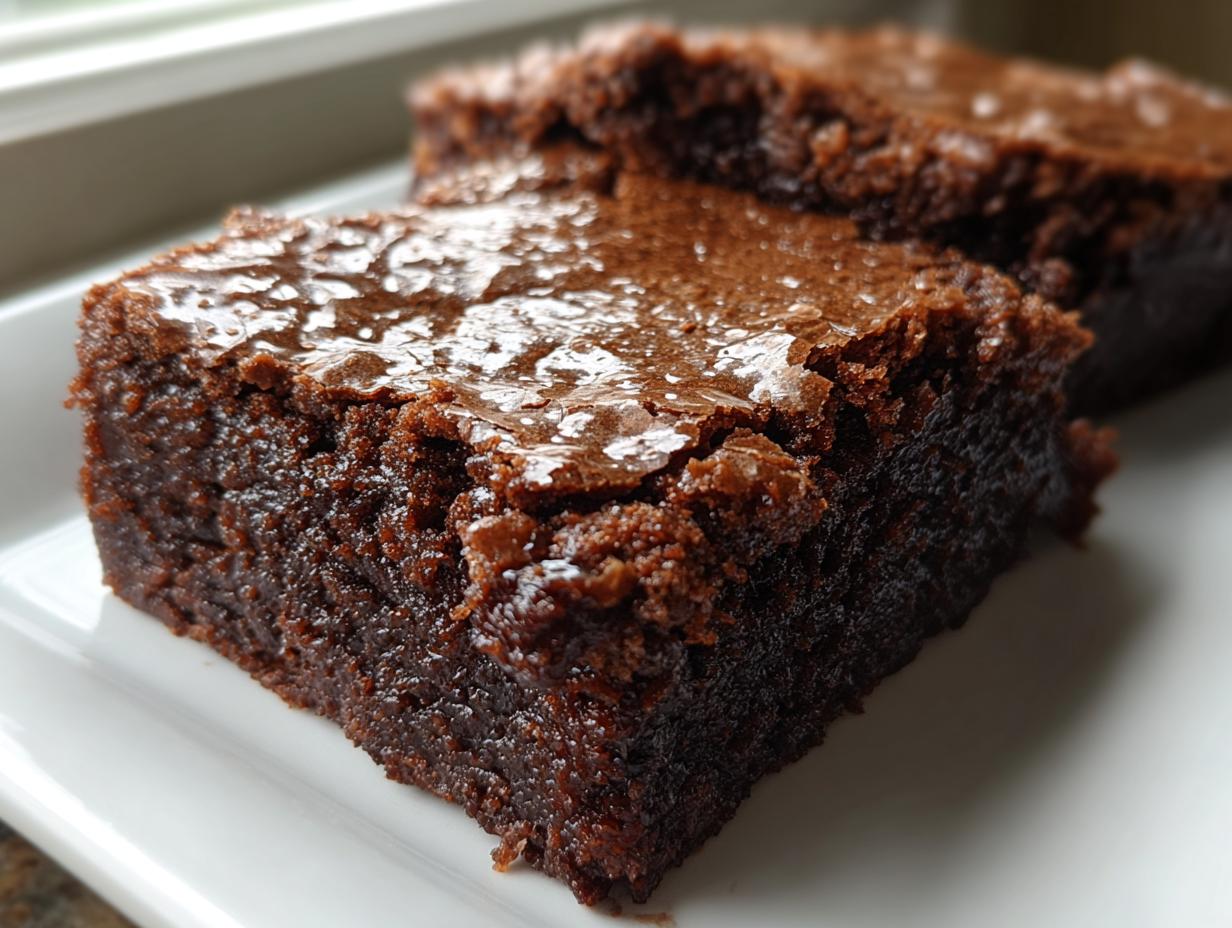
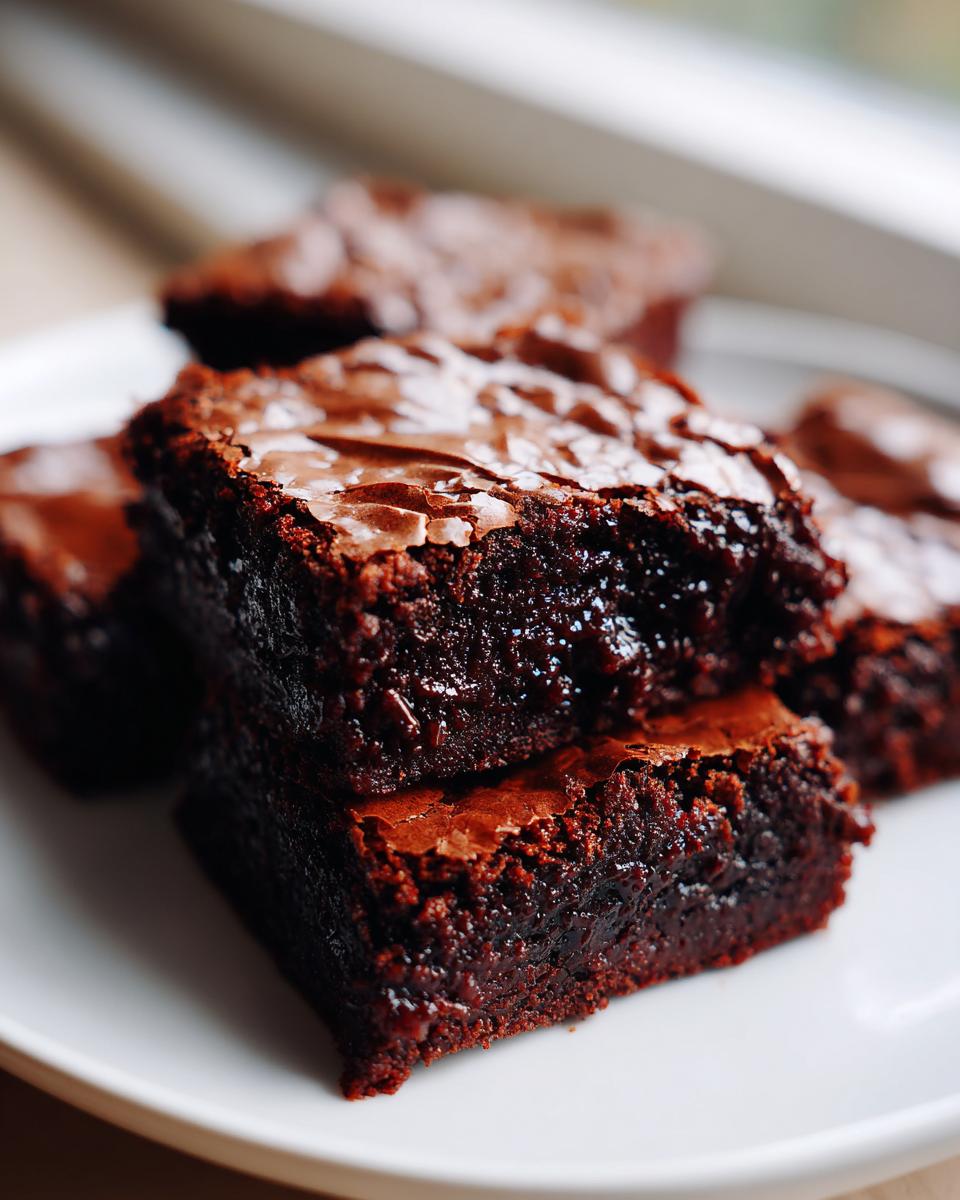
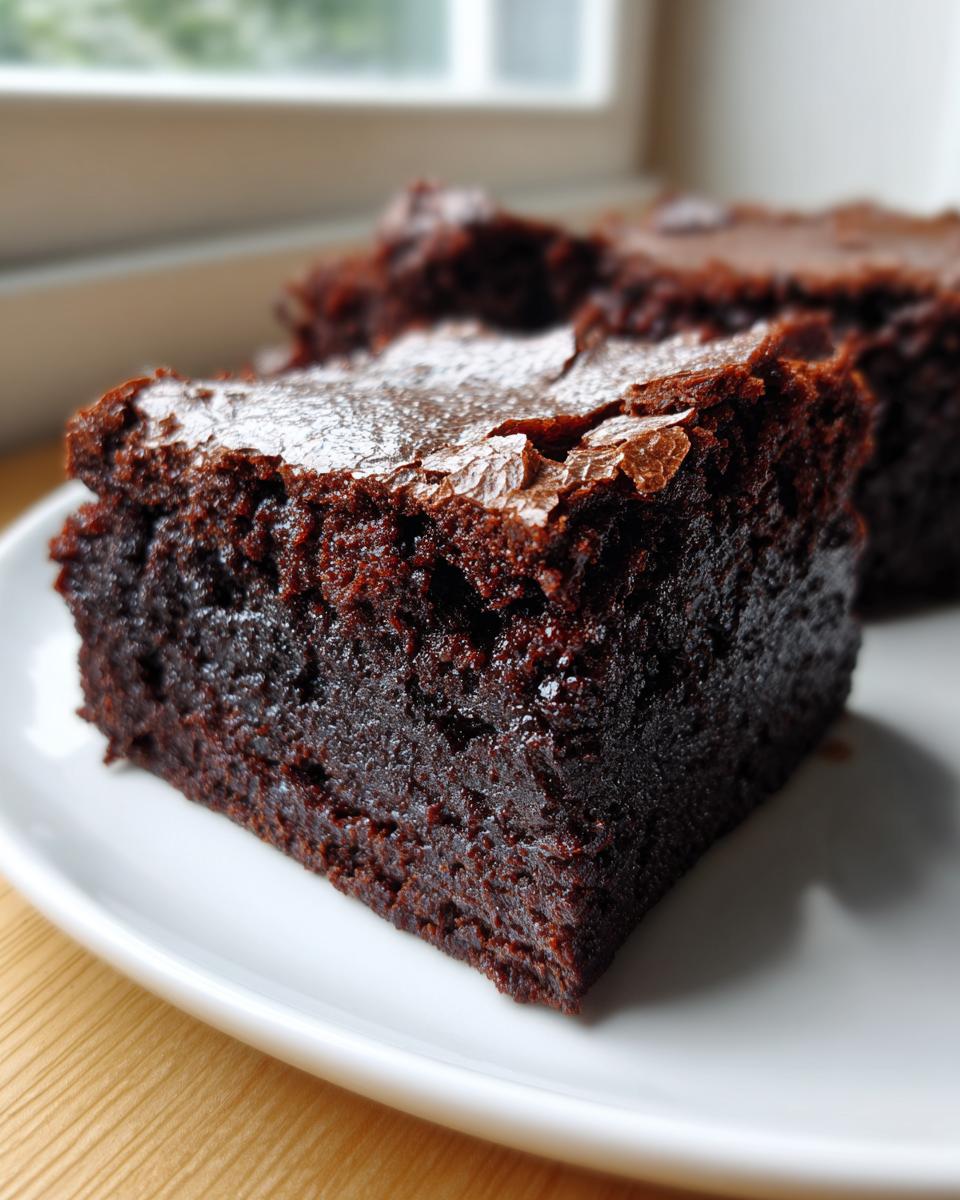
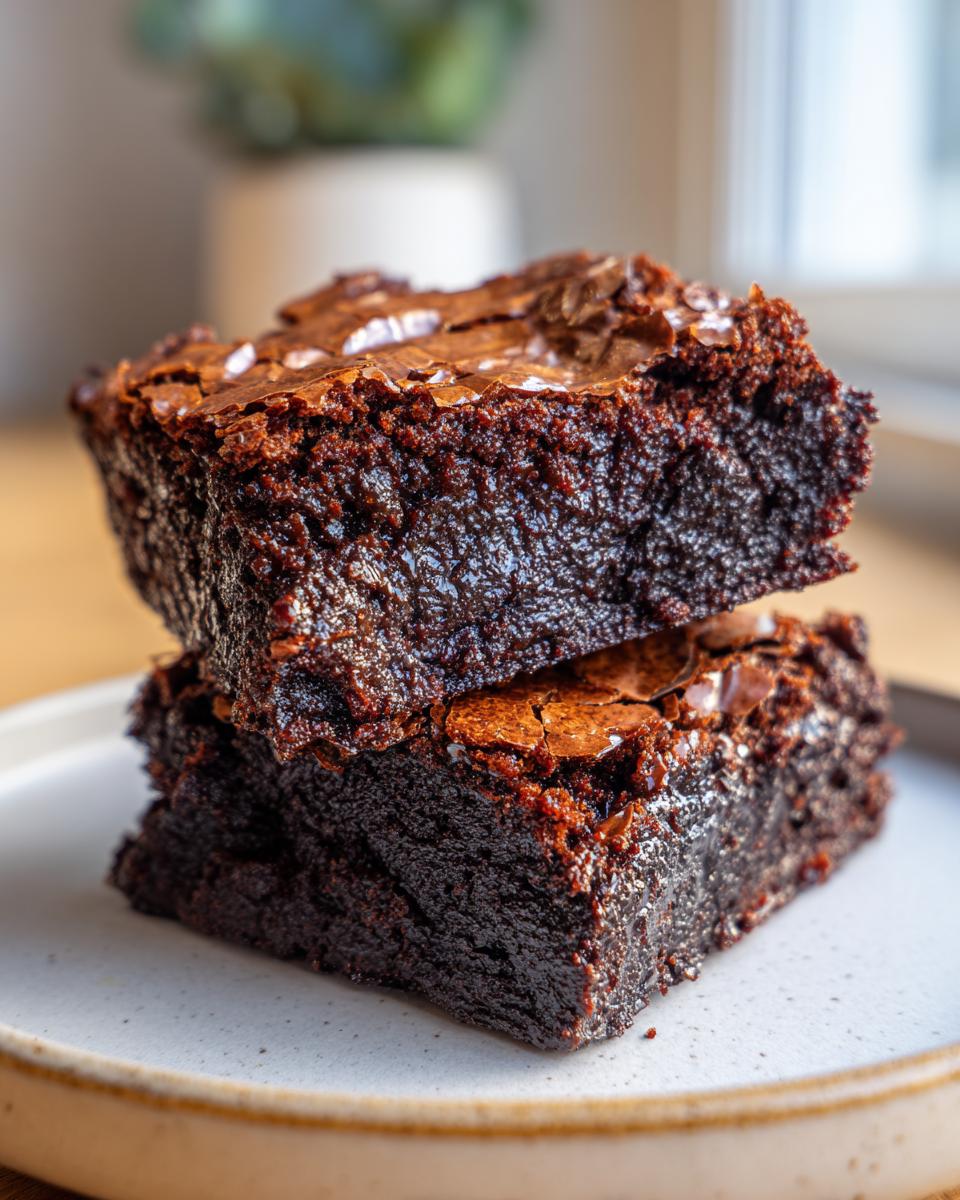
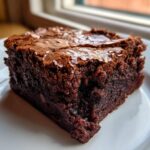
Oh, the quest for the *perfect* brownie! Isn’t it the ultimate baking challenge? We all chase that elusive spot where the edges are chewy, the center is pure, molten goo, and that shiny, crackly top—the sign of a true champion—sits right there waiting for you. I’m Sarah Jane Thompson, and when it comes to simple, honest American classics, I believe firmly that the best brownies are worth the effort. This recipe, my Ultimate Fudgy Brownies with a Shiny, Crackly Top, is the result of years of wanting that bakery-quality richness right here in my own kitchen, just like the traditions you see in recipes like my flourless chocolate torte.
- Why These Brownies Are the Best Brownies Ever
- The Secret to Ultimate Fudgy Brownies: Brown Butter
- Ingredients for Rich Cocoa Brownies
- How to Prepare These Easy Homemade Brownies
- Tips for Success Making Chewy Brownies
- Brownie Variations: Beyond the Classic Fudgy Brownies Recipe
- Storage and Reheating Instructions for Your Brownies
- Frequently Asked Questions About Making Perfect Brownies
- Estimated Nutrition for These Decadent Chocolate Dessert Bars
Why These Brownies Are the Best Brownies Ever
I’ve made batches and batches of brownies over the years, testing every trick out there. Trust me when I say this version cuts through all the noise. It’s the result of careful home testing, looking for that perfect bite every single time. If you’re hunting for the best brownies ever, stop scrolling right now!
What makes them truly different? It comes down to a few key elements that I always check right off my recipe card. You get:
- That deep, nutty flavor from the brown butter—it just screams gourmet.
- The fudgy, deep chocolate texture that melts in your mouth. You won’t get dry cake here!
- And of course, that glorious, paper-thin, shiny crackly top brownies dreams are made of.
This isn’t just one recipe; it’s *the* recipe I turn to when I need a showstopper. I know you’ll love these as much as I do, especially when you compare them to my red velvet brownies when you need a little color!
The Secret to Ultimate Fudgy Brownies: Brown Butter
If you want chocolate flavor that goes beyond standard richness, listen up! The absolute game-changer in this recipe—the thing that makes people ask if these brownies came from a fancy bakery—is browning the butter. Seriously, this one simple step transforms everything.
What happens when you brown butter? You’re gently toasting the milk solids leftover after the water evaporates. This process releases incredible, deep, nutty, almost caramel-like notes. It adds a layer of complexity that you just can’t get from simply relying on cocoa powder and sugar. It’s honestly my favorite way to make brown butter brownies, and it’s absolutely essential for getting that intense flavor we’re after.
I use this technique whenever I want a dessert that feels extra special, sort of like when I make my standard brown butter cookies. It builds flavor right into the base of the bar. It’s proof that a little extra effort with foundational ingredients pays off hugely in the final product!
How to Achieve the Perfect Brown Butter Brownies
Okay, don’t let the fancy name scare you. It’s super easy, but you have to watch it closely! First, melt your unsalted butter in a light-colored saucepan over medium heat. You want to see it foam up, then hear it quiet down. Keep swirling it—this prevents burning!
You’re looking for visual cues. First, you’ll see brown sediment starting to gather at the bottom, and the smell will change from just ‘buttery’ to wonderfully nutty. As soon as you smell that deep aroma and see those tiny brown flecks, yank it off the heat *immediately* and pour it into your mixing bowl. You have to get the brown bits—that’s where all the liquid gold flavor is hiding!
Ingredients for Rich Cocoa Brownies
Alright, let’s talk about what goes into these glorious things. Remember how I mentioned using high-quality components? That really counts here, especially with the chocolate and cocoa. Having everything measured out and ready before you start browning the butter saves you serious headaches later on—it moves fast once you get going!
Here is exactly what you’ll need on hand for these rich cocoa brownies:
- 1 cup unsalted butter, browned (This is the star, so make sure you brown it perfectly!)
- 1 1/4 cups granulated sugar
- 1 cup packed light brown sugar
- 4 large eggs
- 1 tablespoon vanilla extract
- 3/4 cup unsweetened cocoa powder, high quality
- 1/2 cup all-purpose flour
- 1 teaspoon salt
- 1 cup semi-sweet chocolate chips (These bring extra gooey pockets!)
If you use good quality cocoa powder, you’ll notice the difference right away. It makes these bars taste so much deeper than the boxed stuff. You might want to check out my hot fudge brownie bread recipe once you master this base recipe, too!
How to Prepare These Easy Homemade Brownies
Now that we have our glorious ingredients ready, let’s assemble these easy homemade brownies! Even though we have one bowl for the wet ingredients and one for the dry, the general method is super straightforward; you could definitely call this a minimal cleanup recipe. First things first: get your oven warming up to 350°F (175°C). While that heats, you need to prep that 9×9 inch pan. I always use parchment paper, letting it hang over two sides like little handles. That overhang means you won’t struggle to get those perfect gooey chocolate brownies out later!
Next up is that magical brown butter we just talked about. Melt it gently in a saucepan until it foams, quietens down, and you see those brown bits speckling the bottom. Pour it right into your large heatproof bowl—don’t waste those flavorful specks! While the butter is still warm, whisk in both the granulated and brown sugars until they combine nicely. Then, you introduce the eggs one by one, mixing well after each addition until the whole wet mixture looks smooth and glossy. A quick stir of vanilla, and we’re moving on to the dry stuff.
In that separate bowl, quickly whisk together your high-quality cocoa powder, flour, and salt. Then, gently fold these dry ingredients into the wet using a spatula. This is important! Fold until *just* combined. If you beat this, you turn fudgy bliss into tough cake, and we absolutely don’t want that. Finally, fold in those semi-sweet chips. Spread this dreamy batter evenly into your ready pan. For the best result, I love looking at recipes like this one pot creamy chicken and rice soup when I want simple flavor construction!
Baking Time and Cooling for Gooey Chocolate Brownies
This is where discipline comes in, my friends! Bake these beauties for 30 to 35 minutes at 350°F. When you test them, remember: we are aiming for gooey chocolate brownies perfection. The rule here is simple: don’t overbake! If you stick a toothpick in near the edge, it should come out coated in moist crumbs, but the very center must still look a little unset. That slightly underdone look is your ticket to fudgy heaven.
The residual heat in the pan and on the cooling rack is what finishes the baking process. If you wait until the center looks perfectly dry in the oven, you’ll end up with dry, crumbly bars later, and nobody wants that sadness. The final, and maybe hardest, part is resisting the urge to cut them immediately. Let them cool completely in that pan before you use the parchment handles to lift them out. Cutting them hot guarantees a messy, beautiful, but ultimately frustrating pile of chocolate goo. Patience pays off, I promise!
Tips for Success Making Chewy Brownies
You’ve got the brown butter flavor down, now let’s make sure you nail the technique to get those perfect textures. Following these little secrets that I picked up from years of baking—and yes, a few ruined batches along the way!—will guarantee your chewy brownies are the star of the show.
First off, let’s circle back to that chocolate quality. I put it in the ingredient list for a reason: use high-quality cocoa powder! It might seem like a small thing, but for rich cocoa brownies like these, the flavor source matters immensely. Don’t skimp here; it’s what gives you that deep, satisfying chocolate punch.
Next up is the ultimate goal: that heavenly top. The secret to the crackly top brownies you’re dreaming about is entirely about timing. This is critical when you’re aiming for that perfect sheen. Do not overbake them! Seriously, fight the urge to let them bake until the toothpick comes out totally clean. As I mentioned before, leave the center looking slightly molten. That residual heat does the heavy lifting while they cool down, creating that delicate sugar film on top.
Finally, remember that cooling time isn’t optional—it’s part of the recipe! If you cut them hot, you just get soup. These bars need time to firm up both structurally and flavor-wise. Once they are completely cool, the texture solidifies into that amazing dense, yet chewy bar that we’re hunting for. For more easy baking wins, you absolutely have to check out my easy no-bake avalanche cookies recipe for when you need a break from the oven!
Brownie Variations: Beyond the Classic Fudgy Brownies Recipe
Once you master this fudgy base, you realize it’s just a launching pad for more incredible things! Since we are already working with that deep, toasty flavor from the brown butter, we can lean into things that compliment it beautifully. This is where your creativity runs wild.
Feeling like mixing batters? You can absolutely swirl in some cookie dough here to create amazing Brookies Recipe bars. Just drop spoonfuls of your favorite cookie dough on top of the brownie batter before baking. Don’t overdo it, or you lose that signature fugginess!
If you want something really indulgent, think about making Turtle Brownies. After pouring the batter in the pan, swirl in some good caramel sauce and sprinkle toasted pecans over the top. For a tangy contrast, dolloping on some Cream Cheese Brownies batter before baking is always a winner. I’ve even experimented by swirling in some of my red velvet cheesecake batter—it’s unbelievably rich!

For a simpler boost, try mixing in espresso powder with the cocoa, or folding in caramel chips instead of chocolate chips. The possibilities for these gourmet brownie recipes are endless once your base is perfect. If you love the nutty flavor profile, you might also want to check out my pecan pie cheesecake recipe for another decadent treat!
Storage and Reheating Instructions for Your Brownies
Once you manage to slice and cool these glorious decadent chocolate dessert bars without eating them all immediately—which is tough, I know!—you need to store them correctly to keep that fudgy texture intact. Luckily, these brownies are quite sturdy thanks to all that fat content!
For short-term storage, say for the week ahead, keep them right on the counter at room temperature. I wrap the entire slab tightly in plastic wrap first, sometimes even placing that wrapped block into an airtight container. This keeps out any ambient kitchen smells and locks in that moisture. They should stay perfectly soft and chewy for a good four to five days stored this way. If your kitchen runs particularly warm, or if you’ve added any swirls like cream cheese, it’s safer to move them to the fridge, but they will firm up a bit.
If you want them to last longer, freezing is your best friend! You can totally freeze these. Wrap individual squares tightly in plastic wrap, then layer them in a freezer-safe, airtight container. They freeze beautifully for up to three months. When you’re ready for one, just pull one out and let it thaw on the counter for an hour or two.
Now, if you can’t wait, or if they have been chilled and you want to bring back that gooey center, here’s my little trick: Take a single square and microwave it for about 10 to 15 seconds. Don’t go longer! That short blast warms up the chocolate chips and softens the entire bar right back to that just-baked consistency. It’s the best way to enjoy those gooey chocolate brownies right before you take a bite. Speaking of rich treats, you should definitely try my peanut butter fudge recipe next!
Frequently Asked Questions About Making Perfect Brownies
Whenever I share these brownies with friends, they always have questions! It’s completely normal, especially when you’re trying to achieve that perfect balance between fudgy and chewy. Here are some of the things I hear most often in my kitchen.
Why didn’t my brownies get a crackly top?
This is the number one question I get! Honestly, it’s usually an issue of residual heat science. The shiny, crackly top forms when the sugar dissolves completely into the eggs during that initial beating phase, and then that sugary layer dries out first while the inside is still cooking. If you overbake even a little bit, that top layer cooks too long and dries out, losing its signature crispness. For me, the key to those perfect crackly top brownies is pulling them when the very center still looks soft. That remaining heat finishes the job—don’t let them bake until they look dry!
Can I use melted butter instead of brown butter?
You certainly *can*, but you’ll sacrifice some of that deep, sophisticated flavor we love so much! If you are in a huge rush and can’t brown the butter, melted butter works fine for the structure, resulting in more traditional fudgy brownies recipe bars. However, if you swap it, you’re missing out on the nutty depth that makes this recipe special. My advice? Set aside the extra five minutes to brown it—it’s worth every second to get that gourmet taste!
How can I make these into thicker brownies?
That’s a great question, because sometimes you just need a super tall bar! The easiest way to get thicker brownies is by changing your pan size. This recipe is designed perfectly for a 9×9 inch pan. If you switch to an 8×8 inch pan, you’ll need to keep the same amount of batter, which forces it to spread less wide and bake taller. Just keep in mind that the baking time will go up significantly—maybe closer to 40 or 45 minutes—so start checking around the 35-minute mark and use the toothpick test!
Are these considered one bowl brownies?
Well, I try to keep things easy, so I think of them as a near one bowl brownies experience! In the instructions, you’ll see I separate the dry ingredients for a quick whisk to avoid lumps, which technically means two bowls. But the wet ingredients—the butter/sugar/eggs—all get done in one large bowl before incorporating the dry. It’s way easier than having a separate bowl for every single component! It definitely beats the cleanup of some more complicated recipes, like my cream cheese pound cake recipe, which involves a mixer!
Estimated Nutrition for These Decadent Chocolate Dessert Bars
I always feel a little nervous sharing the nutrition facts, kind of like I learned in my chocolate raspberry cake recipe—it’s just an estimate, right? Baking is about joy, not spreadsheets! But for those of you who track things, I pulled the numbers based on the recipe yielding 16 perfect bars.
Keep in mind that because we’re using rich brown butter and high-quality cocoa powder in these decadent chocolate dessert bars, they are definitely an indulgence! This is based on dividing the total recipe by 16 servings.
- Serving Size: 1 brownie
- Calories: 280
- Sugar: 28g (Yes, that’s a treat!)
- Fat: 17g (Mostly good fat from that butter!)
- Saturated Fat: 10g
- Carbohydrates: 31g
- Protein: 4g
- Cholesterol: 75mg
These are meant to be rich, satisfying, and absolutely worth every single calorie. Enjoy them!
PrintUltimate Fudgy Brownies with a Shiny, Crackly Top
Make the best homemade brownies with this recipe. You get ultra-fudgy, chewy, and rich chocolate bars with the desired shiny, crackly top every time you bake.
- Prep Time: 15 min
- Cook Time: 35 min
- Total Time: 50 min
- Yield: 16 brownies 1x
- Category: Dessert
- Method: Baking
- Cuisine: American
- Diet: Vegetarian
Ingredients
- 1 cup unsalted butter, browned
- 1 1/4 cups granulated sugar
- 1 cup packed light brown sugar
- 4 large eggs
- 1 tablespoon vanilla extract
- 3/4 cup unsweetened cocoa powder, high quality
- 1/2 cup all-purpose flour
- 1 teaspoon salt
- 1 cup semi-sweet chocolate chips
Instructions
- Preheat your oven to 350°F (175°C). Line a 9×9 inch baking pan with parchment paper, leaving an overhang on two sides for easy removal.
- Brown the butter: Melt the butter in a light-colored saucepan over medium heat. Continue cooking, swirling often, until the butter foams, then subsides, and brown bits form at the bottom. The butter will smell nutty. Immediately pour the brown butter into a large heatproof bowl, scraping in all the brown bits.
- Whisk the granulated sugar and brown sugar into the warm brown butter until fully combined.
- Whisk in the eggs one at a time, mixing well after each addition until the mixture is smooth and glossy. Stir in the vanilla extract.
- In a separate bowl, whisk together the cocoa powder, flour, and salt.
- Gently fold the dry ingredients into the wet ingredients using a spatula until just combined. Do not overmix.
- Fold in the chocolate chips.
- Spread the batter evenly into the prepared baking pan.
- Bake for 30 to 35 minutes. A toothpick inserted near the edge should come out with moist crumbs attached, but the center should still look slightly underdone for maximum fudginess.
- Let the brownies cool completely in the pan on a wire rack before lifting them out using the parchment overhang.
- Cut into 16 squares.
Notes
- Browning the butter adds a deep, nutty flavor that makes these brownies taste like they came from a gourmet bakery.
- For the best crackly top, do not overbake. The residual heat will continue to cook them as they cool.
- Use high-quality cocoa powder for the richest chocolate flavor in these decadent chocolate dessert bars.
Nutrition
- Serving Size: 1 brownie
- Calories: 280
- Sugar: 28
- Sodium: 120
- Fat: 17
- Saturated Fat: 10
- Unsaturated Fat: 7
- Trans Fat: 0
- Carbohydrates: 31
- Fiber: 2
- Protein: 4
- Cholesterol: 75