
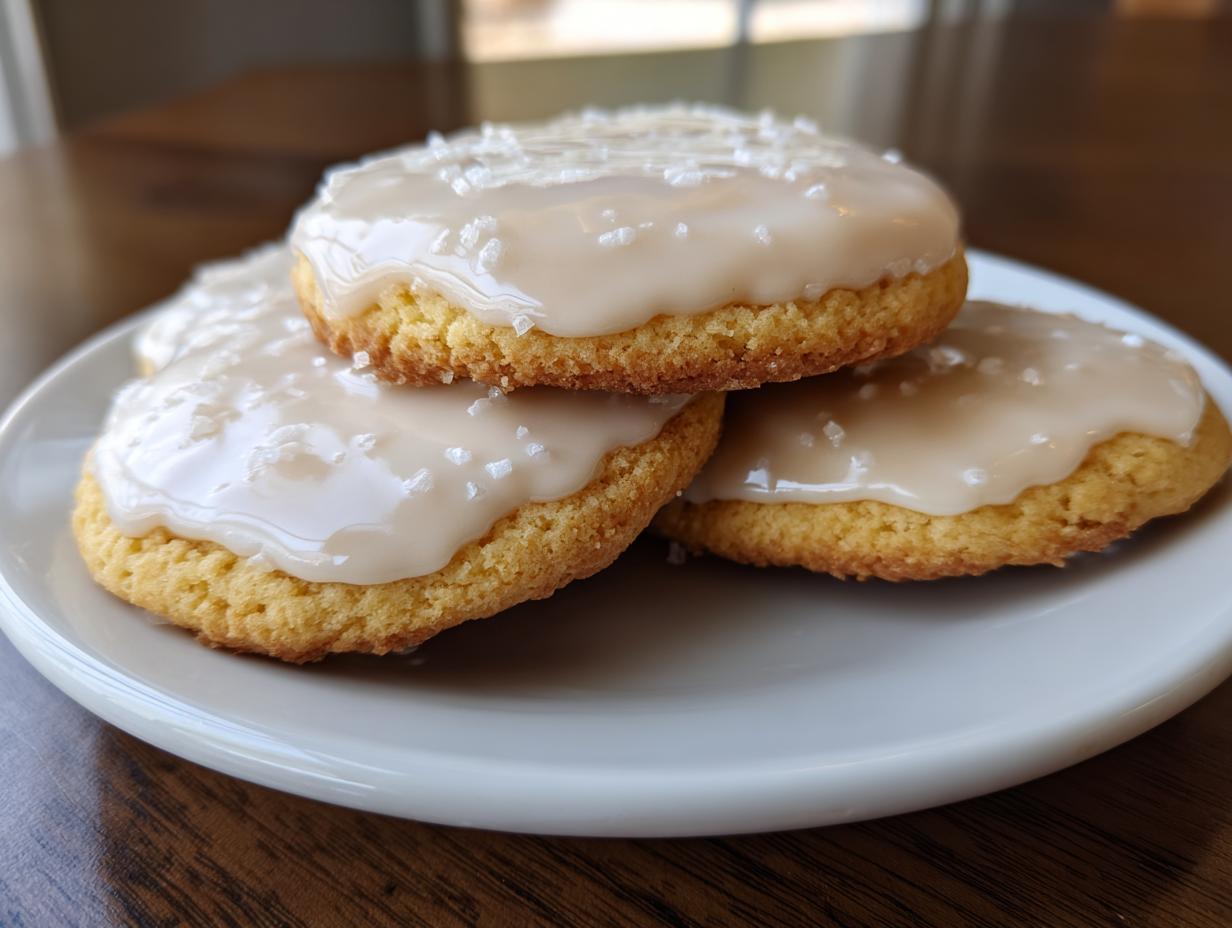
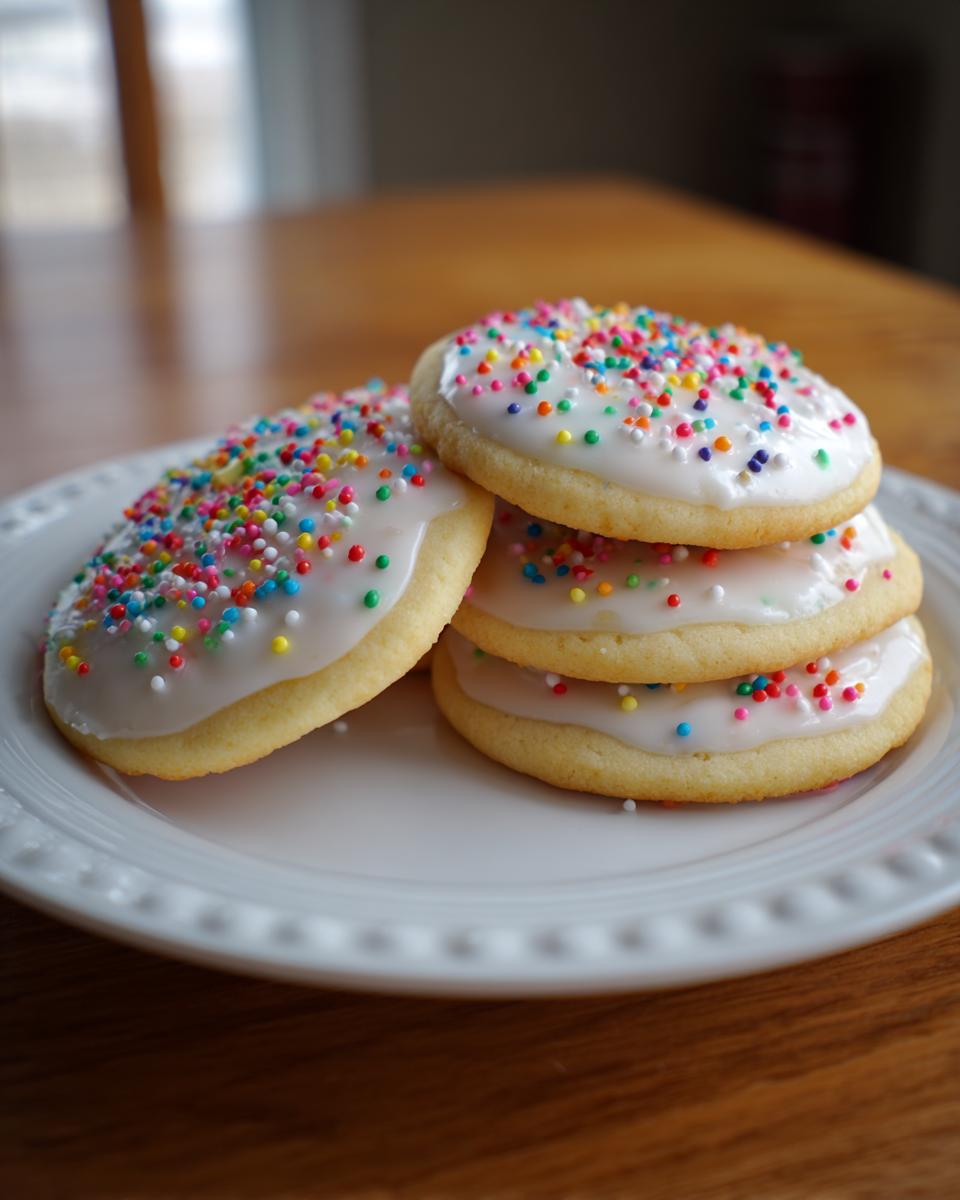
Oh, the sticky tragedy! We’ve all been there, right? You spend hours rolling out, cutting, and baking those perfect sugar cookies, only to have your beautiful decoration melt into a gooey mess. It’s the absolute worst when you need your **sugar cookie icing** to set up firm for stacking or gifting. Trust me, when I was first learning the ropes back in my little Midwest kitchen, I wasted so much time trying to make simple powdered sugar glazes work their magic. That ends today! This recipe, my friends, is the foolproof secret. It’s the kind of robust, glossy **sugar cookie icing** that dries hard and looks like you bought it straight from the bakery case. It’s reliable, and that’s precisely what we love in the Cookin’ Corner!
- Why This Is the Best Sugar Cookie Icing Recipe for Decorating
- Gathering Ingredients for Your Sugar Cookie Icing Recipe
- Step-by-Step Guide to Making Icing That Hardens for Cookies
- Expert Tips for Flawless Sugar Cookie Icing Application
- Drying Time: How to Get Icing to Dry Hard
- Making Variations of This Vanilla Cookie Icing Recipe
- Storage and Keeping Your Sugar Cookie Icing Fresh
- Frequently Asked Questions About This Easy Cookie Frosting
- Nutritional Estimates for This Classic Sugar Cookie Icing
Why This Is the Best Sugar Cookie Icing Recipe for Decorating
If you’re tired of that dreaded sticky layer that never seems to fully set, listen up! Lots of folks just mix powdered sugar with milk or water, but that gives you a simple glaze—pretty, but it stays soft. We need something that sets firm and durable, especially if we’re planning on stacking these cuties or mailing them out.
This recipe pulls out all the stops to deliver that classic, professional look. It’s designed from the ground up to be **icing that hardens for cookies** beautifully, giving you a **glossy icing for sugar cookies** that shines under the lights. Before going through all this trouble, make sure your cookies are perfect! You can grab my favorite soft cutout recipe right here: soft cutout sugar cookie recipe. Once they’re cool, this icing is your absolute best friend for making them look magazine-worthy. I found some great tips on durability over at Delice Recipe, too, but our method here is what I rely on!
Achieving That Perfect Hard Set: The Role of Meringue Powder
The real game-changer here is meringue powder. This isn’t just some fancy chef thing; it’s what makes this **sugar cookie icing** dry hard, every single time. It acts like a stabilizer—think of it as the framework that locks everything into place as it air-dries.
When you skip the powder, you skip the crackle and the set. If you are baking for gifts or big holiday platters, you need that set firm promise, and meringue powder delivers it reliably. No more worrying if your artwork will smear!
The Secret to a Smooth Sugar Cookie Glaze Finish
Once you have your hard-setting agent, the next hurdle is texture. We want a truly smooth sugar cookie glaze, not gritty or bumpy icing. That means we need to whisk out all those stubborn air pockets.
The trick? Aeration time! You mix it low at first, then you beat it on medium-high for a full five to seven minutes. Yes, you heard me! That whipping time incorporates air, which helps create that beautiful, uniform sheen. Proper sifting beforehand also makes a huge difference in achieving that flawless, bakery style cookie icing.
Gathering Ingredients for Your Sugar Cookie Icing Recipe
Okay, now that we know *why* this icing works, we need to make sure our ingredients are top-notch. When you’re aiming for that perfect hard set, those measurements matter more than you think. I always pull everything out before I even turn the mixer on—it just keeps things calm and organized!
This recipe is lean and means business; we’re focusing on the essentials that guarantee that beautiful, glossy finish. Getting these quantities right is key to your success, especially when using my favorite chewy sugar cookies. If you are aiming for holiday decorating, make sure you have your colors ready, too!
Ingredient Clarity and Measurement for Perfect Sugar Cookie Icing
Precision is your friend here, honey. Make sure you sift your powdered sugar first—that’s non-negotiable for avoiding lumps in your final product. We need four cups, sifted, to start. We are also using three tablespoons of meringue powder, which is our secret weapon for firmness.
Also, the water needs to be warm, not hot! Just a little bit—six tablespoons total—along with one teaspoon of vanilla extract. Measure carefully! This small amount of liquid is exactly what helps this amazing **sugar cookie icing** dry flat and firm.
Step-by-Step Guide to Making Icing That Hardens for Cookies
Alright, time to get messy! This is where the magic happens, and it’s all about the mixing sequence. You’ll want a stand mixer or a good hand mixer for this part because we need some serious power to get that durable finish we are looking for in a good **sugar cookie icing**.
First things first, we combine all our dry ingredients—that’s the sifted sugar and the meringue powder—right in the bowl. Whisk them around a bit just to make friends. Then, drizzle in your warm water and vanilla. Start the mixer on low, just enough to bring everything together. We don’t want a sugar cloud explosion in the kitchen, so scrape the sides down well once it starts coming together.
Now, for the secret step to this **icing that hardens for cookies**: Crank that speed up to medium-high! We are beating this icing for a solid five to seven minutes. Honestly, it feels like forever when you’re standing there, but that whipping action is what creates that super smooth texture and air structure needed to set firm later. If you want the base recipe for perfect cookies that hold their shape under this amazing icing, check out my guide on how to make sugar cookie icing recipe dries hard! While you are perfecting your technique, sometimes you need inspiration for creative edges, and you can see some great ideas over at Homemade by Caroline.
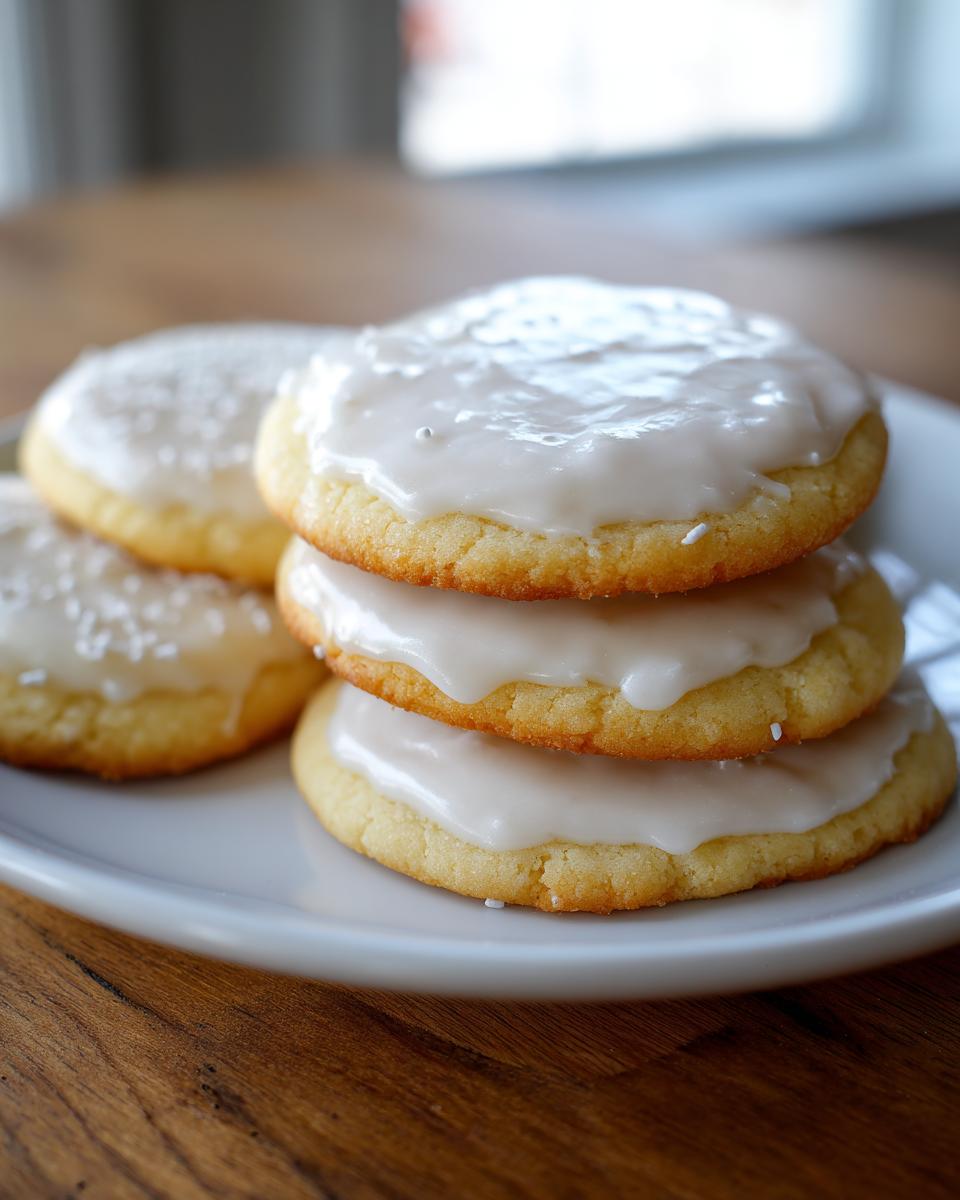
Achieving the Right Consistency: Outlining vs. Flooding
Once you’ve beaten it for ages, you need to check if it’s right for what you’re doing. Are you outlining the cookie edges, or are you flooding the center? If you test it by lifting the whisk, your icing should fall off in a thick ribbon.
For a true **foolproof cookie icing**, watch that ribbon. If it disappears back into the bowl relatively quickly—say, in about 10 seconds—that’s your flooding consistency! If it holds its peak for much longer, it’s better for outlining details. If it’s too thick for flooding, just stir in water one tiny teaspoon at a time. I promise, a few seconds of rest always shows you the truth of your mix. This is the only way to get that perfect, durable finish.
Coloring Your Cookie Decorating Icing Set Firm
If you want color, now is the time to divide your icing and start tinting! My biggest piece of advice here is to use gel food coloring, not the liquid stuff that comes in those little plastic bottles. Liquid colors add too much water, and guess what that does? It messes with the integrity of your structure, and suddenly your **cookie decorating icing set firm** turns into a puddle!
Gel colors are concentrated, so you only need a tiny dab on the end of a toothpick. Mix that color in slowly until you get a uniform shade. Remember, you can always add more color, but you can’t easily take it out if you go too dark!
Expert Tips for Flawless Sugar Cookie Icing Application
Now that you’ve got that gorgeous, stiff icing mixed up, it’s all about maintenance while you decorate. This is where beginners sometimes panic, but it’s simple! Remember that humidity in your kitchen can change everything. If you notice your **sugar cookie icing** starting to thicken up a bit while you’re working on a big batch, don’t sweat it.
Just take your small spatula and stir in a few drops of water. That’s it! It loosens things right up without ruining the hard-setting capabilities. On the flip side, if you were flooding and it starts looking a little too runny, grab a tablespoon of sifted powdered sugar and gently fold that in. These little adjustments are what separates just decorating from achieving that truly professional, bakery-quality look. You’ll find these consistency tricks really help when working with my brown butter sugar cookies, too!
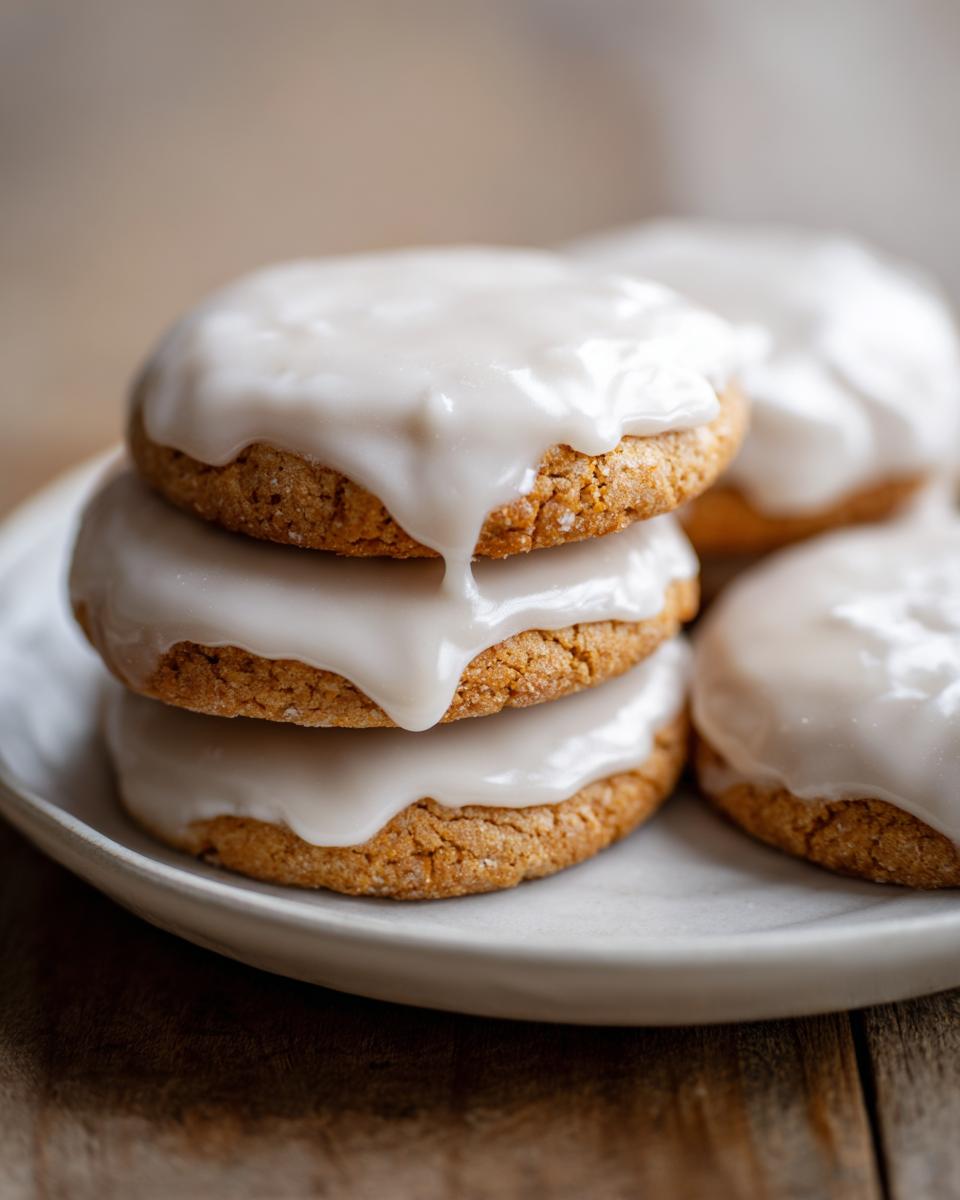
Drying Time: How to Get Icing to Dry Hard
We’ve made the perfect **sugar cookie icing**, but the real test is letting it do its job! Achieving that hard set isn’t about adding more sugar; it’s about patience and air flow. Once your cookies are decorated, you absolutely must leave them sitting out on the counter at room temperature. Resist the urge to put them in the fridge or cover them up!
Covering them traps moisture, and that moisture keeps the icing soft, leading right back to that sticky tragedy we tried to avoid! For the best results—meaning cookies you can actually stack or put into tins for gifting—let them sit uncovered for several hours, probably overnight. This allows the water content to evaporate fully. If you check out Ana Bakes, she has some great pointers on how to get that hard finish, too. Trust me, a little bit of patience now means perfectly set cookies later!
Making Variations of This Vanilla Cookie Icing Recipe
While this base recipe gives you the most wonderful classic vanilla flavor, sometimes you just need a little flair, especially when decorating for the holidays! The beauty of this robust **sugar cookie icing** is how well it accepts other flavors. You can completely change the profile of your cookies by making small swaps.
My favorite way to mix it up is swapping out that vanilla extract entirely. Try using almond extract—just a half teaspoon does wonders, giving your cookies a lovely, slightly sophisticated marzipan-like note. Or, if you’re making cookies for Christmas, stir in a tiny pinch of cinnamon or ground nutmeg during the mixing time. This creates a wonderfully spiced, bakery-style cookie icing!
For a totally different vibe, especially great with citrus sugar cookies, skip the vanilla and add a teaspoon of lemon or orange zest along with the liquid ingredients. That slight tartness cuts through the sweetness perfectly! If you are looking for other festive cookie ideas to top with this icing, you have to check out my maple brown sugar cookies recipe for inspiration!
Storage and Keeping Your Sugar Cookie Icing Fresh
What happens if you don’t use all your glorious, hard-setting **sugar cookie icing**? Don’t toss it! If you have leftover icing that you haven’t colored yet, just scoop it into a small, airtight container. You can usually keep this safely on the counter for a day or two, but if you’re worried, pop it in the fridge. Don’t panic if it gets hard—just let it warm up on the counter for a bit and stir back in a few drops of warm water until it’s smooth again.
Now, for the decorated cookies: You want to keep that beautiful hard shell intact, right? Store the finished cookies in an airtight container, but make absolutely sure they are completely dry first! If you’re stacking them, maybe put a little parchment paper between the layers, just as an extra precaution. This will keep them looking fantastic until you whip up a batch of Christmas cookie bars to share, too!
Frequently Asked Questions About This Easy Cookie Frosting
I know baking questions pop up when you try a new recipe, especially tricky things like getting the perfect set on your icing. Don’t worry if you have a few lingering doubts after mixing up this **easy cookie frosting**—it’s totally normal! Here are a few things I get asked all the time about making sure this **sugar cookie icing** comes out perfectly durable for decorating.
Can I make this royal icing recipe for decorating ahead of time?
Yes, you absolutely can! I often make a big batch of this base icing the day before I plan to decorate, especially if I’m preparing for a big holiday bake. Just store it sealed up tight in an airtight container at room temperature. When you bring it back out, it might be stiff, but just a little bit of gentle stirring will bring it right back to life. It’s a total time-saver!
What if I don’t have meringue powder for my sugar cookie icing?
That’s a common pinch! Meringue powder is key for that firm, crackly set, but if you don’t have any on hand, you can substitute pasteurized egg whites. Use about one large egg white to replace 1 tablespoon of the meringue powder. Remember, though, you have to be super careful with raw eggs. Using the powder is certainly my more **foolproof cookie icing** method since it’s shelf-stable and pasteurized!
How do I make a 4 ingredient cookie icing if I omit the vanilla?
If you need to make a true **4 ingredient cookie icing** because you’re skipping the vanilla extract (maybe you want a pure white base for crafting delicate colors), it will still set hard! You just lose that lovely layer of warmth the vanilla adds. The structure will be fine, but the taste will be decidedly less flavorful. I always recommend keeping that vanilla in if you can, though, even if you’re exploring other flavors like almond or lemon zest!
If you plan on decorating a huge batch of cookies and need more tips on cookie storage in general, you might want to look at my guide on easy 5 ingredient haystack cookies—sometimes the storage tricks cross over!
Nutritional Estimates for This Classic Sugar Cookie Icing
Now, I know we aren’t hanging out in a fancy culinary school here, and frankly, my focus is always on the taste and the hard-setting structure more than counting every calorie! But since some of you lovely bakers like to keep track, I’ve whipped up some ballpark figures for this recipe.
This recipe yields enough icing for about two to three dozen cookies, depending on how heavy-handed you are with your piping. Please remember, these are just estimates based on the standard ingredients listed, so take them with a grain of salt—or maybe a very large spoonful of powdered sugar!
- Serving Size: 1/4 cup
- Calories: 180
- Sugar: 45g
- Sodium: 5mg
- Fat: 0g
- Saturated Fat: 0g
- Unsaturated Fat: 0g
- Trans Fat: 0g
- Carbohydrates: 45g
- Fiber: 0g
- Protein: 1g
- Cholesterol: 0mg
}
PrintSugar Cookie Icing That Hardens Perfectly: Bakery Style Glaze
Learn the simple method for making the best sugar cookie icing that hardens completely, dries glossy, and sets firm for professional decorating results every time.
- Prep Time: 10 min
- Cook Time: 0 min
- Total Time: 10 min
- Yield: Enough icing for 2-3 dozen cookies
- Category: Dessert
- Method: Mixing
- Cuisine: American
- Diet: Vegetarian
Ingredients
- 4 cups powdered sugar, sifted
- 3 tablespoons meringue powder
- 6 tablespoons warm water
- 1 teaspoon vanilla extract
Instructions
- In a medium bowl, whisk together the sifted powdered sugar and meringue powder until fully combined.
- Add the warm water and vanilla extract to the dry ingredients.
- Using an electric mixer on low speed, mix the ingredients until just combined. Scrape down the sides of the bowl.
- Increase the mixer speed to medium-high and beat for 5 to 7 minutes until the icing is very smooth, thick, and holds stiff peaks. This step incorporates air and helps the icing set hard.
- Test the consistency. For outlining, the icing should be thick. For flooding, add water one teaspoon at a time until the icing flows slowly off the whisk in a thick ribbon that disappears into the bowl after about 10 seconds.
- Divide the icing into bowls if you plan to color it. Add gel food coloring sparingly and mix until the color is uniform.
- Use the icing immediately for decorating your cooled sugar cookies.
- Allow the decorated cookies to sit uncovered at room temperature for several hours, or overnight, until the icing is completely dry and hard to the touch.
Notes
- For a glossy finish, avoid over-beating once the desired consistency is reached.
- If the icing becomes too thick while decorating, stir in a few drops of water. If it is too thin, add a tablespoon of sifted powdered sugar.
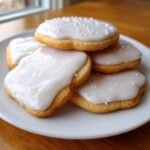
- This icing sets solid, making your cookies stackable and ready for gifting.
Nutrition
- Serving Size: 1/4 cup
- Calories: 180
- Sugar: 45g
- Sodium: 5mg
- Fat: 0g
- Saturated Fat: 0g
- Unsaturated Fat: 0g
- Trans Fat: 0g
- Carbohydrates: 45g
- Fiber: 0g
- Protein: 1g
- Cholesterol: 0mg