
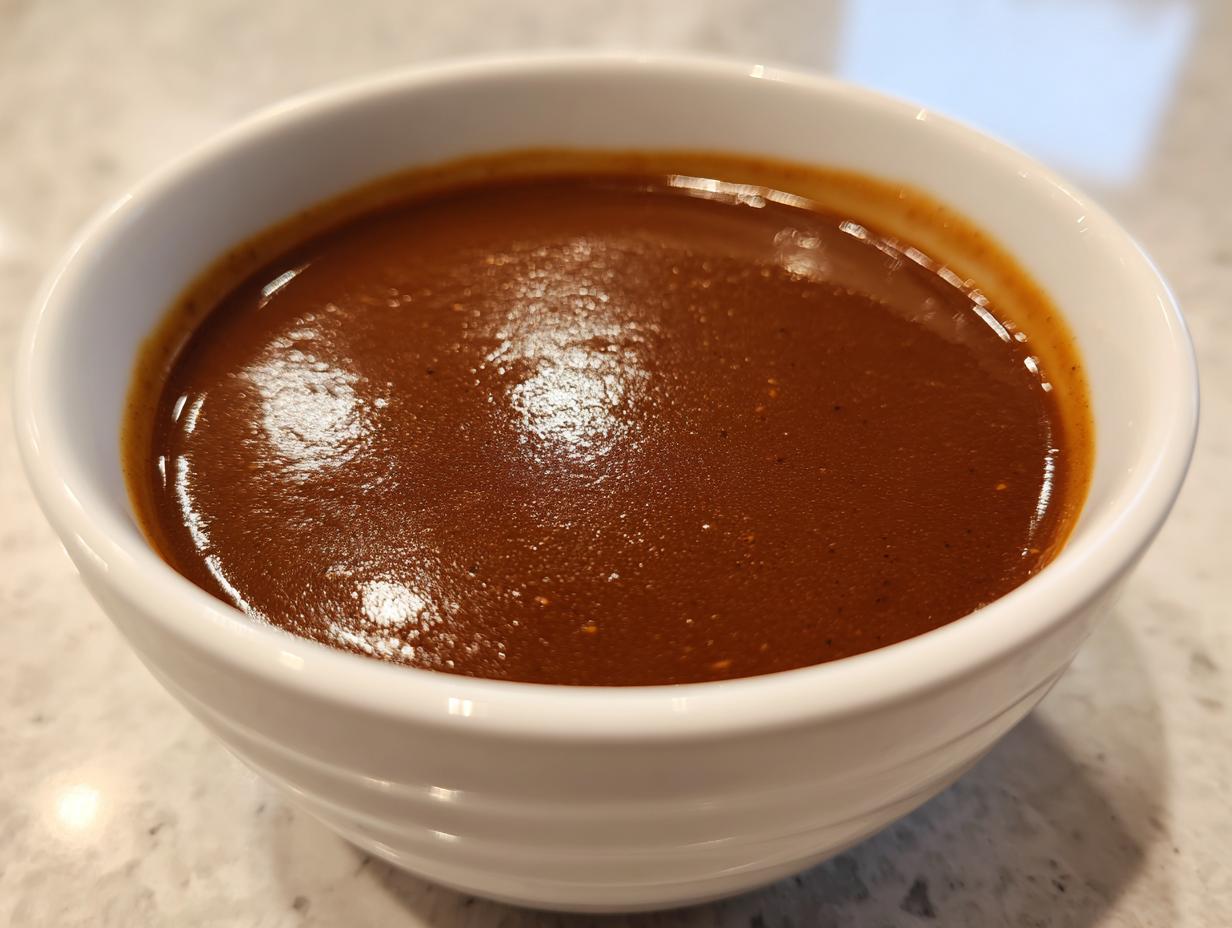
There are few things in the American kitchen that speak of pure comfort quite like a generous ladle of rich, savory gravy pooling over creamy mashed potatoes. That aroma, that feeling—it’s home, plain and simple. Here at Cookin’ Corner, which started in my Midwest kitchen watching my grandmother work magic, we specialize in dependable classics. That’s why I’m thrilled to share what I truly believe is the absolute best homemade brown gravy you’ll ever make. Forget waiting around for a roast to finish; this recipe delivers that deep, velvety flavor completely from scratch, and guess what? You won’t need a single pan dripping to make it perfect. It’s quick, it’s consistent, and it tastes exactly like the sauces that gathered our family for generations. Pair this amazing gravy with my recipe for best buttermilk biscuits for the ultimate comfort plate!
- Why This Homemade Brown Gravy Recipe Works Every Time (No Drippings Needed)
- Ingredients for Your Savory Gravy Sauce Guide
- How To Make Brown Gravy From Scratch: Step-by-Step Instructions
- Tips for Success with Your Velvety Brown Gravy Tutorial
- Serving Suggestions for Classic Comfort Food Sauce
- Storage and Reheating Instructions for Homemade Brown Gravy
- Frequently Asked Questions About Brown Gravy Without Drippings
- Nutritional Information Estimate for Homemade Brown Gravy
- Share Your Homemade Brown Gravy Success
Why This Homemade Brown Gravy Recipe Works Every Time (No Drippings Needed)
I know what you’re thinking: “Gravy without drippings? Is that even allowed?” Trust me, this is the recipe you need when you’re craving that deep, savory flavor but you didn’t roast a bird or cook a prime rib!
This method is a game-changer because it relies on foolproof pantry staples that deliver consistency every time. If you need an easy chicken gravy recipe on a Tuesday night, this is it. Here’s why you can count on this simple stovetop gravy.
Achieving Velvety Brown Gravy Texture
The foundation of any great sauce is a proper roux, and that’s the science behind getting that lump-free, velvety finish. We cook the flour right into the melted butter first. This isn’t just melting; it’s building the structure! You have to whisk constantly when you add your liquids, but that initial roux stage locks in smoothness, ensuring your homemade brown gravy isn’t grainy.
Rich Flavor Without Pan Drippings
Since we skip the drippings, we have to build the flavor up from scratch, and that’s where quality broth comes in! I use a mix of beef and chicken broth; the combination gives the sauce incredible background notes. Plus, that tiny splash of Worcestershire sauce? It’s my secret weapon for adding that rich, almost meaty depth you look for in the Best Beef Gravy Recipe!
Ingredients for Your Savory Gravy Sauce Guide
When you’re making homemade brown gravy from scratch, the quality of your broth really makes the difference between good and absolutely unforgettable. Since we aren’t using drippings, this sauce stands on the flavor of its base liquids. Use the best quality you can find; low-sodium beef broth is my go-to so I can control the salt in the end. Don’t forget that little bit of Worcestershire sauce—it’s magic for depth!
- 4 tablespoons unsalted butter
- 4 tablespoons all-purpose flour
- 2 cups beef broth (low sodium preferred)
- 1 cup chicken broth or water
- 1 teaspoon onion powder
- 1/2 teaspoon garlic powder
- 1/2 teaspoon dried thyme
- 1/4 teaspoon black pepper
- 1/4 teaspoon salt (adjust to taste)
- 1/2 teaspoon Worcestershire sauce (optional, for depth)
If you’re looking for more simple dishes to add this amazing sauce to, check out my collection of quick and easy recipes while you gather these items!
How To Make Brown Gravy From Scratch: Step-by-Step Instructions
Alright, let’s get this incredible homemade brown gravy on the stove! Making sauce from scratch sounds intimidating, but honestly, this is the easiest stovetop gravy you’ll ever tackle. The most important thing is to stay near the pot during the first few minutes—a little patience here means perfect results later.
Creating the Perfect Roux for Thickening Gravy Perfectly
First things first, melt your butter over medium heat. Once it’s bubbly, immediately whisk in all your flour. Now, you need to cook this mixture, stirring it constantly for a good minute or two! We call this the roux, and cooking it is crucial. You want it to turn a beautiful light peanut butter color. Don’t rush this; letting that flour cook out removes that raw, pasty taste, giving your homemade brown gravy those deep, nutty undertones we crave.
Simmering the Broth Based Brown Gravy
Once the roux looks golden, it’s time to start adding liquid, and this is where you need to pay attention! Pour in your beef broth slowly—I mean really slowly—while whisking like crazy to break up any bits of flour. Once all the broth is incorporated and it looks smooth, add your chicken broth and seasonings. Bring the whole pot up to a gentle simmer. Once it starts bubbling softly, turn the heat down low and let it hang out for about 5 to 8 minutes, whisking every minute or so. That gentle simmer is what thickens the sauce perfectly!

This is where you transform those simple ingredients into a rich, broth based brown gravy suitable for any feast. If you’re looking for ideas on what to make alongside this amazing sauce, check out how I make my easy one-pot creamy sausage pasta!
Tips for Success with Your Velvety Brown Gravy Tutorial
Oh, I’ve definitely had gravy mishaps in my time, and that’s how we learn the little secrets! If you want that deep, earthy color that screams classic comfort, just let your roux cook an extra minute or two until it’s a shade darker than peanut butter before you add the broth. But maybe the biggest fear is always ending up with soup instead of sauce!
If your homemade brown gravy ends up too thin after simmering, don’t panic—we have a foolproof fix. We use a cornstarch slurry! Just take one teaspoon of cornstarch and mix it completely with two teaspoons of cold water—make sure there are absolutely no lumps left. Whisk that mixture right into your simmering gravy until it thickens up lovely and smooth. If you accidentally go too thick (oops!), just whisk in a little warm broth or water until you hit that perfect, spoon-coating consistency.
For the smoothest texture possible, I always strain mine through a fine-mesh sieve right before serving. It’s a simple extra step that really elevates this into a restaurant-quality sauce. You can learn more about mastering thickening techniques on my post detailing how I’m thickening gravy perfectly every time!
Serving Suggestions for Classic Comfort Food Sauce
This is the part I love the most! Because this homemade brown gravy recipe relies on rich broth and spices instead of just the bits left in the pan, it’s incredibly versatile. It’s that reliable, savory sauce that just makes everything taste instantly better—like a warm hug from your kitchen.
Of course, the classic pairing is mounds of fluffy mashed potatoes. Seriously, you can’t have potatoes without gravy, and this velvety version will soak in wonderfully!
But don’t stop there! I always make a big batch because I know what we’ll be eating the next day:
- Drizzled generously over pot roast or Sunday meatloaf—it adds moisture and flavor that just can’t be beaten.
- As the rich base for open-faced roast beef sandwiches or hot turkey sandwiches.
- A must-have alongside biscuits, just like in my famous bangers and mash recipe! The savory flavor profile is spot on.
- Excellent poured over hearty rice or even used as the liquid base for simple pan-fried steak.
When you use this gravy, every meal feels like a special occasion, even if it’s just Tuesday night! It elevates simple fare into the kind of classic comfort food sauce we all grew up loving.
Storage and Reheating Instructions for Homemade Brown Gravy
Just like any good sauce, this homemade brown gravy tastes amazing the next day. And because it’s made from scratch, nobody wants to waste it! Storing leftovers properly is key to keeping that beautiful, velvety texture intact when you go to reheat it.
You can definitely keep this gravy in the fridge, and it usually lasts about three to four days easily. Just make sure you seal it up tight in an airtight container first. Plastic containers work fine, but glass ones are my favorite because they don’t absorb any smells.
Now, when it comes to reheating, the stovetop is your best friend. I take it out of the fridge and put it straight into a little saucepan over medium-low heat. The real trick is that it will probably look super thick, maybe even a little gelatinous, once it chills—that’s normal! Don’t worry, it separates a bit when cold.
Stir it patiently while it warms up. If it’s still too stiff for your liking, just whisk in a little warm broth or even just hot water, one tablespoon at a time, until it flows beautifully again. Avoid the microwave if you can, because sometimes it heats unevenly and can cause the sauce to break, but if you must use it, heat it in short bursts and stop often to stir it vigorously.
If you’re looking for ways to use up leftover gravy right away, try using it as the base for some amazing slow cooker meals, like my crockpot beef tips! They absorb that rich flavor perfectly.
Frequently Asked Questions About Brown Gravy Without Drippings
I always get so many questions when people try this recipe for the first time—especially since we aren’t using those traditional pan drippings! It’s normal to have questions when you’re changing up a classic technique, but I promise this is robust enough for any meal.
Can I make this Homemade Gravy Mix Alternative vegetarian or vegan?
Absolutely, you can turn this into a delicious vegetarian or vegan sauce! We just need to swap out the animal products. Instead of beef or chicken broth, use a really good quality, deeply flavored vegetable broth. For the fat, skip the unsalted butter and use a solid vegetable shortening or a hard vegan butter substitute. It works just as well for creating the roux, giving you a wonderful, flavorful sauce without any meat products. It’s a fantastic homemade gravy mix alternative for those days!
How can I get a richer, darker color for my Best Beef Gravy Recipe?
This goes right back to that first important step we talked about: the roux! If you want that deep, mahogany color that makes your Best Beef Gravy Recipe look like it cooked for eight hours, you need to invest a little more time in that butter and flour base. Go ahead and let that roux cook for a full *three* minutes over medium heat, stirring constantly, until it’s a deep, nutty brown color—almost like milk chocolate, but careful not to burn it, seriously!
What is the secret to a Quick Stovetop Gravy that doesn’t clump?
Ah, the dreaded lumps! My number one rule for achieving a quick stovetop gravy that is perfectly smooth is patience during the liquid addition. You whisk the flour and butter until it’s smooth and cooked, right? That’s step one locked in. But when you add the broth, you have to add it *slowly*—like a tiny drizzle at a time—while whisking the mixture aggressively the entire time. You’re basically emulsifying the flour into the liquid. If you dump it all in at once, it immediately seizes up into flour clumps that are almost impossible to smooth out later, no matter how much whisking you do!
Nutritional Information Estimate for Homemade Brown Gravy
Now, I know that when we’re talking about rich, comforting food like a hearty homemade brown gravy, we aren’t usually thinking about the macros! But because we believe in being transparent about what goes into our family recipes here at Cookin’ Corner, I ran the numbers on this sauce based on the ingredients and yield.
Please remember, these figures are just an estimate based on the standard amounts I use, particularly regarding the low-sodium beef broth and the butter. If you swap out ingredients—say, using oil instead of butter—the numbers will change slightly, so take this as a general guide for portion control!
Here is the breakdown based on a serving size of about 1/2 cup:
- Serving Size: 1/2 cup
- Calories: 110
- Fat: 8g
- Saturated Fat: 5g
- Carbohydrates: 7g
- Protein: 3g
- Sodium: 350mg (Note: This is highly dependent on the salt/broth you choose!)
- Sugar: 1g
- Cholesterol: 20mg
See? Not bad at all for a sauce that tastes like it simmered all day long! It’s proof that you don’t need to rely on those heavily processed packets to get that classic flavor.
Share Your Homemade Brown Gravy Success
Well, that’s it! We’ve built the foundation, seasoned it up, and created the most perfectly rich and velvety homemade brown gravy without ever needing to worry if the roast drippings were good enough. I truly hope this recipe makes its way onto your dinner table and becomes a new staple for those cozy, comforting meals we all crave.
Now that you’ve tried it, I desperately want to know what you served it with! Did you drown a pile of mashed potatoes? Did it finally make that meatloaf sing? Don’t be shy!
Please leave a rating down below—five stars if it saved your dinner! It helps other home cooks like you find reliable recipes, and honestly, feedback brings me the greatest joy. If you snapped a picture of your stunning, glossy sauce, tag us on social media! I adore seeing these classic American dishes coming back to life in your kitchens.
If you ever have questions, need help troubleshooting a batch, or just want to say hello, please reach out via the contact page. Cooking is always better when we share the journey. Happy saucing, friends!
PrintThe Ultimate Homemade Brown Gravy (No Drippings Needed): Rich, Velvety, and Ready in Minutes
Make rich, savory brown gravy from scratch without relying on meat drippings. This easy stovetop recipe yields a velvety sauce perfect for mashed potatoes, meatloaf, or roast beef.
- Prep Time: 5 min
- Cook Time: 15 min
- Total Time: 20 min
- Yield: About 3 cups 1x
- Category: Sauce
- Method: Stovetop
- Cuisine: American
- Diet: Vegetarian
Ingredients
- 4 tablespoons unsalted butter
- 4 tablespoons all-purpose flour
- 2 cups beef broth (low sodium preferred)
- 1 cup chicken broth or water
- 1 teaspoon onion powder
- 1/2 teaspoon garlic powder
- 1/2 teaspoon dried thyme
- 1/4 teaspoon black pepper
- 1/4 teaspoon salt (adjust to taste)
- 1/2 teaspoon Worcestershire sauce (optional, for depth)
Instructions
- In a medium saucepan, melt the butter over medium heat.
- Whisk the flour into the melted butter. Cook this roux, stirring constantly, for 1 to 2 minutes until it turns a light peanut butter color. Do not let it burn. This step is key for flavor.
- Slowly pour in the beef broth while whisking continuously to prevent lumps from forming.
- Add the chicken broth (or water), onion powder, garlic powder, thyme, pepper, salt, and Worcestershire sauce if using.
- Increase the heat to medium-high and bring the mixture to a simmer, whisking often.
- Once simmering, reduce the heat to low and let the gravy cook for 5 to 8 minutes, or until it thickens to your desired consistency. Stir frequently to keep the bottom from scorching.
- Taste the gravy and adjust salt and pepper as needed. For an extra smooth texture, you can strain the gravy through a fine-mesh sieve before serving.
Notes
- For a darker color, cook the roux for an extra minute or two until it reaches a darker brown shade before adding the liquid.
- If your gravy is too thick, whisk in a tablespoon of warm broth or water at a time until it reaches the right consistency.
- If your gravy is too thin after 8 minutes of simmering, create a slurry by mixing 1 teaspoon of cornstarch with 2 teaspoons of cold water, then whisk it into the simmering gravy until thickened.
Nutrition
- Serving Size: 1/2 cup
- Calories: 110
- Sugar: 1
- Sodium: 350
- Fat: 8
- Saturated Fat: 5
- Unsaturated Fat: 3
- Trans Fat: 0
- Carbohydrates: 7
- Fiber: 0
- Protein: 3
- Cholesterol: 20