
Oh, you know that feeling when the air turns crisp and suddenly all you crave is that cozy, warm spice that signals fall is truly here? For me, nothing beats baking up something that brings the whole family running to the kitchen. That’s why I’m so thrilled to share what I consider the absolute best easy pumpkin dessert that exists: the iconic pumpkin crunch cake. This isn’t just another bake from the Cookin’ Corner heritage—it’s a dessert that masters the impossible: capturing that gooey, spiced pumpkin pie flavor inside a structure topped with the most addictive, buttery pecan crunch. Forget fussy pie crusts; this layered wonder is where it’s at!
- Why This Classic Pumpkin Crunch Cake is Your New Favorite Fall Cake Recipe
- Gathering Ingredients for Your Pumpkin Pecan Crunch
- Step-by-Step Instructions for the Easiest Pumpkin Dessert
- Tips for Success When Making a Pumpkin Crunch Cake
- Serving Suggestions for Your Creamy Pumpkin Layer Cake
- Storage and Make-Ahead Tips for Your Pumpkin Crunch Cake
- Frequently Asked Questions About Pumpkin Crunch Cake
- Estimated Nutritional Snapshot of this Pumpkin Crunch Cake
- Share Your Experience Making This Autumn Spice Cake
Why This Classic Pumpkin Crunch Cake is Your New Favorite Fall Cake Recipe
If you’re anything like me, you want the festive flavors of Thanksgiving dessert ideas without spending half the day wrestling with pastry dough. That’s the absolute beauty of the pumpkin crunch cake! It’s truly a dessert better than pie because you get all that intense pumpkin spice flavor, but structured in a way that’s just so much simpler for a crowd. This is why it’s a staple in our Cookin’ Corner collection—it’s a reliable fall cake recipe that just *works* every single time.
Here are the reasons why this recipe earns its spot at the top of your fall baking list:
- It’s the definition of an easy pumpkin dessert—basically dump-and-bake!
- It’s incredibly reliable, thanks to using that trusty boxed yellow cake mix shortcut.
- That buttery cake topping provides just the right amount of crunch you crave.
- It’s easier to slice and serve than a full pie, making it perfect for large gatherings.
- It actually tastes better after chilling, which means less stress on the big day!
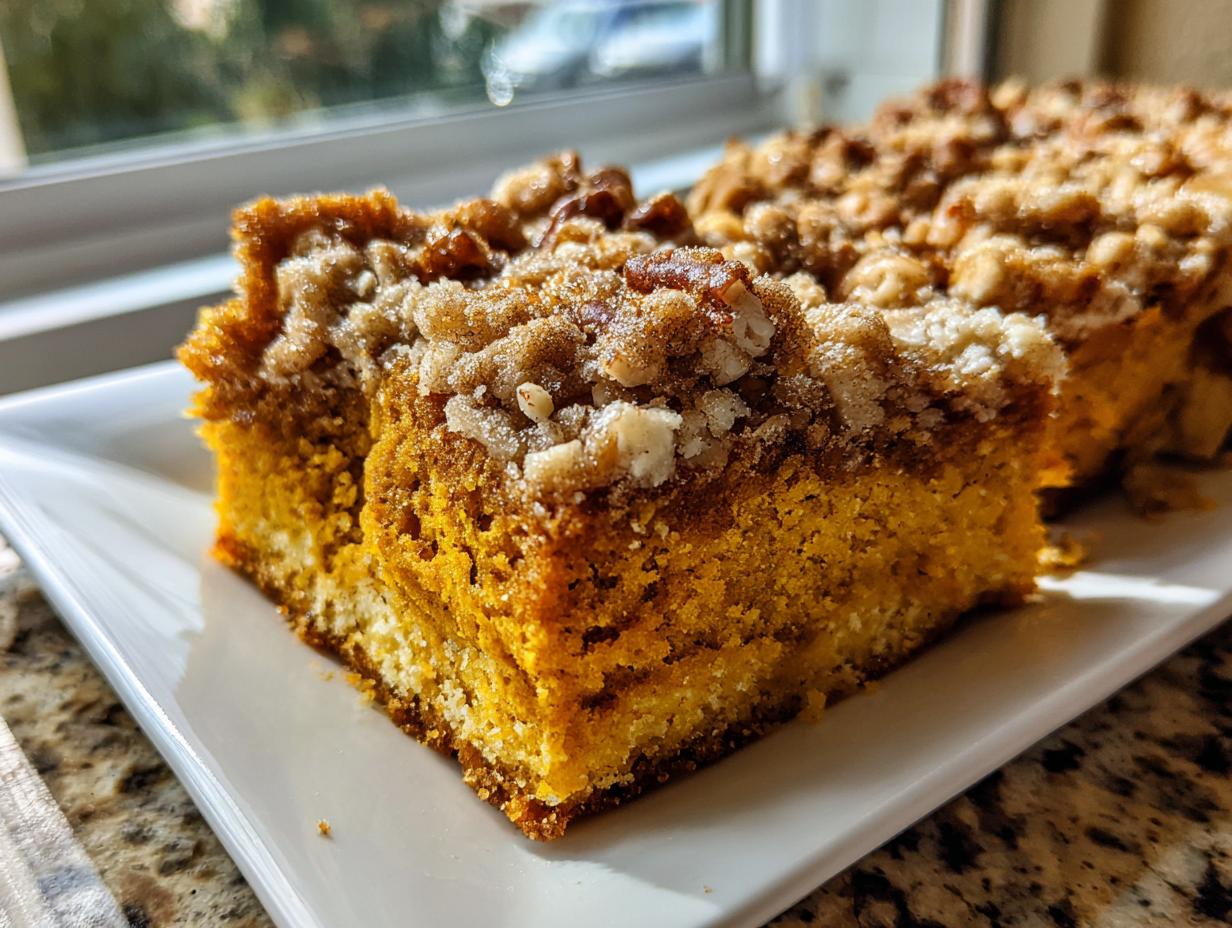
The Magic of the Layered Pumpkin Cake Structure
What makes this a true layer pumpkin cake, and not just a crumble? It’s all about what happens in the oven. First, you pour in that smooth, creamy pumpkin layer. Then, you sprinkle the dry mix and pecans over the top. As it bakes, the butter seeps down and caramelizes the dry topping, while the bottom layer sets up beautifully—no scrambling required. It’s a perfect marriage of textures, not just mixed together! This is the secret to that ultimate pumpkin pecan crunch.
Gathering Ingredients for Your Pumpkin Pecan Crunch
Alright, let’s get our supplies ready! For this next step, I need you to grab everything listed below. Because the magic of the pumpkin crunch cake relies on keeping the components separate until they bake, make sure you have two bowls ready: one for your wet pumpkin base, and one for your dry topping mix.
Here is what you’ll need for this incredibly quick pumpkin bake:
- 1 box yellow cake mix (Yes, the boxed kind! That’s our little secret for a cake mix pumpkin recipe shortcut!)
- 1 can (15 ounces) pumpkin puree
- 1 can (12 ounces) evaporated milk
- 3 large eggs
- 1 1/2 cups granulated sugar
- 1 teaspoon ground cinnamon
- 1/2 teaspoon salt
- 1 cup chopped pecans
- 1 cup (2 sticks) unsalted butter, melted
- Whipped topping or vanilla ice cream, for serving
Ingredient Notes and Substitutions for the Perfect Pumpkin Crunch Cake
Since this is such a straightforward recipe, ingredient quality really shines through. My biggest tip, passed down from my grandmother, is this: You must use pure pumpkin puree, not pumpkin pie filling. The filling already has added sugars and spices, and it will mess up the exact balance we need for that perfect creamy layer. Trust me on this one!
We rely on the boxed yellow cake mix to provide the structure for that dry topping—it’s what creates that signature crunch when mixed with butter and left unstirred. If you’re missing pecans or just feel like switching things up, you can absolutely substitute them! I know some folks love using chopped walnuts, and if you want a special, sweeter kick, swapping half or all of the pecans for toffee bits gives you a fantastic pumpkin toffee crunch variation. It keeps that easy, no-fuss fall baking spirit alive!

Step-by-Step Instructions for the Easiest Pumpkin Dessert
Okay, now that we have everything ready, let’s get this amazing dessert into the oven! Since this is one of the most straightforward quick pumpkin bakes you’ll ever make, just follow these steps exactly, and you’ll have the most requested easy layered dessert.
- Preheat your oven to 350 degrees Fahrenheit (175 degrees Celsius). Lightly grease a 9×13 inch baking dish—we want clean edges!
- In a medium bowl, whisk together the pumpkin puree, evaporated milk, eggs, 1 1/2 cups of the sugar, cinnamon, and salt until the mixture is perfectly smooth. This forms your creamy pumpkin layer.
- Pour that beautiful, smooth pumpkin mixture evenly into your prepared baking dish.
- In a separate bowl, combine the dry yellow cake mix and the chopped pecans. Please, do not mix anything else into this dry topping!
- Sprinkle the dry cake mix and pecan mixture evenly over the pumpkin layer in the baking dish. And I mean evenly! Do not stir them together—this is the key to the whole crunch!
- Slowly drizzle the melted butter over the dry topping layer. Distribute that butter as evenly as possible across the entire surface.
- Bake for 50 to 60 minutes, or until that topping is golden brown and deep colored, and the center looks all set up.
- After it comes out, remove the dish from the oven and let it cool completely on a wire rack. The magic happens here—the layers firm up as it chills.
- You absolutely must chill the pumpkin crunch cake for at least 2 hours before serving. Seriously, don’t cheat this step!
- Serve cold with a dollop of whipped topping or a scoop of vanilla ice cream.
Crucial Timing: Preheating and Setting the Layers in Your Pumpkin Crunch Cake
Listen up, because timing is where even the simplest recipes can trip you up. Make sure your oven is fully preheated to 350°F before anything goes in; we need that immediate, steady heat. Then, the most important timing note comes at the end! After you pull that gorgeous pumpkin pecan crunch creation out, resist the urge to slice it warm. That creamy pumpkin layer needs that two-hour chill time in the fridge to completely set up. If you cut it too soon, you’ll end up with a lovely, runny soup instead of a distinct layer pumpkin cake. Patience pays off here, I promise!
Tips for Success When Making a Pumpkin Crunch Cake
We’ve covered the how-to, but making a truly show-stopping pumpkin crunch cake requires a few little seasoned tricks. These are the things I learned after making (and maybe slightly messing up) this recipe a few too many times for my own family! Follow these tips, and you’ll always get that perfect, distinct separation between the creamy base and that addictive crunch.
First off, remember that butter distribution is everything for the topping. When you drizzle that melted butter over the dry cake mix and pecans, go slow and try to hit every dry corner. If you miss a spot, that area will stay powdery instead of turning into that gorgeous, golden caramelized crunch. Think of it like painting—you need even coverage!
My second huge tip relates to moisture control. This cake is often called a Hawaiian style pumpkin dessert, which means it relies on that wonderful moisture. But for it to work, you must chill it! Don’t even think about slicing into this warm. The chilling time—at least two hours—allows the liquid layers to firm up properly. If you skip this, your slices will collapse into a beautiful puddle instead of holding that perfect layer pumpkin cake structure.
Finally, let’s talk about serving temperature again, because it’s so crucial for the best texture. Always serve this dessert cold. If you leave it out on the counter for too long, the butter in the crunch topping softens, and you lose that snappy texture we worked so hard to create. A chilled slice of this easy pumpkin dessert served straight from the fridge is heavenly, especially with a cool scoop of vanilla ice cream alongside it!
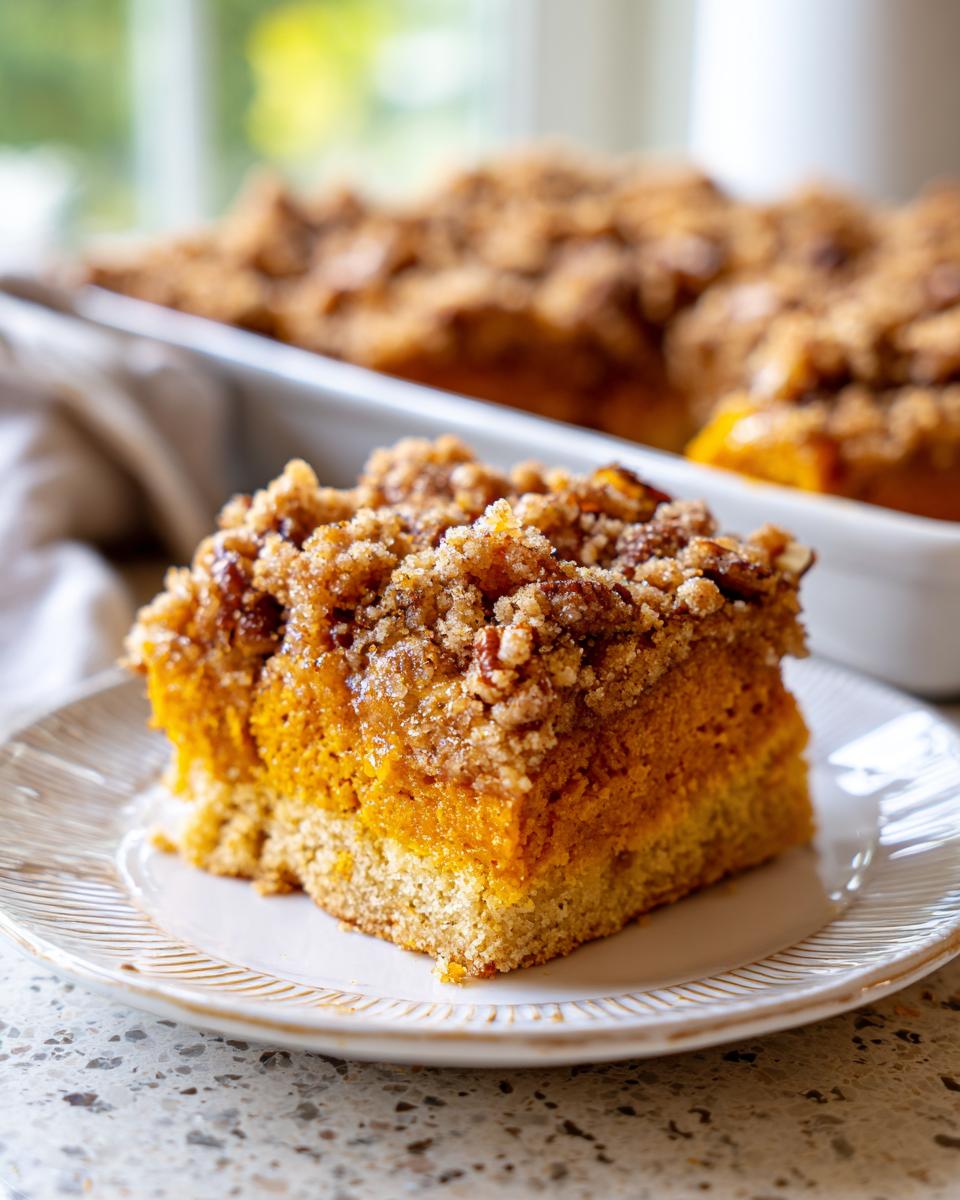
Serving Suggestions for Your Creamy Pumpkin Layer Cake
Once your pumpkin crunch cake has chilled properly—and trust me, waiting is the hardest part of this easy layered dessert—it’s time for the grand finale! This dessert is gorgeous all on its own because you have that lovely contrast between the rich, soft pumpkin layer and that delightful, buttery cake topping.
But if you want to really dress it up for a crowd, especially when you’re serving it as one of your top-tier Thanksgiving dessert ideas, you have a few fantastic, simple choices. We usually stick to the classics because they never fail to please.
- Cold Whipped Topping: A generous, cool dollop of stabilized whipped topping is perfect right before serving. The temperature contrast between the cold cream and the chilled cake is just wonderful.
- Vanilla Ice Cream: If you’re serving this slightly less cold, a scoop of high-quality vanilla ice cream melts just enough to mingle beautifully with the pumpkin pecan crunch topping. (Don’t let it sit too long, though, or you lose that crunch!)
Now, if you are feeling extra fancy—and honestly, who isn’t during the holidays?—I love adding a little extra drizzle. Since we want to enhance that autumnal, sweet vibe, I highly recommend a thin drizzle of homemade caramel sauce right over the top of the crunch layer. That rich, buttery, slightly salty caramel plays *so* well with the cinnamon and the pecans in the crunch. It takes this wonderfully quick pumpkin bake right over the top into holiday centerpiece status!
Storage and Make-Ahead Tips for Your Pumpkin Crunch Cake
Since this delightful pumpkin crunch cake has that creamy, custard-like pumpkin layer, keeping it cold is non-negotiable! You absolutely must store leftovers tightly covered in the refrigerator. It’s one of those great no-fuss fall baking recipes because it actually tastes better the next day!
You can easily make this dessert a full day ahead of time—in fact, I encourage it since it needs those long hours to set up perfectly. Just keep it chilled until about 20 minutes before you plan on serving. If you save leftovers right away, they stay fantastic for three to four days. It’s the ideal make-ahead showstopper!
Frequently Asked Questions About Pumpkin Crunch Cake
I get so many questions every fall about the little details concerning this pumpkin crunch cake! It’s such a popular one, and I love making sure everyone gets that perfect texture and spice combo. Here are the top things folks wonder about when tackling this truly easy pumpkin dessert.
Is this truly a layer pumpkin cake, or is it just a crumble?
That’s a fantastic question! People sometimes think because we use cake mix, it’s just a dump cake, but no! It is absolutely a distinct layer pumpkin cake. The bottom layer is the moist, creamy pumpkin-egg base, and the top layer is that buttery, crispy topping. They don’t mix during baking; they set up perfectly separate. The chilling time is key to keeping those layers defined!
Can I use pumpkin pie filling instead of plain pumpkin puree?
Oh, please don’t! This is where many people accidentally turn this into a flop. You must use plain, 100% pure pumpkin puree for this recipe. Pumpkin pie filling is already sweetened and spiced, and it contains stabilizers that change the texture of the bottom layer. If you use filling, you’ll end up with something too loose after baking, and it won’t set right, totally ruining the creamy pumpkin layer cake vibe we are going for. Stick to plain puree for the best results!
Why didn’t my topping get crunchy, and why is it soggy?
I’ve seen this happen, and nine times out of ten, it comes down to stirring or serving temperature. Remember, when you assemble this, you absolutely cannot stir that dry cake mix pumpkin recipe topping into the wet pumpkin layer! You just sprinkle it on and drizzle the butter. Anything stirred in will result in a gummy mess. Also, remember my big rule: always serve this cold! If you leave it out on the warm counter, the butter in the topping softens, and presto—soggy!
Can I double this recipe for a bigger crowd?
You sure can, but you’ll need a bigger pan! If you double the ingredients for a huge holiday crowd, you’ll want to move from the standard 9×13 dish to a larger half-sheet pan. Just be prepared to extend your baking time significantly, maybe by another 15 to 20 minutes, and keep an eye on the edges. This is the perfect easy layered dessert for making a big batch!
Estimated Nutritional Snapshot of this Pumpkin Crunch Cake
I know some folks watch what they eat, even when diving into the best autumn spice cake! Since this is a rich, deeply satisfying treat, here is the estimated nutritional breakdown for just one slice of this heavenly pumpkin crunch cake. Remember, this is for standard serving sizes based on the ingredients listed above, and your actual results might vary slightly depending on the specific brands of cake mix or the exact amount of butter you drizzle!
Think of this as a wonderful little indulgence for your holiday table or a perfect cozy companion to a cup of coffee.
- Serving Size: 1 slice
- Calories: 450
- Sugar: 45g
- Fat: 25g
- Saturated Fat: 12g
- Carbohydrates: 55g
- Protein: 6g
- Cholesterol: 80mg
The sugar content is a bit higher, naturally, because of the cake mix and granulated sugar we use to create that incredible **buttery cake topping**. However, it’s all part of the package when you make a **dessert better than pie**! Enjoy every bite, knowing you made this amazing easy pumpkin dessert yourself!
Share Your Experience Making This Autumn Spice Cake
Well, that’s it! You’ve done it! You’ve made the incredible pumpkin crunch cake, and now it’s chilling away perfectly in the fridge, waiting to wow everyone at your next gathering. Isn’t that feeling of accomplishment just the best? This recipe, this cozy slice of delicious nostalgia, feels so much more meaningful when I know someone else is enjoying it too.
Now, I absolutely need to know how it turned out for you! Did you stick to the classic pecans, or did you try those toffee bits I mentioned? Did it make your spread of Thanksgiving dessert ideas the talk of the town?
Don’t be shy! Please jump down below and leave me a rating. Five stars is the goal, of course, but even tell me what you loved most about that crunchy topping or how surprisingly moist that creamy layer stayed. If you snapped a picture—perhaps showing off your best dollop of whipped cream topping dessert—please share it on social media and tag me! Using the hashtag #CookinCornerCrunch helps me see all your beautiful bakes!
Creating these classic recipes is always a collaboration, and I truly cherish hearing about your kitchen successes. If you have any questions at all about the process, please don’t hesitate to reach out via our contact page! So go on, enjoy that perfect slice of pumpkin pecan crunch, and let’s connect in the comments below!
PrintClassic Pumpkin Crunch Cake: Easy Layered Dessert

Make this easy pumpkin dessert that tastes like pumpkin pie but has the texture of a cake. This layered pumpkin cake features a moist pumpkin layer and a buttery pecan crunch topping, perfect for Thanksgiving dessert ideas.
- Prep Time: 15 min
- Cook Time: 60 min
- Total Time: 75 min
- Yield: 12 servings 1x
- Category: Dessert
- Method: Baking
- Cuisine: American
- Diet: Vegetarian
Ingredients
- 1 box yellow cake mix
- 1 can (15 ounces) pumpkin puree
- 1 can (12 ounces) evaporated milk
- 3 large eggs
- 1 1/2 cups granulated sugar
- 1 teaspoon ground cinnamon
- 1/2 teaspoon salt
- 1 cup chopped pecans
- 1 cup (2 sticks) unsalted butter, melted
- Whipped topping or vanilla ice cream, for serving
Instructions
- Preheat your oven to 350 degrees Fahrenheit (175 degrees Celsius). Lightly grease a 9×13 inch baking dish.
- In a medium bowl, whisk together the pumpkin puree, evaporated milk, eggs, 1 1/2 cups of the sugar, cinnamon, and salt until the mixture is smooth. This forms your creamy pumpkin layer.
- Pour the pumpkin mixture evenly into the prepared baking dish.
- In a separate bowl, combine the dry yellow cake mix and the chopped pecans. Do not mix anything else into this dry topping.
- Sprinkle the dry cake mix and pecan mixture evenly over the pumpkin layer in the baking dish. Do not stir.
- Slowly drizzle the melted butter over the dry topping layer. Distribute the butter as evenly as possible over the entire surface.
- Bake for 50 to 60 minutes, or until the topping is golden brown and the center is set.
- Remove the dish from the oven and let it cool completely on a wire rack. The layers will set as it cools.
- Chill the pumpkin crunch cake for at least 2 hours before serving.
- Serve cold with a dollop of whipped topping or a scoop of vanilla ice cream.
Notes
- This recipe is often called Hawaiian style pumpkin dessert because of the layered structure.
- For an extra layer of flavor, you can substitute half of the pecans with toffee bits for a pumpkin toffee crunch variation.
- This dessert is best served cold to maintain the distinct layers.
Nutrition
- Serving Size: 1 slice
- Calories: 450
- Sugar: 45
- Sodium: 300
- Fat: 25
- Saturated Fat: 12
- Unsaturated Fat: 13
- Trans Fat: 0
- Carbohydrates: 55
- Fiber: 2
- Protein: 6
- Cholesterol: 80