

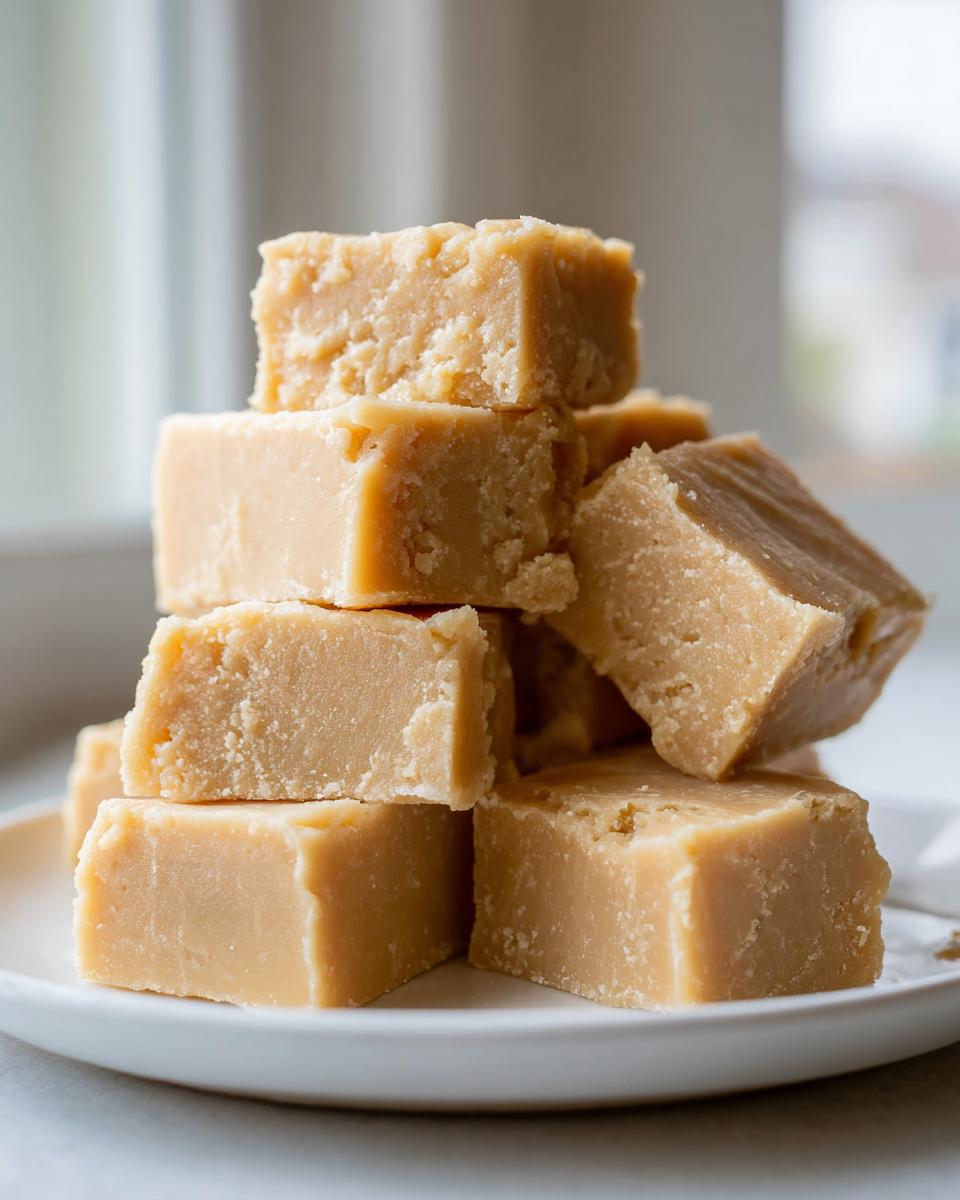
There’s just something magical about homemade candy, isn’t there? Those rich, nostalgic sweet treats instantly take me back to my grandmother’s kitchen, even if we were making something simple like this unforgettable maple fudge. If you’ve ever thought fudge was too complicated, you need to meet this recipe face-to-face! I’m Sarah Jane Thompson, and here at Cookin’ Corner, we focus on recipes that actually work for real home cooks. That’s why I’m thrilled to share my absolute favorite: the Super Creamy, Easy 3-Ingredient Maple Fudge Recipe (No Fail). It captures that deep, cozy flavor of real maple syrup perfectly, and trust me, it’s going to be your new go-to dessert for holiday candy making. If you love easy recipes that deliver big, you should also check out my recipe for easy no-bake avalanche cookies while you’re here!
- Why This Creamy Maple Fudge Recipe Works Every Time
- Gathering Ingredients for Your Easy Maple Fudge
- Simple Instructions for Perfect Maple Fudge
- Variations: Making Maple Fudge with Walnuts
- Tips for Success with This Easy Maple Fudge Recipe
- Storage and Serving Suggestions for Your Maple Fudge
- Frequently Asked Questions About Homemade Maple Fudge
- Estimated Nutritional Snapshot for Maple Fudge
- Share Your Creamy Maple Fudge Creations
Why This Creamy Maple Fudge Recipe Works Every Time
I understand you might be skeptical. Fudge usually means candy thermometers and agonizing over the softball stage, right? Not with this magic mix! That’s why I developed this version; it’s my guarantee that you get astounding results without the stress. It’s truly the king of creamy maple fudge.
- It’s completely no bake maple fudge—you melt, stir, and chill. That’s it!
- The melt-in-your-mouth texture is unbelievable; it’s just so smooth.
- You get that deep, authentic maple flavor without overpowering sweetness.
The Secret to Velvety Fudge Texture
The traditional method relies on beating sugar crystals just right, which is tricky business. Here? We let the sweetened condensed milk and melted white chocolate do the heavy lifting. They create this luscious, stable base that inherently leads to velvety fudge every single time. You just can’t mess up this texture combo!
Quick Prep for Homemade Maple Fudge
Seriously, the hands-on time is about ten minutes total. I can whip this up right before making dinner. It’s perfect for those moments when you need homemade maple fudge fast, whether for a last-minute dessert or a spontaneous craving. If you’re looking for other quick ideas, check out my tips for quick dessert ideas.
Gathering Ingredients for Your Easy Maple Fudge
The beauty of this ultra-simple maple fudge is that you only need three core players. That said, because we rely so heavily on these few items, their quality matters immensely! Don’t try to cheap out here, especially on the syrup—it’s the star flavour. We’re keeping this list short, sweet, and focused on what truly yields success for your easy maple fudge.
Here is exactly what you need to grab from the pantry:
- One (14 ounce) can of sweetened condensed milk. Please make sure this can is unopened when you start; we don’t want any crusty edges!
- One (12 ounce) package of white chocolate chips. Yes, chips work perfectly here; you don’t need special melting wafers for this particular method.
- One full cup of pure maple syrup. This is non-negotiable!
If you wanted to try something completely different for another day, I have a great recipe for easy slow cooker apple butter that uses pure syrup too, but for this fudge, only the best will do.
Ingredient Notes and Real Maple Syrup Quality
Okay, let’s drill down on the syrup for a second because this is where the flavor magic happens. You absolutely must use 100% pure maple syrup. Don’t even think about grabbing the pancake syrup that’s mostly corn syrup. That stuff has an artificial taste that will ruin this delicate confection. We want that rich, woodsy sweetness found only in the real deal. I always order a good bottle online for my pure maple syrup supply specifically for candy making.
As for the white chocolate chips, these are crucial because they provide the structure and the creamy foundation. They melt down so beautifully, locking in that maple flavour without adding any competing vanilla notes that you might find in baking bars. Simple white chips are your friend here!
Simple Instructions for Perfect Maple Fudge
Now for the fun part! Seriously, if you can stir something gently over low heat, you can master this recipe. I’ve included all my little secrets here to make sure your first batch of maple fudge sets up beautifully and tastes like pure heaven. Don’t rush any of these steps, especially the melting part, and you’ll be rewarded!
Preparing Your Pan and Melting the Base
First things first, get that 8×8 inch pan ready. I line mine with parchment paper, making sure there are flaps or an overhang sticking up over the edges. That parchment is your release mechanism later on—it’s amazing! Lightly grease that paper too, just for extra insurance.
Next, you combine the sweetened condensed milk and the white chocolate chips in a saucepan. Keep the heat low—medium-low is plenty. You need to stir this mixture constantly. I like to use a silicone spatula so I can really scrape the bottom corners. We are looking for smooth, not bubbly. If it starts to boil, yank it off the heat instantly! We never want to boil this base if we want that truly smooth texture.
Mixing and Setting the Creamy Maple Fudge
Once everything is melted down and looks like glossy caramel, take the pan off the burner immediately. That’s when you fold in the cup of pure maple syrup. Stir until it incorporates completely; the color will deepen slightly, and you’ll start smelling that wonderful autumn scent. This is the moment you create the magic creamy maple fudge!
Pour that luxurious mixture into your prepared pan. Spread it out gently—don’t beat air into it now! Then, it goes into the fridge. Seriously, no peeking! It needs a minimum of three hours to chill and set properly. If you try to cut it early, you’ll end up with delicious maple syrup goo instead of fudge. Once it’s firm, you just lift it right out using those parchment handles. If you want more great tips on quick cooking, check out my collection of quick easy recipes.
For more great dessert inspiration, you can see how others are enjoying this type of treat over at Chop Notch!
Variations: Making Maple Fudge with Walnuts
While this basic three-ingredient maple fudge is honestly perfect just the way it is—creamy, rich, and simple—I know so many of you love that extra crunch! If you’re looking to elevate this into a decadent, seasonal treat, adding walnuts is absolutely the way to go. This transforms it into a beautiful maple fudge with walnuts confection that looks gorgeous on a holiday platter.
The great news is that incorporating these nuts is incredibly easy, and it fits right into our ‘quick dessert ideas’ mindset. You don’t have to change the melting or setting process one tiny bit. The key is timing, just like everything else in the kitchen!
To make this a true maple fudge with walnuts batch, you need about half a cup of chopped walnuts. Make sure they are lightly toasted first—it makes such a difference in flavor! Toss them into the mixture right after you fold in the maple syrup, but before you pour the fudge into the prepared pan. You are gently folding them in, not beating them, so you keep that signature smooth texture we worked so hard to achieve.
If you’re planning on making a big batch of sweet homemade gifts this year, handing someone a box of this nutty, maple-infused treat feels so personal. It’s far superior to any store-bought candy, I promise you! You can see a similar decadent recipe over at My Golden Recipes if you want more inspiration on making those wonderful sweet treats.
Remember, as you’re packaging these up for sweet homemade gifts, use really nice parchment paper or small cellophane bags tied with twine. They look so charming! For even more ideas on packaging and presenting your amazing creations, take a look at some of my tips on sweet homemade gifts here on the blog.
Tips for Success with This Easy Maple Fudge Recipe
Even though this really is the most forgiving easy maple fudge recipe on the planet, good cooking always comes down to paying attention to the finer points. My grandmother always said, “A good baker anticipates the problem before it happens.” I want your batch to be the creamiest, best maple fudge you’ve ever made, so let’s talk about locking in that perfect smooth texture and making sure it sets up firmly.
Remember what I said about high-quality ingredients? It bears repeating! That pure maple syrup isn’t just for flavor; it affects the final consistency. If you use anything less than 100% pure grade A or B, the flavor will be off, and sometimes those substitutes can react poorly when heated with the condensed milk, leading to a grainy texture later on. Always use quality ingredients!
Troubleshooting Common Maple Fudge Issues
Don’t panic if things don’t look exactly right when you pour them into the pan. Here’s what you should check if your fudge isn’t looking perfect:
- It looks grainy or slightly gritty: This usually happens if the chocolate mixture got too hot and started to seize up before you added the syrup. For this specific recipe, it’s rare, but if it happens, try stirring just a teaspoon of hot water into the warm mixture off the heat—sometimes that fat and sugar bond can be coaxed back together.
- It won’t set up in the fridge: Did you chill it long enough? Three hours is the minimum. If your house is really warm, or if you overloaded it with too many warm walnuts, it might need four or even five hours. If it’s still soft after 5 hours, you can try moving it to the freezer for 30 minutes—that usually firms things right up.
- It feels greasy: That means the chocolate separated slightly from the milk mixture. Next time, make sure you are heating that base very gently over low heat and stirring constantly. Don’t let it simmer!
If you’re still looking for other fail-safe recipes to perfect, I have my tips for making the best soft sugar cookies that never crack!
Storage and Serving Suggestions for Your Maple Fudge
Once you successfully conquer this simple maple fudge recipe, the next big question is: how do I keep this sugary goodness around long enough to enjoy it? Since this confection is so rich, you might not eat it all in one sitting—though I sometimes manage it!
Because we used white chocolate and condensed milk instead of a traditional cooked sugar base, the way we store it is a little different from those old-fashioned fudge recipes your grandmother might have made. The good news is that it’s very stable!
For everyday eating, I keep my airtight container right on the counter. It holds onto that soft, almost buttery texture perfectly at room temperature for about a week. If you’re making a huge batch for holiday candy making and need it to last longer, the fridge is your friend. It will firm up a bit more in there, but it stays fresh for two to three weeks.
If you wrap each square tightly in wax paper before boxing them up, they look so professional! This is perfect for presenting them as those lovely sweet homemade gifts we talked about earlier. For extra gift inspiration, especially if you’re canning this winter, take a peek at my holiday notes on Christmas jam recipes.
When serving, if you pull the fudge out of the fridge about 20 minutes before you plan to eat it, it regains that wonderful, melt-in-your-mouth quality. It’s divine with a hot cup of coffee or alongside some salted nuts. You absolutely have to try it while watching a cozy movie—it’s the perfect winter sweet treat! For more ideas on enjoying this decadent flavor profile, check out the lovely thoughts on Crunch Cloud Candy.
Frequently Asked Questions About Homemade Maple Fudge
I’ve answered so many questions about this maple fudge over the years both in emails and comments, so I figured I’d put the most common ones right here. It’s important that you feel confident when trying these fudge recipes, especially when dealing with candy! Knowing the ‘why’ behind the ingredients is what separates a good batch from an absolutely perfect one.
Can I substitute the white chocolate chips in this maple fudge recipe?
That’s a great question! If you’re looking to make something closer to a traditional real maple syrup candy, you might be tempted to swap the white chocolate for butter and a heavier dose of sugar, but I really wouldn’t recommend it for this specific method. The white chocolate chips are doing double duty here: they add sweetness and, critically, they act as the stabilizer that allows this treat to set perfectly without a candy thermometer. The condensed milk and chocolate combo is what gives you that unbelievably smooth texture. If you swap them out, you’re ending up with a completely different recipe that will likely need to be cooked on the stovetop for much longer—it won’t be this easy maple fudge anymore!
Is this considered a no bake maple fudge?
Yes, absolutely! This is one of the main reasons I love this recipe so much. Technically, you are heating the mixture on the stove for about five minutes to melt the chocolate, but you are never cooking it to a specific temperature or boiling it. Because there is no “setting” process involving crystallization via boiling and beating, it squarely falls into the no bake maple fudge category. You just need gentle heat to create a smooth foundation, and then the chilling does all the hard work. It’s a game-changer for quick dessert ideas!
If you’re looking for other quick treats that don’t require turning on the oven during the hot months, make sure you roam through my collection of quick dessert ideas. You’ll find lots of other ways to satisfy that sweet craving without the fuss!
Estimated Nutritional Snapshot for Maple Fudge
I always get asked about the nutrition facts, especially when delivering these gorgeous little squares as sweet treats during the holiday season. When you’re whipping up something this delightful, knowing the basics helps! Now, remember, since this is made with real maple syrup and rich condensed milk, it’s truly a decadence, not an everyday staple. This snapshot is based on making 36 small squares, using standard ingredients as listed in the recipe.
We always aim for transparency here at Cookin’ Corner. Because every brand of white chocolate or every specific maple syrup density can vary slightly, these numbers are solid estimates meant to give you a helpful guide, not a lab report. They reflect one standard serving size.
- Serving Size: 1 square
- Calories: 145
- Sugar: 18 grams (Yep, it’s candy, but it’s natural maple goodness!)
- Sodium: 35 mg
- Fat: 7 grams
- Saturated Fat: 4 grams
- Protein: 2 grams
- Cholesterol: 15 mg
See? It’s a perfect little energy boost for a cozy night! We’ve kept the ingredients minimal, which means we know exactly where every bit of flavor and energy is coming from. It’s part of what makes this one of my favorite quick dessert ideas for sharing with friends.
Share Your Creamy Maple Fudge Creations
Well, now that you have the easiest, creamiest maple fudge recipe right in your hands, I really, truly want to hear about it! Cooking is a shared experience, and seeing your beautiful, glossy squares makes my day. Did you toast your walnuts? Did you manage to keep your hands off the pan while it chilled? Spill all the details!
Don’t just make this treat; become part of the Cookin’ Corner family by telling me what you thought! Leave a star rating below—it helps other home cooks know this recipe is reliable. If you ran into any snags or discovered a new tiny trick, please drop a comment. I read every single one, and I love troubleshooting alongside you.
And please, snap a picture if you can! Tag me on social media with your finished creamy maple fudge. Knowing that my grandmother’s simple, effective recipe is making its way into your home kitchens for fall dessert ideas or holiday candy making is exactly why I keep this blog going. If you have any questions at all about the process after reading through, don’t hesitate to head over to my contact page!
PrintSuper Creamy, Easy 3-Ingredient Maple Fudge Recipe (No Fail)
Make this simple, creamy maple fudge using only three ingredients. This no-bake treat captures the rich flavor of real maple syrup and sets up perfectly for a velvety, melt-in-your-mouth texture, ideal for holiday candy making or quick dessert ideas.
- Prep Time: 10 min
- Cook Time: 5 min
- Total Time: 3 hours 15 min
- Yield: 36 small squares 1x
- Category: Dessert
- Method: No Bake
- Cuisine: American
- Diet: Vegetarian
Ingredients
- 1 (14 ounce) can sweetened condensed milk
- 1 (12 ounce) package white chocolate chips
- 1 cup pure maple syrup
Instructions
- Line an 8×8 inch baking pan with parchment paper, leaving an overhang on the sides for easy removal. Lightly grease the paper.
- In a medium saucepan over medium-low heat, combine the sweetened condensed milk and white chocolate chips. Stir constantly until the chocolate is completely melted and the mixture is smooth. Do not let it boil.
- Remove the pan from the heat. Stir in the pure maple syrup until fully incorporated. This is your base for creamy maple fudge.
- Pour the fudge mixture into the prepared pan. Spread it evenly.
- Refrigerate the fudge for at least 3 hours, or until firm enough to cut.
- Lift the fudge out of the pan using the parchment paper overhang. Cut into small squares.
- Store the homemade maple fudge in an airtight container at room temperature or in the refrigerator.
Notes
- For maple walnut fudge, gently fold in 1/2 cup of chopped walnuts after mixing in the maple syrup.
- Use high-quality, real maple syrup for the best flavor in this maple syrup dessert.
- If you want a slightly firmer texture, you can cook the mixture for 2-3 minutes after the chocolate melts, stirring constantly, before adding the maple syrup.
Nutrition
- Serving Size: 1 square
- Calories: 145
- Sugar: 18
- Sodium: 35
- Fat: 7
- Saturated Fat: 4
- Unsaturated Fat: 3
- Trans Fat: 0
- Carbohydrates: 20
- Fiber: 0
- Protein: 2
- Cholesterol: 15