
When you’re planning any kind of gathering—a big game day spread, a holiday appetizer table, or even just a Sunday brunch—you need a snack that disappears fast. Trust me, I’ve seen entire platters vanish before anyone has finished their first plate! That’s why I’m sharing what I guarantee is the ultimate classic deviled eggs recipe. Forget dry yolks and runny filling; this one is unbelievably easy and delivers that perfect, rich, creamy texture every single time. Here at Cookin’ Corner, we focus on preserving those tried-and-true American classics Mom or Grandma always made. This recipe is straight from that Midwest kitchen heritage, where reliable flavor is the only law that matters.
We aren’t messing around with weird substitutions here. This is the straightforward path to the best deviled eggs you’ll ever make. They are simple, tangy, and truly a crowd-pleaser!
- Why This is the Ultimate Classic Deviled Eggs Recipe
- Gathering Ingredients for Perfect Deviled Eggs
- How to Make Deviled Eggs: Step-by-Step Instructions
- Tips for Serving Crowd Pleasing Snacks: Perfect Deviled Eggs Presentation
- Make Ahead Appetizers: Storage for Classic Deviled Eggs
- Variations on Classic Deviled Eggs
- Frequently Asked Questions About Deviled Eggs
- Estimated Nutrition for Deviled Eggs
- Share Your Favorite Party Appetizers
Why This is the Ultimate Classic Deviled Eggs Recipe
I’ve tried every trick under the sun, but the reason this recipe stands out is all in the ratios. We aren’t just throwing ingredients together; we hit that exact sweet spot for flavor and texture that makes folks ask for the recipe immediately. This isn’t just any snack; it’s designed specifically to give you the most satisfying, creamy deviled eggs filling possible. When you follow these steps, you get that perfect blend of rich yolk, smooth mayonnaise base, and that essential little zip your best deviled eggs need to really shine. It’s reliability in a little white spoon, I promise!
Perfect Texture and Tang for Creamy Deviled Eggs Filling
Listen, the secret sauce for the filling is the acid! That touch of pickle juice wakes everything up so it isn’t too heavy. Don’t skip it or substitute unless you absolutely have to. You have to mash those yolks until they are practically powder before you add anything wet. That’s how you get that wonderfully creamy deviled eggs filling without those weird, dry bits hiding in the corner. It smooths everything right out. Once you mix it, give it a taste!
Easy Deviled Eggs Recipe: Foolproof Steps
If you’re worried about making these for the first time, don’t be! This is truly an easy deviled eggs recipe. The magic starts right at the beginning with how we cook the eggs through our specific boiling and resting method. Seriously, if you follow the 12-minute standing time, the shell basically gives up and falls right off. No swearing, no broken whites, and no tiny shell fragments stuck where they shouldn’t be. It takes the stress right out of the prep work!
Gathering Ingredients for Perfect Deviled Eggs
Okay, time to grab our list! You can’t make the best deviled eggs without the right foundation. We are keeping this simple because true classic flavor doesn’t need ten different spices. You’ll need a full dozen large eggs, of course! Then we need the trifecta for creaminess: good mayonnaise, quality yellow mustard, and a splash of something acidic. Don’t forget your salt and pepper, and definitely have paprika ready for that final flourish. Every item has a job to do, so measuring correctly is key here!
Ingredient Notes and Substitutions for Tangy Deviled Eggs
Let’s talk about those eggs first. Here’s a big secret from my kitchen: if your eggs are super fresh—like week-old farm eggs—sometimes they stick! For easy deviled eggs recipe success, try to use eggs that are maybe seven days old. They cooperate so much better when peeling. Now for the tanginess factor: I always use pickle juice from a jar of sweet Gherkins. That little bit of sweetness with the brine makes the tangy deviled eggs I crave. But if you don’t have any juice handy, a tablespoon of white vinegar works in a pinch, though it leans a bit sharper!
How to Make Deviled Eggs: Step-by-Step Instructions
Alright, here is where the real magic happens in making these crowd pleasing snacks! We’re walking through the whole process of how to make deviled eggs, but pay extra close attention to steps one through three—they are critical for success and easy cleanup. Get a big saucepan ready. You need to cover those 12 large eggs with fresh, cold water, making sure the water is about an inch over the top of the eggs. Bring that water to a full, rolling boil over high heat. As soon as it’s aggressively boiling, turn the heat off immediately, cover the whole thing tightly, and let those eggs sit. This soak time is important: set a timer for exactly 12 minutes.
Once that timer goes off, you can’t dilly-dally! You need an ice bath ready—a big bowl loaded with ice and cold water. Transfer those hot eggs right into the ice water. This stops the cooking instantly, which prevents that gross grayish ring around the yolk, and it causes the egg to shrink away from the shell just enough for easy peeling later. Let them chill completely, which takes about 15 minutes. Peel them when they are cool enough to handle, slice them in half lengthwise, and gently scoop out those yolks onto your working platter.
Achieving the Best Deviled Eggs Filling Texture
This is for the texture buffs among us! Once the yolks are in the bowl, take a fork and mash them up until they look like fine sand. No lumps allowed! Seriously, mash it completely smooth first. Then, we introduce the mayo, mustard, salt, and pepper. You need to mix this until it’s completely smooth and creamy—I sometimes use a hand mixer for 30 seconds just to guarantee that ultra-smooth, luscious finish for that creamy deviled eggs filling. Once it looks perfect, cover the bowl. Don’t skip the final step: put the filled eggs in the fridge for at least 30 minutes before you dust them with paprika. Chilling helps everything set up perfectly!
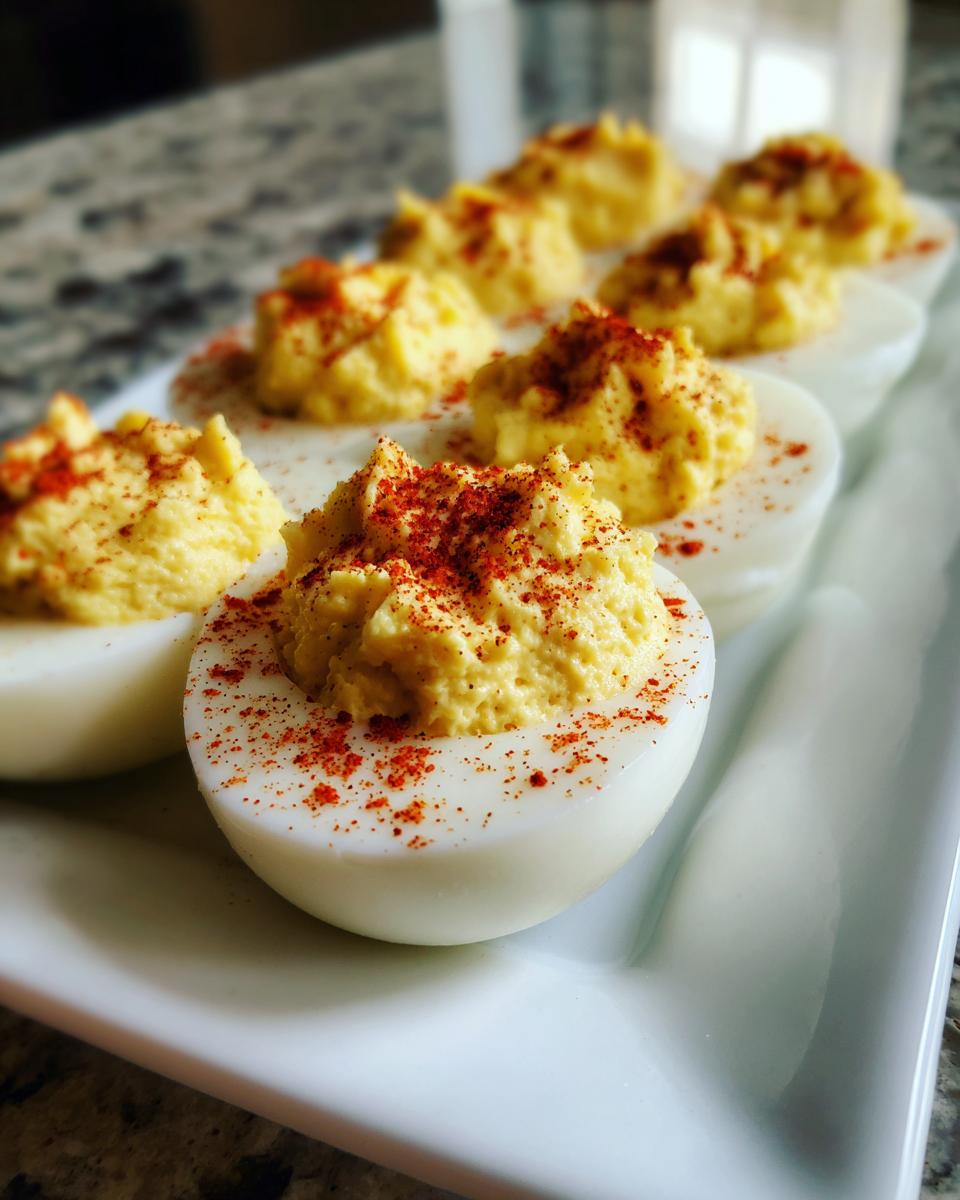
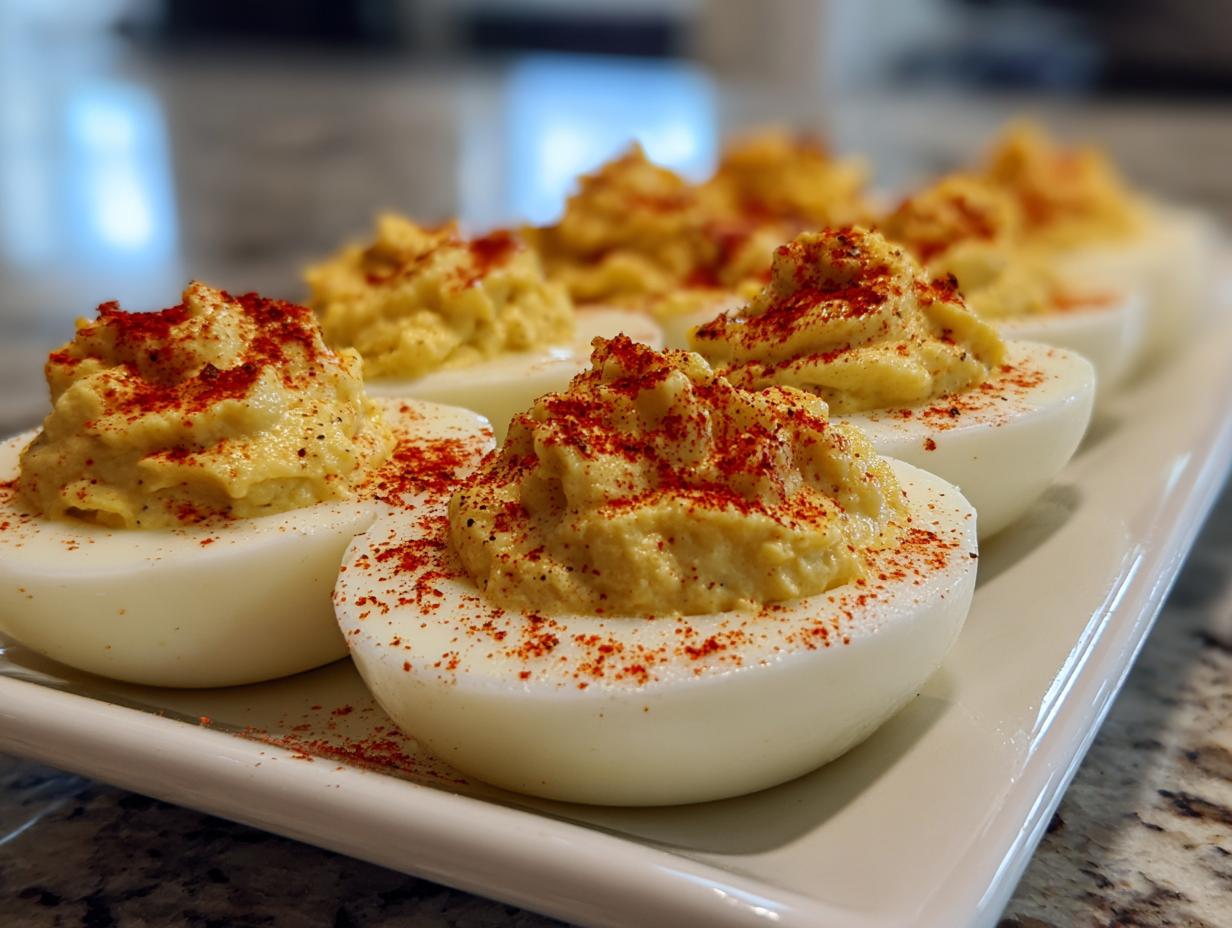
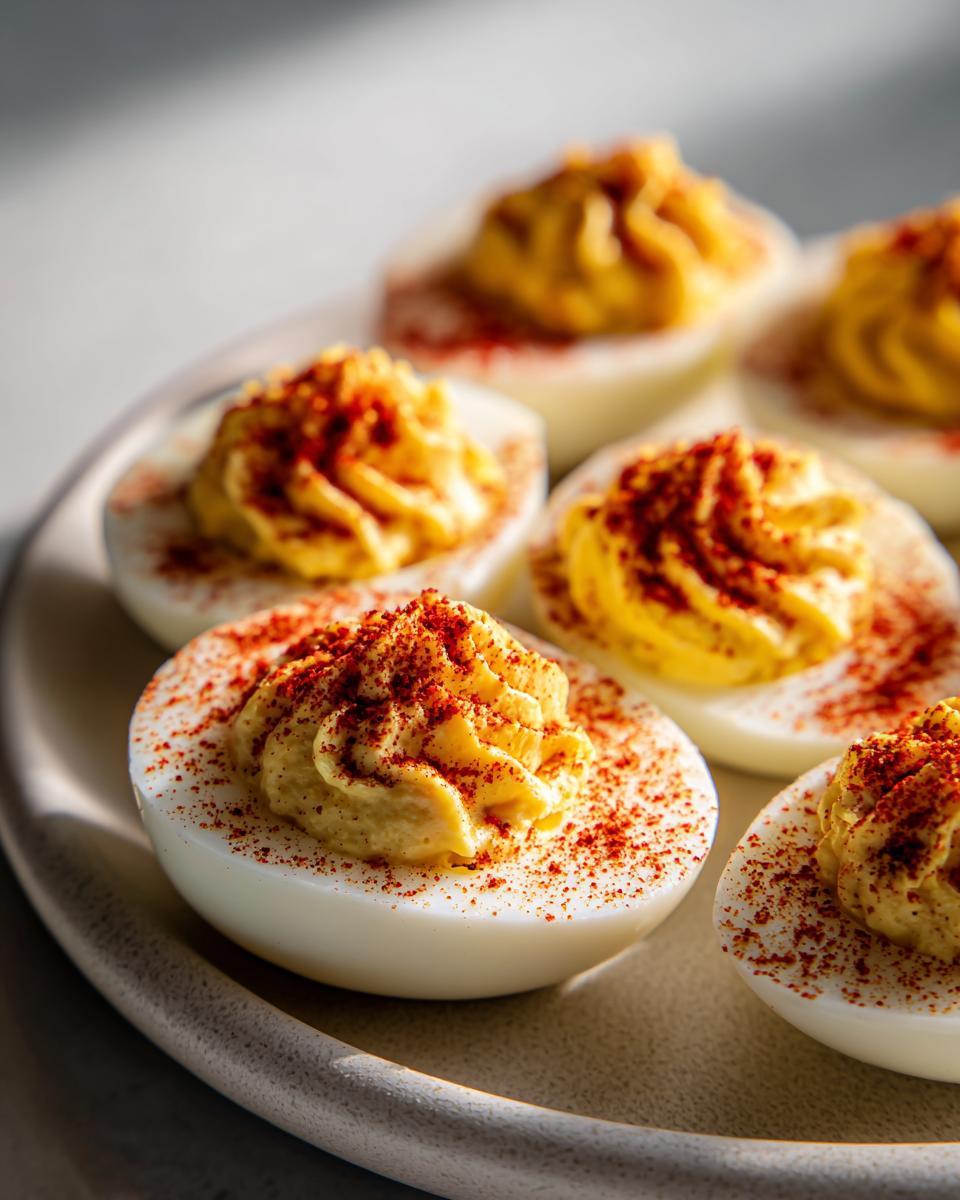
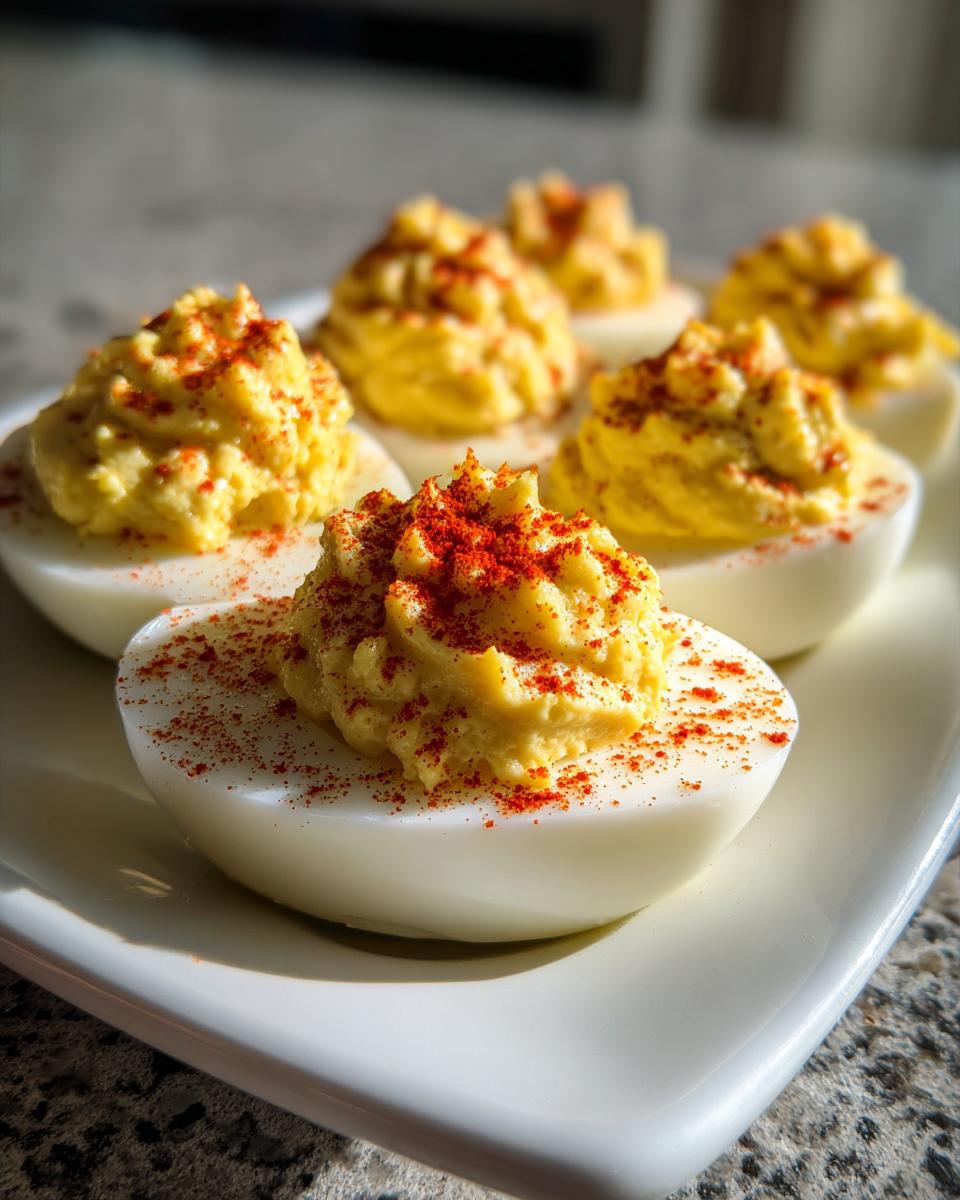
Tips for Serving Crowd Pleasing Snacks: Perfect Deviled Eggs Presentation
These deviled eggs are inherently crowd pleasing snacks, but presentation makes them unforgettable! When you’re setting these out for Thanksgiving appetizers or a big potluck, take just an extra minute or two on the finish. You can definitely use a spoon to dollop the filling back into the whites, and that looks rustic and homemade, which I love. But if you want that bakery look, grab a piping bag with a lovely star tip—it makes those filling swirls look professional instantly!
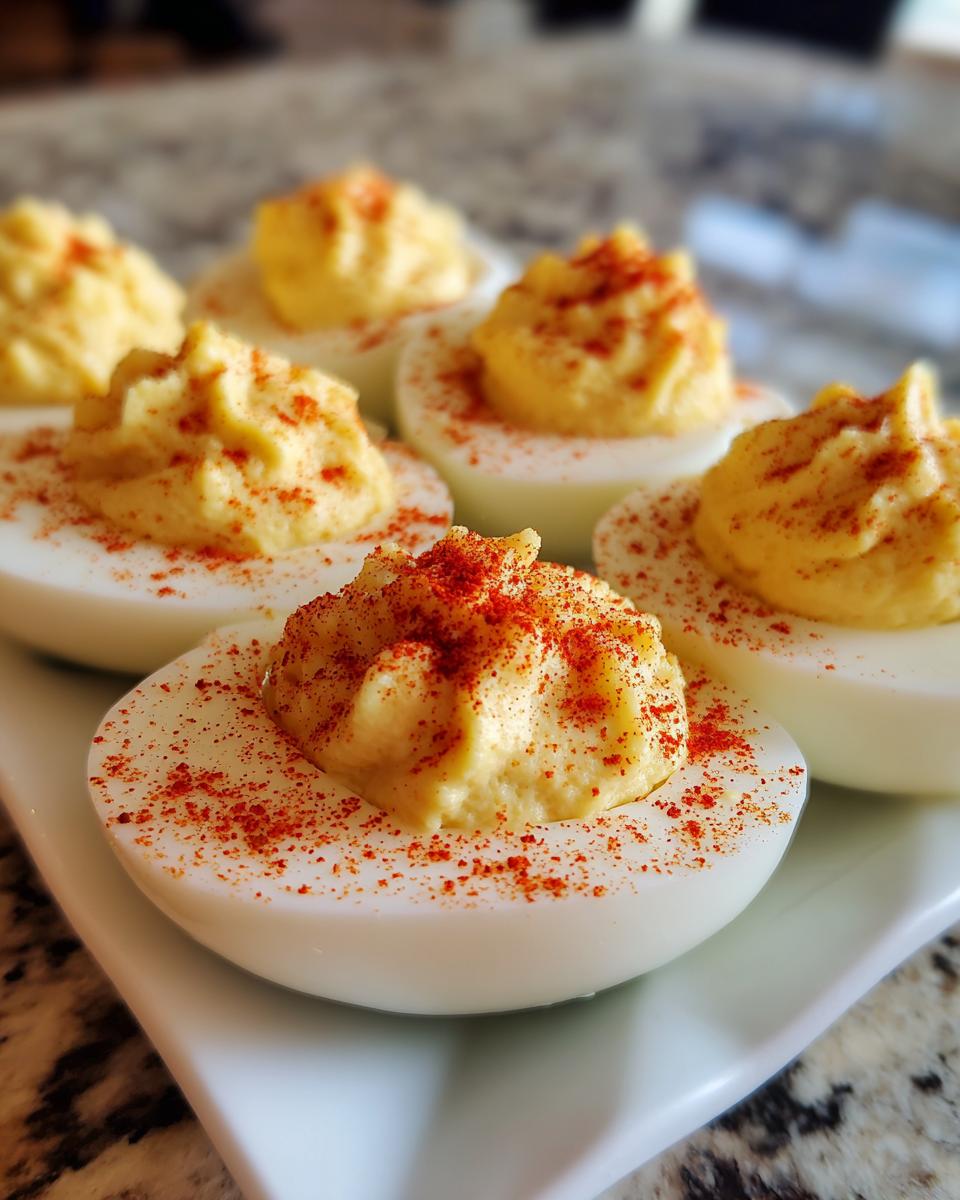
The final touch is crucial: the paprika dusting. Don’t be shy, but use a fine sieve so it lands evenly. I learned early on that letting the paprika sit on the counter waiting to be used makes it clump up. Keep the shaker close! My personal trick for serving? Always place them on a platter with some contrasting green elements—maybe some fresh, chopped chives or parsley sprinkled around the edges. It just makes those vibrant, paprika dusted eggs pop!
Make Ahead Appetizers: Storage for Classic Deviled Eggs
One of the best things about these classic deviled eggs is that they totally qualify as make ahead appetizers, which saves so much stress on party day! You can absolutely make the filling mixture a day ahead of time. Just store the smooth yolk mixture tightly covered in the fridge. If you’ve already filled the egg whites, cover the entire platter very tightly with plastic wrap—make sure the wrap doesn’t touch the paprika, or it will smudge!
I always tell folks that even though you can refrigerate them for up to two days, they taste their absolute best when you let them chill for at least 30 minutes right before you serve them. That little bit of chill time helps the mustard and pickle juice really meld into the rich yolk. It makes such a difference for those perfect finger food recipes!
Variations on Classic Deviled Eggs
While this classic recipe is my forever favorite, I totally get it—sometimes you want to switch things up for a big crowd or just because you’re feeling adventurous! We don’t mess with the core creamy filling too much, but adding one extra flavor item can totally transform your deviled egg variations. It’s honestly so fun to have a few different styles mixing on the platter.
The quickest way to jazz things up is adding crispy bits right on top. Think about how amazing some salty bacon would be? Sprinkle on some crumbled deviled eggs with bacon bits with that final dusting of paprika—wow! Another simple twist is stirring in something green, like finely minced fresh dill or chives right into the yolk mixture. That gives you a fresh, slightly herbal lift that’s perfect for springtime brunches.
If you want something a little spicy, you can even swap that pickle juice for a tiny dash of hot sauce. Just make sure you only add half a teaspoon at first and taste it. You’re looking for a little kick, not a fire alarm. These little tweaks mean you can serve the same base recipe multiple times without anyone getting bored!
Frequently Asked Questions About Deviled Eggs
I know you probably have a few questions swirling around after seeing how truly easy these are! It’s normal when you find a new favorite snack. People always ask me about peeling because that’s the number one frustration with holiday egg appetizers, after all. Here are the main things I get asked about when people are making these appetizers for potluck and brunch!
What is the secret to easy-peeling eggs for deviled eggs?
Oh, this is my favorite question! The trick is twofold, honey. First, remember what I mentioned? Eggs that are just a week old peel way easier than super fresh ones—it’s a science thing I won’t bore you with! Second, the cooking process itself. You bring the water to a full, rolling boil, then you take it off the heat and cover it for exactly 12 minutes. That gentle simmer cooks them perfectly. Immediately plunging them into an ice bath stops the residual heat and makes the egg white pull away from the membrane. Do those two things, and you won’t curse your shells anymore!
Can I make the creamy deviled eggs filling ahead of time?
Absolutely, and I highly recommend it if you’re making these for a big party! You can certainly prepare your creamy deviled eggs filling a day ahead of time. Just mix it up exactly as the recipe states until it’s beautifully smooth, cover it tight with plastic wrap right against the surface of the filling—you want to prevent that weird skin from forming—and pop it in the fridge. When you’re ready to serve, just fill your whites and dust with paprika. You can keep the prepared filling safely for about two days this way. It’s a lifesaver when you’re prepping other finger food recipes!
If you’ve got any other lingering questions about getting the perfect easy deviled eggs recipe results, feel free to reach out on my contact page. Happy cooking!
Estimated Nutrition for Deviled Eggs
Now, I know we aren’t hanging out in the kitchen tracking every single microgram, but I like to give you a rough idea of what’s in these incredible finger food recipes. Based on my ultimate deviled egg recipe measurements, two halves of these beautiful bites clock in around 80 calories. That’s pretty low for something this delicious, right? You get about 7 grams of fat and 3 grams of protein per serving.
Keep in mind, these are just estimates! If you use a light mayonnaise or swap out mustard types, those numbers will shift a little bit. But for a standard serving size, these classic deviled eggs are a fantastic, responsible choice for any party spread. Enjoy them guilt-free!
Share Your Favorite Party Appetizers
That’s the whole secret to making the absolute, best deviled eggs that will disappear while they are still sitting on the counter! I really hope you give this recipe a try the next time you need a quick appetizer or some reliable finger food recipes for a potluck. It’s my number one go-to for anything from Game Day to Thanksgiving.
Now, I love hearing from you all! Did you make these? How did the 12-minute boil work out for your peeling situation? I’d be thrilled if you’d leave a rating right below this section—it really helps other home cooks find this recipe. And don’t be shy, drop any questions or photos of your beautifully paprika-dusted creations in the comments. I read every single one! I can’t wait to see what you think of this ultimate classic!
PrintUltimate Classic Deviled Eggs Recipe: Easy and Creamy

Make the best deviled eggs for your next gathering with this easy, classic recipe. The filling is perfectly creamy and tangy, making these a guaranteed crowd-pleasing appetizer for any party or holiday.
- Prep Time: 20 min
- Cook Time: 12 min
- Total Time: 47 min
- Yield: 24 halves 1x
- Category: Appetizer
- Method: Boiling and Mixing
- Cuisine: American
- Diet: Vegetarian
Ingredients
- 12 large eggs
- 1/2 cup mayonnaise
- 2 tablespoons yellow mustard
- 1 tablespoon pickle juice (or white vinegar)
- 1/2 teaspoon salt
- 1/4 teaspoon black pepper
- Paprika, for dusting
Instructions
- Place eggs in a large saucepan and cover with cold water by about one inch. Bring the water to a rolling boil over high heat.
- Once boiling, immediately remove the pan from the heat, cover it, and let the eggs stand for exactly 12 minutes.
- Prepare an ice bath by filling a large bowl with ice and cold water.
- Transfer the eggs immediately from the hot water to the ice bath to stop the cooking process. Let them cool completely, about 15 minutes. This step helps with easy peeling.
- Peel the cooled eggs. Slice each egg in half lengthwise.
- Carefully scoop the yolks into a medium bowl. Place the empty white halves on a serving platter.
- Mash the yolks thoroughly with a fork until no lumps remain.
- Add the mayonnaise, mustard, pickle juice, salt, and pepper to the mashed yolks. Mix until the filling is completely smooth and creamy.
- Spoon or pipe the yolk mixture back into the egg white halves.
- Dust the tops of the filled eggs lightly with paprika before serving.
- Chill the deviled eggs for at least 30 minutes before serving for best flavor.
Notes
- For easy peeling, use slightly older eggs (about a week old) rather than very fresh ones.
- If you prefer a tangier flavor, substitute the pickle juice with apple cider vinegar.
- To achieve a professional look, use a piping bag fitted with a star tip to fill the egg whites.
- These make-ahead appetizers keep well in the refrigerator for up to two days when covered tightly.
Nutrition
- Serving Size: 2 halves
- Calories: 80
- Sugar: 0.5
- Sodium: 110
- Fat: 7
- Saturated Fat: 2
- Unsaturated Fat: 5
- Trans Fat: 0
- Carbohydrates: 0.5
- Fiber: 0
- Protein: 3
- Cholesterol: 105