
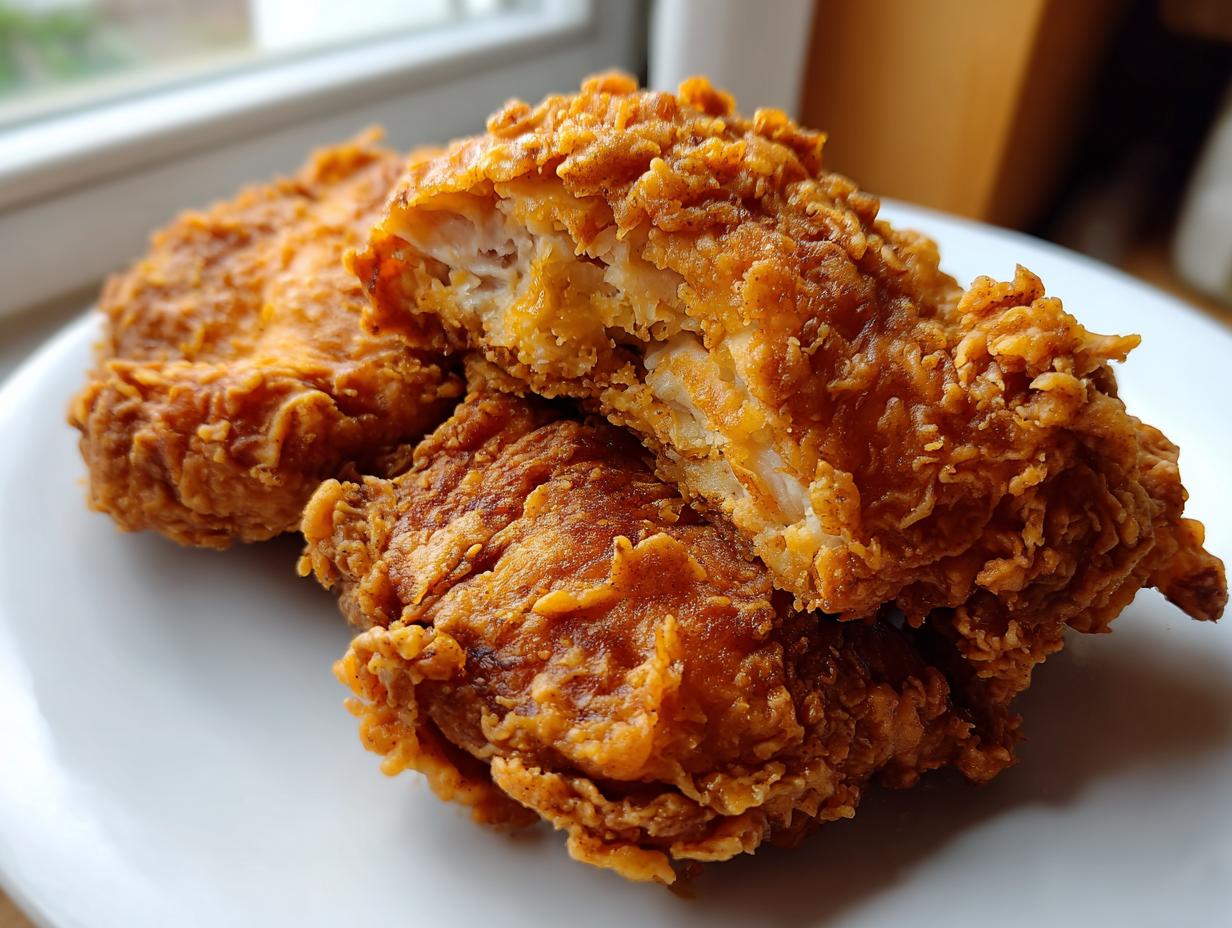
Oh, that smell! If I close my eyes, I can still smell the hot oil and savory spices drifting through my grandmother’s kitchen. Nothing says “home” quite like sinking your teeth into proper Southern-style fried chicken—that perfect contrast of a shatteringly crispy, golden exterior giving way to incredibly juicy meat inside. That’s the goal here, folks! This isn’t some fussy restaurant trick; this is classic American home cooking, refined over years in my family’s kitchen. We believe the best flavors come from tried-and-true methods, and I’ve got every tiny secret bottled up in this recipe just for you.
- Why This is the Best Fried Chicken Recipe for Family Dinner Recipes
- Gathering Ingredients for Classic Southern Fried Chicken
- Step-by-Step Instructions for Deep Fried Chicken
- Tips for Success When Making Homemade Fried Chicken
- Variations on Southern Style Fried Chicken
- Serving Suggestions for Your Golden Brown Chicken
- Storage and Reheating Instructions for Leftover Fried Chicken
- Frequently Asked Questions About Making Fried Chicken
- Estimated Nutritional Information for Fried Chicken
- Share Your Classic Comfort Food Chicken Creations
Why This is the Best Fried Chicken Recipe for Family Dinner Recipes
Look, I’ve tried a million ways to make chicken for a crowd. You need something reliable when everyone is gathered around the table waiting, right? That’s why I promise you this is the best fried chicken recipe you’ll ever try for family dinner recipes. The magic isn’t just in the spices; it’s in the structure. We nail that perfect contrast: the crust has to scream crunch, but the meat inside must be so tender it practically melts. The whole secret starts way before the oil even gets hot, and it all comes down to buttermilk.
The Secret to Ultra Juicy Fried Chicken: The Buttermilk Marinade
You absolutely cannot skip the chill time for buttermilk fried chicken. I know you’re itching to get frying once you mix everything up, but trust me, patience pays off! We let this chicken soak for a minimum of four hours, but if you can swing it overnight, you win! That’s when the good stuff happens. The mild acid in the buttermilk starts gently breaking down all those tough little muscle proteins. When you finally drop that marinated piece into the hot oil, those proteins relax, holding onto all the moisture. That’s how you get that unbelievably juicy fried chicken every single time. Don’t rush this part, it’s non-negotiable for real Southern flavor!
How to Make Crispy Chicken Coating That Stays On
Want to know how to make crispy chicken that doesn’t fall off in the fryer? It’s about texture and technique during the dredge. We use a mix of flour and cornstarch. That cornstarch is the secret weapon! It gives you that famous thin, craggy crunch that stays attached. When you pull the chicken out of that tangy buttermilk bath, you have to let the excess drip off—seriously, don’t blot it dry. That little bit of wetness helps the flour stick! Then, and this is important, you need to press that flour mixture onto the chicken. Don’t just toss it; really work that seasoning into the meat to build up those beautiful, crunchy peaks.
Gathering Ingredients for Classic Southern Fried Chicken
Alright, let’s talk what you need to grab from the pantry and fridge! Making really good, authentic, Southern-style fried chicken hinges on selecting the right meat. Forget boneless, skinless strips for this recipe. We need the bone in, skin on chicken pieces—thighs and drumsticks are my absolute favorites for maximum flavor and juiciness, though breasts are great too. This recipe is set up to feed about four good eaters (4 servings, to be exact!). While the total time looks long because of the mandatory marinade, the actual prep time is only about 20 minutes, and the frying itself takes around 35 minutes cooked.
Ingredient Notes and Substitutions for Perfect Fried Chicken
When it comes to the frying medium, you want something that can handle the heat without breaking down. I almost always reach for vegetable oil or plain shortening; they have high smoke points, which is crucial! Sarah Jane, the founder here, used to swear by shortening for that richer flavor, but vegetable oil works like a charm and is easier to find. Now, about this buttermilk—if you are desperate and have zero buttermilk on hand, don’t panic! You can whip up a substitute in two seconds. Just take 4 cups of regular milk and stir in 4 tablespoons of white vinegar or lemon juice. Let it sit on the counter for about ten minutes until it looks slightly curdled. Voila! Instant, usable, acidic liquid for your marinade. It’s not *quite* the same, but it keeps your dinner plans on track!
Step-by-Step Instructions for Deep Fried Chicken
Okay, deep breath! This is where the magic turns into reality. Making fantastic deep fried chicken is all about control, especially temperature control. We’re going to follow these steps exactly—don’t freestyle here until you’ve mastered the basics. Once your chicken has had its long, luxurious bath, we move onto the coating and then the sizzle. It’s a little messy, yes, but the results are worth every drop of oil splatter! We want that golden, crispy, melt-in-your-mouth texture that makes this dish a classic comfort food.
Preparing the Marinade and Dredging for Golden Brown Chicken
First things first, you need to mix up that brine we talked about. Whisk together your spices—that salt, pepper, paprika, and the powders—right into the buttermilk and hot sauce. Make sure that seasoning is evenly distributed before you introduce the chicken pieces. They need to swim in that seasoned bath for at least four hours, ideally soaking overnight so they get completely tenderized. When it’s time to move them to the flour and cornstarch mix, resist the urge to wipe off the excess buttermilk! That wetness is your best friend; it creates the glue for that amazing crust. Press that flour firmly onto every crevice so you get those craggy bits you’re looking for.
Frying Technique for Crispy Fried Chicken Recipe Success
Now, here is where you behave like a scientist! You absolutely must monitor that oil. We need it hovering right around 325 degrees Fahrenheit. If you don’t have a thermometer, you’re just gambling, so dig one out! Too cool and your crispy fried chicken recipe turns into an oil sponge. Only drop in three or four pieces at a time—don’t crowd the pot, or the temperature will instantly plummet and undo all your hard work. Let those pieces fry for a solid 6 to 8 minutes on one side until they are glowing deep brown. Flip carefully and finish until the internal temperature hits 165 degrees. That’s your safety signal that the inside is cooked perfectly through. For more on mastering these classic Southern techniques, check out this great guide: Southern Fried Chicken Secrets.
Tips for Success When Making Homemade Fried Chicken
If you want truly fantastic homemade fried chicken, you need to pay attention to the little things we learned the hard way! I’m sharing the exact notes pulled right off my family’s recipe index cards now, because these tweaks separate good chicken from legendary chicken. My biggest piece of advice is about waiting. Once you’ve dredged your chicken pieces in that seasoned flour, don’t rush them into the oil! Let them sit on the wire rack for about 15 minutes before frying. This quick rest lets the flour hydrate just a bit, which helps it bond to the chicken so it doesn’t fall off later. It’s a tiny step, but it makes a huge difference in that final crackle!
Temperature is king! Seriously, this cannot be stressed enough. You must keep that oil locked between 315°F and 330°F. I remember years ago, Sarah Jane—the founder of this whole corner—tried making a huge batch without checking the temperature, and half the chicken turned pale and soggy! She learned right then you either monitor that heat, or you end up with oil-logged food. For the exterior crunch, a high, steady temperature is non-negotiable. If you are working with big pieces like breasts, sometimes they look perfect outside but are still raw in the middle. My tip for that is to pull them out of the oil just before they look done and pop them onto a baking sheet in a 350°F oven to finish cooking gently. It locks in the flavor beautifully! For more foolproof tips on getting that perfect golden crust, take a look here: Grandma’s Crispy Southern Fried Chicken Secrets.
Variations on Southern Style Fried Chicken
While this recipe nails classic Southern style fried chicken, I never feel bad about shaking things up now and then once you know the basic technique works! Once your chicken has had its bath and your flour mix is ready, you can really play around with spices. If you want a smoky depth that is just heavenly, try mixing in a teaspoon of smoked paprika right into your flour dredge.
Or maybe you want to kick up the marinade? Forget just cayenne, try swapping out half the hot sauce for a rich, smoky chipotle puree if you like heat that lingers. For a more herbaceous flavor that feels a little more European but still fits right on the plate with biscuits, try stirring a teaspoon of dried thyme or even finely crushed dried rosemary right into your flour mix. The acid in the buttermilk seems to highlight those herbal notes beautifully. Don’t be afraid to make this your signature blend while keeping the crispy-juicy structure intact!
Serving Suggestions for Your Golden Brown Chicken
That glorious, golden brown chicken is destined for more than just being eaten straight off the rack, though I do it sometimes! When you put this much effort in, you deserve a feast. My favorite way to serve this is exactly how we did it growing up: piled high on a big platter with super creamy mashed potatoes and gravy on the side—not on the chicken, that’s cheating! A crisp, vinegary coleslaw cuts through the richness perfectly. And of course, you need fluffy, hot biscuits for soaking up any last flavorful drippings. It completes the whole comforting picture!
Storage and Reheating Instructions for Leftover Fried Chicken
The sign of truly great fried chicken is that it’s still tasty the next day, even if it’s lost a bit of that initial shatter! If you have any leftovers from your amazing batch of fried chicken, how you store it matters immensely for crispness. Please, for the love of all that is crunchy, do not store it in a sealed plastic container or wrapped tightly in foil. That traps steam, and steam is the enemy of crunchiness!
The best way is to let the chicken cool completely, and then store it loosely covered on a wire rack set over a plate. This lets air circulate around it. If you happen to skip the wire rack and use paper towels, I promise you, that bottom crust will be soggy by morning—I learned that lesson way back when!
To reheat and bring back that glorious crispness, skip the microwave entirely. That makes the crust chewy! The oven or an air fryer are your best friends here. Set your oven to about 375°F (190°C), spread the chicken on a fresh wire rack set over a baking sheet, and heat for about 10 to 15 minutes. You just want to warm it through and crisp that coating back up. The air fryer does this even faster, usually in about 5 to 8 minutes at 370°F. Enjoy your second-day comfort food!
Frequently Asked Questions About Making Fried Chicken
I know you’ve got questions swirling, especially when it comes to getting that perfect result! Frying can feel intimidating, but once you have the right temperatures locked down, you’re golden. Here are the things folks ask me about most often regarding this fried chicken recipe and achieving maximum crispness.
Can I bake or air fry this fried chicken recipe instead of deep frying?
Oh, bless your heart for trying to save a little oil! You certainly *can* bake or air fry this chicken, but I need to be completely honest with you: it won’t be the same creature. This recipe is designed for the deep, bubbling action of the fryer. Baking or air frying simply won’t give you that signature, thick, craggy crust we worked so hard to build with the cornstarch! You’ll end up with a much drier exterior, but yes, it’s a healthier option if that’s what you’re prioritizing over that incredible, classic deep fried chicken texture.
How long should I marinate the chicken for the juiciest fried chicken?
This is my favorite question because it gets right to that luxurious interior! For the juiciest fried chicken possible, you need time. The minimum amount of soak time I will allow in that seasoned buttermilk bath is four hours. That gives the acid enough time to start tenderizing those fibers. But if you really want that fall-off-the-bone tenderness, go for overnight! Seriously, if you can prep it the night before, your results will be miles beyond what a short soak can achieve. It’s worth the planning, I promise!
What is the proper oil temperature to prevent soggy fried chicken?
Temperature, temperature, temperature! This is your make-or-brake moment for achieving that crispy finish instead of ending up with soggy fried chicken. You need to keep your oil right in that sweet spot between 325°F and 330°F. If the oil is too cool—say, dipping below 315°F—the chicken instantly starts absorbing that hot oil like a sponge, and bam, you get greasiness instead of crunch. If you push it over 340°F, the outside burns to a dark brown charcoal before the inside even finishes cooking. Watch that thermometer like a hawk, okay? It’s the only way to guarantee that perfect, even cook.
Estimated Nutritional Information for Fried Chicken
Now, I like to keep things real around here, and when you’re making something this delicious, you know it’s not going to taste like a plain salad! This is honest-to-goodness, pan-fried American comfort food, and that usually means a little more fat and richness. I’ve put the basic estimates right here for you based on those measurements. Remember, because we are frying, this is just an educated guess!
For a single serving—that’s just one piece of this incredible fried chicken—you are looking at around 450 calories. That includes about 28 grams of fat, and a whopping 32 grams of protein, which is fantastic! The carb count is sitting low, right around 15 grams. I always stress that these numbers will swing depending on what kind of chicken you bought, how much oil it really absorbed, and if you made substitutions in your spice blend. But this gives you a great baseline for planning your side dishes!
Share Your Classic Comfort Food Chicken Creations
Wow, I hope you loved making this batch of crispy fried chicken! If the flavor made you feel like you were back at a family picnic, please do me a huge favor and shoot over a 5-star rating right down below.
I absolutely live to hear how you customized it! Drop a comment and let me know if you tried different spices or sides. And please, snap a picture and tag us on social media—I want to see your beautiful, golden pieces! If you have any burning questions later, don’t hesitate to reach out directly through the contact page. Happy cooking, y’all!
PrintClassic Crispy Southern Fried Chicken

Make incredibly juicy, Southern-style fried chicken with a perfectly seasoned, golden, and crunchy crust using this reliable recipe.
- Prep Time: 20 min
- Cook Time: 35 min
- Total Time: 4 hours 55 min
- Yield: 4 servings 1x
- Category: Dinner
- Method: Deep Frying
- Cuisine: American
- Diet: None
Ingredients
- 3 lbs bone-in, skin-on chicken pieces (thighs, drumsticks, breasts)
- 4 cups buttermilk
- 2 tablespoons hot sauce
- 1 tablespoon salt
- 1 tablespoon black pepper
- 1 tablespoon paprika
- 1 teaspoon garlic powder
- 1 teaspoon onion powder
- 1 teaspoon cayenne pepper
- 2 cups all-purpose flour
- 1/2 cup cornstarch
- Vegetable oil or shortening, for frying
Instructions
- In a large bowl, combine the buttermilk, hot sauce, salt, pepper, paprika, garlic powder, onion powder, and cayenne pepper. Mix well.
- Add the chicken pieces to the buttermilk mixture, ensuring they are fully submerged. Cover the bowl and refrigerate for at least 4 hours, or preferably overnight, to achieve juicy meat.
- In a separate shallow dish, whisk together the flour and cornstarch. This mixture creates the crispy coating.
- Remove the chicken from the marinade, letting excess buttermilk drip off, but do not wipe it dry.
- Dredge each piece of chicken thoroughly in the flour mixture, pressing the flour onto the chicken to create a thick, craggy coating. Place the coated chicken on a wire rack.
- Pour enough oil into a large, heavy-bottomed pot or deep fryer to reach about 2 inches deep. Heat the oil to 325 degrees Fahrenheit (160 degrees Celsius). Use a thermometer to monitor the temperature.
- Carefully place 3 to 4 pieces of chicken into the hot oil, ensuring you do not overcrowd the pot, which lowers the oil temperature.
- Fry the chicken for about 6 to 8 minutes per side, turning occasionally, until it is deep golden brown and cooked through (internal temperature should reach 165 degrees Fahrenheit or 74 degrees Celsius). Adjust cooking time based on the size of the pieces.
- Remove the chicken from the oil and place it on a clean wire rack set over a baking sheet to drain excess oil. Do not place it on paper towels, as this can steam the crust and make it soggy.
- Repeat the frying process with the remaining chicken, maintaining the oil temperature between batches.
- Serve the crispy fried chicken hot.
Notes
- For extra crispy skin, allow the dredged chicken to rest on the wire rack for 15 minutes before frying. This lets the coating hydrate slightly.
- Maintain the oil temperature strictly between 315°F and 330°F for the best texture and to prevent the chicken from absorbing too much oil.
- If you are cooking larger pieces like breasts, you may need to finish them in a 350°F oven after frying to ensure they cook completely without burning the exterior.
Nutrition
- Serving Size: 1 piece
- Calories: 450
- Sugar: 1
- Sodium: 650
- Fat: 28
- Saturated Fat: 7
- Unsaturated Fat: 21
- Trans Fat: 0
- Carbohydrates: 15
- Fiber: 1
- Protein: 32
- Cholesterol: 110