
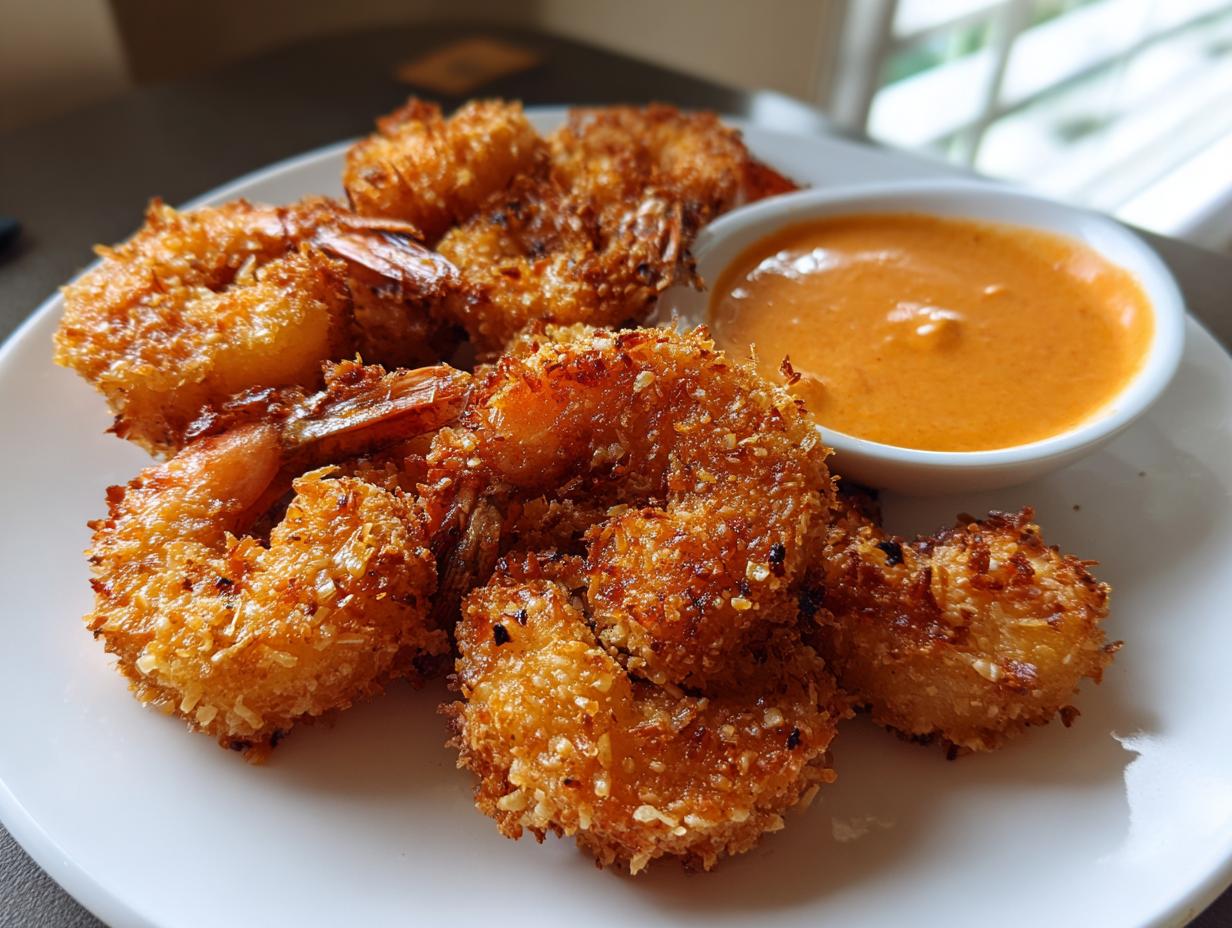
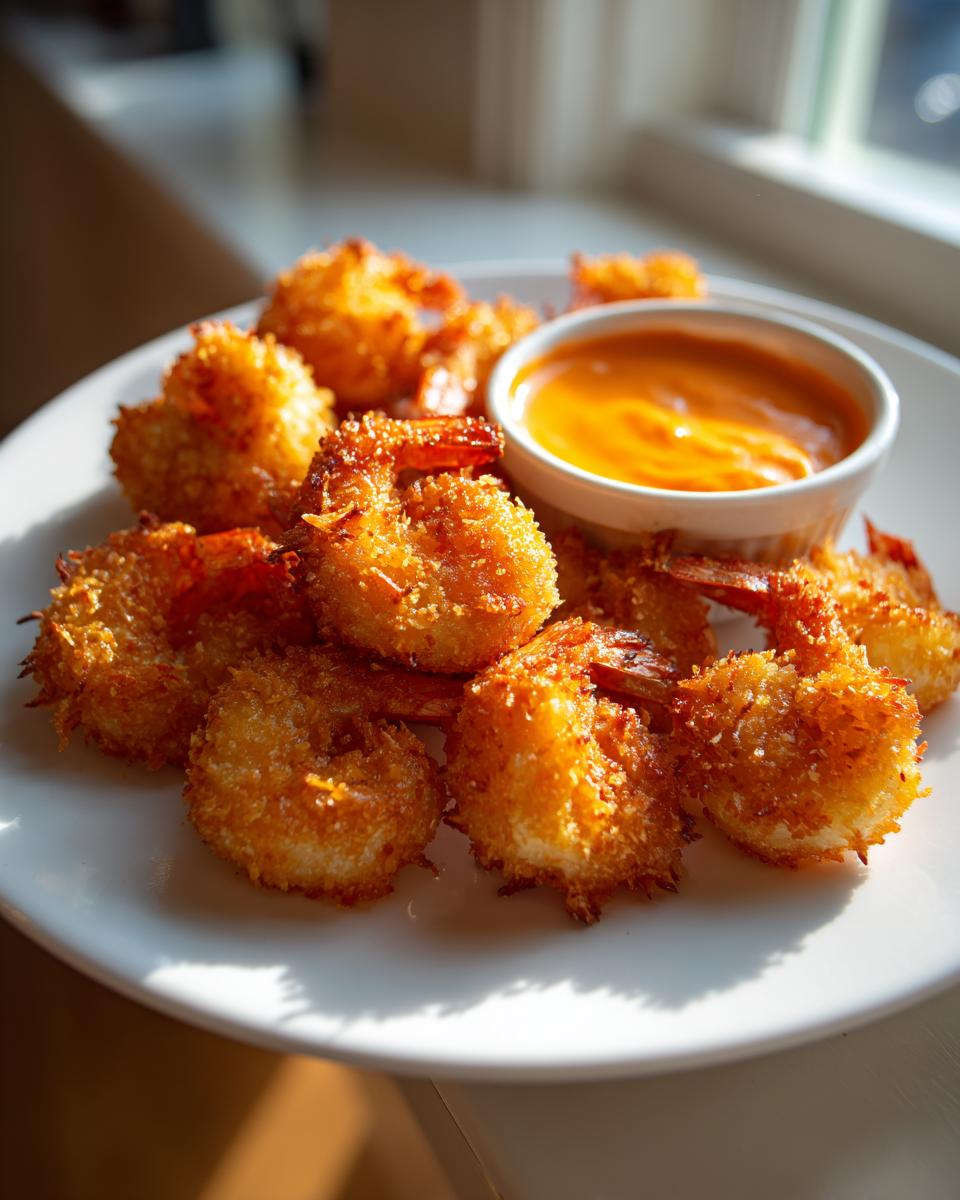
There is nothing quite like that first bite of genuinely crispy, golden **coconut shrimp**. You know the one—it has that audible crunch, that perfect crackle, before you even hit the sweet, tender shrimp inside. For years, I chased that restaurant-quality experience at home, and honestly, most attempts ended up sad and chewy. Not this time! This recipe nails that texture using our secret ingredient addition blended right with the coconut. Coupled with my simple homemade sweet chili mayo dipping sauce, this is the appetizer that wins every single time.
Here at Cookin’ Corner, we believe food tells a story, and my journey started in a Midwest kitchen where reliability was key. I spent ages perfecting these classics so you don’t have to guess! If you love shrimp appetizers with a serious kick, you’ll want to check out my ideas for easy crispy bang bang shrimp too. This preparation guarantees you get the best coconut shrimp—flawlessly crunchy and bursting with tropical flavor, ready faster than delivery.
- Why This Crispy Coconut Shrimp Recipe Works (Expert Tips)
- Ingredients for Perfect Coconut Shrimp and Dipping Sauce
- How to Make Restaurant Style Coconut Shrimp
- Alternative Cooking Methods for Crispy Coconut Shrimp Recipe
- Serving Suggestions for Your Easy Coconut Shrimp Appetizer
- Storage & Reheating Instructions for Leftover Coconut Shrimp
- Frequently Asked Questions About Coconut Shrimp
- Estimated Nutritional Data for Savory Sweet Shrimp Bites
- Share Your Perfect Coconut Shrimp Creations
Why This Crispy Coconut Shrimp Recipe Works (Expert Tips)
I know you’re tired of sinking money into shrimp only to have them come out soggy when you fry them. That always stopped me from making them for parties! But trust me, this technique turns out perfectly crunchy coconut shrimp every single time because we are cheating the system just a little bit. The difference isn’t the shrimp itself; it’s what we coat it with.
When I was testing this recipe, I found that using shredded coconut alone just didn’t give that structural integrity we needed. That’s why I always mix it with Panko breadcrumbs. Those lovely flakes hold up to the oil beautifully. I even had to step on a few batches of old breadcrumbs in the pantry because they just weren’t right! If you want to talk about reliable crunch, you can see how I apply the same dedication when I make my crispy coconut chicken tenders.
The Secret to Golden Fried Coconut Shrimp Texture
The absolute most important thing for that golden fried texture is the oil temperature. If your oil is too cool—say, 325°F—the coating soaks up fat like a sponge before it has a chance to set, and boom, soggy shrimp. You must keep that oil steady at 350°F. Seriously, investing in a cheap candy or deep-fry thermometer was a game-changer in my kitchen; I can’t stress that enough! Also, whatever you do, don’t crowd the pot. Overloading it drops the temperature instantly. Visit another great method for perfecting the crust here: Crispy Coconut Shrimp Recipe.
Ingredients for Perfect Coconut Shrimp and Dipping Sauce
Okay, ingredient gathering time! This is where we build our foundation for success. I always lay everything out first—you know, my little version of mise en place—because once that oil is hot, there’s no looking up measurements! We’re sticking to simple pantry staples, but don’t skip the Panko; it’s non-negotiable for that crunch we talked about. These ingredients create what I absolutely call the Best Coconut Shrimp Dipping Sauce to cut through the richness.
For the Best Coconut Shrimp Coating
We need a classic three-step station here, but we’re bumping up the texture score right in the final bowl. Make sure those shrimp are dry as a bone before they even see the flour. It’s messy, but trust me, it’s worth it!
- 1 lb large shrimp, peeled and deveined (I like leaving the tails on for easy dipping, but you do you!)
- 1 cup all-purpose flour
- 2 large eggs, beaten until they’re nice and frothy
- 1 cup sweetened shredded coconut
- 1/2 cup Panko breadcrumbs (The crunch factor!)
- 1/2 teaspoon salt
- 1/4 teaspoon black pepper
- Vegetable oil, enough for frying (usually about 2 inches depth in your frying pan)
Homemade Sweet Chili Mayo Dipping Sauce Components
This sauce just balances everything perfectly—it’s sweet, a little spicy, and creamy. If you want something fun to dip with, I also have a killer recipe for easy creamy beer cheese dip, but for these tropical bites, this mayo combo can’t be beaten.
- 1/2 cup sweet chili sauce (The good stuff!)
- 1/4 cup good quality mayonnaise
- 1 teaspoon Sriracha (Optional—if you like it to bite back just a little bit!)
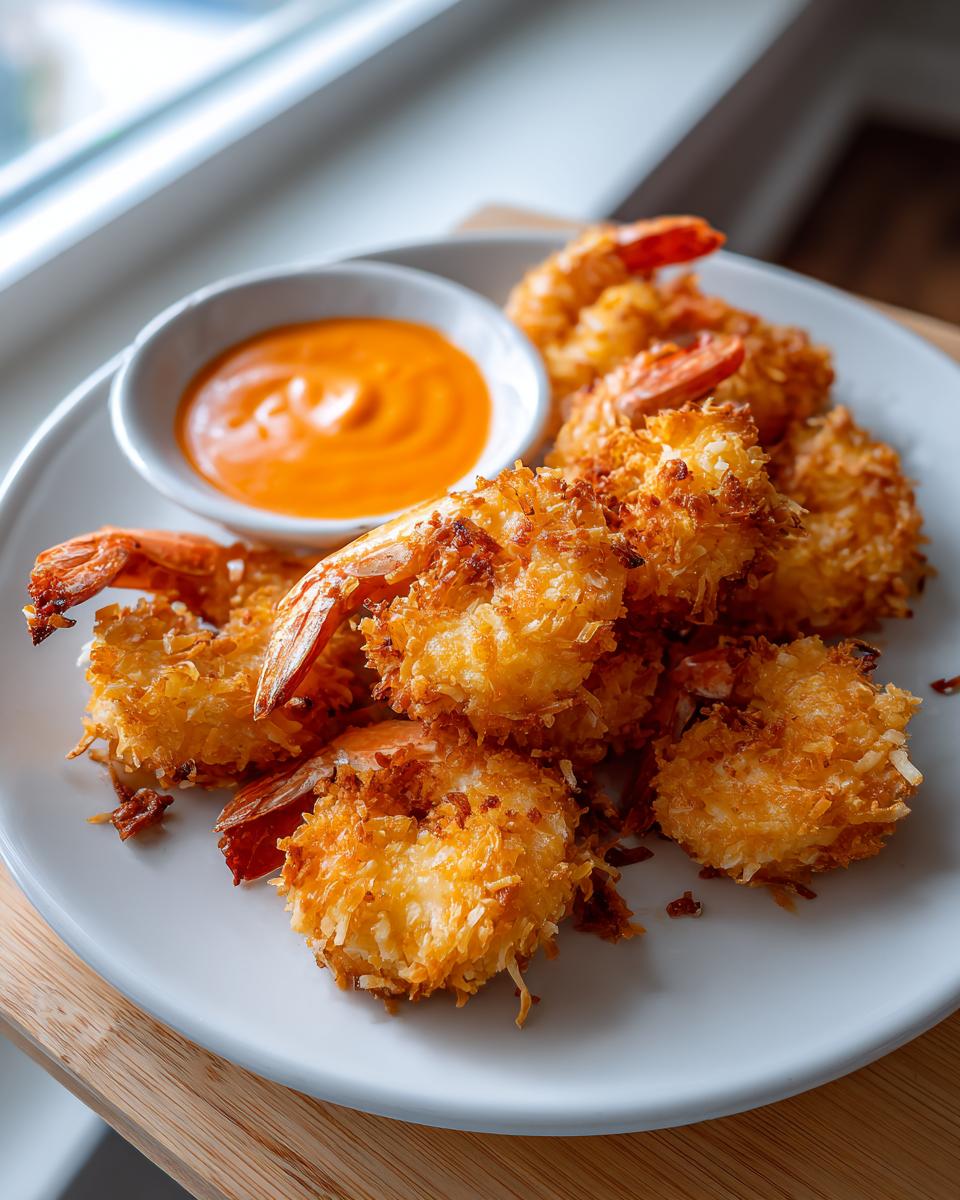
How to Make Restaurant Style Coconut Shrimp
Alright, let’s get this coating party started! Making fantastic Restaurant Style Coconut Shrimp is all about organization and staying calm when things get hot. Remember how I hammered home the patting dry step? Do that first, seriously. Then, we set up a classic three-stage breading line. This ensures every shrimp gets that thick, beautiful crust we’re aiming for. It’s quick work once you get into the rhythm, and you’ll be amazed how fast you can turn out a batch!
Once everything is coated, you want to get those beauties into the oil fast—but not all at once! We need steady heat for that maximum crunch. You can also find some interesting alternatives to deep frying when you check out this great guide on crunchy coconut shrimp.
Setting Up Your Coconut Shrimp Breading Station
You need three shallow dishes lined up in this order: Flour, Egg, Coconut-Panko Mix. First, dust the dry shrimp thoroughly in the flour mix—shake gently to get rid of the excess flour; too much flour will gum up the next stages. Then, dunk it into the eggs—let that excess egg drip off back into the bowl. This binder layer is what makes the final coating stick!
Once they are dripping egg, press them firmly into the coconut mix. Really press! You want that crunchy coating totally sealed onto the shrimp. Place the fully coated guys on a baking sheet while you heat the oil. If you have just a minute, throwing them in the fridge for 15 minutes now is a pro move to help lock that Panko in place before submersion.
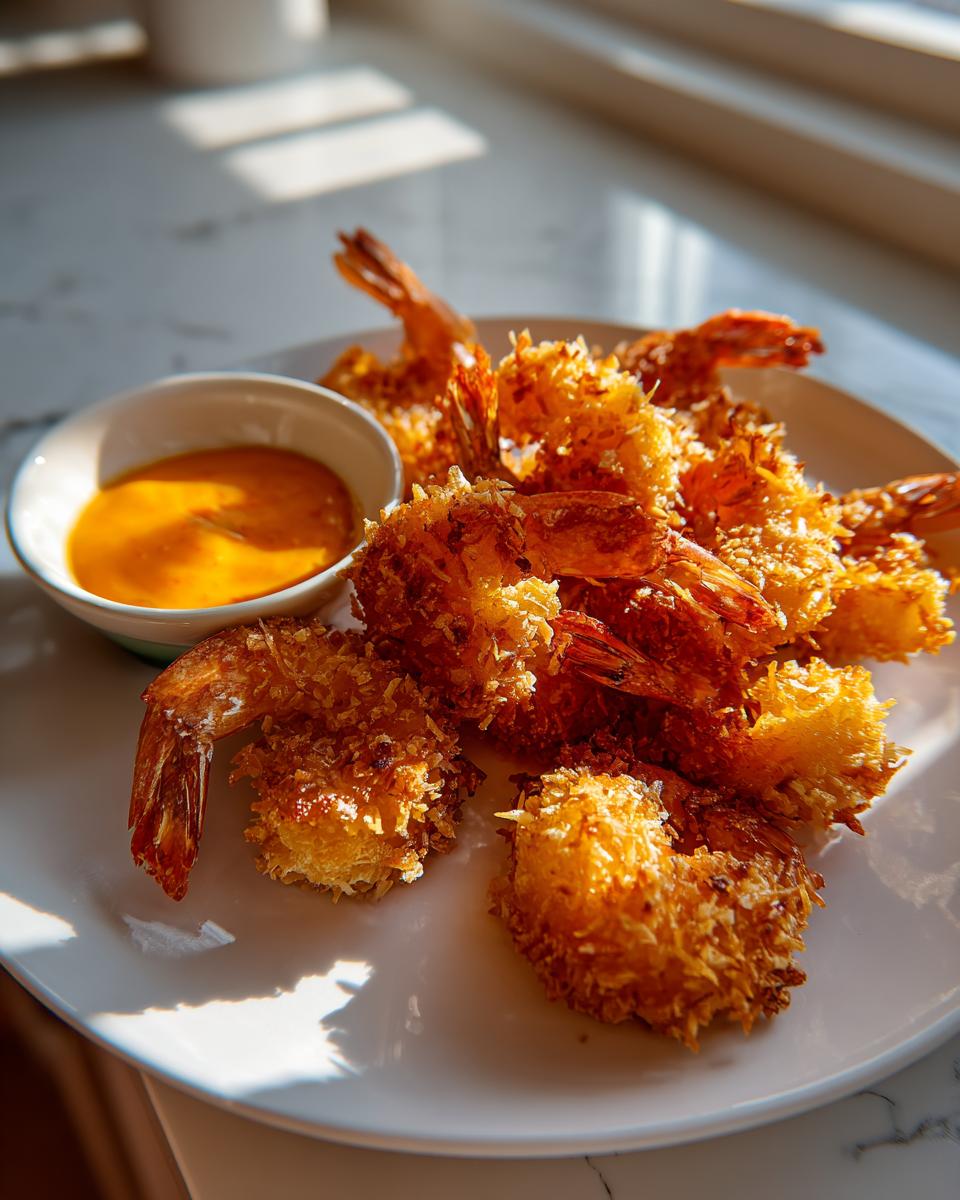
Frying the Coconut Shrimp to Golden Perfection
This is the moment of truth! Get your oil up to a solid 350°F. If you don’t have a thermometer, you test it by dropping a tiny, coated piece of shrimp in—it should start bubbling immediately and gently. We are frying for just 2 to 3 minutes per side. Watch them closely! They go from perfect gold to burned fast.
Work in batches, maybe 6 or 8 shrimp at a time. If you throw too many in, the oil temperature plummets, and guess what happens? Soggy coconut shrimp! Don’t let that happen! As soon as they look deeply golden brown, pull them out quickly with a slotted spoon and set them onto a wire rack over a paper towel or baking sheet. That rack is important because you want air circulation underneath them, or the bottom gets steamy and soft. For more tips on getting a great crust on fried seafood, take a peek at my guide to crispy fried shrimp.
Alternative Cooking Methods for Crispy Coconut Shrimp Recipe
I totally get it—sometimes you want that amazing crunch without standing over a pot of hot oil. Dealing with deep frying isn’t always practical, especially for a quick weeknight snack or if you’re trying to keep things lighter. The good news is that this coating stands up really well to other methods too! We’ve been testing ways to get fantastic results for the whole family, which is how we nailed down the methods for things like my air fryer salmon.
If you are looking for a less hands-on approach that still delivers a great texture and is much friendlier on cleanup, you’ll want to try these alternatives. We’re exploring how to get that golden appeal without relying on submersion frying, focusing on options that keep the coating intact.
Achieving Crunch with an Air Fryer Coconut Shrimp Healthy Version
The air fryer is my go-to when I want something light but still want that satisfying exterior. For the Air Fryer Coconut Shrimp Healthy version, you don’t need to change the breading station at all—that Panko mix is your friend here too! Preheat your air fryer basket to 380°F. Lay the breaded shrimp in a single layer; seriously, do not stack them up or you’ll end up steaming them instead of crisping them.
Lightly spray the tops of the shrimp with cooking spray—this is what helps achieve that fast golden color. Cook them for about 10 to 12 minutes total, flipping halfway through to get even browning on both sides. They come out beautifully crisp and are perfect when paired with that sweet chili mayo!
Tips for Sheet Pan Coconut Shrimp Baking
Baking is the easiest route if you’re making a huge batch for a party appetizer! For the Sheet Pan Coconut Shrimp variation, preheat your oven to a nice, hot 400°F (200°C). You need to line a heavy-duty baking sheet with parchment paper first—this stops any sticking, which is common with sugary coatings like coconut. Lightly brush or spray the tops of the breaded shrimp with a neutral oil before they go in.
Pop them into the hot oven and bake for about 10 to 12 minutes. Remember to flip them around the 7-minute mark so you don’t end up with a soggy bottom. They won’t get quite as deeply browned as the fried ones, but they are still wonderfully crisp and taste amazing. You can find more great non-fried cooking inspiration over at Air Fryer Coconut Shrimp.
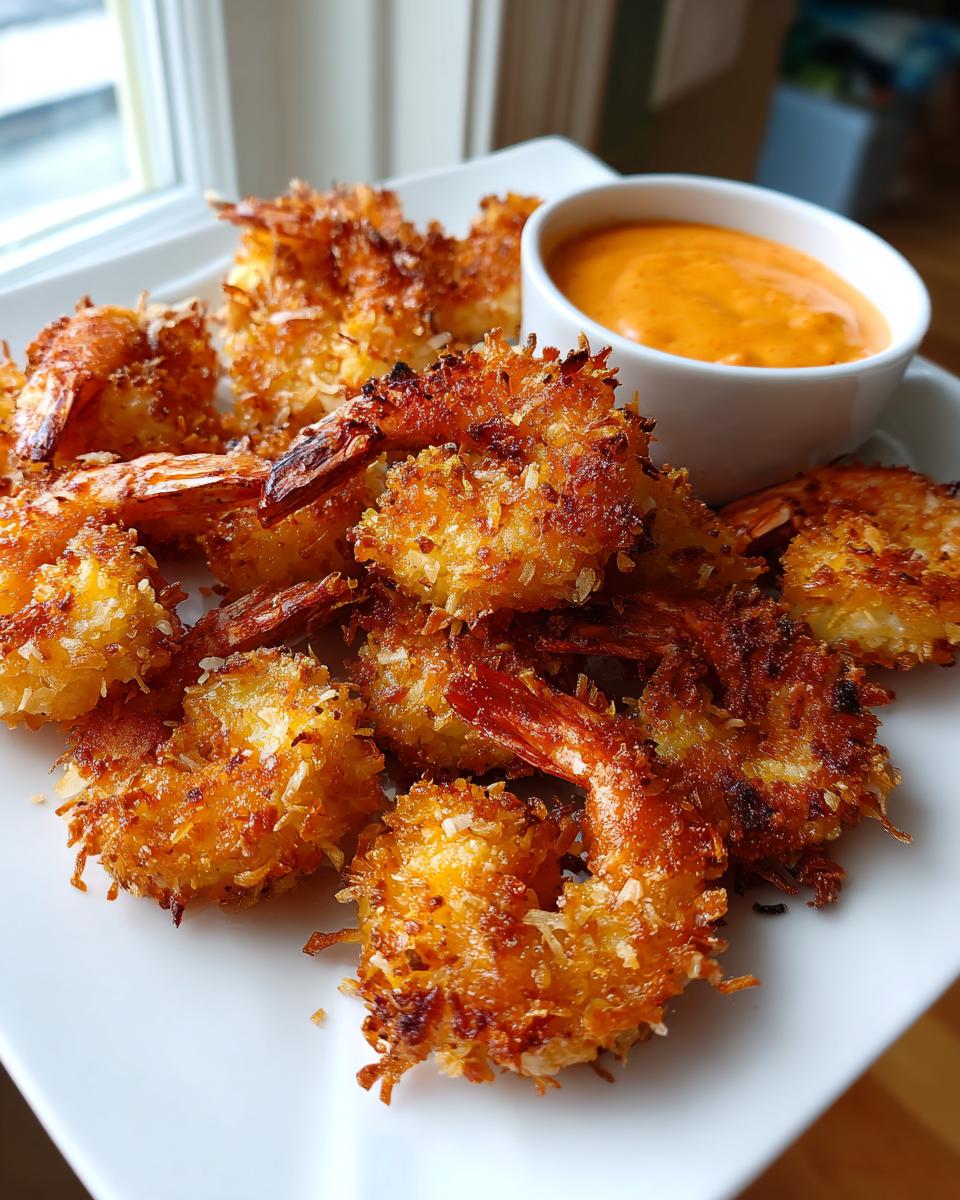
Serving Suggestions for Your Easy Coconut Shrimp Appetizer
Now that you have conquered the crunch and mixed up that dreamy dipping sauce, the fun part is setting the scene! These little bites are way too exciting for just plopping them on a paper plate, right? If you are planning for game day or just having a casual get-together, these make phenomenal party appetizers shrimp!
Of course, the Sweet Chili Mayo is the perfect partner, but you know me—I always like to give folks options. Offering a small trio of dips always makes the platter look more impressive and gives everyone the chance to customize their tropical experience. It’s about presentation, and frankly, leftovers (if there are any!) are nearly impossible to reheat crispy, so we need to maximize their first-outing glory!
For a real splash of flavor, try scattering some toasted, unsweetened coconut flakes over the serving platter just before you bring them out—it just ups that tropical vibe! If you are looking for other amazing dips to serve alongside, you absolutely must check out my recipe for Texas Trash Dip; it’s another absolute crowd-pleaser that disappears first!
To easily turn this appetizer into a fantastic quick seafood dinner, serve 5 or 6 shrimp per person over a bed of fluffy steamed jasmine rice. Toss your rice with a tiny bit of lime juice before plating, and serve it alongside some steamed green beans or a simple slaw dressed lightly with a vinegar base. It makes the whole dish feel fresh and complete!
Storage & Reheating Instructions for Leftover Coconut Shrimp
Now, let’s talk about the leftovers. If you are lucky enough to have any—because these appetizers tend to vanish instantly!—you need to treat them gently. The enemy of a perfectly fried coating is moisture, so we have to manage storage carefully if we want to save that gorgeous crunch we worked so hard to achieve.
The absolute best way to store them is *not* in an airtight plastic container. Air-tight containers trap any lingering steam, and that steam turns crisp coatings soft and sad almost immediately. Instead, spread your leftover **coconut shrimp** out in a single layer on a plate or baking sheet, and cover them loosely with a paper towel before tucking them into the fridge. They’ll keep okay like this for about two days.
When it comes time to reheat them and bring back that beautiful crunch—and you *must* reheat them; leftovers just aren’t the same soggy—forget the microwave! The microwave is the kryptonite of crispy food, I’m telling you. It steams the coating from the inside out. We need dry heat to resurrect that golden texture.
Your best tools here are the oven or the air fryer. Set your oven to 375°F (about 190°C). Spread the shrimp out on a rimmed baking sheet—again, single layer! Pop them in for about 7 to 10 minutes. If you’re using the air fryer, set it to 350°F and give them 4 to 5 minutes, checking them around the 3-minute mark. They heat up surprisingly fast, and you’ll get that satisfying snap back in your coating! It’s such a relief when you manage to revive fried leftovers properly, isn’t it?
Frequently Asked Questions About Coconut Shrimp
When people send me messages asking about tweaking recipes, it’s usually because they want that perfect result—the crunch, the flavor, that tropical feel! Because we’ve spent so much time perfecting this recipe, I wanted to quickly tackle the questions I hear most often. Trust me, I’ve asked my friends these exact questions a hundred times!
Can I make this Coconut Shrimp Recipe ahead of time?
That’s a very smart question if you’re planning on serving these as party appetizers shrimp! Here is my firm rule: You can absolutely prepare the coating process ahead of time, but never fry them until you are ready to serve. If you’re making them for a big gathering, follow the breading steps perfectly, place the coconut crusted shrimp on a tray, and pop them in the fridge for up to a few hours. When your guests arrive, you just pull that tray out and start frying! This chilling step actually helps your coating adhere even better. If they need to be done way ahead, you can fry them and then reheat them later using the oven method I talked about.
What is the best way to reheat coconut shrimp to keep it crispy?
Oh, this is the #1 problem with leftovers! As I mentioned before, absolutely do not put them in the microwave. That just ruins the joy of a great crust. Since we are aiming for that perfectly delicious crunch, we need dry heat. Pull out your oven or air fryer. For the oven, 375°F for about 8-10 minutes works wonderfully; you just want them heated through and crisped up. If you use the air fryer, 350°F for 4 or 5 minutes is usually all it takes. Make sure you check them early, just like when frying, because these savory sweet shrimp bites reheat much faster than they cook raw!
If you’re looking for a lighter salad option to go alongside your reheated bites, you might enjoy my recipe for easy crunchy cabbage salad!
For another great source on getting that perfect crunch in fried shrimp, check out the tips here: Crispy Fried Coconut Shrimp Recipe.
Estimated Nutritional Data for Savory Sweet Shrimp Bites
Now, I always preface this section by saying that this is a party appetizer, not health food! And since we are deep-frying, the numbers can swing a little based on how much oil gets absorbed. Think of this as a good general ballpark figure for the nutrition you’re looking at when you enjoy these savory sweet shrimp bites.
We pulled these estimates based on the ingredients listed above, assuming a serving size of about four of those glorious, crunchy shrimp. This should help you keep track, especially if you are trying to balance out a larger meal or party spread!
- Serving Size: 4 shrimp
- Calories: About 350
- Protein: 18 grams
- Total Fat: 20 grams (Remember, some of this is from the frying oil, so it varies!)
- Carbohydrates: 25 grams
- Sugar: 15 grams (Mostly from the sweetened coconut and the dipping sauce)
I always tell folks that if you use the air fryer or bake them, you shave off a good chunk of that fat number, which is a bonus! But honestly, for that true restaurant thrill, the frying method can’t be beaten. Use this data as a helpful guide, but remember the main goal: making memories around a delicious, home-cooked plate of the best coconut shrimp!
Share Your Perfect Coconut Shrimp Creations
Well, that’s it! You’ve made the crispiest, most satisfying coconut shrimp this side of the ocean. Now that your kitchen smells like a tropical vacation spot, I really, truly want to hear about it! This whole site exists because sharing food is how we share love, just like my grandmother taught me back in the Midwest. Your successes are what keeps Cookin’ Corner going!
Once you’ve dunked that last perfectly crunchy shrimp into that sweet chili mayo—tell me how it went! Did you serve them up for a big game day crowd? Did the kids devour them before you could even get a plate ready? Let me know!
Please take a moment to leave a star rating right below this recipe. Honestly, those ratings help other home cooks like you find this reliable recipe. A 5-star rating means the world to me because it tells me we nailed that crunch again! If you took a picture of your incredible golden batch, I would absolutely love for you to tag us or send it along. Seriously, sharing photos of your food memories brightens my entire day.
If you have any last-minute questions about technique, need clarification on the oil temperature, or just want to tell me how much you loved the sauce, please don’t hesitate to reach out through my contact page. Happy cooking, and I hope these tropical bites bring as much joy to your table as they bring to mine!
PrintCopycat Crispy Fried Coconut Shrimp with Sweet Chili Mayo
Make restaurant-style coconut shrimp at home. This recipe uses a Panko coating for maximum crunch and includes instructions for a simple, balanced sweet chili mayo dipping sauce.
- Prep Time: 20 min
- Cook Time: 10 min
- Total Time: 30 min
- Yield: 4 servings 1x
- Category: Appetizer
- Method: Deep Frying
- Cuisine: American
- Diet: Vegetarian
Ingredients
- 1 lb large shrimp, peeled and deveined, tails on or off
- 1 cup all-purpose flour
- 2 large eggs, beaten
- 1 cup sweetened shredded coconut
- 1/2 cup Panko breadcrumbs
- 1/2 teaspoon salt
- 1/4 teaspoon black pepper
- Vegetable oil, for frying
- For the Dipping Sauce: 1/2 cup sweet chili sauce
- For the Dipping Sauce: 1/4 cup mayonnaise
- For the Dipping Sauce: 1 teaspoon Sriracha (optional)
Instructions
- Prepare the shrimp: Pat the shrimp completely dry using paper towels. This step is key for crispiness.
- Set up a standard breading station with three shallow dishes. Place the flour mixed with salt and pepper in the first dish. Beat the eggs in the second dish. Combine the shredded coconut and Panko breadcrumbs in the third dish.
- Dredge each shrimp first in the flour mixture, shaking off excess.
- Dip the floured shrimp into the beaten egg, letting excess drip off.
- Finally, press the shrimp firmly into the coconut-Panko mixture, ensuring a thick, even coating. Place coated shrimp on a plate or baking sheet.
- Prepare the dipping sauce: In a small bowl, whisk together the sweet chili sauce, mayonnaise, and Sriracha, if using. Set aside.
- Heat the oil in a deep skillet or Dutch oven to 350°F (175°C). You need about 2 inches of oil.
- Carefully place shrimp into the hot oil, working in batches to avoid overcrowding the pan. Do not add too many at once, as this lowers the oil temperature and results in soggy shrimp.
- Fry for 2 to 3 minutes per side, until the coating is golden brown and the shrimp is cooked through.
- Remove the crispy coconut shrimp with a slotted spoon and place them on a wire rack set over a baking sheet to drain excess oil.
- Serve the hot, perfectly crunchy coconut shrimp immediately with the homemade sweet chili mayo.
Notes
- For extra crispiness, chill the breaded shrimp for 15 minutes before frying.
- If you prefer baking, arrange the coated shrimp on a lightly oiled baking sheet and bake at 400°F (200°C) for 10-12 minutes, flipping halfway, until golden.
- To make this a quick seafood dinner, serve over steamed rice with a side of steamed broccoli.
Nutrition
- Serving Size: 4 shrimp
- Calories: 350
- Sugar: 15
- Sodium: 450
- Fat: 20
- Saturated Fat: 10
- Unsaturated Fat: 10
- Trans Fat: 0
- Carbohydrates: 25
- Fiber: 1
- Protein: 18
- Cholesterol: 150