

Listen up, because if you’re hosting game day, a potluck, or just need an excuse to eat cheese straight out of a baking dish, you have found your new absolute favorite recipe. Forget those sad, lukewarm dips that go untouched after halftime. Today we are making the absolute King: the texas trash dip. This isn’t just any layered dip; it’s rich, it’s intensely cheesy, and it’s got that fantastic, necessary goo factor we all crave. Trust me when I tell you that this recipe has been passed around our neighborhood gatherings for years, tried and tested until it’s absolutely foolproof. It comes together so easily, but it tastes like you spent hours crafting a spectacular Tex-Mex masterpiece. You’re going to want to grab your biggest bag of tortilla chips right now!
- Why This Texas Trash Dip Recipe is Your New Go-To Game Day Dip
- Essential Ingredients for the Ultimate Texas Trash Dip
- Step-by-Step Instructions for Perfect Texas Trash Dip
- Expert Tips for the Best Texas Trash Dip
- Serving Suggestions for Crowd Pleasing Appetizers
- Storage and Reheating Instructions for Leftover Texas Trash Dip
- Frequently Asked Questions About Texas Trash Dip Recipe
- Estimated Nutritional Data for Texas Trash Dip
- Share Your Game Day Dip Success
Why This Texas Trash Dip Recipe is Your New Go-To Game Day Dip
Seriously, this is the dip that vanishes first at every single party I bring it to. It checks every single box you could possibly have for an appetizer! You don’t need fancy gadgets or complicated techniques, which is why it keeps making the rotation. Forget worrying about your spread; this fills the room with the best smells.
- It’s wonderfully creamy and cheesy—pure comfort food.
- Prep time is just 15 minutes, making it the ultimate Easy Party Appetizer.
- It bakes up into a bubbling, Hot Cheesy Dip that stays delicious while it’s warm.
- It passes the ultimate test: It’s a confirmed crowd-pleaser for any gathering!
Quick Assembly for the Best Party Dip
I know you hate complicated recipes when company is coming over. That’s why I love this! You just mix the base ingredients in one bowl, dump them in the dish, and then do the sour cream/salsa layer next. Everything is just stirred together, not whipped or folded. It takes me maybe 10 minutes to get it ready for the oven, and then I can stop worrying about it and focus on the actual party!
Essential Ingredients for the Ultimate Texas Trash Dip
To make sure this dip lives up to its amazing reputation, we can’t just eyeball things. When you’re making a layered dip, the consistency of each layer matters a ton, especially the first one! I looked through my notes and consulted some folks who’ve been making this for ages—including some family friends who swear by this recipe for every Super Bowl party—and precision here is what separates a good dip from the dip everyone fights over. You want everything measured out perfectly so we get those clean, distinct layers when we scoop it out later. It’s all about the foundation!
If you’re curious about where I get my confidence in these classic recipes, it’s because I believe in sharing tested traditions, just like the ones that built this site. You can read more about that philosophy over on our About Page.
Layer One Base: Creamy Bean Dip Components
This is where we build the flavor powerhouse for the bottom layer. The most important thing here, and I mean most important, is the cream cheese. Don’t even think about tossing it in barely soft! It needs to be softened completely at room temperature. If it’s cold, you’ll end up with little cream cheese lumps scattered throughout your dip, and that’s just a texture disaster waiting to happen. You’ll need one full 16-ounce package of that softened cream cheese, one 16-ounce can of good quality refried beans—the smooth kind, not the chunky ones—and one full standard packet of taco seasoning mix. Just stir those three things until they are totally uniform. That’s your starting line!
The Gooey Cheese Topping for Your Texas Trash Dip
You absolutely need three kinds of cheese for the right melt dynamics in this texas trash dip. If you use all one kind, you lose that complexity! We’re using a total of about two and a half cups of shredded cheese, but remember the split: you want one cup of sharp Cheddar for that great flavor punch, one cup of Monterey Jack because it stretches like crazy, and then half a cup of a Mexican blend. That combination ensures you get those satisfying, long, gooey cheese pulls we associate with the very best warm Tex Mex dip. Don’t forget those optional jalapeños sprinkled on top either, they give it just the right little kick!
Step-by-Step Instructions for Perfect Texas Trash Dip
Okay, now that we have all our glorious ingredients ready to go for this truly amazing texas trash dip, let’s get this appetizer into the oven! First thing first, fire up that oven to 350 degrees Fahrenheit. You need a nice, steady heat for this layered goodness to melt perfectly together. Grab your 8×8 baking dish—or maybe an oven-safe skillet if you want that cool, rustic look—and just give it a quick grease up so nothing sticks to the melted cheese later. We are building flavor from the bottom up!
Creating the Layered Taco Dip Foundation
Take that creamy bean mixture you just made—remember the soft cream cheese and the beans? Mix that up until it looks happy, then smooth it into the bottom of your prepared dish. That’s Layer One, setting the stage. Next, in a separate bowl, you’re going to marry the sour cream, the salsa (make sure you drained that salsa well!), and those diced green chiles. Spread this white layer right over the bean base. Be gentle here; you don’t want to tear up that first layer! Just take your time and distribute it evenly across the entire surface so every scoop gets some of the creamy tang.
Baking and Finishing Your Warm Tex Mex Dip
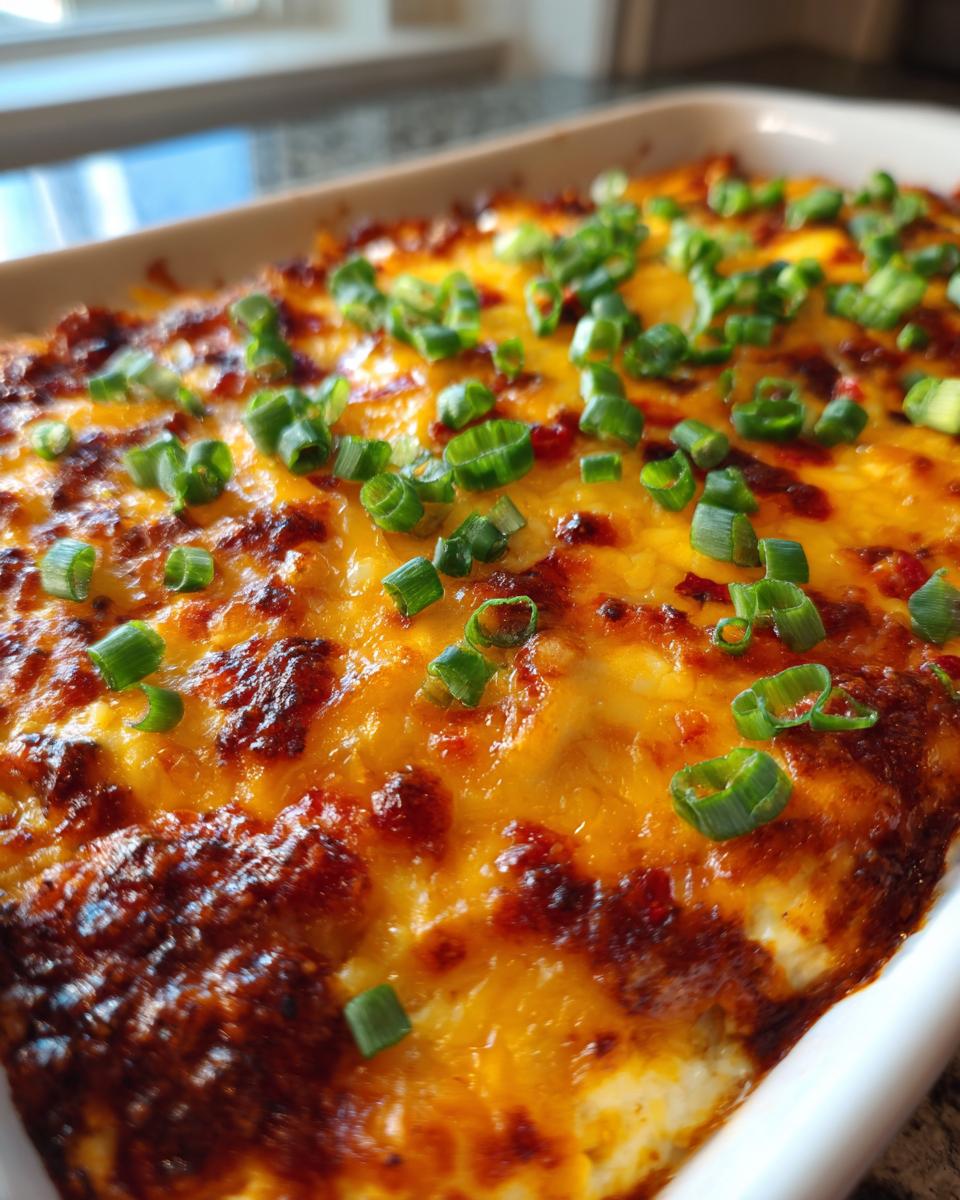
Now for the fun part—cheese time! Sprinkle all those mixed shredded cheeses generously over that sour cream layer. If you’re using the jalapeños, now is the time to scatter them artfully on top. Pop the whole thing into your preheated 350°F oven. It only needs about 20 to 25 minutes. You’ll know it’s ready when the edges are starting to bubble happily and the cheese on top is completely melted and looking glorious, like a golden blanket. Pull it out, and don’t forget the green onions right at the end for a fresh little pop of color before you serve this warm Tex Mex dip straight away!

Expert Tips for the Best Texas Trash Dip
Listen, making a great texas trash dip is mostly about the layers, but a few little tricks can take it from good to legendary. If you want this to be the standout appetizer at your next game day, you need to pay attention to details like draining. Seriously, draining those chiles and that salsa is non-negotiable! If you don’t drain them, you’ll end up with a watery soup instead of a delightfully thick, scoopable dip. Watery dip is just sad, folks!
Also, remember what I said about serving it hot? It needs to be steaming! Once this beautiful bubbly cheese starts to cool down, it gets a little stiff. We want that irresistible gooey pull every single time someone digs in. If you’re worried about timing or keeping it warm on a buffet table, I have a little trick for you, too. For my bigger gatherings, I sometimes skip the oven entirely and toss this whole thing into a slow cooker on low for about two hours. It keeps it perfectly warm and melty. For that method, just keep the cheese off until the last 15 minutes so it doesn’t burn!
If you want to read about another guaranteed party favorite that people constantly ask me for, check out this amazing post on a cheesy dip from our friends online that also brings the wow factor—it’s a fantastic gooey, cheesy party favorite.
Making a Meaty Texas Trash Dip Variation
Now, I know some of you were probably wondering where the ground beef was during the main recipe, right? This is where we turn this into a truly hearty masterpiece—a Meaty Party Dip! This variation is amazing if you’re feeding a crowd that needs something substantial alongside those chips.
It’s simple: you just take about a pound of ground beef and get it browned up in a skillet first. While it’s cooking, season it really well, but here is the key part: use only half of that taco seasoning packet you planned for the bean layer. Once the beef is cooked, drain off every last drop of grease! I mean it, drain that stuff out! Then, you spread that seasoned, glorious ground beef right on top of that refried bean base—that’s Layer One. Then you just continue with the sour cream layer and the cheese topping as normal. You’ll be amazed at how much richer and more satisfying this layered taco dip becomes with just a few extra minutes of work!
Serving Suggestions for Crowd Pleasing Appetizers
Okay, so you have this bubbling, perfect, hot cheesy dip sitting on your counter, and you are ready to go. But wait! What are you going to dip into this magnificent creation? You absolutely cannot serve this masterpiece with those flimsy, pale chips that crumble the second they touch anything substantial. This amazing warm Tex Mex dip needs reinforcements!
My absolute number one recommendation is always sturdy, restaurant-style tortilla chips. You need that heft to handle the weight of the cheese and beans you’re scooping up. Look for the thicker, slightly salty variety—they just hold up better to the heat of this dip.

But don’t stop there! For variety, and for those friends who might be watching their carbs a little closer, I always set out a few other things:
- Sturdy Crackers: Think basic water crackers or those hearty wheat thins. Anything thin simply meets its doom when it meets this rich base.
- Raw Veggies: Carrot sticks are great, but bell pepper slices—especially the red and yellow ones—offer a nice sweet crunch that contrasts beautifully with the spicy dip.
- Slightly Toasted Pita Bread: Cut pita bread into triangles, brush them lightly with olive oil and a tiny sprinkle of salt, and bake them for five minutes until they crisp up a bit. They become fantastic little scoops!
The point is, you want a vehicle strong enough to deliver that cheesy, creamy goodness straight to your mouth without breaking halfway. Set out a colorful array, keep the dip piping hot, and watch how fast those crowd pleasing appetizers disappear!
Storage and Reheating Instructions for Leftover Texas Trash Dip
One of the best things about having a huge batch of texas trash dip is that you inevitably end up with leftovers, even after the party ends! You definitely want to save this, especially since it tastes different—and some people even say *better*—the next day once those flavors really settle in. Don’t you dare let any of that cheesy goodness go to waste!
When you have cooled the dip down a bit (don’t put piping hot dip straight into the fridge, that’s bad for your fridge!), cover your baking dish tightly with some plastic wrap or transfer the remaining dip into an airtight container. It will keep just fine in the refrigerator for about three or four days. Just make sure it’s sealed up tight so it doesn’t absorb any weird fridge smells!
Reheating Options: Oven vs. Microwave
Okay, so you’re ready for round two. The texture absolutely changes slightly when this magnificent creation chills, mostly because the cream cheese firms up and the cheese congeals a bit, but we can fix that easily! My preferred method, the one that brings back that fresh-from-the-oven bubbly feeling, is definitely the oven.
- Preheat your oven to about 325 degrees Fahrenheit. You don’t need it super hot, just warm enough to melt things gently.
- Place the dip (still in its oven-safe dish, of course!) inside. Let it bake for maybe 15 to 20 minutes. You are just looking for it to get warm throughout and that cheese to start looking soft and melty again.
Now, I won’t judge you if you’re hungry right now! If you need that cheesy fix instantly, the microwave works in a pinch. Carefully scoop a portion onto a microwave-safe plate. Heat it in short bursts—say, 30 seconds at a time—stirring between each blast. Keep doing that until it’s heated through. Just promise me you’ll stir it well, because microwaves always leave those cold spots nestled right in the middle!

No matter how you reheat it, you might need to stir in a tiny splash of milk or maybe a spoonful of sour cream right at the end if it seems a little too stiff. That always brings back a little bit of that creamy consistency we loved so much the first time around!
Frequently Asked Questions About Texas Trash Dip Recipe
I get so many great questions about this recipe because everyone wants their version of the texas trash dip to be the very best one on the table! Since this is such a fantastic Creamy Bean Dip, I figured I’d tackle the most common things people ask me privately about making it for their big events.
Can I assemble this layered taco dip ahead of time?
Oh, absolutely! This is one of the best features of this particular Simple Dip Recipe. You can totally assemble the entire thing—base, sour cream, and cheese layers—the day before you plan to serve it. Cover it tightly with plastic wrap and keep it in the fridge. When you are ready to serve, just pull it out, let it sit on the counter for about 15 minutes while the oven preheats, and then bake it according to the directions. It will just need an extra 5 to 10 minutes in the oven since it’s starting cold! This makes it the perfect stress-free appetizer for busy party days.
What if I need a less spicy or non-spicy dip?
That is easily managed! If you don’t like the kick from the jalapeños, just leave them off the top layer. Simple as that! You still get so much flavor from the taco seasoning in the base. If you want to dial back the heat even more, use mild taco seasoning instead of regular, or try using Monterey Jack cheese instead of the sharp Cheddar, as Cheddar sometimes carries a bit more of a bite. This recipe is so versatile; you can definitely tailor it to avoid too much spice while still enjoying this Cheesy Baked Dip.
Can I use low-fat or reduced-fat ingredients?
This is where I have to give you my real, honest opinion as a home cook who prioritizes texture. While you *can* use reduced-fat cream cheese and low-fat sour cream, your dip will lose a lot of that signature melt and goo factor. The high fat and protein content in the full-fat dairy ingredients is what gives you that amazing stretch and creamy mouthfeel. If you swap them out, you risk a thinner, slightly grainy final product, especially when it cools down. I always tell folks when making a true, decadent Game Day Dip, it’s worth splurging on the full-fat stuff once in a while!
The cream cheese is too hard, what’s the quick way to soften it?
I’ve been there! You remember you need to make the dip five minutes before everyone arrives. Don’t try to microwave the whole block—it gets hard on the edges and soupy in the middle. The best trick for slightly firm cream cheese is to slice it into three or four thin little discs. Lay those discs on a small plate and microwave them on 20% power for about 15 to 20 seconds total. Check it after the first 10 seconds. It softens up evenly right away without melting completely. You can find more tips on pantry prep like this over on our Terms of Use page, where we talk about reliable methods.
Is this technically a layered taco dip or a true Texas Trash Dip?
That’s a great question! They are very, very similar cousins! Most folks use the terms interchangeably, but traditionally, a classic 7-layer taco dip is served cold and often includes things like black olives or lettuce on top. Because ours is served warm, thick, baked until gooey, and relies heavily on that refried bean and seasoned cream cheese base, it falls squarely into the Texas Trash Dip category. It’s the warm, hearty, cheesy version of that cold classic!
Estimated Nutritional Data for Texas Trash Dip
Alright, let’s talk about the numbers, just briefly! I always say that if you have to ask about the nutrition facts on a texas trash dip, you probably shouldn’t be making it, because this is pure game-day joy! But for those of you who like to keep track, I scrounged up the estimated data based on the standard recipe ingredients. Remember, this is just a guideline—your portion size and exact brands used will change things a little bit.
This is based on 8 servings, so remember if you serve it thinner at a big crowd event, those numbers go down! Everything here uses the standard, non-meaty version detailed above.
- Calories: About 320 per serving.
- Total Fat: Roughly 26 grams, with about 15 grams coming from Saturated Fat. Yes, we need that fat for the ultimate gooey texture!
- Protein: A respectable 10 grams per scoop.
- Carbohydrates: Around 12 grams.
- Sugar: Only about 3 grams, which is surprisingly low for something this decadent!
I’m not a nutritionist, of course—I’m just a home cook passing along recipes that taste amazing! So please take this as a rough idea. If you’re worried about sodium, you can definitely use low-sodium refried beans and maybe go lighter on the taco seasoning in the base, but honestly, that seasoning is what gives this a lot of its signature zip!
Share Your Game Day Dip Success
Well, that’s it! You have successfully made the absolute best texas trash dip that your friends and family have ever tasted. I swear, the look on someone’s face when they manage to get a perfect, cheesy scoop of this warm masterpiece is worth all the mixing!
Now that you’ve had a chance to enjoy this incredible Game Day Dip, I would be thrilled if you headed back here and let me know how it went! Don’t be shy—tell me everything! Did you stick to the recipe exactly, or did you get adventurous and try that meaty variation I shared?
Leave a Star Rating and Tell Me About Your Potluck Dip Ideas
Seriously, please rate this recipe for me using the stars right above or below this section. It helps other cooks figure out if they should make this next for their Potluck Dip Ideas list! Even better, drop a comment below. I love hearing which ingredients you mixed up or how you served it. Did you use sturdy crackers or go all-in on the tortilla chips?
If you made that heartier version, I’d love to hear how your crowd reacted to that savory addition. If you’re looking for even more inspiration for meaty appetizers, you should definitely check out the tips shared over at Meaty Texas Trash Dip for more ideas on bulking up your party spread!
Don’t forget to snap a picture of your bubbly, cheesy success and tag us on social media—seeing your finished dips is honestly the best part of running this corner of the internet. If you run into any snags in the future, or just want to ask a quick question about quantities or timing, you can always reach out via our Contact Page. Happy dipping, friends!
PrintThe Ultimate Creamy & Cheesy Texas Trash Dip (Easy Game Day Appetizer)

Make this hot, layered Texas Trash Dip for your next gathering. It combines refried beans, cream cheese, taco seasoning, and plenty of gooey cheese for a simple, crowd-pleasing Tex-Mex appetizer perfect for game days or potlucks.
- Prep Time: 15 min
- Cook Time: 25 min
- Total Time: 40 min
- Yield: 8 servings 1x
- Category: Appetizer
- Method: Baking
- Cuisine: Tex-Mex
- Diet: Vegetarian
Ingredients
- 1 (16 ounce) package cream cheese, softened
- 1 (16 ounce) can refried beans
- 1 packet (1 ounce) taco seasoning mix
- 1 cup sour cream
- 1 cup salsa, drained
- 1 (4 ounce) can diced green chiles, drained
- 1 cup shredded Monterey Jack cheese
- 1 cup shredded sharp Cheddar cheese
- 1/2 cup shredded Mexican blend cheese
- 1/4 cup sliced pickled jalapeños (optional)
- 2 green onions, sliced (for garnish)
Instructions
- Preheat your oven to 350 degrees Fahrenheit. Lightly grease an 8×8 inch baking dish or a similar sized oven-safe skillet.
- In a large bowl, combine the softened cream cheese and the refried beans. Mix them together until they are mostly smooth.
- Stir in the taco seasoning mix until it is evenly distributed throughout the bean and cream cheese base.
- Spread this mixture evenly into the bottom of your prepared baking dish. This forms your first layer.
- In a separate bowl, mix the sour cream, drained salsa, and drained diced green chiles. Spread this mixture over the bean layer.
- Top the sour cream layer evenly with the shredded Monterey Jack cheese, Cheddar cheese, and Mexican blend cheese.
- If you are using them, sprinkle the sliced pickled jalapeños over the top layer of cheese.
- Bake for 20 to 25 minutes, or until the dip is heated through and the cheese is completely melted and bubbly.
- Remove the dip from the oven. Sprinkle with sliced green onions before serving hot with tortilla chips or sturdy crackers.
Notes
- For a Meaty Texas Trash Dip variation, brown 1 pound of ground beef with half a packet of taco seasoning. Drain off any grease. Spread the cooked meat evenly over the refried bean layer before adding the sour cream mixture.
- If you prefer a slower, more even melt, you can assemble the dip in a slow cooker on low for 2 hours, topping with cheese for the last 15 minutes.
- Serve this hot, cheesy dip immediately for the best texture.
Nutrition
- Serving Size: 1 serving (approx 1/8 of recipe)
- Calories: 320
- Sugar: 3
- Sodium: 650
- Fat: 26
- Saturated Fat: 15
- Unsaturated Fat: 11
- Trans Fat: 0.5
- Carbohydrates: 12
- Fiber: 2
- Protein: 10
- Cholesterol: 65