
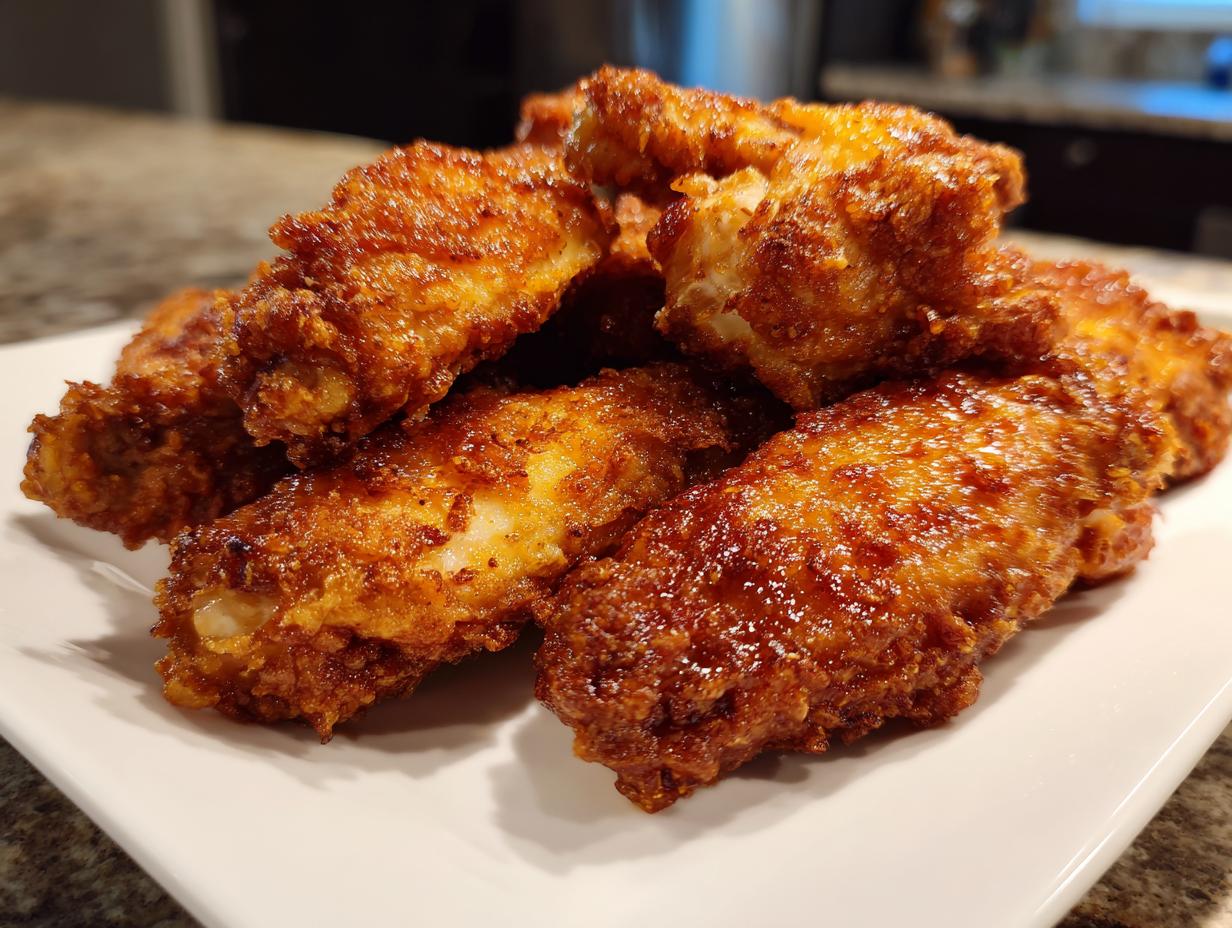
Oh, my heart aches every time I hear someone say they gave up on homemade chicken wing night because the results were just sad and soggy! We’ve all been there, right? You try baking them, hoping for that deep-fried crunch, and end up with rubbery disappointment. Well, put down the deep fryer because I’m sharing the one trick that changed everything in my kitchen: the humble baking powder secret. This method delivers the ultimate crispy baked chicken wings—shatteringly crisp skin on the outside and still unbelievably juicy inside. Trust me, this is the reliable technique you need for the best chicken wing experience, whether it’s for a big game day or just a Tuesday.
- Why This is the Ultimate Crispy Chicken Wing Recipe (No Fry Secret)
- Gathering Your Ingredients for Perfect Chicken Wing Preparation
- Step-by-Step Instructions for the Best Chicken Wing Recipe
- Flavoring Your Crispy Chicken Wing: Sauce and Rub Ideas
- Making Game Day Chicken Wings for a Crowd
- Storage and Reheating Instructions for Leftover Chicken Wing Pieces
- Troubleshooting Common Crispy Baked Chicken Wing Issues
- Frequently Asked Questions About This Chicken Wing Method
- Sharing Your Cookin' Corner Success
Why This is the Ultimate Crispy Chicken Wing Recipe (No Fry Secret)
Look, I spent years making sad, floppy wings. I really did! I’d load up the baking sheet, watch them shrink, and pull out something that belonged more in a soup than on a party platter. I chased that restaurant crunch for ages until I stumbled onto the game-changer. This baked chicken wings no fry method is the most reliable thing I’ve ever found for getting truly crispy chicken wings without turning on the deep fryer. It was such a relief to finally have a foolproof recipe, like the one you can find details on over at this great baking guide!
When you use this technique, you’re not just hoping for the best; you’re guaranteeing a winner for your next spread of chicken wing pieces. Forget those heavy batter recipes that weigh everything down. We want that shattering texture you get from high-heat frying, but we’re achieving it right here in the oven. I learned exactly what makes this work, and honestly, finding this secret made me so excited to host game day parties again!
The Science Behind Crispy Oven Roasted Wings
People think crispiness is all about the heat, but it’s really about the surface of the skin. When we mix in baking powder—and yes, it *has* to be baking powder, not baking soda—we are subtly raising the pH level of the chicken skin. Think of it like this: the baking powder helps suck out the moisture that steam usually creates while cooking.
By drying out the surface layer during the initial bake time, we let the skin brown beautifully instead of steaming itself. This process is exactly what creates those amazing, crunchy edges on crispy oven roasted wings. It’s simple chemistry that gives you that deep, golden crunch every single time.
Gathering Your Ingredients for Perfect Chicken Wing Preparation
Okay, now for the shopping list! Getting the right starting materials for your chicken wing pieces is half the battle won. The ingredient list is simple, which I just love, but there are two small details you absolutely can’t skip if you want those perfect, shiny, crispy wings. First, make sure you are using baking powder—and if you can swing it, grab the aluminum-free kind. That little extra detail keeps the flavor pure!
The only thing more important than the baking powder is drying those wings! Seriously, grab a great stack of paper towels and blot them until they feel almost rough, not slick. Moisture is the enemy of crunch. If you struggle with getting things crispy, check out my guide on making easy crispy nuggets—the core drying concept is the same!
Ingredient Notes and Substitutions
If you ran out of kosher salt, standard table salt works fine, but maybe use a tiny bit less since it sneaks up on you! If someone in your house isn’t keen on heat, just leave the cayenne pepper out entirely; it won’t ruin the crispiness at all. Don’t worry if you can only find regular baking powder; it will still work its magic to give you those fantastic crispy chicken wings. The powder does the heavy lifting here, so don’t skip it!
Step-by-Step Instructions for the Best Chicken Wing Recipe
This is where the magic happens, and honestly, it’s easier than making toast! For an easy chicken wing recipe that delivers, we need to set up your oven correctly first. Crank that temperature way up to 425°F (that’s 220°C), and please, please use a wire rack over a lined baking sheet. That rack is vital; it lets the air get underneath so the bottom of your chicken wing pieces don’t steam. That counter-intuitive step is what guarantees those beautiful, juicy chicken wings without the soda-soggy texture.
The Critical Drying and Coating Process
Remember what I said about moisture being the enemy? This is where we put in the work. Take your wings and pat them down with paper towels until you cannot get another drop of wetness off. Then, in a big bowl, combine all your dry seasoning with that magic baking powder. Dump those dry wings into the bowl and toss them around until every single spot is coated white. This coating is what allows them to crisp up so fantastically, giving you that true baked chicken wings no fry result!

Baking Times and Flipping for Maximum Crunch
Once they’re coated, spread them out on that rack—no overlapping, please! Into the hot oven they go for the first stretch, which is 25 minutes. This sets the crust. When you pull them out, flip every single piece over carefully. Pop them back in for the final 20 to 25 minutes. Keep an eye on them then; you are looking for a deep, gorgeous golden-brown color that signals they are done and perfectly crunchy. If you ever decide to switch to an air fryer later, look at my tips for air fryer chicken tenders—it uses a similar dry-out principle!
Flavoring Your Crispy Chicken Wing: Sauce and Rub Ideas
Now that you’ve successfully made the crispiest chicken wing pieces imaginable using only your oven, it’s time for the fun part: flavoring! This is where you can really bring in those popular tastes like Lemon Pepper or that amazing Honey Garlic flavor everyone craves. Remember, because these wings are so delightfully crisp, they hold onto sauces beautifully, turning them into perfect sticky chicken wings without turning them soggy!
When they come piping hot out of the oven, this is your moment. Toss them immediately! If you’re looking for the absolute best flavoring ideas, I’ve got great flavor guides just waiting for you. You can explore how to make rich sauces like the ones mentioned over at my teriyaki post, or check out the depth of flavor in cowboy butter wings. If you want a straight-up dry rub chicken wings recipe instead, just toss the hot wings with an extra teaspoon of salt and pepper before serving!
Quick Homemade Wing Sauce Ideas
You don’t need a store-bought bottle for incredible flavor, honestly. For a super simple Lemon Pepper glaze, just melt a stick of butter and whisk in some fresh lemon zest and loads of lemon pepper seasoning. If you prefer something a little sweet and savory, whisk together equal parts honey and soy sauce, and bubble it on the stove for just two minutes—it’s one of my favorite homemade wing sauce ideas! These quick options let you customize your spice level instantly. For more inspiration on amazing flavor coatings, visit my full ideas page on honey mustard creations!
Making Game Day Chicken Wings for a Crowd
When the big game is on, or you’ve got a house full of folks looking for fantastic party appetizers chicken wings, you absolutely have to scale this recipe up. Don’t panic about losing that crispiness when you make a giant batch of these oven baked wings!
The best advice I can give for doubling or tripling the recipe is this: you must use two or even three wire racks. If you try to pile them all onto one sheet, you just end up steaming the middle wings, and we definitely don’t want that! Make sure you use the largest cookie sheets you own to keep that vital space between each chicken wing piece.
If you have to use two racks, try to put them on the middle and top shelves. You’ll want to swap their positions halfway through the baking time so they brown evenly. If you’re looking for even more crowd-pleasing snacks, you should check out my recipe for easy party dips while your wings are baking! If you’re looking for other crispy styles, check out what the folks over at Flavor Monk have cooked up, too.
Storage and Reheating Instructions for Leftover Chicken Wing Pieces
It’s rare that we have any leftover chicken wing pieces after a party, but when we do, I have strict rules about how they are managed! If you need to save some for later, tuck them into a standard airtight container and straight into the fridge. Don’t let them sit out too long, or you know the texture will suffer.
The most important thing is reheating. Please, please, skip the microwave! It guarantees a soft, sad wing. Instead, spread the chilled pieces back out on a wire rack set over a baking sheet, just like we did the first time. Pop them into a 400°F oven for about 8 to 10 minutes. That quick blast of dry heat pulls the moisture out of the skin again, and bam—you’ve got those perfect crispy chicken wings back!
Troubleshooting Common Crispy Baked Chicken Wing Issues
Sometimes, even with the best recipe in hand, little hiccups happen when cooking a batch of chicken wing pieces. Don’t sweat it! When I find my wings are looking a little soft when they come out of the oven, nine times out of ten, it comes down to two things we talked about: overcrowding or not drying them enough at the start. If your wings are still soggy, pull them out, give them a quick flip, and maybe even turn the heat up slightly for the last 10 minutes to force some moisture out.
Another common worry is when that beautiful baking powder crust seems to have vanished! If your coating fell off, it almost always means the wings weren’t patted completely dry before tossing, or you skipped that crucial step of tossing them thoroughly in the powder mix. You need that dry surface for the baking powder to adhere to. Trust me, paying close attention to drying and spreading them out on the rack guarantees you get those glorious, super crispy wings next time around!
Frequently Asked Questions About This Chicken Wing Method
I know you’ve got questions! When you’re trying to achieve something wonderful like a perfect chicken wing texture without resorting to frying, there are always little doubts creeping in. That’s totally normal. I’ve gathered the questions I get asked most often about how to make these oven baked wings shine every single time, so you can bake with total confidence!
Can I make these chicken wings in an air fryer instead?
Oh, absolutely you can! If you have an air fryer, it’s a fantastic little tool, though I still swear by the oven for big batches. For the air fryer, you still need to do the full drying and baking powder coating, of course. Pop them into the basket at about 380°F (195°C) for 20 minutes. Then, open it up, flip them all over, and cook for another 10 to 15 minutes until they are spot on. Because they cook so fast, you have to watch closely so they don’t burn before they get that signature crunch. For more air fryer tips in general, I share a lot of my best secrets over on my air fryer chicken tenders guide!
Are these the healthiest chicken wings I can make?
In my book, yes, they certainly are! When we talk about the simplest way to enjoy a batch of chicken wing pieces without loading up on extra fat, skipping the deep fryer is the biggest step you can take. Since we aren’t submerging them in oil, this recipe naturally works toward making some great healthy chicken wings. You are in total control of the sodium in the rub and any glaze you add after baking, which is just the way I like it!
What is the best way to ensure my wings stay juicy inside?
That’s my favorite question! Getting that contrast between the extreme crispness and the tender meat is what this whole recipe is about. The absolute key to retaining those juicy chicken wings is that baking powder mixture. It works so hard to dry out the skin that the meat underneath steams perfectly without drying itself out. But here’s the other half: don’t walk away when they hit the 40-minute mark! As soon as they look perfectly golden and crackly, pull them out. They continue cooking for a bit after leaving the oven, so stopping right when they look done guarantees a moist interior.
Sharing Your Cookin’ Corner Success
Well, that’s it, my friends! You now have the secret to the crispiest, juiciest, most game-day-worthy chicken wing pieces you can make right in your own oven. The next step is totally up to you, and I couldn’t be more excited for you to get baking!
Once you’ve tried these, I really, really want to hear how they turned out. Did you go with a classic Lemon Pepper dusting, or did you toss them in a sweet and sticky Honey Garlic glaze? Please drop a comment right below and give this ultra-reliable recipe a star rating. Reviews like yours help other home cooks feel confident trying new techniques!
And if you snapped a photo of your crispy creation—especially if you tried one of the big batches for a party—please share it on social media and tag me! Seeing your success stories, whether it’s a simple weeknight dinner or a huge platter for cheering on your favorite team, is truly what Cookin’ Corner is all about. If you’re still looking for more bold flavors to try out later, check out my guide on easy gochujang chicken for your next flavor adventure!
PrintUltimate Crispy Baked Chicken Wings: The No-Fry Secret Technique

Learn the simple technique to make shatteringly crispy baked chicken wings in your oven that rival deep-fried versions. This recipe keeps the inside juicy while delivering the ultimate crunch, perfect for game day or easy weeknight dinners.
- Prep Time: 15 min
- Cook Time: 45 min
- Total Time: 60 min
- Yield: 4 servings 1x
- Category: Appetizer
- Method: Baking
- Cuisine: American
- Diet: Low Fat
Ingredients
- 2 lbs chicken wings (flats and drumettes separated)
- 1 tablespoon baking powder (aluminum-free is best)
- 1 teaspoon kosher salt
- 1/2 teaspoon black pepper
- 1/2 teaspoon garlic powder
- 1/2 teaspoon onion powder
- 1/4 teaspoon cayenne pepper (optional, for a little heat)
Instructions
- Preheat your oven to 425°F (220°C). Line a large, rimmed baking sheet with parchment paper or aluminum foil. Place a wire cooling rack on top of the prepared baking sheet. This setup allows air to circulate completely around the wings.
- Pat the chicken wings completely dry using paper towels. This step is crucial for crispiness.
- In a large bowl, combine the baking powder, salt, pepper, garlic powder, onion powder, and cayenne pepper.
- Add the dried chicken wings to the bowl. Toss thoroughly until every piece is evenly coated with the dry mixture. The baking powder helps dry out the skin and promotes browning.
- Arrange the coated wings in a single layer on the wire rack, ensuring there is space between each wing for air flow. Do not overcrowd the pan.
- Bake for 25 minutes.
- Flip each wing over. Return the pan to the oven and bake for another 20 to 25 minutes, or until the skin is deeply golden brown and very crisp.
- Remove the wings from the oven. You now have perfect crispy oven roasted wings ready for serving plain or tossing in your favorite homemade wing sauce ideas.
Notes
- For extra sticky chicken wings, toss the hot, crispy wings immediately in your favorite sauce (like honey garlic wings sauce or a simple BBQ glaze) right after they come out of the oven.
- If you prefer a dry rub chicken wings recipe, skip the sauce step and simply add 1 tablespoon of your favorite dry seasoning blend to the initial coating mixture.
- This technique works well for making healthy chicken wings as it avoids added frying oil.
Nutrition
- Serving Size: 4 wings
- Calories: 250
- Sugar: 1
- Sodium: 350
- Fat: 15
- Saturated Fat: 5
- Unsaturated Fat: 10
- Trans Fat: 0
- Carbohydrates: 1
- Fiber: 0
- Protein: 25
- Cholesterol: 90