
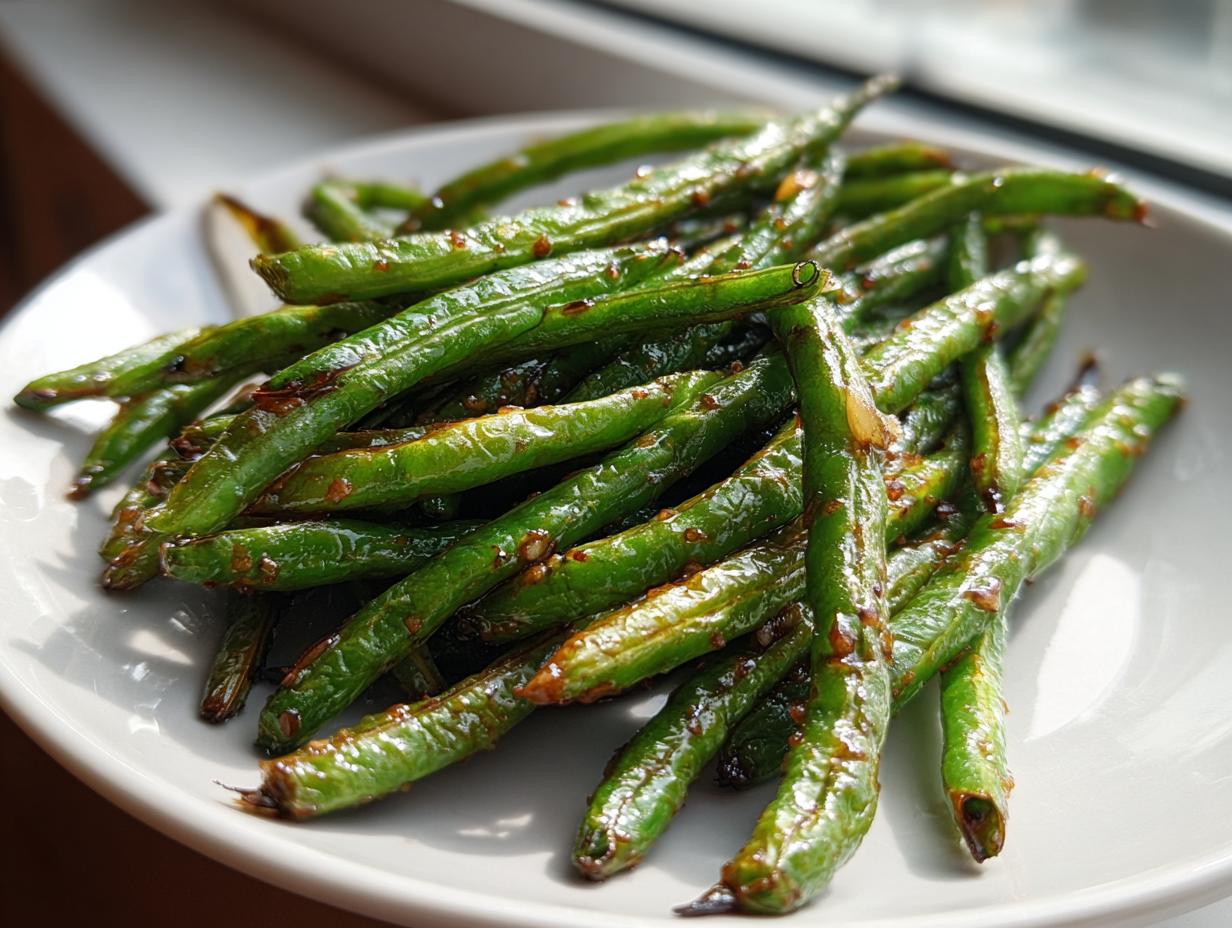
We all get that Friday night craving, right? You want the punchy flavor of Chinese takeout, but you don’t want to wait for delivery. Me too! That’s why I perfected this recipe for making the best chinese green beans with garlic sauce right on your stovetop. Forget soggy vegetables—we are chasing that beautiful, intense char that only restaurants seem to capture. This dish is proof that simple ingredients, handled with the right home-cook sensibility, deliver restaurant-quality results every single time. It’s fast, it’s punchy, and honestly, once you master the blister, you’ll never go back to plain steamed beans again. Trust me on this one; it’s become my go-to!
- Why You Will Love Making chinese green beans with garlic sauce
- Essential Ingredients for Perfect chinese green beans with garlic sauce
- Equipment Needed for Wok Fried chinese green beans
- Step-by-Step Instructions for Blistered Green Beans
- Ingredient Notes and Substitutions for Vegan chinese sides
- Tips for Success When Making chinese green beans with garlic sauce
- Serving Suggestions for these chinese side dishes
- Storing and Reheating your garlic green beans
- Frequently Asked Questions about chinese green beans with garlic sauce
Why You Will Love Making chinese green beans with garlic sauce
I keep making these over and over because they just hit the spot! If you try to order something like this out, it’s always either mushy or drowned in sauce. Not here! What makes this so special is how easy it is to get that restaurant magic:
- It’s lightning fast! Seriously, with only 10 minutes of cook time, this is faster than waiting for the delivery driver to even leave the restaurant parking lot.
- That amazing texture is all yours! We nail the “dry fried green beans” concept by getting those lovely, smoky, blistered green beans spots right in your own skillet.
- It hits all the right flavor notes—garlic-forward, savory, slightly sweet, and perfectly balanced with just a hint of pepper.
- You don’t need a fancy setup; your largest skillet works perfectly fine if you follow my heat rules for wok fried green beans!
- It’s incredibly flexible. Need it gluten-free? No problem! Need an easy vegan chinese sides option? Done!
- This recipe makes any weeknight dinner feel like a special takeout event without the effort.
Honestly, the crispy-chewy texture you get from high-heat cooking is what makes these garlic green beans addicting. You’ll be craving them every week!
Essential Ingredients for Perfect chinese green beans with garlic sauce
The ingredient list for these garlic green beans is short, which is why ingredient quality and precision matter so much! You really just need fresh vegetables and the basic building blocks of flavor. I’ve laid out exactly what you need below so you can have everything prepped before that wok gets screaming hot. Don’t skip the measured oil amounts; that’s key for getting the proper dry-fry effect.
- 1 pound fresh green beans, make sure they are completely trimmed—no tough ends allowed!
- Vegetable Oil: You’ll need 3 tablespoons total, but we use it in two stages, so keep that measurement handy.
- Garlic: About 4 cloves, minced finely. Don’t even think about grabbing the jarred stuff today; we need that fresh, sharp bite.
- Ginger: Just 1 teaspoon of fresh ginger, minced up small. It adds a warmth next to that punchy garlic.
- Soy Sauce: 1 tablespoon of good quality soy sauce. If you’re going gluten-free, remember that < Tamari is your best pal here.
- Sugar: 1 teaspoon. This isn’t meant to make them sweet, just to balance out all that salty soy sauce and help the beans caramelize just a little.
- Ground White Pepper: Just 1/4 teaspoon. It gives a different background heat than black pepper!
- The Secret Tiny Bit of Liquid: 1 tablespoon of plain water or vegetable broth. This comes in right at the end to help the sauce cling perfectly.
Seriously, having these items ready to go is half the battle. Once you start cooking, it all happens so fast!
Equipment Needed for Wok Fried chinese green beans
Now, let’s talk tools! You don’t need to run out and buy a whole new setup for this. Since we are aiming for those charred, blistered green beans, the most important thing is having something that gets ripping hot and *holds* that heat when you dump the beans in. The actual equipment list is short and sweet, just how I like it!
For the best results, you’ll want:
- A Wok: If you have one, dust it off! A wok’s sloping sides are perfect for tossing the beans up high and letting the steam escape quickly, which is vital for avoiding soggy chinese green beans.
- My Home Cook Backup: If you don’t have a wok, grab your largest, heaviest skillet. I mean the one that retains heat well—cast iron or thick stainless steel is ideal. Just remember the batch rule if you use a standard skillet.
- A Sharp Knife and Cutting Board: We need nicely minced garlic and ginger, so having a decent knife makes prepping those aromatics so much less frustrating.
- Tongs or a Wide Spatula: Something sturdy for tossing those beans around when they start sizzling!
That’s pretty much it! We aren’t fussing with fancy steaming baskets or deep fryers here. This is pure, high-heat, stovetop action to get those amazing garlic green beans flavor!
Step-by-Step Instructions for Blistered Green Beans
This is where the magic happens, folks, and timing is everything! The secret to getting those amazing, crinkly, smoky textures in your dry fried green beans is pure, unadulterated high heat. We are essentially flash-frying them in a small amount of oil. If your wok or skillet isn’t huge, don’t try to cram all pound of beans in at once—they’ll steam instead of char! Cook them in two separate batches if you need to. I learned that the hard way; crowding the pan kills the sizzle we’re aiming for.
Achieving the Signature Blister on the chinese green beans
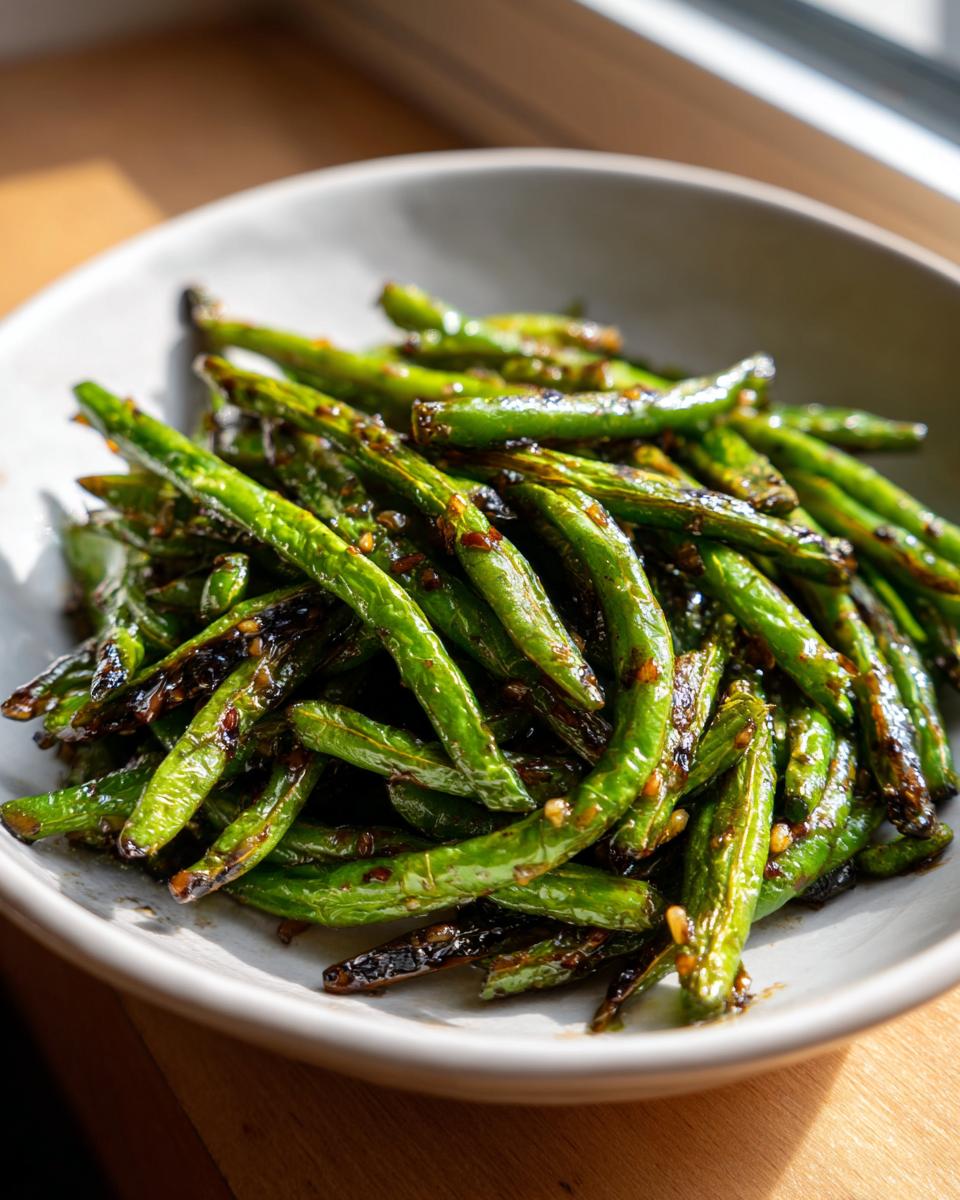
First things first: get 2 tablespoons of your oil smoking hot in that wok over high heat. I mean shimmering! Then, dump in those trimmed green beans—all at once if you can manage it without overcrowding. Now, here’s the absolute, non-negotiable rule: don’t touch them for a solid 2 to 3 minutes. You have to let the bottom surface make contact with that incredible heat and start turning deep, dark brown. Once you see those spots appear, toss them gently and keep cooking another 3 to 5 minutes until they are tender-crisp and beautifully wrinkled. Scoop those beauties out and set them aside immediately.
Building the Punchy Garlic Sauce for chinese green beans with garlic sauce
Once the beans are resting, drop the heat down to medium. Add that last tablespoon of oil and toss in your minced garlic and ginger. We only want about 30 seconds here before they turn golden—if you burn that garlic, it’ll turn bitter and you’ll have to start over! While they are sizzling, whisk together your soy sauce, sugar, and white pepper in a tiny bowl. Return the beans to the wok, pour that sauce mixture over them, and pour in your tablespoon of water or broth. Toss everything vigorously for just one minute until that sauce gets sticky and clings to every single bean. Then, pull it off the heat right away—don’t let them stew! You can check out the full ingredient list, including the instructions for making an amazing < gluten-free version, in the main recipe details above.
Ingredient Notes and Substitutions for Vegan chinese sides
One of the things I absolutely adore about these chinese green beans is how accommodating they are! Since we’re keeping things simple and aiming for fantastic flavor, you might wonder about swapping out one or two things. Absolutely! Cooking should bend to your pantry, not the other way around. That’s what Sarah Jane, the founder here, always taught—use what you have with care!
Let’s tackle the questions I always get about customizing these garlic green beans, especially if you are keeping them fully vegan or gluten-free.
- Soy Sauce Swap: If you need these to be gluten-free, swapping the regular soy sauce for Tamari is your move. It’s a direct 1:1 substitution, and honestly, I think Tamari adds a slightly richer, deeper savoriness to the sauce. You can find more about why we love flexible recipes over on our < About page!
- The Broth Question: We use just a tiny splash of water or vegetable broth right at the end. If you use broth, make sure it’s a low-sodium version, especially since soy sauce already brings the saltiness. This little bit of liquid helps emulsify the sauce so it coats the beans instead of just sitting at the bottom of the pan.
- Heating Things Up: If you’re craving the real buzz you get from true < Sichuan green beans—that fiery kick—you have a couple of easy ways to amp up the spice! My favorite method is adding about half a teaspoon of dried chili flakes right into the oil when you are about to fry the garlic and ginger. Or, if you have it, a dash of chili oil at the very end is wonderful. It really lets you tailor the heat level for your own taste buds!
It’s so easy to make these work for any dinner theme you’ve got going on!
Tips for Success When Making chinese green beans with garlic sauce
If you try to rush these garlic green beans, they will turn on you! Seriously, the difference between perfectly blistered green beans and mushy ones comes down to controlling the battlefield—that is, your hot pan. For these wok fried green beans to succeed, you have to respect the high heat. I’ve narrowed down the three most important things I always focus on to make sure they come out tasting exactly like takeout.
First, and I can’t stress this enough, High Heat is Non-Negotiable for the First Cook. You need almost smoking oil before those beans hit the surface. If the oil isn’t hot enough, the beans will immediately start releasing their water, and bam! Now you’re steaming them in bean juice instead of frying them in oil. That char marks the flavor, so crank that burner up!
Second, practice the Art of Patience During Blistering. Remember when I talked about not touching them for 2 to 3 minutes? That waiting period is crucial. It allows the natural sugars on the surface of the green beans to caramelize and develop those dark, savory spots we love. When Sarah Jane first perfected these over at Cookin’ Corner, she realized timing was everything. If she prodded them too soon, she’d lose the char, hence why we have to be patient just on that initial searing stage. It feels scary leaving them alone, but trust the process!
My final tip for keeping these chinese side dishes perfect is to drain the cooked beans well before tossing them with the sauce. They may look slightly wrinkly when you remove them, but they should not be dripping oil or water back into the wok. The sauce is just a quick glaze at the very end. Adding them back into a totally dry hot wok, just before the sauce and broth go in, prevents them from softening up too much when the final minute of cooking comes around. That quick toss is all they need to absorb the flavor!
Serving Suggestions for these chinese side dishes
Look, these garlic green beans are honestly never going to apologize for stealing the show. They are so punchy and flavorful that they make any standard weeknight meal feel like a fantastic Chinese feast. But if you are planning a full takeout spread right there in your own dining room, you need some mains to go alongside them!
Think balance! Since these beans are salty, garlicky, and have that wonderful smoky char, you want something slightly milder or perhaps protein-heavy to soak up some of that flavor. Here are my favorite ways to round out a dinner featuring the best chinese green beans with garlic sauce:
Pairing with Simple Rice and Noodles
You absolutely need a base layer to catch any stray bits of garlic sauce that might escape your beans. For me, nothing beats a really good, slightly oily, fried rice. Whip up a big batch of simple egg fried rice—you know, the classic kind—and let the savory juices from the beans mingle with the rice. That’s comfort food perfection!
If rice isn’t your thing, I love serving these alongside simple pan-tossed noodles. Think plain lo mein noodles tossed with just a splash of sesame oil and maybe a few shredded scallions. We want that noodle texture to contrast nicely with the snap of our wok fried green beans. Keep the noodle sauce light so the powerful flavor of the beans can really shine through!
Main Course Companions
When I make these blistered green beans, I usually try to pair them with a main dish that doesn’t have a heavy, overly sweet sauce already going on. Overloading on sauce is my biggest cooking pet peeve!
Try serving your garlic green beans next to:
- Simple Sesame Chicken: A lighter style of crispy chicken that relies more on texture than a thick, gloppy sauce.
- Soy-Glazed Tofu or Beef: Something savory that just needs a side veggie that packs a flavor punch but doesn’t overwhelm the main protein.
- Steamed Fish with Ginger and Scallions: If you’re keeping it really fresh and lighter, the bright flavor of steamed fish is beautiful next to these intense garlic sauce green beans.
Whatever you decide on, remember these are your star chinese side dishes. They don’t need a complicated partner—they just need a happy audience!
Storing and Reheating your garlic green beans
Okay, sometimes my family can’t finish the entire batch of garlic green beans (though honestly, I usually try!). The great news is that these chinese green beans with garlic sauce store surprisingly well, but you have to reheat them the right way. If you just microwave them, they’ll lose that beautiful char and end up limp and sad, and we have certainly worked too hard for mushy beans!
For storage, you want them completely cooled before they go into the fridge. Store any leftovers in a well-sealed, airtight container. If you keep them in the refrigerator, they should stay fresh and safe to eat for about three to four days. Any longer than that, and the texture really starts to suffer, no matter how you reheat them.
When it comes to reheating, my number one rule is: NO MICROWAVE! I know it’s tempting, but the steam pocket created in the microwave instantly softens the beans and ruins the blistered texture we worked so hard to achieve. If you want to get close to that fresh-from-the-wok flavor again, you absolutely must bring the pan back out—your trusty skillet or wok.
Here is my preferred method for bringing these amazing garlic sauce green beans back to life. I heat up about half a teaspoon of fresh vegetable oil in the skillet over medium-high heat—just enough to slick the pan. Once it’s hot, toss the cold beans in. Stir them constantly for just two or three minutes until they heat through and you start to see those little wrinkled edges crisp up again. They won’t be *exactly* how they were the first time, but they will be delightfully savory and still have a good bite!
If you happen to have an air fryer, that works wonderfully too! Spread the cooled beans in a single layer inside the basket and air fry them at about 350 degrees Fahrenheit for maybe 4 minutes. That dry heat really helps evaporate any moisture that built up in the fridge. Check out our < Privacy Policy page if you have any security questions about saving your recipe notes!
Frequently Asked Questions about chinese green beans with garlic sauce
Can I use fresh ginger or ginger powder in my garlic green beans?
Oh, I definitely recommend fresh ginger! You want that zesty, bright flavor that only comes from grating it fresh right before you toss it in the wok. Honestly, the difference is huge when you’re trying to nail that authentic restaurant taste. If you are in a total pinch and have absolutely no fresh ginger on hand, you *can* substitute with ground ginger, but you’ll need much less—maybe just a tiny pinch, like a quarter teaspoon—because the powder is far more concentrated. But please, use the fresh stuff if you can for the best garlic green beans experience!
How do I make this recipe spicier, like Sichuan green beans?
That’s a fantastic question! If you love that numbing, fiery kick you get from true Sichuan green beans, you can add it easily to this recipe without changing the core sauce structure. Remember how I mentioned adding chili flakes earlier? That’s your easiest route. Before you add your minced garlic, toss in about half a teaspoon of dried red chili flakes into that hot oil. Let them sizzle for just 10 seconds until they look toasted—don’t let them burn! This infuses the oil with heat right away. If you want a deeper heat, you can also add a drizzle of chili oil right on top when you are serving them up. It adds flavor and color!
What is the best way to store leftovers of this chinese side dish?
Storing leftovers of these chinese side dishes is simple, but reheating requires a little strategy if you want to keep any of that lovely texture! First, make sure they are fully cooled down. Then, put them into a small, airtight container. They are good in the fridge for up to four days. When you reheat them, skip the microwave! I advise throwing them back into a hot, dry skillet over medium-high heat for just a few minutes. This helps wake up the oil and lets any excess moisture evaporate, so you don’t end up with soggy chinese green beans the second day!
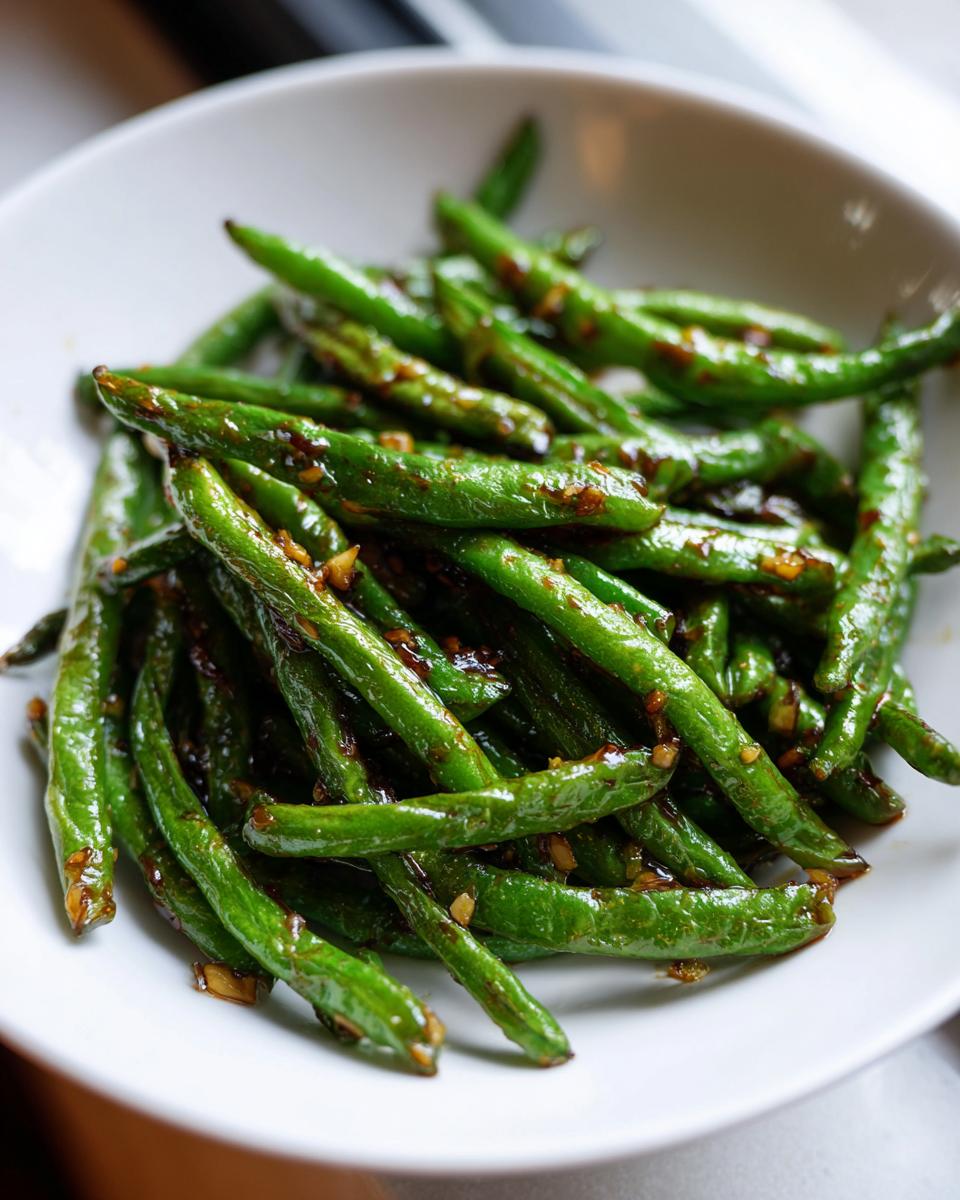
PrintGarlic Sauce Green Beans (Dry Fried Style)

Make restaurant-style blistered green beans quickly in a wok or skillet with a punchy garlic soy sauce.
- Prep Time: 10 min
- Cook Time: 10 min
- Total Time: 20 min
- Yield: 4 servings 1x
- Category: Side Dish
- Method: Stir-Frying
- Cuisine: Chinese
- Diet: Vegan
Ingredients
- 1 pound fresh green beans, trimmed
- 3 tablespoons vegetable oil, divided
- 4 cloves garlic, minced
- 1 teaspoon fresh ginger, minced
- 1 tablespoon soy sauce (or tamari for gluten-free)
- 1 teaspoon sugar
- 1/4 teaspoon ground white pepper
- 1 tablespoon water or vegetable broth
Instructions
- Heat 2 tablespoons of vegetable oil in a wok or large skillet over high heat until shimmering.
- Add the trimmed green beans to the hot oil in a single layer if possible. Cook without stirring for 2 to 3 minutes to allow the beans to blister and char slightly.
- Toss the beans and continue cooking for another 3 to 5 minutes until they are tender-crisp and have developed dark spots. Remove the beans from the wok and set them aside.
- Reduce the heat to medium. Add the remaining 1 tablespoon of oil to the wok.
- Add the minced garlic and ginger. Cook for about 30 seconds until fragrant, being careful not to burn the garlic.
- Return the green beans to the wok.
- In a small bowl, mix together the soy sauce, sugar, and white pepper. Pour this mixture over the beans.
- Add the water or vegetable broth. Toss everything quickly to coat the beans evenly with the sauce. Cook for 1 minute until the sauce thickens slightly.
- Remove from heat and serve immediately.
Notes
- For a spicier flavor, add 1/2 teaspoon of chili flakes or a dash of chili oil with the garlic.
- If you do not have a wok, use the largest, heaviest skillet you own and cook the beans in batches to maintain high heat for proper blistering.
- Tamari can replace soy sauce if you need a gluten-free option.
Nutrition
- Serving Size: 1/4 of recipe
- Calories: 120
- Sugar: 3
- Sodium: 350
- Fat: 9
- Saturated Fat: 1
- Unsaturated Fat: 8
- Trans Fat: 0
- Carbohydrates: 9
- Fiber: 4
- Protein: 3
- Cholesterol: 0