
There’s something truly magical that happens in the kitchen right before the big holiday meal, isn’t there? It’s not just the turkey cooking; it’s the symphony of side dishes getting their final touches. For me, nothing shouts ‘home’ louder than the aroma of roasting sage and butter floating up from the oven. If you’re tired of that suspiciously dry, crumbly stuffing from the box—and trust me, I’ve been there—then you’re ready for the game-changer. We’re making the absolute best homemade stuffing, period. This isn’t just about changing ingredients; it’s about bringing that soulful, comforting taste of the American kitchen right to your table. We focus on achieving that perfect contrast: a deeply moist, savory interior enveloped in a wonderfully crisp, golden top layer. This recipe has been perfected over years of holiday tables, and it proves that tradition, made with care, always tastes the best. Pair it with my creamy garlic mashed potatoes for the ultimate comfort food spread!
- Why This homemade stuffing Recipe Stands Apart
- Gathering Ingredients for the Best homemade stuffing
- Step-by-Step Instructions for Classic homemade stuffing
- Baking Your homemade stuffing for a Crisp Top
- Stuffing vs Dressing: Understanding the Difference
- Make Ahead stuffing and Alternative Cooking Methods
- Serving Suggestions for this Holiday stuffing Recipe
- Frequently Asked Questions About Classic Bread Stuffing
- Nutritional Estimates for Your homemade stuffing Serving
- Nutritional Estimates for Your homemade stuffing Serving
Why This homemade stuffing Recipe Stands Apart
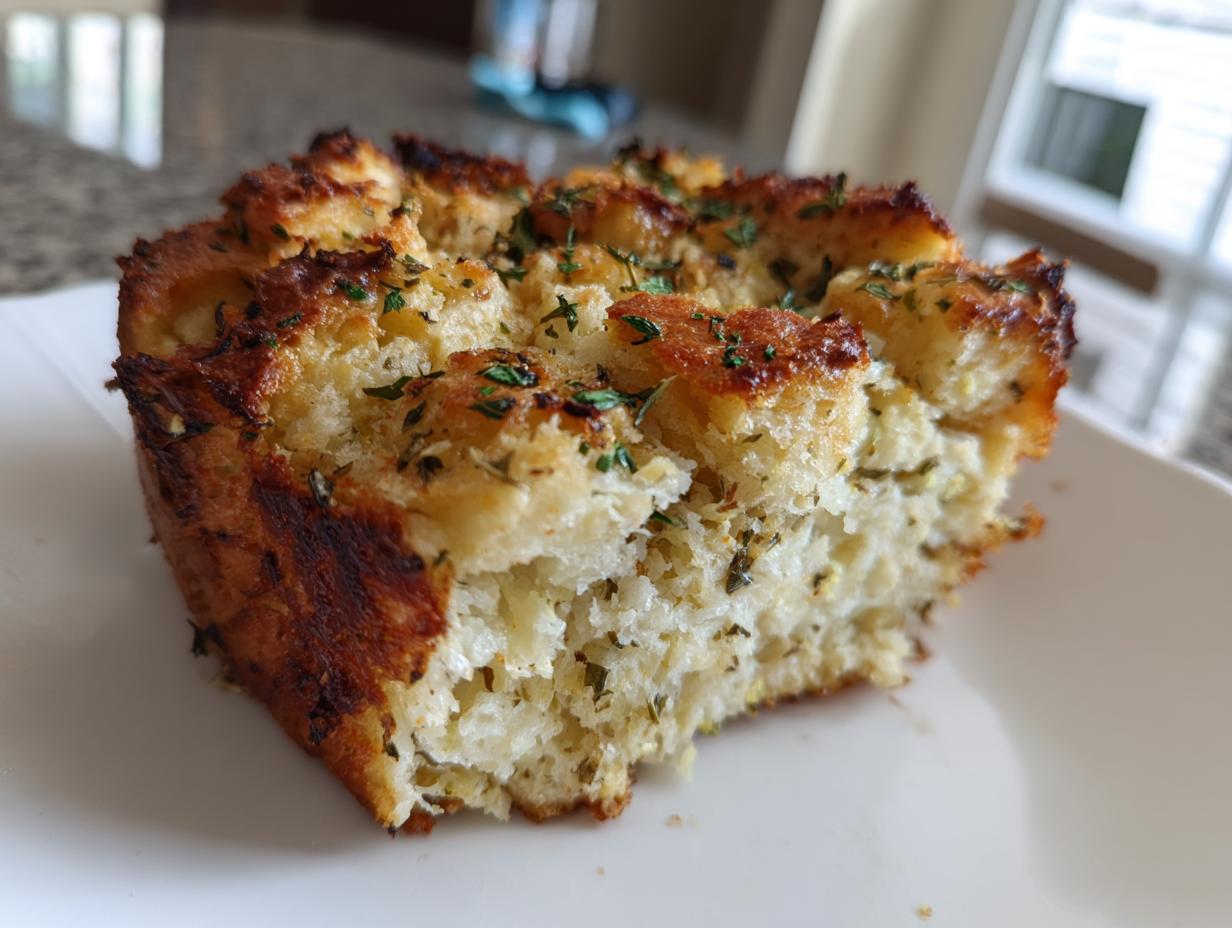
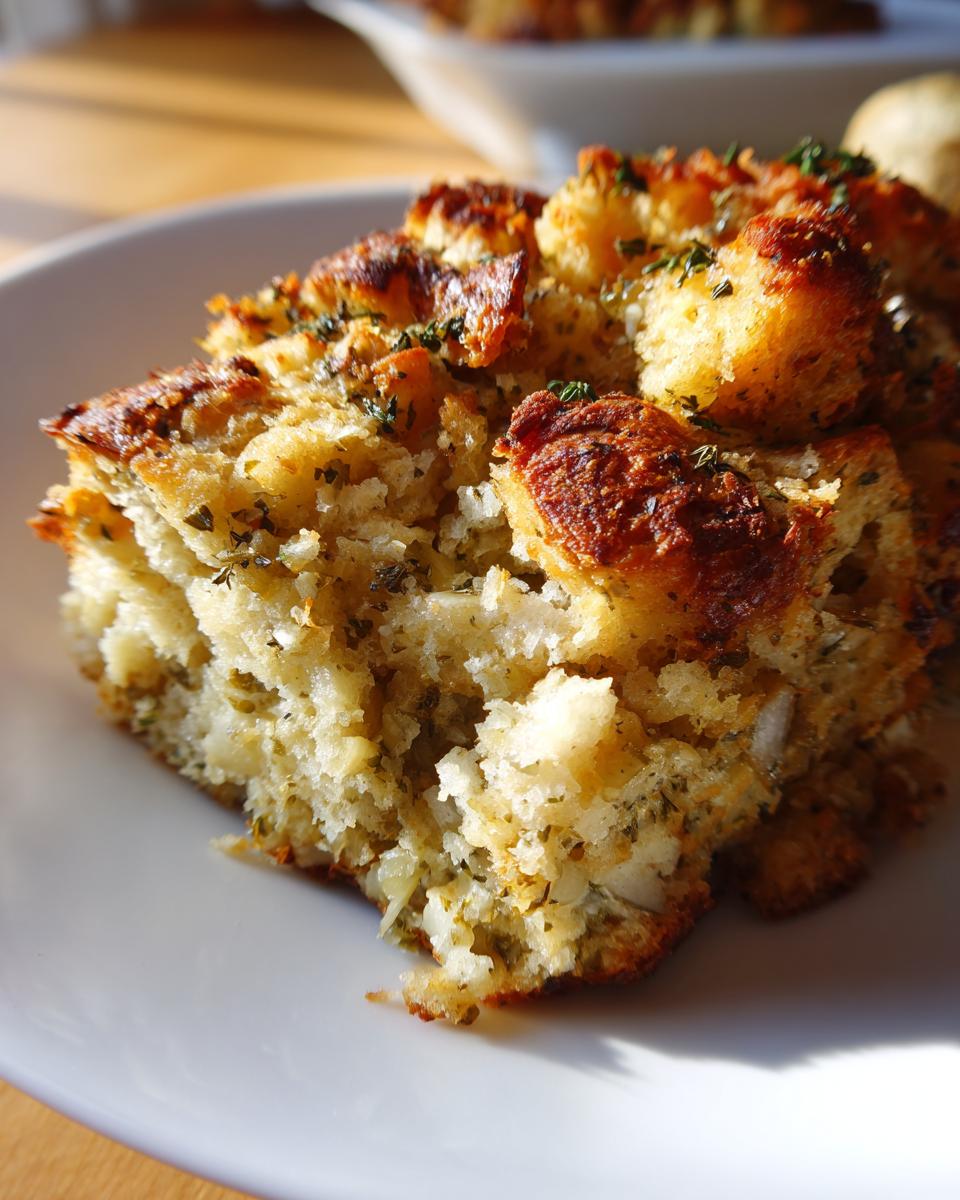
Honestly, ditching that blue box was the best thing I ever did for my holiday table. This isn’t just stuffing; it’s a statement—the best homemade side dish you can put out! The secret? It’s all about the texture dance happening in the oven. You get that wonderful, buttery richness throughout, ensuring the inside stays fluffy and drenched in broth, but the top? Oh, the top gets beautifully golden brown and just a little bit crunchy.
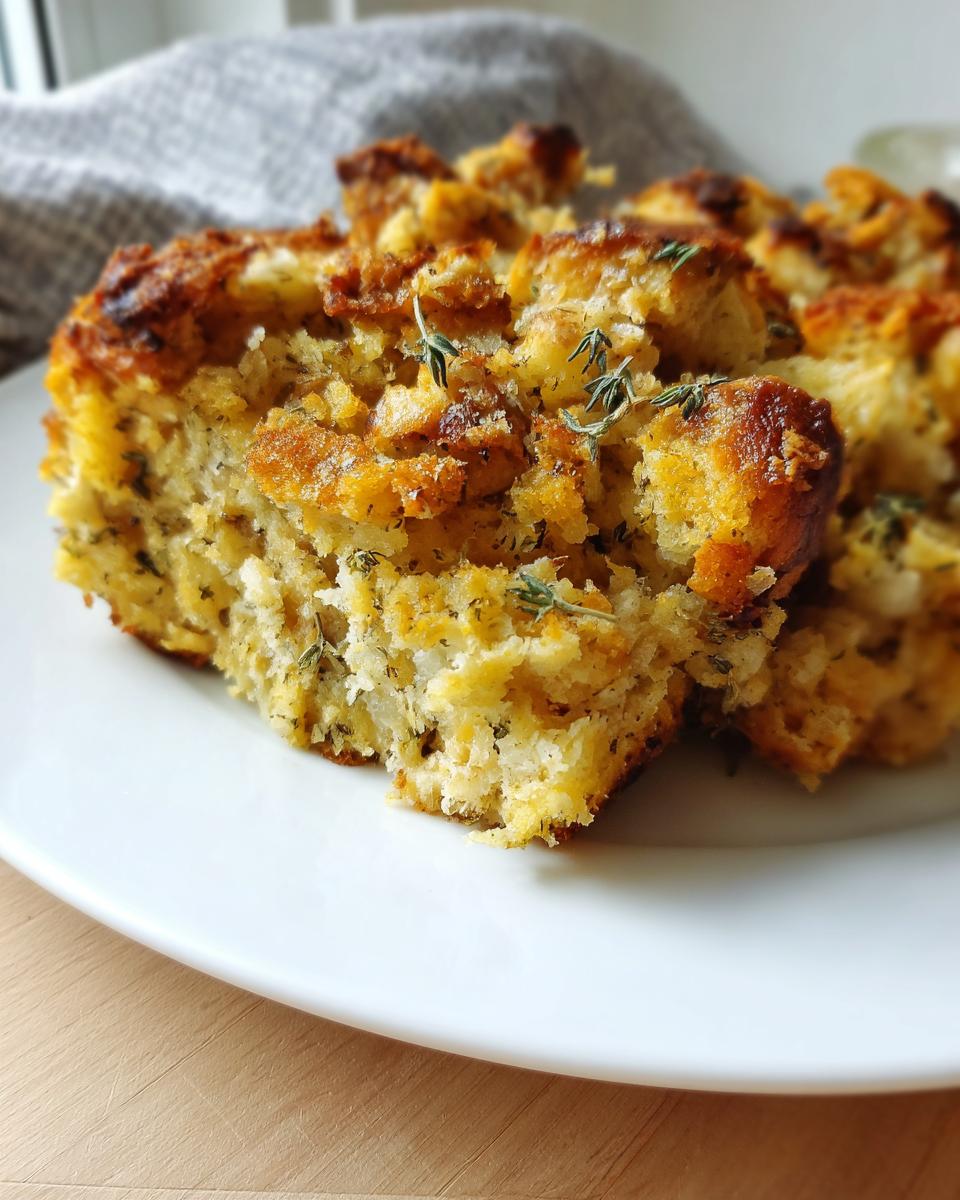
We skip those weird, dusty flavor packets every single time. Instead, we lean hard into fresh ingredients to nail that deep, complex savory herb stuffing flavor everybody remembers from childhood. It tastes bright, warm, and exactly like home should smell. If you’re looking to upgrade your roasted bird companion, this is the ticket. You can check out my recipe for classic cottage pie if you want another guaranteed winner!
Gathering Ingredients for the Best homemade stuffing
Okay, grabbing the right stuff is half the battle, especially when we want that rich, buttery stuffing recipe that melts in your mouth! This isn’t complicated, but you have to respect the process. Start with your bread; this is non-negotiable: you need day-old bread, cut into about 1-inch cubes. Stale cubes hold their shape when they soak up the liquid, which is crucial for texture later.
We’re loading up the flavor base here too. I use a full cup of butter—yes, a full cup!—to sauté two big, chopped yellow onions and four stalks of celery until they are sweet and tender. Don’t rush this part; those softened veggies are what infuse every single bite with sweetness rather than that sharp onion bite.
- 1 pound day-old bread, cut into 1-inch cubes
- 1 cup (2 sticks) unsalted butter
- 2 large yellow onions, chopped
- 4 celery stalks, chopped
- 4 cloves garlic, minced
- 1 tablespoon fresh rosemary, chopped
- 1 tablespoon fresh parsley, chopped
- 1 teaspoon dried sage
- 1 teaspoon poultry seasoning
- 1 teaspoon salt
- 1/2 teaspoon black pepper
- 2 cups chicken broth (or turkey broth)
- 2 large eggs, lightly beaten
Ingredient Notes and Substitutions for homemade stuffing
When it comes to the bread, please feel free to mix it up! I usually use a good quality sourdough if I can find it—it has a nice hint of tang. But plain white sandwich bread works perfectly fine, just make sure it’s truly dry. If you’re making this for a vegetarian holiday meal, you can use vegetable broth instead of chicken broth, no problem there, though it will taste slightly less savory. If you’re running to the pantry for other things later, remember my easy recipe for homemade chocolate syrup is a lifesaver!
The real kick comes from those fresh herbs. This is truly a stuffing with fresh herbs recipe because dried parsley just doesn’t have the same vibrant color or kick. If you’re out of fresh rosemary, you can substitute dried sage, but you’ll want to use about one-third of the amount suggested, maybe just a half teaspoon, because dried sage is intense!
Step-by-Step Instructions for Classic homemade stuffing
Now we get to the fun part! Making this easy traditional stuffing is less like following complicated directions and more like a comforting ritual. First things first: get your oven hot! We preheat it to 350°F while you get everything prepped. Grab your 9×13 inch baking dish and just give it a light buttering—we want the stuffing to release easily later, not stick like glue.
We move right into getting the bread ready. You don’t just dump bread into the casserole dish; we toast it first! I spread the cubes out on a baking sheet and pop them in for about 10 to 15 minutes. This is key, folks; we need them dry, but please don’t let them start browning! Dry cubes are sponges, and soggy cubes lead to mush.
Next up, the flavor bomb! Melt that butter in a big skillet over medium heat. Throw in your chopped onions and celery. You need to let these two cook until they start really softening up—that takes about 8 to 10 minutes. Once they smell sweet, toss in the garlic, rosemary, sage, parsley, and poultry seasoning. You only cook that for about a minute until you can really smell those herbs coming alive. Don’t burn the garlic, though, or it throws off the whole pot! If you haven’t seen my recipe for French onion potato bake, you are missing out on another great comfort side!
Time to combine the main players! In a big bowl, mix those dried bread cubes with the cooked veggies, salt, and pepper. Give it a gentle toss. Then, tackle the liquid: whisk your 2 large eggs lightly in a separate bowl and mix them with the broth. Slowly pour this all over the bread mixture. You want everything evenly moistened, but I mean *gently* toss it. Do not overmix! Then, it all goes into that buttered baking dish!
Drying the Bread: The First Step to Perfect homemade stuffing Texture
I know I mentioned this earlier, but I can’t stress it enough: Step 2 is where the magic starts for texture. If you skip baking those cubes for 10 to 15 minutes until they are just dry—almost like croutons you’d snack on—they will turn into a heavy paste when the broth hits. We are aiming for a stuffing that has integrity, that doesn’t collapse into itself. Think of the drying process as creating little fortified walls ready to absorb moisture without turning to mush later on. It’s what sets this apart from just soaking stale bread!
Achieving Moist stuffing Secrets: Mixing the Liquid
The real key to those moist stuffing secrets is in how you introduce the egg and broth. You see, the eggs are the binder helping everything hold together, but if you add them unevenly, some parts get weirdly eggy while others stay dry. Whisking the egg and broth together first makes sure that liquid kisses every single bread cube evenly when you pour it over. Remember that gentle toss? That keeps the air pockets we developed when drying the bread intact. If you overmix here, you’ll smash those pockets, and you end up with a dense brick instead of fluffy dressing.
Baking Your homemade stuffing for a Crisp Top
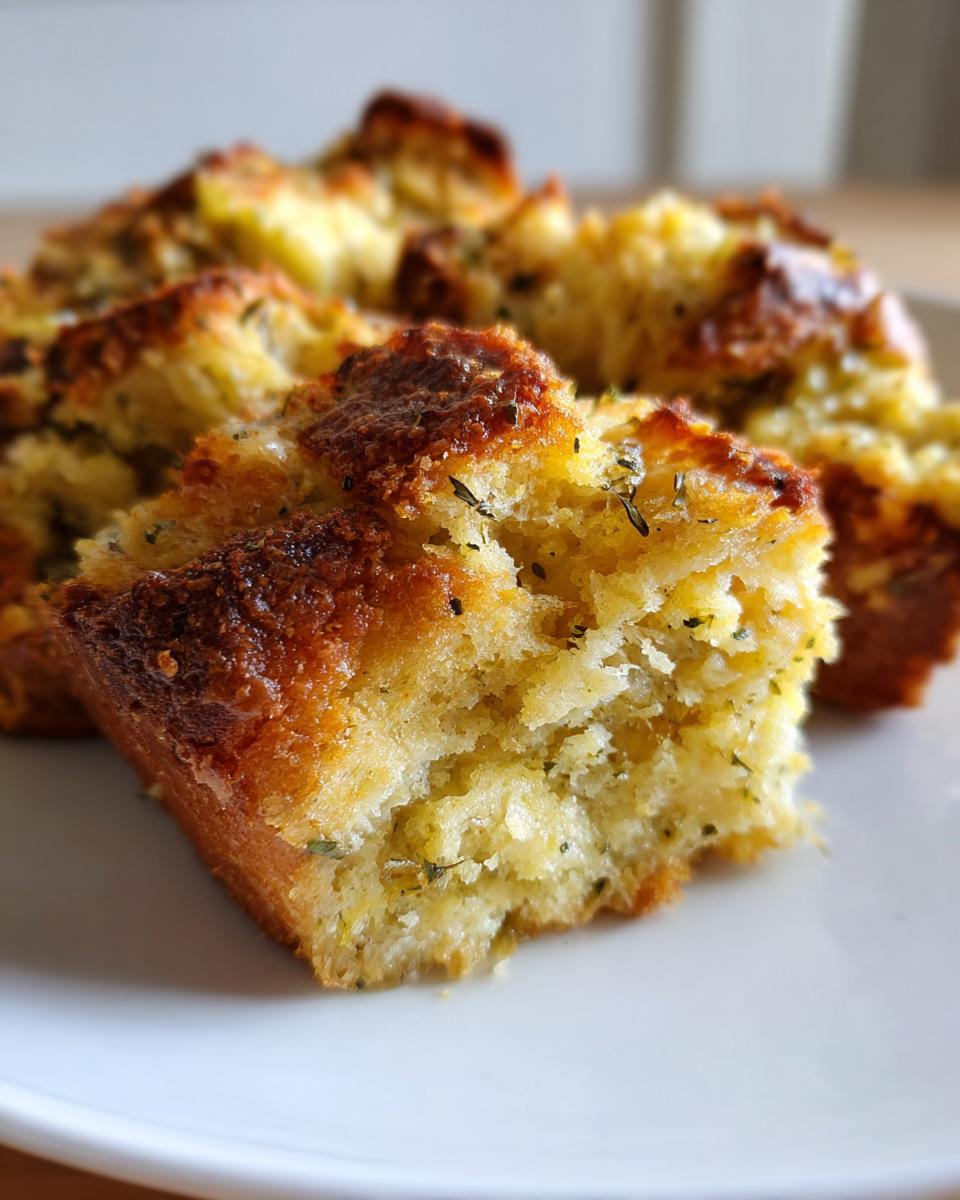
The moment of truth has arrived! Transfer that perfectly moistened mixture into your prepared 9×13 dish. Now, we bake it for about 30 to 40 minutes. The goal is simple: the inside must be heated all the way through, and the top needs that signature golden-brown crust that screams ‘holiday comfort food.’ Trust me on this next part—if you want that amazing texture contrast, pull the foil off (or bake it uncovered, depending on how long you decided to cover it) for the last 10 minutes.
That final uncovered blast of heat gives you those irresistible crispy edges we all want in our homemade stuffing. Once it’s beautifully browned, let it rest for 10 minutes before serving; it sets up nicely in that time. While it rests, you can certainly check out my recipe for oven-roasted potatoes—they go perfectly right alongside!
It’s a flavorful dish, and if you want to see another amazing take on a classic, check out this recipe I love: Homemade Stuffing Recipe linked here.
Stuffing vs Dressing: Understanding the Difference
I get this question every year around November, like clockwork! People get so worried about using the ‘right’ word, but honestly, for this recipe, it doesn’t matter one bit. The difference is purely geographical and where you cook it. If you bake this buttery mix right inside the turkey cavity, it’s stuffing. Simple as that.
But if you bake it separately in a dish, like we are doing here, it’s technically dressing. That’s the whole stuffing vs dressing debate settled! Because we bake ours separately for that amazing crispy top, I usually call it dressing, but who’s counting? It’s fantastic either way, especially if you set it up as an overnight bake using my cinnamon French toast casserole method as inspiration!
Make Ahead stuffing and Alternative Cooking Methods
Listen, holidays get hectic, and anything I can do ahead of time earns its spot in my kitchen. Good news: this is a fantastic make ahead stuffing recipe! You can completely mix everything together—bread, veggies, and the liquid—cover the dish tightly, and put it in the fridge for up to 24 hours. Just remember one simple adjustment:
- When you bake it straight from the fridge, it needs a little extra time. Add 10 to 15 minutes to the total baking time to ensure the center gets hot enough.
If you’re completely out of oven space, I know some people swear by the slow cooker. While I prefer the crispy texture you get baking on the stovetop, you *can* try making Crockpot stuffing. You’ll want to sauté the veggies first, then mix it all, and cook on low for about 3 to 4 hours. It won’t get that crispy top, but it will be incredibly moist! If you love prepping the night before, you might also adore my ultimate make-ahead sausage breakfast casserole—it saves so much morning chaos.
For those looking up different slow-cooker methods, I found someone who shares a great approach to that version here: Homemade Bread Stuffing – Quick and Easy Recipe.
Serving Suggestions for this Holiday stuffing Recipe
This savory, herby dish is the ultimate partner for almost any holiday feast. You absolutely need roast turkey alongside this stuffing, of course! But the real secret to a perfect plate is the gravy; make sure you’ve whipped up a silky batch to drizzle generously over both the turkey and this wonderfully moist bread!
Speaking of spreading the love, this stuffing tastes heavenly next to my creamy mashed potatoes. And for that necessary festive brightness, don’t forget my recipe for easy homemade cranberry sauce—it cuts through all that richness beautifully!
Frequently Asked Questions About Classic Bread Stuffing
I know jumping into a classic bread stuffing recipe from scratch can bring up a few last-minute worries, especially when you’re juggling everything for the holiday meal. That’s okay! If you have questions about making sure this side dish turns out perfectly savory and delicious, you’ve come to the right place. I’ve gathered the ones I’m asked most often right here. And hey, if you’re still looking for something equally comforting, my cottage pie recipe is always a huge hit!
Can I use dried herbs instead of fresh herbs in this stuffing?
Oh, absolutely you can, though I truly prefer the fresh stuff for flavor complexity! If you have to use dried herbs, remember that they are much more concentrated than their fresh counterparts. The rule of thumb I always go by is 1 teaspoon of dried herb equals about 1 tablespoon of fresh herb. So, for the rosemary and parsley we called for, you’ll want to use roughly 1 teaspoon of dried rosemary and 1 teaspoon of dried parsley. Since dried herbs don’t release as much moisture as fresh ones, you might find your stuffing is a tiny bit drier, so keep an eye on it while baking. Don’t start messing with the liquid, just check for doneness a little sooner.
What is the secret to moist stuffing secrets when baking ahead?
When you’re preparing the make ahead stuffing option, the most important thing is liquid absorption. Make sure every single bread cube has been evenly moistened before you cover it and chill it overnight. If you see dry spots after you’ve poured the broth mixture over, toss it gently one more time before covering. When you pull it out the next day to bake, it will be quite cold, which means it hasn’t had time to heat through properly. Because of this, you absolutely must add that extra 10 to 15 minutes to the baking time. A good tip for reheating specifically is to drizzle just a teeny splash of extra broth over the top before you cover it with foil for the first part of the bake—that guarantees you maintain those fantastic moist stuffing secrets we are aiming for!
If you want to compare notes on other traditional recipes, you can see how another great cook handles their version on this Best Ever Classic Stuffing Recipe.
Nutritional Estimates for Your homemade stuffing Serving
Now, I always say that when you’re making traditional comfort food like this, we aren’t strictly counting calories—we’re making memories! But I know some of you like a little ballpark idea of what’s in that delicious scoop. These estimates are based on the ingredients listed and what we typically use here at Cookin’ Corner for one generous 1-cup serving:
- Calories: 350
- Fat: 20g
- Carbohydrates: 35g
- Protein: 8g
This assumes you’re using standard baking methods and the amount of butter listed. As always, since commercial broth and bread brands vary so much, these are just estimates to give you a general idea. Enjoy every buttery, herby bite!
Nutritional Estimates for Your homemade stuffing Serving
Now, I always say that when you’re making traditional comfort food like this, we aren’t strictly counting calories—we’re making memories! But I know some of you like a little ballpark idea of what’s in that delicious scoop. These estimates are based on the ingredients listed and what we typically use here at Cookin’ Corner for one generous 1-cup serving:
- Calories: 350
- Fat: 20g
- Carbohydrates: 35g
- Protein: 8g
As always, since commercial broth and bread brands vary so much, these are just estimates to give you a general idea. If you’re looking for something lighter to round out the meal, you should totally try my kale salad with lemon parmesan dressing; it’s amazing how much flavor you can pack into greens!
PrintThe Best Homemade Herb Stuffing: Moist Interior and Crispy Top
Create a truly memorable holiday side dish with this classic homemade stuffing recipe. You achieve a perfectly moist interior and a wonderfully textured, slightly crisp top using fresh herbs and buttery bread.
- Prep Time: 20 min
- Cook Time: 45 min
- Total Time: 65 min
- Yield: 8 servings 1x
- Category: Side Dish
- Method: Baking
- Cuisine: American
- Diet: Vegetarian
Ingredients
- 1 pound day-old bread, cut into 1-inch cubes
- 1 cup (2 sticks) unsalted butter
- 2 large yellow onions, chopped
- 4 celery stalks, chopped
- 4 cloves garlic, minced
- 1 tablespoon fresh rosemary, chopped
- 1 tablespoon fresh parsley, chopped
- 1 teaspoon dried sage
- 1 teaspoon poultry seasoning
- 1 teaspoon salt
- 1/2 teaspoon black pepper
- 2 cups chicken broth (or turkey broth)
- 2 large eggs, lightly beaten
Instructions
- Preheat your oven to 350°F. Lightly butter a 9×13 inch baking dish.
- Spread the bread cubes in a single layer on a large baking sheet. Bake for 10 to 15 minutes until the cubes are dry but not browned. Set aside.
- In a large skillet over medium heat, melt the butter. Add the chopped onions and celery. Cook until softened, about 8 to 10 minutes.
- Add the minced garlic, fresh rosemary, fresh parsley, dried sage, and poultry seasoning to the skillet. Cook for 1 minute until fragrant.
- In a large bowl, combine the dried bread cubes, the cooked vegetable mixture, salt, and pepper. Toss gently to mix the flavors.
- In a separate bowl, whisk together the chicken broth and the lightly beaten eggs.
- Pour the broth and egg mixture evenly over the bread mixture. Toss carefully until the bread is evenly moistened. Do not overmix.
- Transfer the stuffing mixture to the prepared baking dish.
- Bake for 30 to 40 minutes, or until the top is golden brown and the center is heated through. For an extra crispy top, you can bake uncovered for the last 10 minutes.
- Let the stuffing rest for 10 minutes before serving this essential Thanksgiving side dish.
Notes
- For a make-ahead stuffing option, prepare the mixture completely, cover it, and refrigerate for up to 24 hours. Add an extra 10 to 15 minutes to the baking time if baking directly from the refrigerator.
- If you prefer a dressing cooked outside the bird, use 2 cups of broth. If you plan to stuff the turkey, reduce the broth to 1 1/2 cups to account for moisture absorbed during roasting.
- To achieve the best texture, use slightly stale bread. If your bread is fresh, dry it out in a low oven (250°F) for about 20 minutes first.
Nutrition
- Serving Size: 1 cup
- Calories: 350
- Sugar: 3
- Sodium: 450
- Fat: 20
- Saturated Fat: 11
- Unsaturated Fat: 9
- Trans Fat: 0
- Carbohydrates: 35
- Fiber: 2
- Protein: 8
- Cholesterol: 85