
Oh my goodness, there is just nothing that screams “cozy American autumn” louder than the sight of perfectly dipped, glistening caramel apples. If you’ve ever tried making them only to end up with a sweet, gooey mess that slides right off the apple the second it sets, then trust me, you are not alone! That’s why I spent years tweaking and testing my grandmother’s candy recipes to bring you what I truly believe is the BEST Foolproof Homemade Caramel Apples recipe out there. We honor that tradition of home cooking here at Cookin’ Corner, and this recipe is all about making sure your caramel actually sticks, every single time. Get ready for treats gorgeous enough for a gourmet display but easy enough for a weeknight fall craving!
- Why This is the Best Caramel Apple Recipe for Guaranteed Success
- Ingredients for Making Classic Caramel Apples
- Step-by-Step Instructions for Foolproof Caramel Apples
- Tips for Making Truly Gooey Caramel Apples
- Creative Caramel Apple Ideas Beyond the Classic Caramel Apples
- Storing Your Homemade Caramel Apples
- Frequently Asked Questions About Caramel Apples
- Nutritional Estimates for Classic Caramel Apples
- Share Your Caramel Apple Creations
Why This is the Best Caramel Apple Recipe for Guaranteed Success
If you’ve sworn off making homemade caramel apples because the candy always wants an early bath on the baking sheet, this is the recipe that’s going to win you back! I’ve tested this batch about a dozen times—and I mean *tested* it—to ensure we get those rich, unbelievably gooey caramel apples that stay put. That’s the promise of a truly foolproof caramel recipe, and it comes straight from time-honored methods we trust.
This isn’t pulled from a fancy culinary school; this is pure, reliable American home baking knowledge passed down. We take a lot of care making sure that the caramel reaches that perfect firm ball stage. When you combine the right cooking temperature with proper prep, you don’t just get good caramel apples; you get the Best Caramel Apple Recipe you’ll ever use. I even have a great guide on making simple caramel sauce if you want to double up on your candy-making skills!
The Secret to Perfectly Coated Apples: Prep Matters
Listen to me closely on this part, because more caramel disasters happen right here than anywhere else! Every single apple needs to look like it just came off the tree—not the grocery store shelf. Those shiny, gorgeous apples have a coating of wax, and the caramel absolutely hates it. It will slide right off! So, here’s my non-negotiable first step:
I grab a big bowl of warm water and pour in a splash of white vinegar—just a little splash to help cut through that waxy shield. We let those 12 Granny Smiths soak for about ten minutes. It loosens everything right up! Once they’re out, you have to dry them, and I mean *bone dry*. Lay them out on paper towels and pat every single one down. If there is any moisture left on that skin, that gorgeous caramel we worked so hard on won’t have anything to grab onto. Total commitment to dryness means guaranteed sticking!
Ingredients for Making Classic Caramel Apples
I think you’ll love how simple the caramel base is! We aren’t messing around with fussy ingredients here. It’s all about the basics cooked perfectly. Remember, stick to the measurements, and you’ll have that classic fall flavor we all crave.
- 12 medium Granny Smith apples (Seriously, only Granny Smith! They hold up best and taste amazing against the sweet caramel.)
- 12 wooden or paper lollipop sticks
- 1 cup (2 sticks) unsalted butter (Make sure it’s real **butter**!)
- 2 cups light corn syrup
- 1 (14 ounce) can sweetened condensed milk
- 2 cups granulated sugar
- 1 teaspoon vanilla extract
- 1/2 teaspoon salt
Gourmet Caramel Apple Toppings Selection
This is where you can really let your personality shine and turn these into show-stopping Gourmet Caramel Apples! Think about mixing textures—you need something crunchy to contrast that gooey center. Set all these out in shallow bowls before you even start cooking the caramel, because you’ll need to move fast.
- Chopped nuts (pecans are my favorite!)
- Mini chocolate chips
- Crushed pretzels (Salty and sweet is the best combo, ask me how I know!)
- Shredded coconut
Step-by-Step Instructions for Foolproof Caramel Apples
Alright, time to make some magic! This is where all that prep pays off. You want to line up a baking sheet with parchment paper—don’t use wax paper, it melts!—and have your toppings ready to go. Once the caramel hits that perfect temperature, you need to work quickly before it sets up on you, so be ready!
Cooking the Caramel to the Perfect Temperature
Get your heavy saucepan on medium heat. Toss in the butter, corn syrup, condensed milk, sugar, salt, and vanilla. Stir everything constantly until that sugar melts completely. Once it starts bubbling, stop stirring! Stirring after it boils can actually cause the caramel to get grainy, which we absolutely don’t want when aiming for perfect, Sticky Caramel Apples.
Now, plug in that candy thermometer—this is your best friend! You need to let it cook until it hits exactly 245 degrees Fahrenheit. That is the firm ball stage, the sweet spot that guarantees your caramel will cling beautifully. Don’t rush it, and don’t undercook it, or it’ll run right off the sides! When you hit 245°F, yank that pan off the heat instantly.
The Caramel Apple Dipping Technique and Setting
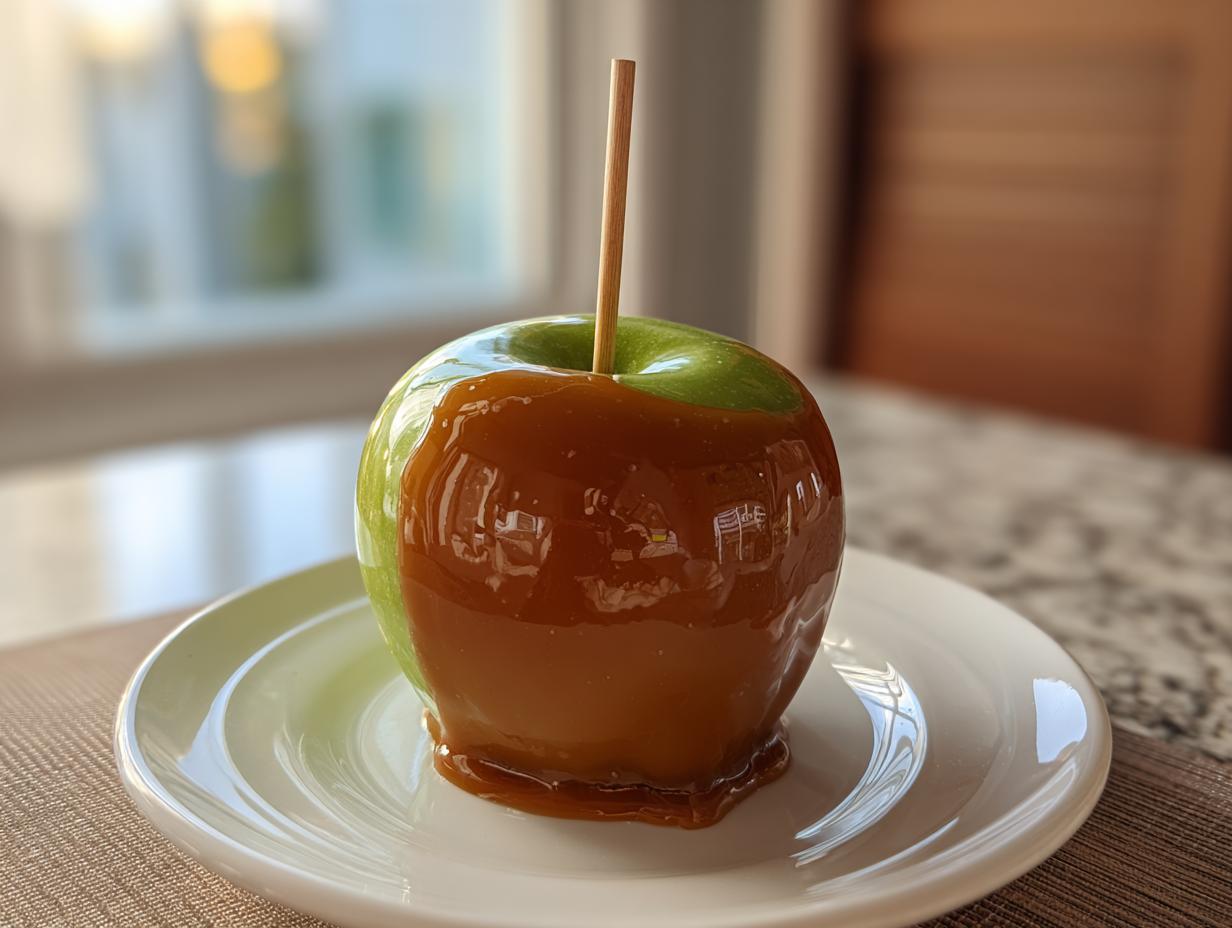
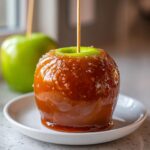
This is the big moment! You need to let that caramel cool for about 5 to 10 minutes after you take it off the burner. It will thicken up a touch—this small rest period is crucial for good coating. Tilt the saucepan slightly so the caramel gathers on one side. Dip an apple straight down, spinning it gently to get full coverage. Lift it out and hold it over the pot just long enough for the thick drips to slow down.

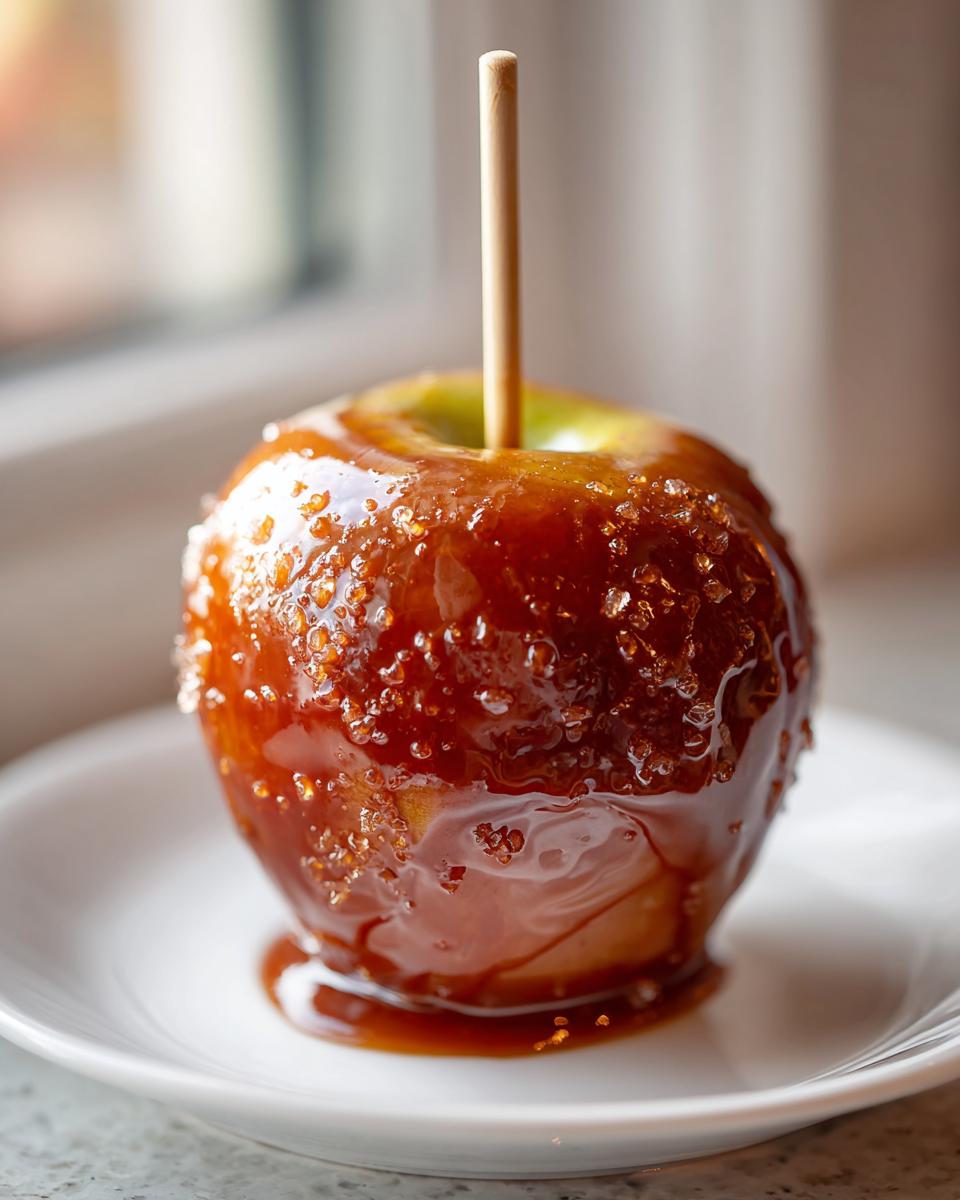
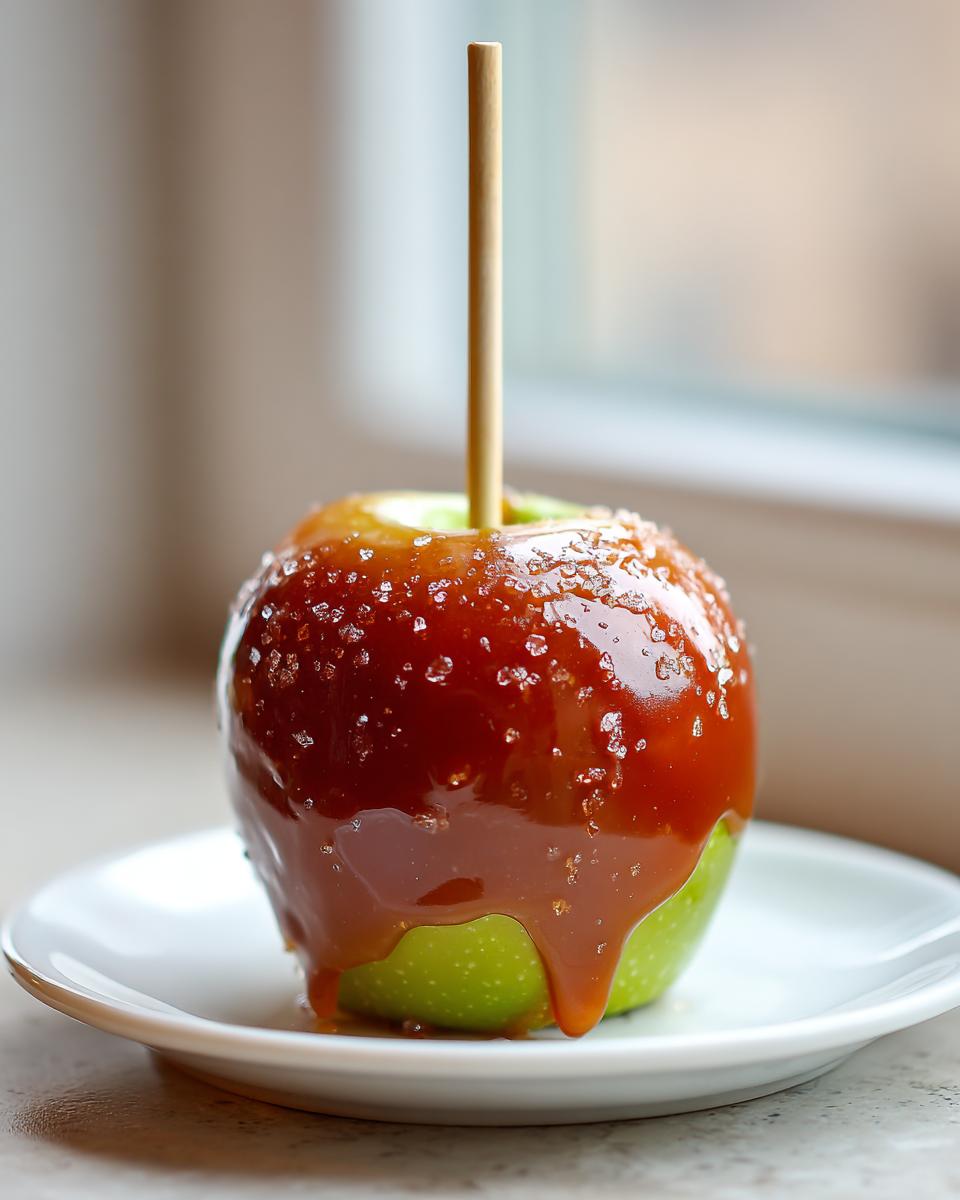
Right away, roll the bottom edge, or the whole thing if you’re feeling ambitious, in your toppings. If you wait even ten more seconds, those toppings won’t stick! I always recommend checking out great tips, like those found here on dipping technique. Once they look perfect, place them carefully on that parchment-lined sheet. They need about an hour at room temperature to fully set up, so hands off until then!
Tips for Making Truly Gooey Caramel Apples
Now that you’ve mastered the initial dip and the caramel isn’t running off, we can talk about taking these babies from good to absolutely unforgettable—hello, perfectly Gooey Caramel Apples! Handling caramel when it starts to cool can be tricky, but trust me, we have easy fixes for every potential hiccup. I always keep a tiny bit of heat handy just in case!
If you set the apples down and wait an hour, sometimes the caramel stiffens up a bit too much before you’ve finished the batch. Don’t panic and certainly don’t throw out the leftover caramel! If your pot gets too firm while you are still dipping, just put it back on the lowest setting on your stove for just a minute or two. Stir it gently—don’t whisk it—until it loosens up enough to coat the apples smoothly again. This little trick keeps your dipping station going strong!
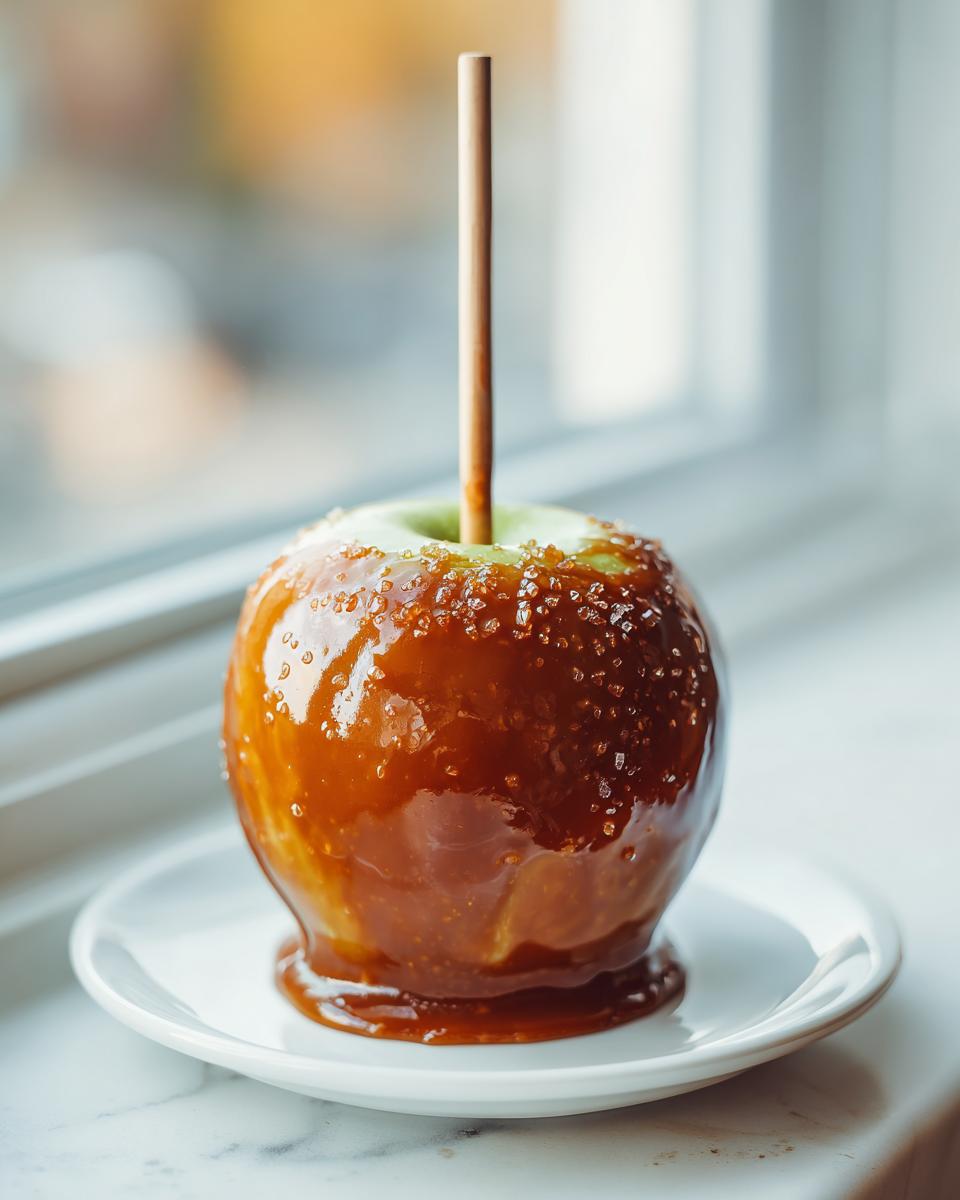
For those of you who want that really professional look, you absolutely have to try the double-dip. After your first caramelized layer has set completely (give it an hour, maybe more if your kitchen is warm), you can dip the apple again. This gives you this thick, almost textured coating that just screams “gourmet.” It’s excellent if you’re planning on drizzling chocolate on top later, too! For more inspiration on fun coatings, you can check out some great ideas over here.
And what about when you just can’t handle a whole apple? I totally get it! I often make Caramel Apple Slices when I need a quicker treat or for a party tray where people just want a quick bite. The hack is simple: cut your apple into thick wedges—like, half-inch thick slices—and insert a sturdy toothpick into the core end of each slice. Then, when you dip them, they set up much faster because of the surface area. Just be careful when dipping the slices; they are a little less stable than the whole apple!
Creative Caramel Apple Ideas Beyond the Classic Caramel Apples
We’ve nailed the classic version, which is wonderful for that nostalgic, fall-fair feel. But sometimes you want to go a little extra, right? We can definitely riff on this recipe to create some amazing Gourmet Caramel Apples that are perfect for gifts or just making an everyday dessert feel special. Don’t be afraid to experiment!
One of my favorite little secrets for a more complex, almost Old Fashioned Caramel Apples flavor is to add a pinch of flaky sea salt right into the caramel *after* it comes off the heat. It’s such a tiny addition, but that tiny pop of salt against the rich, buttery sweetness is just heaven. If you love chocolate, you simply must try drizzling melted dark chocolate over the top of the cooled caramel layer. I’ve experimented with different combinations, and a simple dark chocolate and sea salt topping is spectacular. You can see how I pair creamy richness with tartness in my chocolate raspberry cake, and the principle works here too!
If you want to see some truly stunning, photo-worthy examples of high-end decor for your apples, you absolutely need to check out the gorgeous designs shared by experts here. They really take it to the next level!
Making Caramel Apple Minis and Slices
Not everyone wants a giant, sticky apple to wrestle with, especially for big parties or when the little ones are trick-or-treating! Making smaller versions is one of my favorite Caramel Apple Ideas because they are so easy to manage and you can sample more topping combinations that way.
For Caramel Apple Minis, you select the smallest, perfectly shaped apples you can find and just use slightly shorter sticks. The dipping process is the same, but they take less time to set up. For the apple slices—which are fantastic for serving on a platter—I just cut the apple into thick wedges, maybe about one-sixth of the apple per piece. Make sure the cut sides are nice and flat. Then, instead of a stick inserted through the core, just stick a toothpick firmly into the skin side of the wedge. They dip beautifully and set up fast since the caramel layer is thinner. Since they set so quickly, you can even get fancy and dip them a second time if you want extra thickness!
Storing Your Homemade Caramel Apples
You’ve made the perfect batch of caramel apples, and now you’re wondering how to keep that beautiful sheen and gooey texture without turning them into a sticky mess! This is a tough one, because traditionally, anything that contains that much sugar and dairy doesn’t love the fridge, but sometimes you have leftovers after a party.
If you managed to eat them all within 24 hours, leave them on the counter! Seriously! Room temperature storage—cool, dry, and out of direct sunlight—is the absolute best environment for maintaining that original texture. They should last beautifully for a day this way. If you used *real* butter like we did in our no-fail caramel recipe, they are generally okay on the counter for a short time.
However, if you made a massive batch (or if your kitchen is just terribly warm), you might need the fridge to keep them from melting into puddles. The problem with the fridge, though, is that the cold temperature hardens the caramel instantly, which can ruin our goal of having Perfectly Coated Apples that are still tender. If you *must* use the fridge, you need to wrap each apple individually.
Take them one by one and wrap them tightly in plastic wrap, making sure the wrap seals around the stick, too. This keeps the cold air and any weird fridge smells out. When you want to eat one, pull it out about 30 to 45 minutes before serving. This gives the caramel time to soften up again, bringing back some of that lovely, gooey texture we worked so hard to achieve!
Frequently Asked Questions About Caramel Apples
Whenever I share my recipes, people always have the best questions, and when it comes to candy making, those questions are usually about fixing things that went maybe just a tiny bit wrong! I totally get it; cooking sugar is a science, but we’re treating it like a fun science project in the kitchen. Here are some things I hear most often when making these Homemade Caramel Apples.
What type of apple works best for caramel apples?
If you try to talk me into using a Red Delicious for these, I’m going to have to politely decline! The secret weapon here is the tartness that just cuts through the richness of the caramel. My absolute top pick, hands down, is the Granny Smith. They are firm—which you need so they don’t get mushy when you dip them—and their bright, tart flavor balances out all that sweet, gooey goodness we cooked up. It makes for the most satisfying bite!
Can I use store-bought caramels instead of making a No Fail Caramel Recipe?
Yes, you absolutely *can* take a shortcut, but I have to give you fair warning: homemade just tastes better! Our No Fail Caramel Recipe creates a depth of flavor that the pre-wrapped squares can’t quite match, and it’s usually much smoother. If you are in a pinch and using those caramels, you can’t just melt them straight; they need help. Melt them slowly—I mean *slowly*—over low heat. To get that nice flowing texture we want for dipping, stir in about two tablespoons of heavy cream or milk for every twelve wrapped caramels you melt. That little bit of fat helps them flow nicer, but it still won’t beat the real deal!
How do I prevent the caramel from becoming too hard?
This is all about temperature control, my friend, and it’s the key to avoiding rock-hard apples! If your caramel turned into a brittle toffee instead of staying soft and Gooey, you cooked it too long. Remember that magic number: 245 degrees Fahrenheit for the firm ball stage? If you go past 247°F, it’s going to set up too firm when it cools. Secondly, make sure after you pull the pot off the heat, you let it rest for those 5 to 10 minutes I mentioned. That slight cooling time lets it thicken just enough so it doesn’t run off the apple, but it stays soft enough to chew beautifully. If you are looking for quick fixes for dinner disasters, that’s on another page, but for candy, timing is everything!
Nutritional Estimates for Classic Caramel Apples
Now, I know when we are making beautiful, rich treats like these caramel apples, we aren’t exactly focusing on fiber counts! But just so you have a general idea of what you’re indulging in, I’ve put together some estimates based on one average apple dipped in our classic plain caramel.
Keep in mind these numbers can change wildly depending on how thick you dip, if you go for a double-dip (naughty!) or, most importantly, what kind of glorious toppings you decide to heap on top! If you sneak in some pretzels or nuts, that fat and carb count goes up, naturally! It’s just a guide, so please enjoy these without feeling guilty—they are a classic American fall dessert and deserve to be made!
- Serving Size: 1 apple
- Calories: Around 450 (This is if you skip the heavy toppings!)
- Sugar: Approximately 75g
- Fat: About 18g
- Saturated Fat: Roughly 11g
- Carbohydrates: Around 75g
- Protein: About 3g
- Sodium: About 150mg
Honestly, the best part of these nutrition facts is knowing that we used real butter and high-quality ingredients, which is always my focus here at Cookin’ Corner. The tartness of the Granny Smith really helps balance out the intensity of the sugar, making sure every bite is worth it!
Share Your Caramel Apple Creations
Well, you did it! You made it through the sticky business and emerged victorious with a batch of the most gorgeous, foolproof caramel apples a person could dream up. I feel like we’ve been in the kitchen together, and I’m sending you a virtual high-five right now!
Making these classics is such a joy, and the best part of running Cookin’ Corner is hearing from all of you who bring these old-school recipes to life in your own homes. So please, don’t be shy! I absolutely love hearing which topping combination you landed on. Did you go classic? Did you try the pretzels? Drop a comment below and let me know how many stars you’d give this recipe!
And if you managed to take a picture of your stunning, perfectly coated apples before they disappeared—I really hope you share them! Tag us on social media so I can see your incredible handiwork. Seeing your delicious results really keeps my own passion going, and reminds me why sharing these time-tested recipes is so important to our little corner of the internet. If you loved this trip down memory lane with candy making, you can always learn more about the heart behind our kitchen philosophy over on our About Page. Happy fall baking, everyone!
PrintThe BEST Foolproof Homemade Caramel Apples
Make rich, gooey caramel apples that actually stick with this no-fail recipe. This guide covers the technique for perfectly coated apples, ideal for fall festivities or gifts.
- Prep Time: 20 min
- Cook Time: 30 min
- Total Time: 50 min
- Yield: 12 apples 1x
- Category: Dessert
- Method: Stovetop Candy Making
- Cuisine: American
- Diet: Vegetarian
Ingredients
- 12 medium Granny Smith apples
- 12 wooden or paper lollipop sticks
- 1 cup (2 sticks) unsalted butter
- 2 cups light corn syrup
- 1 (14 ounce) can sweetened condensed milk
- 2 cups granulated sugar
- 1 teaspoon vanilla extract
- 1/2 teaspoon salt
- Optional Toppings: Chopped nuts, mini chocolate chips, crushed pretzels, shredded coconut
Instructions
- Prepare the apples: Wash the apples thoroughly to remove any wax coating. You can soak them in warm water with a splash of vinegar for 10 minutes, then dry them completely. Insert one stick firmly into the core of each apple.
- Prepare the dipping station: Line baking sheets with parchment paper or silicone mats. Set out your chosen toppings in shallow bowls.
- Make the caramel: In a large, heavy-bottomed saucepan, combine the butter, corn syrup, condensed milk, sugar, salt, and vanilla extract.
- Cook the caramel: Heat the mixture over medium heat, stirring constantly until the sugar dissolves. Stop stirring once it boils.
- Use a candy thermometer and continue to cook the mixture until it reaches 245 degrees Fahrenheit (firm ball stage). This usually takes 15 to 25 minutes after boiling begins.
- Remove the pan from the heat immediately once the temperature is reached. Let the caramel cool slightly, about 5 to 10 minutes, stirring occasionally to prevent a skin from forming. The caramel should thicken slightly.
- Dip the apples: Tilt the saucepan slightly. Dip one apple into the caramel, turning to coat completely. Lift the apple out and allow excess caramel to drip off.
- Coat with toppings: Immediately roll the bottom half or the entire apple in your desired toppings, or leave plain for classic caramel apples.
- Set the apples: Place the coated apples on the prepared baking sheets to cool and set completely, about 30 to 60 minutes at room temperature.
Notes
- For the caramel to stick, the apples must be completely dry and the caramel must cool slightly after cooking before dipping.
- If the caramel becomes too stiff while dipping, return the pan to low heat briefly to soften it, stirring gently.
- For a double-dipped look, allow the first layer of caramel to set completely before dipping a second time.
- To make caramel apple slices, cut the apples into thick wedges, insert toothpicks, and dip the slices.
Nutrition
- Serving Size: 1 apple
- Calories: 450
- Sugar: 75g
- Sodium: 150mg
- Fat: 18g
- Saturated Fat: 11g
- Unsaturated Fat: 7g
- Trans Fat: 0g
- Carbohydrates: 75g
- Fiber: 2g
- Protein: 3g
- Cholesterol: 55mg