
Oh, friends, if you love that snappy, salty, garlicky crunch that only a perfect pickle can deliver, wait until you try these! I’m Sarah Jane Thompson, and in my family kitchen, we believe a good preserving recipe should work hard for you. That’s why I’m sharing what I genuinely believe is the best dilly bean recipe out there. You get the best of both worlds here: instructions for unbelievably crisp, quick refrigerator dilly beans you can eat tomorrow, *and* the reliable, safe steps for water bath canning so you can enjoy that garden bounty all year long. Trust me, these flavorful dilly beans will be your new favorite tangy vegetable snack. If you love crisp flavors, you might also want to check out my recipe for easy, crispy Bang Bang Shrimp!
- Why This Is the Best Dilly Beans Recipe for Preserving Summer Green Beans
- Gathering Ingredients for Perfect Dilly Beans
- How to Make Dilly Beans: Step-by-Step Instructions
- Expert Tips for Perfect Dilly Beans Every Time
- Serving Suggestions for Tangy Vegetable Snacks
- Storage and Reheating Instructions for Homemade Dilly Beans
- Frequently Asked Questions About Dilly Beans
- Share Your Homemade Dilly Beans Experience
- Estimated Nutritional Data for Dilly Beans
Why This Is the Best Dilly Beans Recipe for Preserving Summer Green Beans
When I set out to perfect my dilly beans—and believe me, that took a few tries!—I had two non-negotiables. First, they had to taste bright, tangy, and authentically seasoned with garlic and dill. Second, they absolutely *had* to stay crunchy! If you’re serious about preserving summer green beans, you need reliability.
This is honestly the best dilly bean recipe because it keeps things simple while giving you options. You get that perfect flavor profile whether you’re making a small batch for the fridge or processing jars for the pantry.
- The bright, zesty brine gets deep into every bean snap.
- It covers both quick refrigerator pickles *and* shelf-stable canning.
- It uses simple, easy-to-find ingredients for amazing results.
If you want something else reliably crispy later, check out my homemade corn dogs—different food, same crunchy satisfaction!
Crunch Factor: Achieving Crunchy Pickled Green Beans Every Time
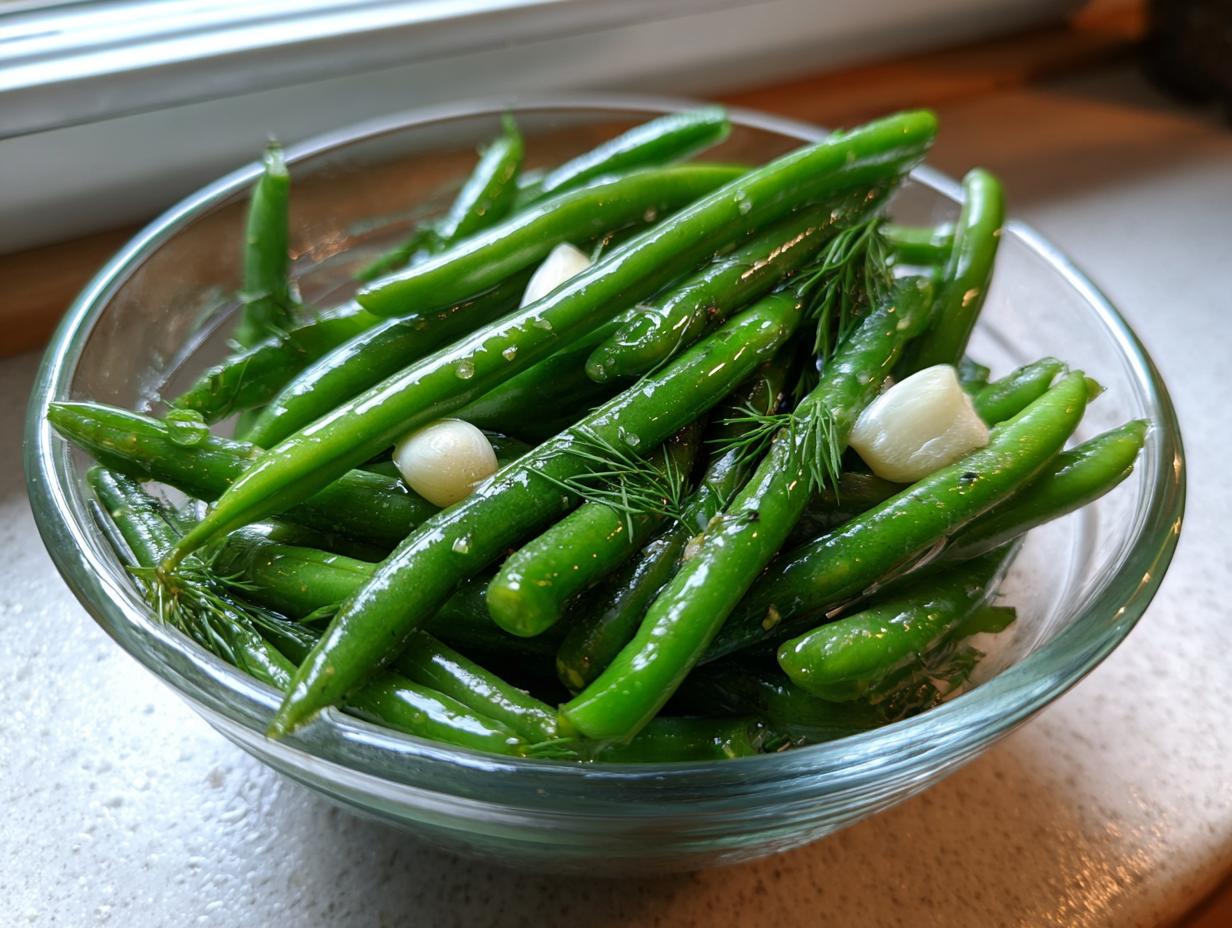
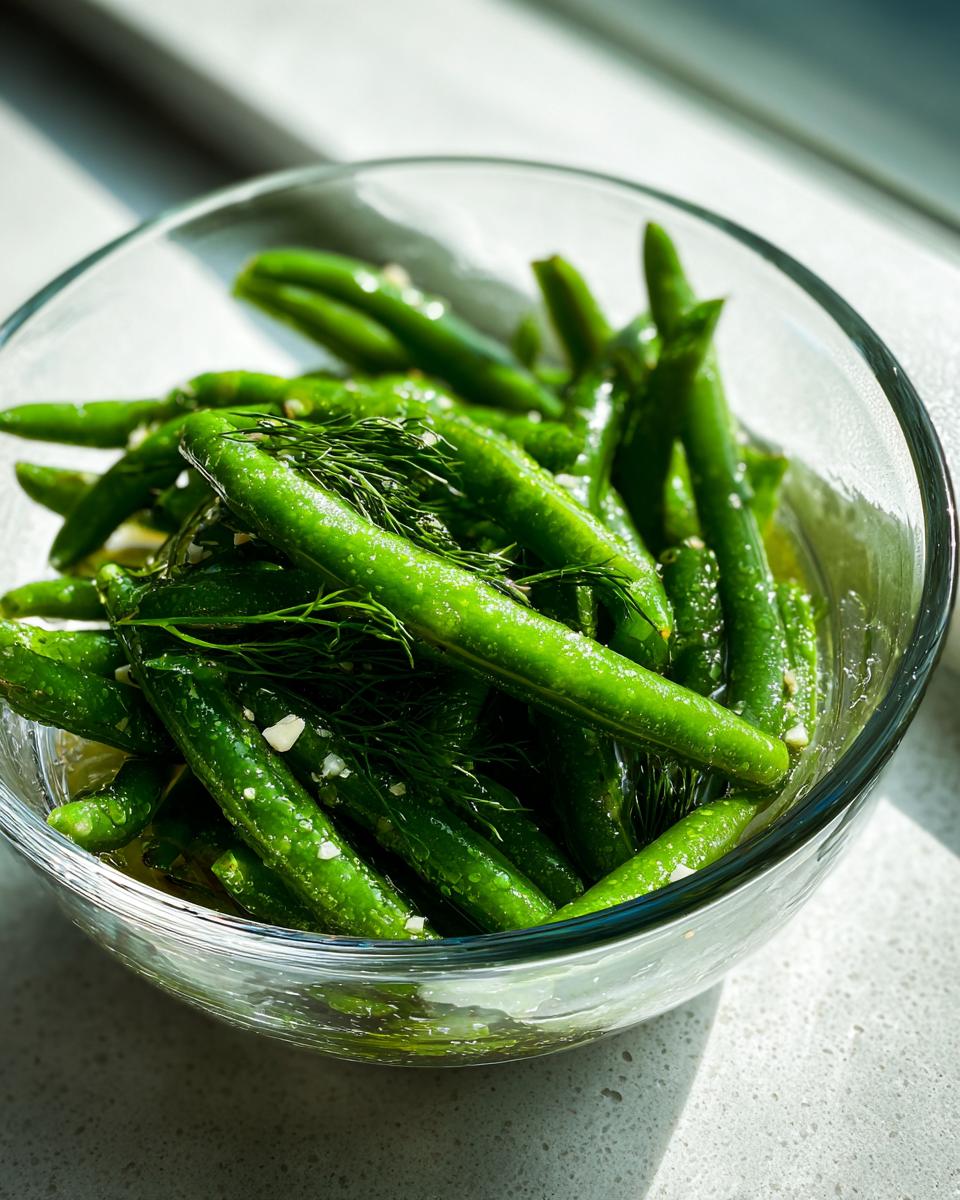
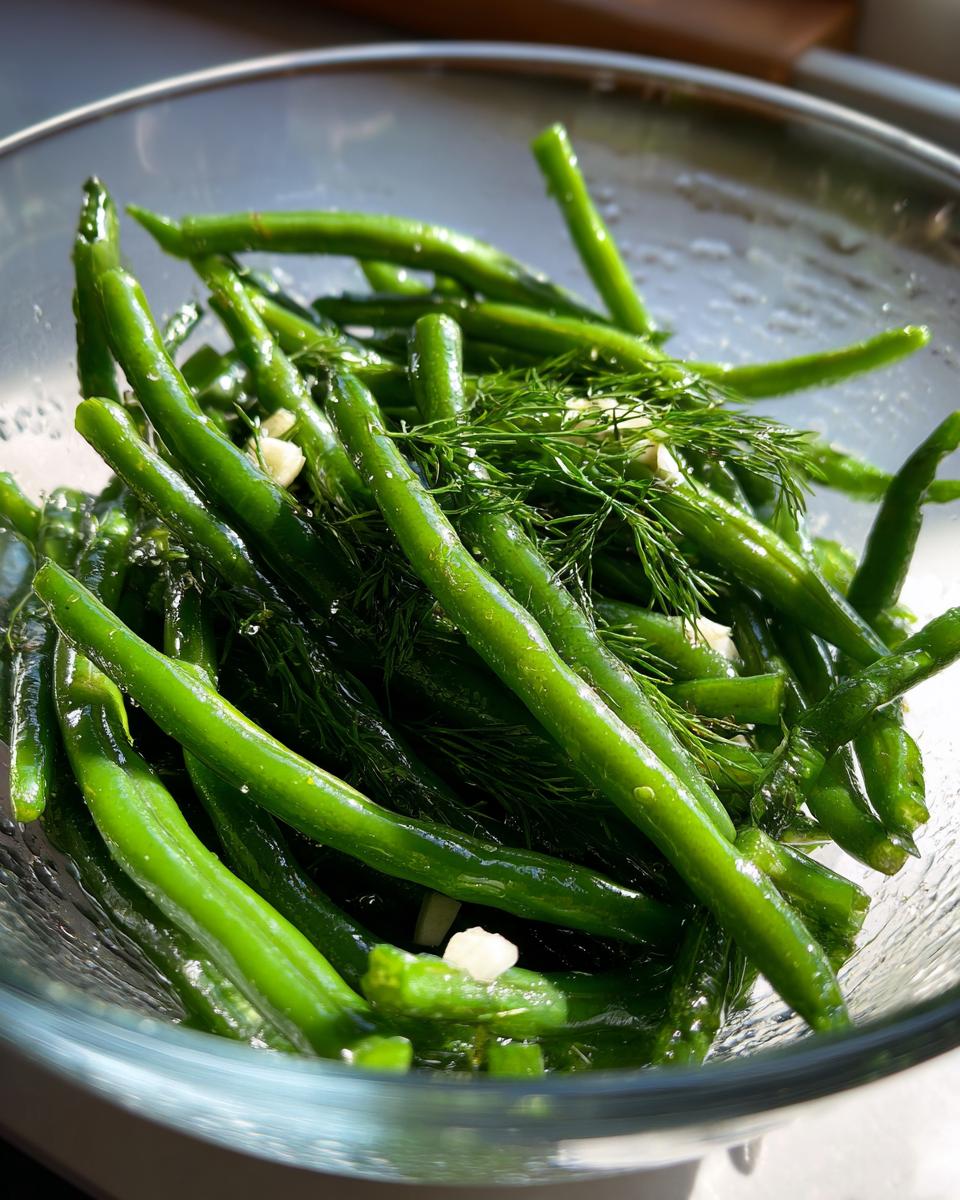
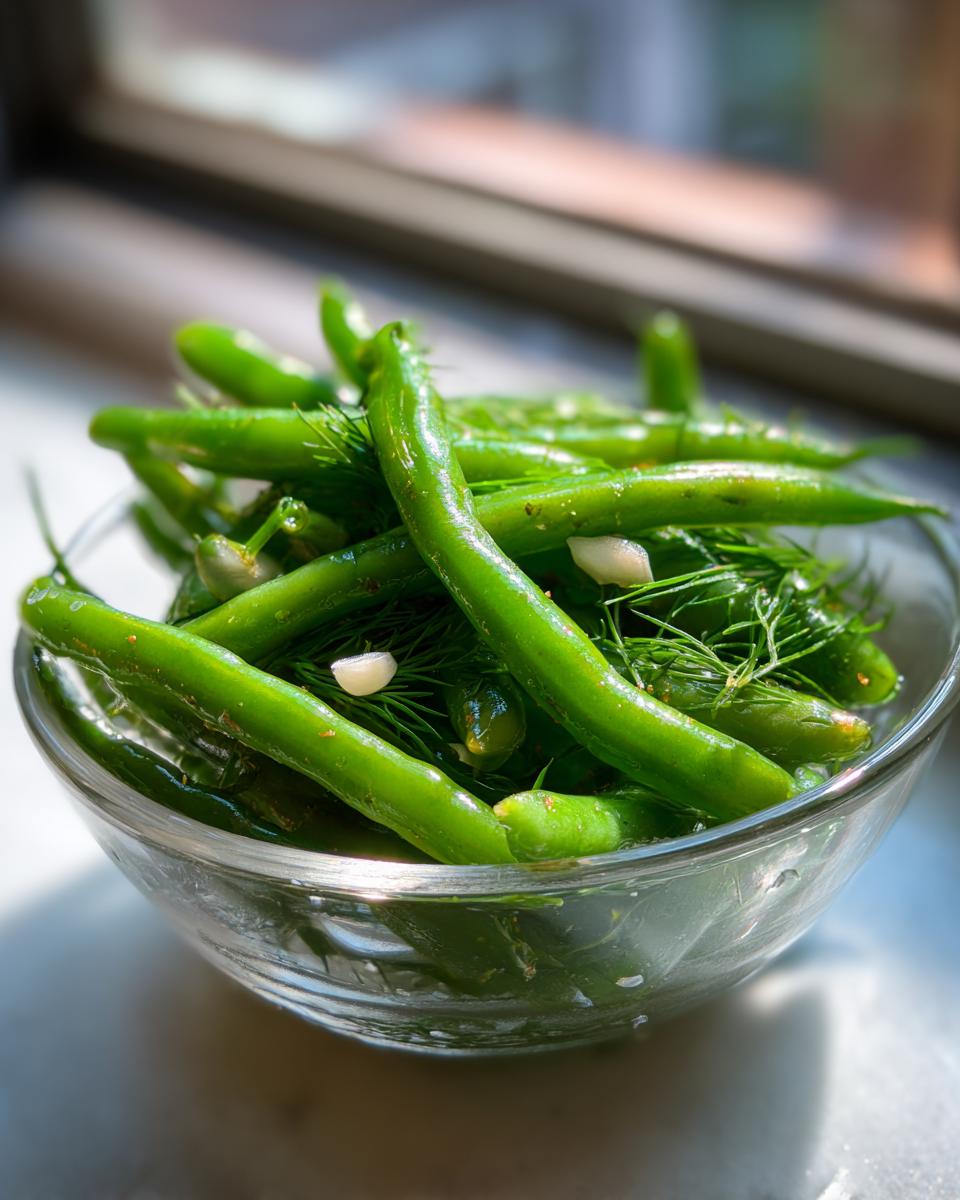
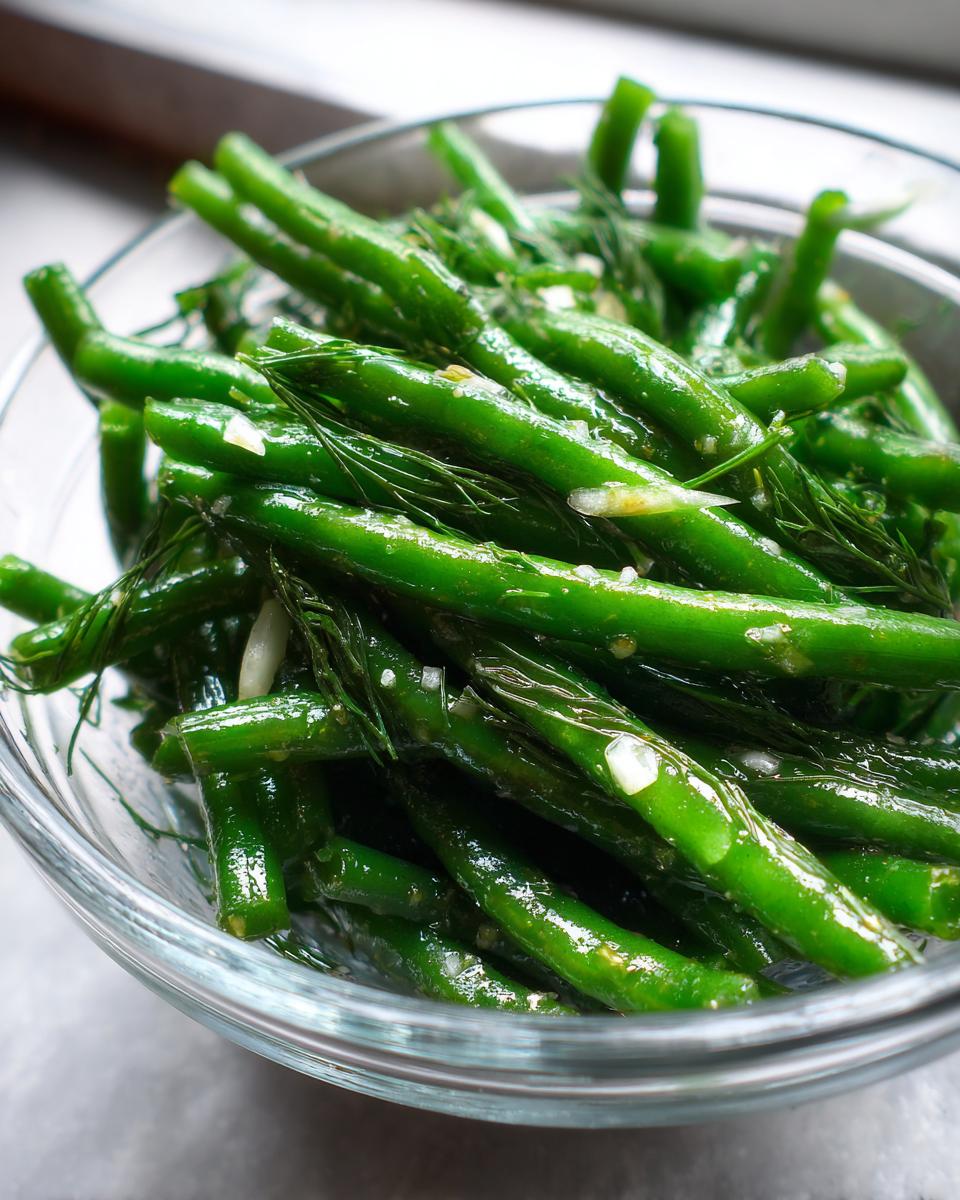
Listen, soggy pickles are a crime against summer vegetables. To get those delightfully crunchy pickled green beans that people fight over, the secret starts with the bean itself. You must use very fresh, young green beans. If they look limp or dull at the store, leave them behind!
Also, we don’t cook the beans first—we pack them raw into the jars. The hot vinegar brine shocks them just enough to set the texture beautifully without making them soft. Don’t worry, we’ll talk more about bean selection in the tips section, but know that freshness is key here!
Gathering Ingredients for Perfect Dilly Beans
When you’re ready to start, make sure your station is set up because the prep moves fast once you get going. We need good, firm green beans and all our flavor boosters ready to go. Remember, for the best results, you’ll need exactly 3 pounds of fresh green beans, and yes, you absolutely need to trim those ends off first!
The brine is simple—just vinegar, water, and pickling salt. It’s important to have your garlic cloves peeled and halved so they get friendly with the brine during the pickling process. Seriously, having everything measured out makes the whole assembly process so much smoother. If you need a great dip to serve alongside these pickles later, you should check out my French Onion Dip from Scratch recipe!
Ingredient Notes and Substitutions for Your Garlic Dill Beans Recipe
Let’s talk flavor keepers! If you have fresh dill heads from your garden, use them—they are wonderful. But if you only have the dried seed, that works just fine for our garlic dill beans recipe. If you want to crank up the heat and make those famous spicy dilly beans readers always ask about, just toss in a few extra red pepper flakes, or even a thin slice of jalapeño in each jar.
One thing you cannot substitute, however, is the vinegar! It needs to be 5% acidity white vinegar. Anything less won’t be strong enough to safely pickle your beans, and we don’t want any funny business in our jars. Safety first, flavor always!
How to Make Dilly Beans: Step-by-Step Instructions
Alright, this is where the real magic happens! Whether you’re planning for a short wait or long-term storage, the first steps are about getting those jars clean and ready. I always have my canning jars hot and ready to go before I even think about boiling the brine—it saves so much time! Remember that beautiful, zesty brine we talked about? We need to get that brewed up perfectly.
Preparing the Vinegar Brine Green Beans Base
Grab a saucepan that’s good quality—nothing reactive like old aluminum, please! We’re combining the vinegar, water, and that essential pickling salt. Bring that mixture up to a rolling boil, and you have to stir until every grain of salt disappears. If the salt doesn’t dissolve, your brine isn’t right, and that affects everything! Once it’s boiling nicely, it’s ready to pour.
Water Bath Canning for Long-Term Dilly Beans Canning
This part requires a little attention, but if you follow these safety steps, you’ll be rewarded! Pack your raw beans tightly into those hot jars—we need 1 inch of headspace here for reliable easy dilly beans canning. Pour that super-hot brine over the top carefully! Wipe those jar rims down until they squeak—no stickiness allowed—center the lids, and screw those bands fingertip tight. Then, they go into the canner for a full 10 minutes of processing time. Once they are processed, turn the heat off, wait 5 minutes, and lift them out carefully to cool on a towel. Do not peek or touch them until they’ve settled for 24 hours!
Making Refrigerator Dilly Beans for Quick Pickle Green Beans
If you can’t wait a month for pickles (and who can blame you?), the refrigerator route is so much fun! The packing is the same with your garlic and dill, but keep your headspace smaller—just 1/2 inch above the brine. You still need that boiling hot brine, but once the jar is sealed and wiped down, just let it cool on the counter. Pop those refrigerator dilly beans into your fridge as soon as they are cool enough to handle. Honestly, they are *okay* after 24 hours, but oh my goodness, they are incredible after a full week of soaking up that garlicky goodness!
If you happen to have some leftover roasted chicken, try it alongside some juicy, crispy roasted chicken. And when you’re ready for a cheesy comfort meal, my creamy tortilla soup is amazing!
For more insight into old-fashioned preserving methods, I always find inspiration from the wonderful resources out there, like this piece on Sandy Oliver’s Dilly Beans.
Expert Tips for Perfect Dilly Beans Every Time
Now that you have the recipe down, let’s talk about leveling up, because every home cook knows the secret is in the tweaks! You absolutely want those beans to be crisp like a fresh snap, not floppy like sad leftovers. The absolute best tip I can give you for that wonderful texture, especially if you made the canned version, is how you handle the jars after processing. Let them cool completely, undisturbed, on a towel-lined counter. Don’t mess with them for a full day!
If you’re looking for a side that pairs well with just about anything—maybe crispy potatoes from my air fryer wedge recipe?—you need to nail the flavor profile.
Adjusting Spice Levels in Your Dilly Beans Recipe
If you’re like me and love a little kick in your snack line-up, making genuinely spicy dilly beans is easy! We already added the red pepper flakes in the ingredient list, but if you want them truly fire, don’t be shy. You can double the flakes, or better yet, slice up a fresh jalapeño—seeds and all—and tuck a few slices right into the jar before adding the brine. Remember what I said about flavor boosters? Spices are yours to play with, so taste your brine slightly before pouring it, and adjust the heat level until it makes you smile!
Serving Suggestions for Tangy Vegetable Snacks
Now that you have jars full of these amazing, snappy tangy vegetable snacks, just eating them straight out of the jar is definitely an option—I know I do it all the time when no one is looking! But these are so versatile, you should definitely try incorporating them!
They are fantastic chopped up and tossed into potato salad for a bright kick instead of regular pickles. Or, use a few whole ones as a garnish on top of my air fryer salmon for an unexpected contrast. Honestly, they cut through the richness of dishes perfectly. Try setting them out alongside my creamy white chicken enchiladas; it’s an unexpected but delicious pairing!
Storage and Reheating Instructions for Homemade Dilly Beans
Storing these beauties correctly depends entirely on how you made them, which is an important distinction! If you made the quick refrigerator dilly beans, keep those jars sealed up tight in the cold section of your fridge. They stay crisp and delicious for about 4 to 6 weeks if you dig in frequently!
Now, for the canned ones? Those are shelf-stable, which is fantastic! Store your sealed, un-opened jars in a cool, dark pantry. Once you open a jar of canned dilly beans, though, treat it just like the refrigerator batch—must be kept cold. And please, skip the reheating! These are meant to be crisp and refreshing straight from the cold. Warming them up just ruins that wonderful snap we worked so hard to achieve.
Frequently Asked Questions About Dilly Beans
It always amazes me how many questions pop up once people start making their first batch of these tangy treats! That’s why I love seeing your results. Here are a few things folks often ask me about dill pickled green beans and the process of figuring out how to make dilly beans perfectly.
Can I use fresh dill instead of dried dill seed in my dilly beans recipe?
Absolutely, you can! Fresh herbs always bring a little extra bright flavor to any pickling project. If you look back at the ingredients, I mentioned using fresh dill heads if you have them. If you use fresh fronds instead of the dried seed, you’ll likely need about three times the volume. You want a nice little bouquet in there to really perfume the brine. Don’t be shy with the fresh dill!
Why are my refrigerator dilly beans not crunchy?
Oh, that’s the million-dollar question, isn’t it? Usually, if those refrigerator dilly beans go limp, it points back to the beans themselves—they weren’t super fresh, or maybe they sat around too long after picking before going into the jar. A secondary cause could be packing them too loosely. You want to really settle those beans in there so the brine has to push them into place, not just slosh around them! If you are new to this, make sure to check out my step-by-step guide on canning green beans for beginners for general prep tips.
I always want to give credit where credit is due when it comes to tried-and-true methods, and if you are looking for extra canning depth, I sometimes refer back to the reliable guides over at Healthy Canning.
Share Your Homemade Dilly Beans Experience
Look, this recipe is straight from my heart and kitchen to yours! Making these dill pickled green beans is such a joyful way to use up the best of the summer harvest. I truly hope they bring that same tangy crunch to your snacking routine that they bring to mine.
If you give this recipe a try—whether you went for the quick refrigerator batch or followed the water bath canning steps—please come back and tell me how it went! Drop a rating below so others know how much you loved them. I love hearing about your success stories. Did you make them extra spicy? Did you use fresh dill heads?
Tell me everything in the comments! And if you’re already planning your next batch because you ran out too fast (it happens!), check out my collection of easy dinner ideas for some weeknight inspiration!
Estimated Nutritional Data for Dilly Beans
Now, I know some folks watch the numbers closer than others, and that’s perfectly fine! I always advise people to remember that because we are mainly using vinegar, water, and fresh vegetables, these dilly beans are wonderfully light. They are a fantastic, low-calorie way to enjoy a savory and tangy vegetable snack.
Please keep in mind that these are just estimates based on the standard recipe breakdown—the final sodium might shift slightly depending on how much salt you use in your brine, and if you add spicy peppers, things change again! But generally speaking, these numbers represent just how perfectly light these pickles are:
- Serving Size: About 1 bean (This is tough, I usually just grab a handful!)
- Calories: ~5
- Total Fat: Less than 0.1g (practically nothing!)
- Sodium: ~150mg (Remember, this is the trade-off for that tangy pickle flavor!)
- Carbohydrates: ~1.2g
- Fiber: ~0.5g
- Sugar: Only about 0.1g—all natural sugars from the beans!
- Protein: ~0.2g
See? Super lean snacking! It’s why I encourage everyone who tries this recipe to feel good about making big batches. You’re adding flavor to your plate without adding heavy anything else!
PrintCrispy & Tangy Dilly Beans: Easy Refrigerator and Canning Recipe
Learn how to make addictive, crunchy dilly beans using fresh green beans, dill, and garlic. This guide provides instructions for both quick refrigerator pickles and safe water bath canning for long-term storage.
- Prep Time: 25 min
- Cook Time: 15 min
- Total Time: 40 min
- Yield: 4 pints 1x
- Category: Side Dish
- Method: Pickling (Water Bath Canning or Refrigerator)
- Cuisine: American
- Diet: Vegetarian
Ingredients
- 3 lbs fresh green beans, trimmed
- 6 cloves garlic, peeled and halved
- 1/2 cup fresh dill heads or 6 tablespoons dried dill seed
- 1 teaspoon mustard seeds (optional)
- 1 teaspoon red pepper flakes (optional, for spicy dilly beans)
- 1/2 teaspoon whole black peppercorns
- 1/2 teaspoon pickling salt per pint jar
- 1 1/2 cups white vinegar (5% acidity)
- 3 cups water
Instructions
- Prepare the jars: Wash pint canning jars and keep them hot. Prepare your water bath canner if canning.
- Wash the green beans thoroughly. Trim the ends off the beans.
- For refrigerator pickles: Pack the raw green beans tightly into clean pint jars, leaving 1/2 inch headspace. Add 1 clove of garlic, 1 small dill head (or 1 tablespoon dried dill seed), 1/4 teaspoon mustard seed, 1/4 teaspoon peppercorns, and a pinch of red pepper flakes (if using) to each jar.
- For canning: Pack the raw green beans into hot jars, leaving 1 inch headspace. Add the seasonings (garlic, dill, mustard seeds, peppercorns, and pepper flakes) to each jar.
- Prepare the brine: In a non-reactive saucepan, combine the vinegar, water, and pickling salt. Bring the mixture to a rolling boil, stirring until the salt dissolves.
- Pour the hot brine over the beans in the jars, maintaining the required headspace (1/2 inch for refrigerator, 1 inch for canning).
- Remove air bubbles using a non-metallic utensil. Wipe the jar rims clean. Center the lids and screw on the bands fingertip tight.
- For Refrigerator Dilly Beans: Let the jars cool to room temperature, then seal and refrigerate. They are ready to eat in 24 hours but taste best after 1 week.
- For Canning Dilly Beans: Process the sealed jars in a boiling water bath canner for 10 minutes (adjust time for altitude). Turn off the heat, remove the jars after 5 minutes, and let them cool undisturbed on a towel-lined counter. Check seals after 12-24 hours.
Notes
- For the crunchiest pickled green beans, use very fresh, young beans. Do not use beans that are limp or old.
- If you prefer a spicier flavor, increase the red pepper flakes or add a few thin slices of fresh jalapeño to the jar.
- If you are new to canning, follow USDA guidelines for safe water bath processing times.
Nutrition
- Serving Size: 1 bean
- Calories: 5
- Sugar: 0.1
- Sodium: 150
- Fat: 0.01
- Saturated Fat: 0.0
- Unsaturated Fat: 0.0
- Trans Fat: 0.0
- Carbohydrates: 1.2
- Fiber: 0.5
- Protein: 0.2
- Cholesterol: 0