

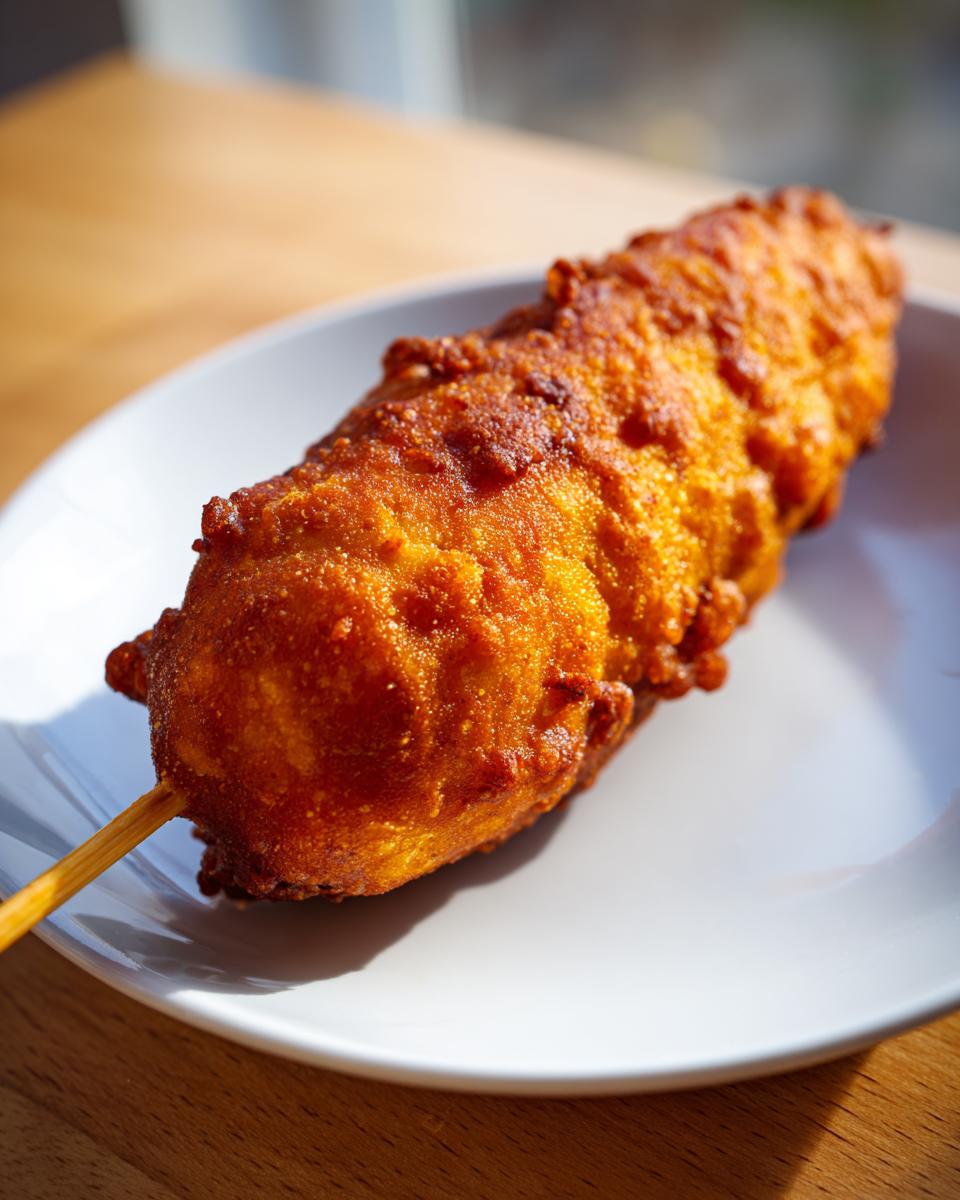
Oh my goodness, is there anything that screams summer fun and happy memories quite like a perfect, piping hot corn dog grabbed right off the stick? Seriously, the smell of them frying immediately takes me back to the county fair years ago. But you know what? We don’t need to wait for a traveling carnival to enjoy that amazing flavor. I have figured out the absolute secret to making the best, super crispy **homemade corn dogs** right here in my own kitchen, and the best part? They’re done in about 30 minutes total!
I get it. Store-bought frozen versions are handy, but they never give you that satisfying crunch or that slightly tangy, fluffy coating. This recipe is all about capturing that authentic, golden-brown street food magic using a simple buttermilk batter. It’s my go-to for when the kids are begging for something fun on a weeknight, or when the big game is on. Trust me, once you try this easy corn dog recipe, you will never go back to the freezer aisle again. It’s pure, delicious American nostalgia made easy!
- Why You Will Love These Homemade Corn Dogs
- Essential Ingredients for Perfect Crispy Corn Dogs
- Expert Tips for Achieving Crispy Corn Dogs
- Step-by-Step Instructions: How to Make Corn Dogs
- Variations: Mini Corn Dog Bites and Honey Corn Dogs
- Serving Suggestions for Your Homemade Corn Dogs
- Storage and Make Ahead Corn Dogs Tips
- Serving Suggestions for Your Homemade Corn Dogs
- Storage and Make Ahead Corn Dogs Tips
- Frequently Asked Questions About Making Corn Dogs
- Nutritional Estimates for These Classic Corn Dogs
- Frequently Asked Questions About Making Corn Dogs
- Nutritional Estimates for These Classic Corn Dogs
Why You Will Love These Homemade Corn Dogs
I could honestly list a hundred reasons, but let’s stick to the few things that matter most when you’re cooking after a long day. These aren’t just good; they are genuinely better than the stuff you buy pre-made, and they don’t take all afternoon!

- Speedy Satisfaction: Seriously, we’re talking about getting these from the kitchen counter to the dipping bowl in about 30 minutes total. Perfect for those last-minute snack attacks!
- Authentic Crunch Factor: That perfectly textured, audible crunch is everything when it comes to great **corn dogs**. Our buttermilk batter guarantees you get that deep golden brown coating every single time.
- Better Than Store-Bought: You control the ingredients, and we ditch the weird fillers. This is top-tier fair food recipes at home quality, guaranteed.
- Kid-Approved Winners: If you struggle finding a **kid friendly dinner idea** that doesn’t involve pizza, these are your secret weapon. They love skewering them, and they certainly love eating them!
- The Buttermilk Tang: That slight sourness from the buttermilk in the **cornmeal batter recipe** balances the savory hot dog and the sweet corn notes. It just tastes richer!
- Perfect for Game Day: Whether you make the full size or the **mini corn dog bites**, these are amazing **game day snacks**. They are easy to handle and perfect for setting out buffet-style.
- Frying is Fun: Okay, maybe not everyone loves frying, but watching these batter puffs up and turns a perfect deep gold color in the hot oil is pure kitchen joy. It’s fast heat, fast food, done right.
Essential Ingredients for Perfect Crispy Corn Dogs
Listen, you can follow every single instruction I give you about temperature and dipping technique, but if you skimp on the quality of your base ingredients, you just won’t get that amazing taste that makes you forget you’re eating them at home instead of the State Fair. Since this is a simple recipe, those few items shine through!
Using fresh baking powder and fine ingredients makes a huge difference in your final coating. The quality here sets the bar for how wonderfully crispy your **homemade corn dogs** will turn out. We’re aiming for that perfect, puffy shell, and the ingredients listed below are non-negotiable for success!
For the Buttermilk Cornmeal Batter
This is where the magic lives! Buttermilk is your secret weapon here. It reacts beautifully with the baking powder and gives the batter that slight tang that cuts through the richness of the frying oil. It creates a gorgeous texture that’s fluffy but sturdy enough to stick.
- 1 cup all-purpose flour – just plain old all-purpose works great here.
- 1 cup fine cornmeal – Make sure it’s fine! We want a smooth coating, not gritty like cornbread.
- 2 tablespoons sugar – This keeps the coating from tasting too savory and helps with that beautiful golden color.
- 2 teaspoons good baking powder – And this needs to be fresh! Old powder won’t give you the lift we need.
- 1 teaspoon salt
- 1/4 teaspoon black pepper
- 1 large egg
- 1 cup buttermilk – Don’t substitute this with regular milk if you can help it; the acid is vital!
- 1/4 cup milk – Just a splash more liquid to get the consistency perfect.
- 1 teaspoon vanilla extract (optional, for honey flavor)
- 1 tablespoon honey (optional) – Check out some other honey-forward recipes if you want to really lean into that sweet-and-salty contrast right here in the batter!
For the Corn Dogs and Frying
Frying means you need to pay close attention to your setup. You don’t want cheap oil that burns easily, and you need the right stick for handling!
- 16 hot dogs or cocktail wieners – Use the good ones, honestly. The flavor pops more!
- Wooden skewers or lollipop sticks – Make sure these are fully wooden and sturdy enough to handle a fully battered dog without snapping.
- Vegetable oil, for deep frying – You need lots! You want about 2-3 inches deep in your pot. Use a high smoke point vegetable oil like canola or peanut oil. That high heat is what gives you the quick, crispy crust.
Expert Tips for Achieving Crispy Corn Dogs
Honestly, making **crispy corn dogs** isn’t about complicated equipment; it’s about temperature control and feeling the batter. We are chasing that perfect, rigid, golden brown coating that traps all the juicy goodness inside. I’ve learned a few things watching my uncle work the deep fryer at the local fall fest, and these tips make all the difference between a soggy coating and a crunchy winner.
Getting this right turns a simple dinner into a spectacular success. If you want to move beyond decent and hit that “copycat corn dog recipe” level, pay close attention to these frying steps. You can see some great methods for handling fried foods over at Cook It Easily, but here is how I apply those lessons specifically to these dogs!
Prepping the Hot Dogs and Batter
Before any frying starts, you have to deal with the dogs themselves. Hot dogs hold moisture like sponges, and moisture is the enemy of crispiness, people! Any water sitting on the surface will cause tiny steam explosions when it hits the 375-degree oil, resulting in weak spots in your batter.
You must pat every single hot dog *bone dry* with paper towels. Take your time here—it’s worth the extra minute. Once they are skewered and dry, move on to the batter. Remember that lumps are okay, and you should actually *aim* for a few lumps! If you mix until it is perfectly smooth, congratulations, you’ve likely developed too much gluten, which leads to a chewy, spongy coating instead of a light, crisp one. Whisk gently until just combined. The batter should be thick enough that when you dip a dog, the coating doesn’t immediately run off completely.
Frying Technique for the Best Corn Dogs
Temperature is everything when you’re deep frying. If your oil isn’t hot enough (below about 365°F), the batter soaks up oil like mad instead of cooking instantly, making your **homemade corn dogs** greasy and limp. If it’s too hot (over 385°F), the outside burns before the middle gets warm.
We are aiming for a steady 375°F. Use a candy or deep-fry thermometer! Having one isn’t optional if you want perfect results. Also, don’t rush the process by cramming too many dogs in at once! If you drop in four dogs when the recipe calls for two, the oil temperature will plummet instantly. Work in small batches of two or three at a time. Once you dip them and hold the stick for those first 10 seconds until the batter sets, you can let go. Letting them float freely ensures that the oil circulates evenly around the entire coating, guaranteeing that gorgeous, uniform **golden brown coating** you are looking for!
Step-by-Step Instructions: How to Make Corn Dogs
Okay, Chef! This is where we bring it all together. Follow these steps exactly, and you’ll have the best **corn dogs** you’ve ever made. Remember that I talked about how important the temperature is? That means we need to get the oil hot *before* we even think about dipping the first hot dog. If you’re looking for a little more background on where these classic comfort food recipes come from, you can always check out our story over at Cookin’ Corner!
We need three things ready before dipping begins: dry dogs, thick batter, and sizzling oil. Timing is everything here!
- Prep the Dogs: First thing, take those hot dogs and pat them down until they are completely dry using paper towels. Please don’t skip this; dry dogs mean crispy batter!
- Skewer Them Up: Carefully insert one wooden skewer into the bottom end of each hot dog. Leave plenty of stick showing so you have a good, clean handle.
- Oil Check: Pour about two to three inches of vegetable oil into your heaviest pot—a Dutch oven is fantastic for this. Set it over medium-high heat and get that thermometer in there. We need that oil locked steady at 375 degrees F (190 degrees C).
- Mix the Batter: While the oil is heating up, you should have already mixed your batter (see the ingredient section if you haven’t!). Make sure you whisk it just until everything is combined—lumps are your friends here, remember?</li/
- The First Dip: Take one skewered hot dog and plunge (or gently lower) it straight into the thick batter. You want total coverage.
- Drip Off Excess: Pull the dog out and hold it over the bowl for just a second or two. You want that excess, runny batter to drip back in so you don’t get huge batter puddles in your oil when you fry.
- Set the Batter: Take your dipped dog and carefully lower it into the hot 375°F oil. Hold onto the stick firmly! You need to hold it right there for about 10 seconds. This is crucial! You are letting the batter flash-cook right where it touches the oil so it adheres firmly and doesn’t slide off.
- Release and Fry: Once that coating has set, let go of the stick and let the **corn dog** float freely.
- Keep it Moving: Fry them for about 3 to 4 minutes total. Turn them every so often with tongs so they brown evenly on all sides until they reach that perfect deep golden color.
- Don’t Overcrowd: Only fry two or maybe three at a time. If you try to crowd the pot, the oil temperature drops faster than you can say “game day snacks,” and we end up with greasy dogs!
- Drain Properly: Once they’re looking perfect and crispy, pull them out quickly with tongs and place them immediately on a wire rack that you’ve set over a paper towel-lined baking sheet. That rack lets the air circulate underneath so the bottoms don’t steam and get soggy.
- Serve Fast! These are best enjoyed piping hot right off the rack. Grab your mustard and ketchup and get ready to enjoy the best **homemade corn dogs** ever!
Variations: Mini Corn Dog Bites and Honey Corn Dogs
Now, listen, while this classic recipe for full-sized corn dogs is rock-solid, sometimes you need something a little different, right? Maybe you’re hosting a huge crowd for the Super Bowl, or maybe you just want to sneak a few extra bites without committing to the whole hot dog. We can adapt this! This is one of the beautiful things about mastering the basic **cornmeal batter recipe**—you can pivot easily.
If you want to make these even quicker and more fun, shrinking them down into **mini corn dog bites** is brilliant. If you are feeling extra retro, you can lean into that subtle sweetness of the **honey corn dogs** variation, too. Everything you need to know to switch things up is right here.
Making Adorable Mini Corn Dog Bites
This is my number one recommendation for parties or when you need something that goes from fryer to plate in two seconds flat. The concept is exactly the same, but we change the size of the sausage we are dipping.
Instead of using a whole hot dog, just grab your knife and cut your hot dogs into thirds. If you are using cocktail weenies, you can actually skip the cutting step entirely, which makes this an almost instant batch of **bite sized snacks**! Since the pieces are smaller, they cook faster, but be careful—they can go from perfect to overdone in an instant.
When running these through that 375°F oil, you only need about 2.5 to 3 minutes total, maybe less if you are using those tiny cocktail wieners. Keep an eye on them! They look amazing piled high on a platter, and they are way better than those frozen ones you used to buy!
If you want the full experience of those tiny, shareable fair favorites, you can check out some fantastic ideas on how to serve them over at Snack Starter—they have an incredible post all about irresistible mini corn dog bites.
Adding Honey for Sweet and Savory Dogs
Remember how I mentioned that optional honey and vanilla extract in the batter ingredients? That’s the secret to making your own **honey corn dogs**! If you add that tablespoon of honey and the teaspoon of vanilla extract—which I often do when I’m not rushing—the batter takes on this gorgeous, subtle sweetness.
It really complements the savory hot dog and mixes beautifully with the cornmeal. When these fry up, they get this incredibly rich, almost caramelized flavor layer on the outside. It’s slightly different from the plain classic flavor, and it always gets rave reviews at potlucks. It’s a subtle upgrade that tastes like you fussed over them for hours, but really, it took thirty seconds!
Serving Suggestions for Your Homemade Corn Dogs
You’ve done the hard work—you perfected the batter, managed the oil temperature like a pro, and now you have a rack full of the crispiest, juiciest **corn dogs** you’ve ever made. What now? Well, we eat them, obviously! But how you serve them can turn a simple snack into a full-blown event, whether it’s Friday night dinner or the major football game.
Condiments Are Half the Fun
Forget the tiny packets of mustard you get at the stadium. When you make these at home, you deserve the gourmet treatment (or at least the good squirting bottles!). This is where you let everyone customize their own experience. These are definitely **kid friendly dinner ideas** when you offer a fun spread of dips.
- The Classics: You absolutely need good yellow mustard and, of course, ketchup. No debate here.
- Sweet Heat: Try stirring a little hot sauce or a dash of cayenne into the ketchup for a slight kick. Or, dip them straight into honey if you skipped the honey in the batter—that sweet and salty combo is addictive.
- Creamy Cool Down: A tangy fry sauce (mayo mixed with ketchup and a little pickle relish) is amazing for dipping. It’s richer than just mayo and adds great moisture for dipping the crunchy exterior.
- For the Grown Ups: If you’re setting these out for a party or **game day snacks**, add some spicy brown mustard or even a little sriracha mayo on the side. Trust me, the savory dogs handle complex flavors really well.
Making Them a Full Meal or Appetizer Spread
These aren’t meant to stand alone! That’s what makes them such a fantastic, fun centerpiece for any casual meal. Since they are technically fried food on a stick, they look great arranged nicely!
For a hearty, **kid friendly dinner**, you can set them up like an easy platter. Serve them alongside some crunchy celery and carrot sticks (my way of sneaking in veggies!) and maybe a side of baked beans or crispy sweet potato fries so you still have that classic fair vibe without deep frying everything.
If you are using them as **appetizer ideas for parties**, definitely lean into the **mini corn dog bites** version! Serve them upright in a tall container or punch bowl lined with parchment paper. People can just grab a stick and go. They look so much cooler standing up than laid flat, and it makes holding them while mingling super easy!
No matter how you serve them, make sure you have plenty of napkins ready. Messy handheld food just tastes better, doesn’t it?
Storage and Make Ahead Corn Dogs Tips
Life happens, right? Maybe you made a double batch because you anticipated how fast these would disappear, or maybe you just have some glorious leftovers screaming to be eaten tomorrow. Storing perfectly crispy fried food like these **homemade corn dogs** requires a little strategy, though. If you just toss them in an airtight container straight away, you’re going to steam them, and that crunchy coating will go totally soft. We absolutely cannot let that happen!
The secret here is cooling them down properly before they ever see the inside of a storage container. If you’re planning ahead, this section is your new favorite **make ahead corn dogs** guide!
Chilling Before Frying (The Pro Prep Move)
I pulled this tip straight out of the notes because it is a game-changer for guaranteed crispiness. If you have the time—maybe you’re making these for a party later in the day—battering all your dogs and then chilling them is genius. Stick those fully battered, skewered dogs onto a baking sheet lined with parchment paper, and pop them in the fridge for about 15 minutes.
Why do this? When the cold batter hits the hot oil, it’s shocked into setting up instantly and firmly. This prevents it from sloughing off or bubbling unevenly, which really helps you achieve that beautiful, thick, and uniform coating we love. It’s a pause button that pays off huge in texture later!
Storing Leftover Corn Dogs
If you do end up with leftovers—which I don’t usually manage, but for you, I’ll pretend—you need to let them cool completely on a wire rack first. Don’t cover them while they are still warm! Once they are totally room temperature, transfer them to an airtight container. They keep well in the fridge for about three days.
Now, reheating is where you truly seal the deal for an awesome remaining snack. Forget the microwave; that will make them rubbery. You want heat that crisps them back up!
- The Oven or Toaster Oven: This is my preferred way. Set your oven to about 350°F (175°C). Place the cold dogs directly onto a baking sheet (a wire rack underneath is even better for air circulation!) and heat them for about 8 to 10 minutes. They should come out hot all the way through, and that cornmeal crust will regain most of its crunch!
- The Air Fryer: If you have one, use it! An air fryer is essentially a small convection oven, and it’s fantastic for reheating fried things. Set it to 350°F and cook for about 4-5 minutes, shaking them halfway through. They come out nearly as good as fresh!
You can totally make these earlier in the day to serve later for **game day snacks**. Just fry them all, let them cool completely on the rack, store them, and then do the oven reheat about 20 minutes before everyone arrives. Easy peasy!
Serving Suggestions for Your Homemade Corn Dogs
You’ve done the hard work—you perfected the batter, managed the oil temperature like a pro, and now you have a rack full of the crispiest, juiciest **corn dogs** you’ve ever made. What now? Well, we eat them, obviously! But how you serve them can turn a simple snack into a full-blown event, whether it’s Friday night dinner or the major football game.
Condiments Are Half the Fun
Forget the tiny packets of mustard you get at the stadium. When you make these at home, you deserve the gourmet treatment (or at least the good squirting bottles!). This is where you let everyone customize their own experience. These are definitely **kid friendly dinner ideas** when you offer a fun spread of dips.
- The Classics: You absolutely need good yellow mustard and, of course, ketchup. No debate here.
- Sweet Heat: Try stirring a little hot sauce or a dash of cayenne into the ketchup for a slight kick. Or, dip them straight into honey if you skipped the honey in the batter—that sweet and salty combo is addictive.
- Creamy Cool Down: A tangy fry sauce (mayo mixed with ketchup and a little pickle relish) is amazing for dipping. It’s richer than just mayo and adds great moisture for dipping the crunchy exterior.
- For the Grown Ups: If you’re setting these out for a party or **game day snacks**, add some spicy brown mustard or even a little sriracha mayo on the side. Trust me, the savory dogs handle complex flavors really well.
Making Them a Full Meal or Appetizer Spread
These aren’t meant to stand alone! That’s what makes them such a fantastic, fun centerpiece for any casual meal. Since they are technically fried food on a stick, they look great arranged nicely!
For a hearty, **kid friendly dinner**, you can set them up like an easy platter. Serve them alongside some crunchy celery and carrot sticks (my way of sneaking in veggies!) and maybe a side of baked beans or crispy sweet potato fries so you still have that classic fair vibe without deep frying everything.
If you are using them as **appetizer ideas for parties**, definitely lean into the **mini corn dog bites** version! Serve them upright in a tall container or punch bowl lined with parchment paper. People can just grab a stick and go. They look so much cooler standing up than laid flat, and it makes holding them while mingling super easy!
No matter how you serve them, make sure you have plenty of napkins ready. Messy handheld food just tastes better, doesn’t it?
Storage and Make Ahead Corn Dogs Tips
Life happens, right? Maybe you made a double batch because you anticipated how fast these would disappear, or maybe you just have some glorious leftovers screaming to be eaten tomorrow. Storing perfectly crispy fried food like these **homemade corn dogs** requires a little strategy, though. If you just toss them in an airtight container straight away, you’re going to steam them, and that crunchy coating will go totally soft. We absolutely cannot let that happen!
The secret here is cooling them down properly before they ever see the inside of a storage container. If you’re planning ahead, this section is your new favorite **make ahead corn dogs** guide!
Chilling Before Frying (The Pro Prep Move)
I pulled this tip straight out of the notes because it is a game-changer for guaranteed crispiness. If you have the time—maybe you’re making these for a party later in the day—battering all your dogs and then chilling them is genius. Stick those fully battered, skewered dogs onto a baking sheet lined with parchment paper, and pop them in the fridge for about 15 minutes.
Why do this? When the cold batter hits the hot oil, it’s shocked into setting up instantly and firmly. This prevents it from sloughing off or bubbling unevenly, which really helps you achieve that beautiful, thick, and uniform coating we love.
Storing Leftover Corn Dogs
If you do end up with leftovers—which I don’t usually manage, but for you, I’ll pretend—you need to let them cool completely on a wire rack first. Don’t cover them while they are still warm! Once they are totally room temperature, transfer them to an airtight container. They keep well in the fridge for about three days. And honestly, these are almost as good reheated!
Now, reheating is where you truly seal the deal for an awesome remaining snack. Forget the microwave; that will make them rubbery. You want heat that crisps them back up!
- The Oven or Toaster Oven: This is my preferred way. Set your oven to about 350°F (175°C). Place the cold dogs directly onto a baking sheet—yes, a wire rack underneath is even better for air circulation! Heat them for about 8 to 10 minutes. They should come out hot all the way through, and that cornmeal crust will regain most of its crunch!
- The Air Fryer: If you have one, use it! An air fryer is fantastic for reheating fried things. Set it to 350°F and cook for about 4-5 minutes, shaking them halfway through. They come out nearly as good as fresh!
You can totally make these earlier in the day to serve later for **game day snacks**. Just fry them all, let them cool completely on the rack, store them, and then do the oven reheat about 20 minutes before everyone arrives. It’s foolproof!
Frequently Asked Questions About Making Corn Dogs
I always get asked the same things when folks decide to try frying for the first time, or when they’re wondering how these **easy corn dog recipes** stack up against the ones they love eating out. Don’t worry about any specific technique here; if you have a question, chances are I’ve tried it in my kitchen already!
Can I bake the corn dogs instead of frying them?
You absolutely can try to bake them, but I won’t lie to you—it changes the game completely. When you bake them, you lose that signature, all-around crispy shell that makes a great corn dog. To get anything close, you need to lightly spray the battered dogs heavily with oil before baking at 400°F until golden. You’re aiming for a “baked donut” texture rather than a true fried crunch. For the best results, stick to the frying method described! If you need more tips on safe frying, remember to check out our terms of use page here: Cookin’ Corner policies.
What if I don’t have buttermilk? Can I substitute it?
I totally understand, not everyone keeps buttermilk on hand! The acidity is really important for the lift in the **cornmeal batter recipe** because it interacts with the baking powder, but you can make a great substitute. Just take one cup of regular milk, stir in one tablespoon of white vinegar or lemon juice, and let it sit on the counter for about 5 minutes until it starts to curdle slightly. That’s buttermilk for you! It works perfectly for this recipe.
Which hot dogs work best for homemade corn dogs?
This is a matter of personal preference, but because the batter is so rich and flavorful, I find that a higher-quality, savory hot dog really shines through. Think about those classic ballpark dogs or even all-beef franks. Cocktail wieners work great for **mini corn dog bites**, but for the standard size, use a hot dog that has good flavor on its own because you only cook it for a few minutes!
How can I make sure my batter stays warm when I’m frying a big batch?
This is a tough one because you don’t want the batter getting too thin! I usually mix the batter right before I start frying, but if you have to start ahead, you can place your bowl of batter inside a larger bowl filled with an inch or two of very warm (not hot!) water. Stir it every so often. Also, remember those **make ahead corn dogs** tips above—if you batter them and chill them for 15 minutes, they are cold when they go into the fryer, which lets you fry more batches without the batter overheating in the bowl.
Are these considered a kid friendly dinner idea or just a snack?
They are both! Honestly, they are perfect for a **quick snack recipe** right after school, but serving about three or four dogs per person with a side of baked beans or homemade coleslaw turns this into a wonderfully fun and filling **kid friendly dinner idea**. They taste exactly like exciting fair food, which makes dinner feel like a party!
Nutritional Estimates for These Classic Corn Dogs
I always believe in transparency here at Cookin’ Corner. While the exact numbers can swing a bit depending on how thick your batter coat is or what brand of hot dog you splurge on, I wanted to give you a general yardstick for what you’re looking at with this recipe. Remember, this delicious fried food is best enjoyed in moderation, but when you’re making them yourself, you know exactly what’s going into that crispy coating!
These estimates are based on using one standard hot dog and the full batter recipe, yielding 16 servings total. For all the detailed privacy information regarding tracking on our site, please review our Privacy Policy. I figure knowing the nutrition helps when you plan these as **fun family meals**!
- Serving Size: 1 corn dog
- Calories: 280
- Fat: 18g (Includes about 6g Saturated Fat)
- Carbohydrates: 18g
- Protein: 12g
- Sugar: 5g
They do have a bit of sodium since we’re using hot dogs, so keep that in mind if you’re watching your salt intake! But wow, 12 grams of protein in such a fun **game day snack**? I’ll take it! That’s why these **homemade corn dogs** are better than the store-bought versions—you can choose!)
Frequently Asked Questions About Making Corn Dogs
I always get asked the same things when folks decide to try frying for the first time, or when they’re wondering how these **easy corn dog recipes** stack up against the ones they love eating out. Don’t worry about any specific technique here; if you have a question, chances are I’ve tried it in my kitchen already!
Can I bake the corn dogs instead of frying them?
You absolutely can try to bake them, but I won’t lie to you—it changes the game completely. When you bake them, you lose that signature, all-around crispy shell that makes a great corn dog. To get anything close, you need to spray the battered dogs heavily with oil before baking at 400°F until golden. You’re aiming for a “baked donut” texture rather than a true fried crunch. For the best results in achieving that **golden brown coating**, stick to the frying method described! If you need more tips on safe frying, remember to check out our terms of use page here: Cookin’ Corner policies.
What if I don’t have buttermilk? Can I substitute it?
I totally understand, not everyone keeps buttermilk on hand! The acidity is really important for the lift in the **cornmeal batter recipe** because it interacts with the baking powder, but you can make a great substitute. Just take one cup of regular milk, stir in one tablespoon of white vinegar or lemon juice, and let it sit on the counter for about 5 minutes until it starts to curdle slightly. That’s buttermilk for you! It works perfectly for this recipe.
Which hot dogs work best for homemade corn dogs?
This is a matter of personal preference, but because the batter is so rich and flavorful, I find that a higher-quality, savory hot dog really shines through. Think about those classic ballpark dogs or even all-beef franks. Cocktail wieners work great for **mini corn dog bites**, but for the standard size, use a hot dog that has good flavor on its own because you only cook it for a few minutes!
How can I make sure my batter stays warm when I’m frying a big batch?
This is a tough one because you don’t want the batter getting too thin! I usually mix the batter right before I start frying, but if you have to start ahead, you can place your bowl of batter inside a larger bowl filled with an inch or two of very warm (not hot!) water. Stir it every so often. Also, remember those **make ahead corn dogs** tips above—if you batter them and chill them for 15 minutes, they are cold when they go into the fryer, which lets you fry more batches without the batter overheating in the bowl.
Are these considered a kid friendly dinner idea or just a snack?
They are both! Honestly, they are perfect for a **quick snack recipe** right after school, but serving about three or four dogs per person with a side of baked beans or homemade coleslaw turns this into a wonderfully fun and filling **kid friendly dinner idea**. They taste exactly like exciting fair food, which makes dinner feel like a party!
Nutritional Estimates for These Classic Corn Dogs
I always believe in transparency here at Cookin’ Corner. While the exact numbers can swing a bit depending on how thick your batter coat is or what brand of hot dog you splurge on, I wanted to give you a general yardstick for what you’re looking at with this recipe. Remember, this delicious **fried food** is best enjoyed in moderation, but when you’re making them yourself, you know exactly what’s going into that crispy coating!
These estimates are based on using one standard hot dog and the full batter recipe, yielding 16 servings total. For all the detailed privacy information regarding tracking on our site, please review our Privacy Policy. I figure knowing the nutrition helps when you plan these as **fun family meals**!
- Serving Size: 1 corn dog
- Calories: 280
- Fat: 18g (Includes about 6g Saturated Fat)
- Carbohydrates: 18g
- Protein: 12g
- Sugar: 5g
They do have a bit of sodium since we’re using hot dogs, so keep that in mind if you’re watching your salt intake! But wow, 12 grams of protein in such a fun **game day snack**? I’ll take it! That’s why these **homemade corn dogs** are better than the store-bought versions—you can choose!)
PrintEasy Crispy Homemade Corn Dogs

Make classic, crispy corn dogs at home using a simple buttermilk cornmeal batter. This recipe yields delicious, golden-brown treats perfect for quick family dinners or game day snacks.
- Prep Time: 15 min
- Cook Time: 15 min
- Total Time: 30 min
- Yield: 16 servings 1x
- Category: Dinner
- Method: Deep Frying
- Cuisine: American
- Diet: Vegetarian
Ingredients
- 1 cup all-purpose flour
- 1 cup fine cornmeal
- 2 tablespoons sugar
- 2 teaspoons baking powder
- 1 teaspoon salt
- 1/4 teaspoon black pepper
- 1 large egg
- 1 cup buttermilk
- 1/4 cup milk
- 1 teaspoon vanilla extract (optional, for honey flavor)
- 1 tablespoon honey (optional)
- 16 hot dogs or cocktail wieners
- Wooden skewers or lollipop sticks
- Vegetable oil, for deep frying
Instructions
- Pat the hot dogs completely dry with paper towels. Insert a wooden skewer into the bottom of each hot dog, leaving enough room to hold.
- In a large bowl, whisk together the flour, cornmeal, sugar, baking powder, salt, and pepper.
- In a separate bowl, whisk the egg, buttermilk, milk, vanilla extract, and honey, if using.
- Pour the wet ingredients into the dry ingredients and whisk until just combined. Do not overmix; a few lumps are acceptable. The batter should be thick enough to coat the hot dogs.
- Pour about 2-3 inches of vegetable oil into a deep, heavy-bottomed pot or Dutch oven. Heat the oil to 375 degrees F (190 degrees C). Use a thermometer to monitor the temperature.
- Dip a skewered hot dog into the batter, ensuring it is fully coated. Allow excess batter to drip off briefly.
- Carefully lower the battered hot dog into the hot oil, holding the stick until the batter sets (about 10 seconds). Then, release the stick.
- Fry 2-3 corn dogs at a time, turning occasionally, until they are deep golden brown and crispy, about 3-4 minutes. Do not overcrowd the pot.
- Remove the cooked corn dogs with tongs and place them on a wire rack set over a baking sheet lined with paper towels to drain excess oil.
- Serve immediately with your favorite condiments.
Notes
- For extra crispiness, chill the battered hot dogs on a parchment-lined tray for 15 minutes before frying.
- If you prefer mini corn dog bites, cut hot dogs into thirds before skewering and reduce frying time slightly.
- To keep corn dogs warm while frying the rest, place them on a wire rack in a 200 degree F oven.
Nutrition
- Serving Size: 1 corn dog
- Calories: 280
- Sugar: 5
- Sodium: 650
- Fat: 18
- Saturated Fat: 6
- Unsaturated Fat: 12
- Trans Fat: 0.5
- Carbohydrates: 18
- Fiber: 1
- Protein: 12
- Cholesterol: 45