
Some days, you just crave something truly decadent, right? Like pulling a velvet curtain back on a fancy dinner party, but you want it ready before the evening even starts. Well, I have just the secret that lets you create an Elegant Dinner Party Dessert using barely any effort! Forget fussy recipes with tempering eggs and worrying about separation; we are making the easiest, yet incredibly rich and creamy dessert: a genuinely Easy 3-Ingredient No-Bake chocolate mousse.
The beauty of this particular chocolate mousse recipe is how it channels the spirit of home cooking I grew up with—simple ingredients that deliver huge flavor and a gourmet finish. We’re taking something that always feels impressive and making it totally approachable for every home cook. Trust me, this recipe delivers that silky, melt-in-your-mouth texture every single time. You won’t believe how little work is involved before you’re diving into dessert heaven. You can find more of my go-to feel-good dessert recipes right here.
- Why This Easy No Bake Chocolate Mousse is Your New Favorite
- Gathering Ingredients for Your Silky Chocolate Mousse Recipe
- Step-by-Step Instructions for Homemade Chocolate Mousse Perfection
- Tips for Success with Your Chocolate Mousse
- Variations on the Classic Chocolate Mousse
- Serving Suggestions for This Elegant Dinner Party Dessert
- Storage and Reheating Instructions for Chocolate Mousse
- Frequently Asked Questions About Making Chocolate Mousse
- Nutritional Estimates for This Quick Chocolate Treat
Why This Easy No Bake Chocolate Mousse is Your New Favorite
I truly believe the best desserts are the ones that look like they took days but only took minutes of effort. That’s what this chocolate mousse does! It promises a Rich and Creamy Dessert without turning on the stove for long or messing with egg whites. It’s dependable, folks—a real lifesaver when you need a showstopper fast. You’ll want to bookmark this for when company drops by unexpectedly.
We keep hearing how scary mousse can be, but not here! This recipe is perfect for the best chocolate mousse for beginners because it relies on good quality chocolate and perfectly whipped cream to do all the heavy lifting for you.
Perfect Texture: Light and Airy Chocolate Mousse
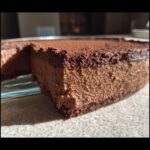
What you end up with is honestly miraculous. We skip the lengthy egg-white folding and still achieve that beautiful, cloud like mousse texture. It is light enough that you can eat a whole serving, yet it has enough structure to hold its shape cleanly when chilled. It just melts, beautifully, right on your tongue!
Simple Ingredients for a Decadent Mousse Dessert
This is the definition of an Easy No Bake Chocolate Mousse. Seriously, just three main players are needed! We are keeping things super straightforward here. Fewer ingredients mean less chance for error, which is exactly what we want when aiming for homemade chocolate mousse perfection.
Gathering Ingredients for Your Silky Chocolate Mousse Recipe
Okay, let’s talk about what you need to grab for this gorgeous, silky chocolate mousse recipe. Because we are using so few items, the quality really does shine through! I always advise using the best bittersweet chocolate you can afford—it makes all the difference for that deep, gourmet chocolate dessert flavor.
Here’s the quick list you need to gather:
- 6 ounces bittersweet chocolate, finely chopped
- 1 cup heavy whipping cream, divided (this is important!)
- 2 tablespoons granulated sugar
Remember, about 1/4 cup of that cream gets heated up to melt the chocolate, and the remaining 3/4 cup is getting whipped into glorious stiff peaks later on. Don’t mix those amounts up!
Step-by-Step Instructions for Homemade Chocolate Mousse Perfection
Now for putting this wonderful, velvety chocolate dessert together! Since this is a no-bake chocolate mousse recipe, there’s no standing over a hot stove fussing with temperatures, but there are two steps where technique truly makes the difference between good and sensational. Pay close attention to the chocolate melting and, most importantly, the folding!
Once you have your ingredients ready, grab your nice mixing bowl and let’s get started on creating that deeply flavored foundation. You can check out my handy guide on making other simple chocolate treats if you’re feeling ambitious later!
Creating the Chocolate Base for the Chocolate Mousse
First things first: chop up that bittersweet chocolate nice and small. Put it into a bowl where it can sit happily by itself. Next, take just that small portion of heavy cream—the 1/4 cup—and heat it gently in a little saucepan until you see those tiny bubbles starting to form around the edge. Don’t let it boil! That hot cream goes right over the chocolate, and then you just wait, patient like! Let it sit for five full minutes; this lets the heat do the hard work.
After five minutes, give it a whisk. You are looking for a mixture that is totally smooth, glossy, and deep brown. Taste it—wow! That’s pure chocolate flavor right there. Set this aside so it can cool completely down to room temperature. If it’s too hot when you mix it later, you’ll just melt all the air out of your cream, and we don’t want that!
Whipping Cream and Folding for Cloud Like Mousse Texture
While that chocolate cools off, grab your bigger bowl. Whip the remaining 3/4 cup of heavy cream with the sugar until you get stiff, proud peaks. I mean they need to stand up straight when you lift the whisk! This is key for that airy structure.
Now comes the careful part for that cloud like mousse texture. Take maybe a third of your whipped cream and gently fold it into the cooled chocolate base. This lightens up the chocolate so it blends better. Then, fold in the rest of the whipped cream, super gently! Seriously, use a large spatula and cut down the middle, sweep around the side, and fold over. Stop folding the second you don’t see any white streaks left. This delicate handling is what guarantees your homemade chocolate mousse perfection.

Tips for Success with Your Chocolate Mousse
Even though this is an easy recipe, a couple of things can take your chocolate mousse from good to truly memorable. First, I have to stress ingredient quality again. If you use subpar chocolate, you’ll end up with a dull, sad dessert. Invest in that bittersweet bar; it’s the main flavor here!
Second, temperature control is vital. Make sure your melted chocolate base is absolutely room temperature before you start folding in the whipped cream. If it’s hot, it melts the air right out of your cream, and poof—no more light structure! If you’re nervous about folding, watch a quick video first. You just want to incorporate, not stir! It’s the same gentle move I use when I make my famous brownie batter, keeping all those lovely air bubbles locked in for that perfect gourmet chocolate mousse finish.
Variations on the Classic Chocolate Mousse
Even though this simple chocolate mousse recipe is perfect as is, sometimes you just want to jazz things up a bit, right? That’s where having some fun with variations comes in. I love tweaking this recipe slightly depending on what I have on hand or what mood strikes me. It’s still a very quick chocolate treat, but these tiny adjustments can make it feel brand new!
You mentioned wanting a hint of something extra, and I totally agree. If you want to make this a truly Double Chocolate Mousse Recipe—because honestly, who doesn’t?—just fold in about 1/4 cup of those tiny mini chocolate chips right before you put in the final batch of whipped cream. They stay slightly firm and give you a nice little surprise crunch!
Here’s another trick I use when I need a little depth, especially if I’m serving it after a savory dinner: instant coffee! Just dissolve about half a teaspoon of very strong instant espresso powder into that 1/4 cup of cream before you heat it up. It doesn’t make it taste like coffee, but it deepens the chocolate flavor immensely, giving you that signature gourmet chocolate dessert profile. It’s subtle, but people always notice something special is going on!
If you are making this for the adults and want a little warmth, a splash of orange liqueur, like Grand Marnier, works beautifully with dark chocolate. Just add a teaspoon right into the melted chocolate base when it cools down slightly. These little additions let you personalize your homemade chocolate mousse without ruining the fundamental airy structure we worked so hard to achieve. It’s all about playing with those core flavors!
If you’re interested in other ways to use chocolate powder at home, I’ve got a fantastic recipe for making your own homemade cocoa powder that you might enjoy mixing into other things!
Serving Suggestions for This Elegant Dinner Party Dessert
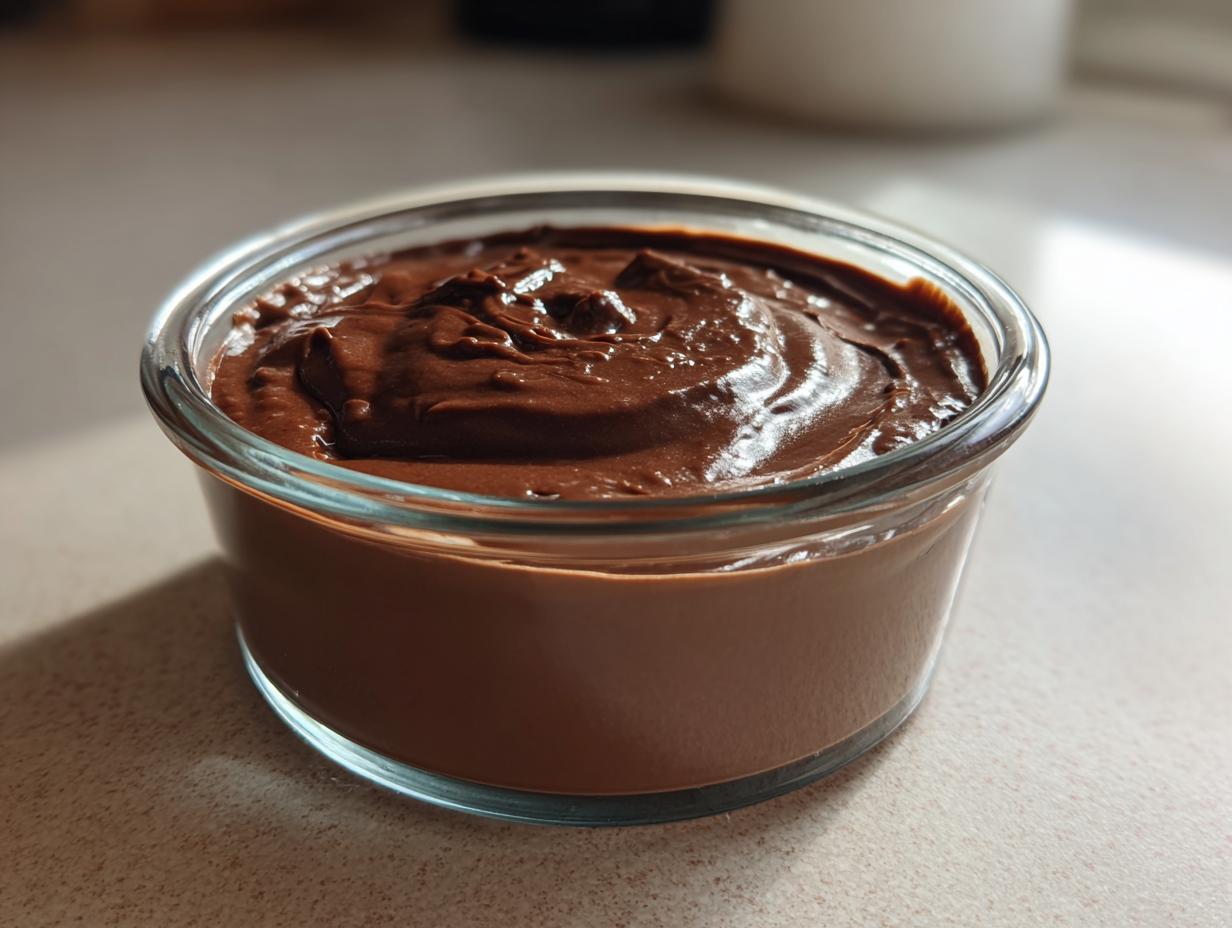
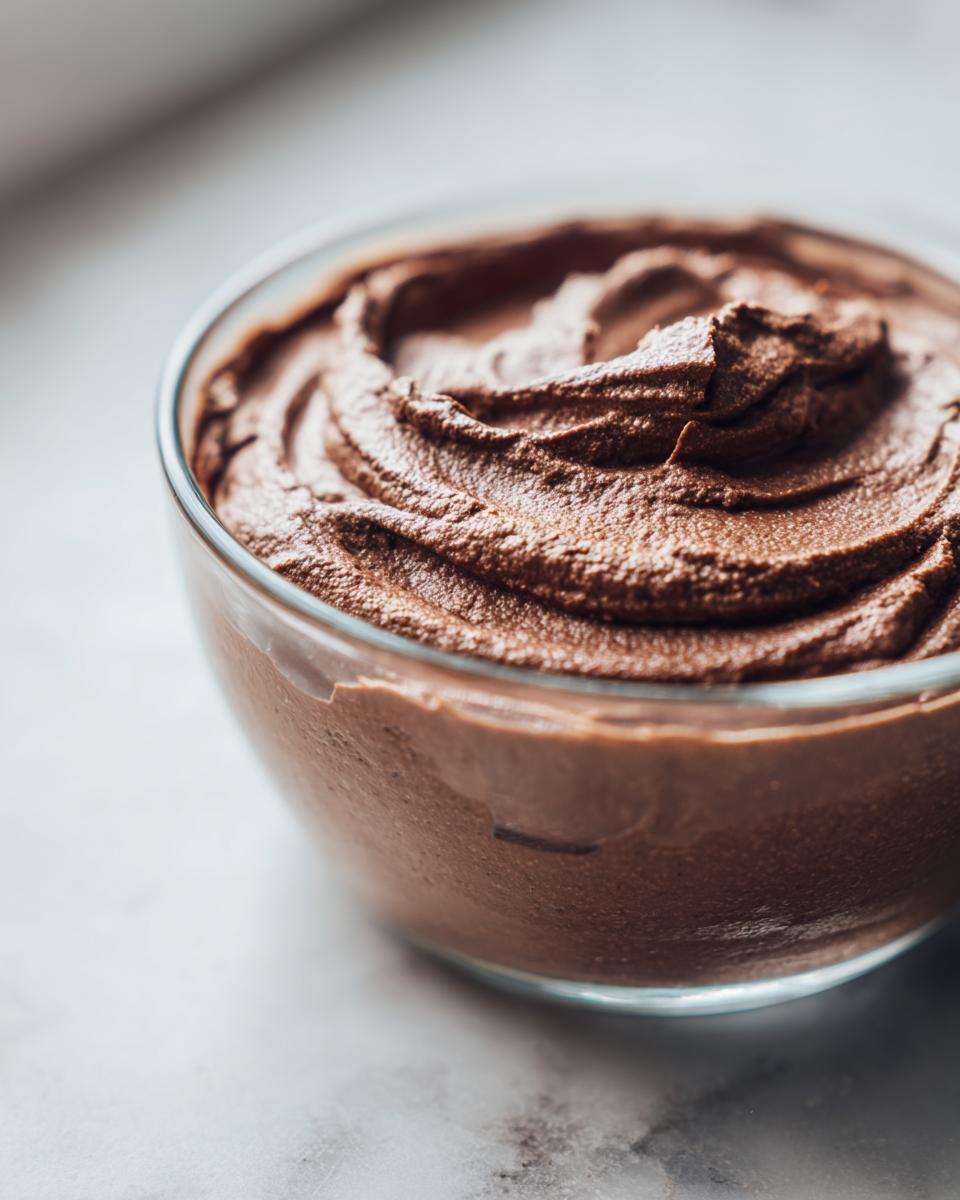
This chocolate mousse is so simple to make, but honestly, presentation is where you really level up and make it feel like a five-star treat! Since this recipe sets up so beautifully, you have a lot of freedom with how you serve it. For a truly Elegant Dinner Party Dessert vibe, ditch the big bowl and opt for individual servings. It makes portion control easy, and every guest feels like they got their own little slice of heaven.
I love using little glass ramekins or clear stemware—even small martini glasses work great if you have them! Just spoon the mousse in after it’s chilled perfectly. Seeing that rich, dark color contrasting against the glass just looks so fancy, doesn’t it?
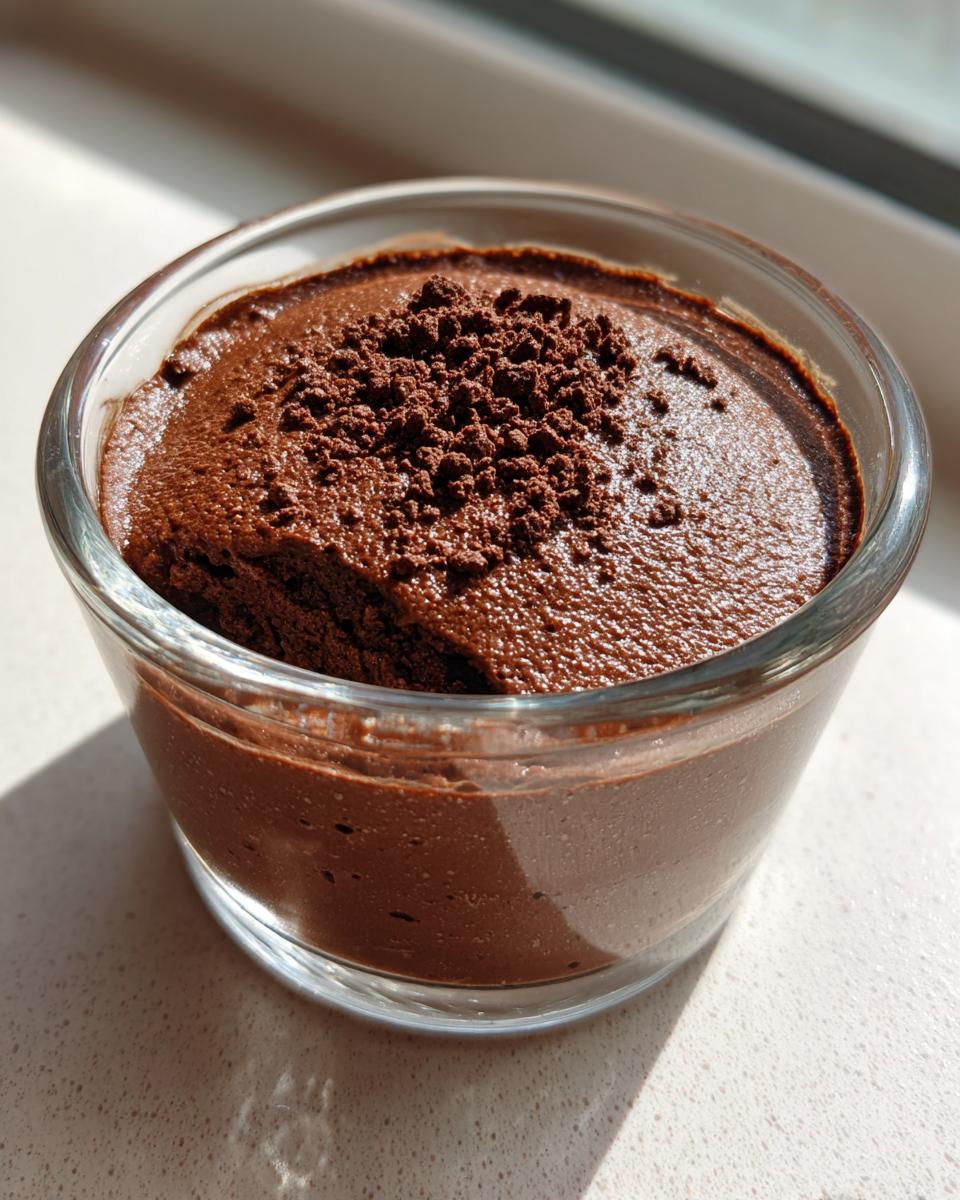
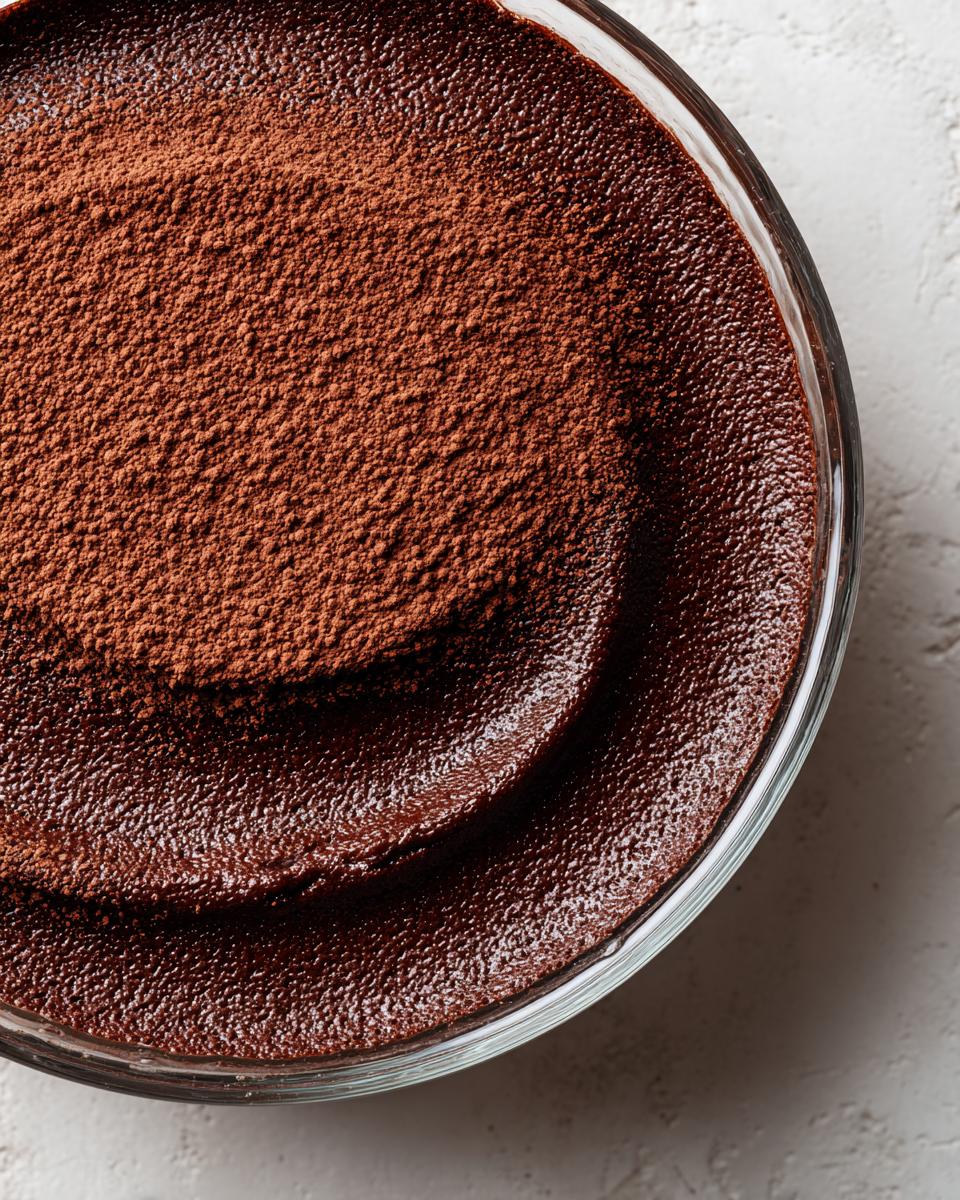
Now, for the finishing touch—this is crucial for turning a quick chocolate treat into something memorable. The recipe notes suggest fresh raspberries or a simple dusting of cocoa powder, and I highly recommend both!
- Cocoa Dusting: Right before serving, use a fine-mesh sieve and dust the top lightly with unsweetened cocoa powder. This gives it a beautiful matte finish and adds a slight bitter contrast to the sweetness.
- Fresh Berries: Toss a couple of bright red raspberries or sliced strawberries on top. The pop of color against the dark chocolate is stunning.
- Chocolate Shavings: If you have a vegetable peeler, shave a bit of extra high-quality chocolate right over the top. It looks so professional!
You could also layer this in glasses with a crunchy base for texture—maybe a crushed Oreo or Biscoff crust—if you want to go wild! For inspiration on other layered desserts, you might want to check out my Salted Caramel Cheesecake recipe. Either way, let the presentation speak for how much love you put into this dessert!
Storage and Reheating Instructions for Chocolate Mousse
The best part about this chocolate mousse being such a sturdy, reliable dessert is knowing you can make it ahead of time! This is why it’s such a fantastic option for dinner parties or for those weeks when you just need a satisfying dessert ready to go. Unlike delicate custards, this no-bake version holds up really well.
You can definitely make this a day or two in advance, which gives you so much breathing room before guests arrive. In fact, I’m told by many folks (and I’ve experienced it myself) that it actually tastes even richer on Day Two! You can easily keep leftovers stored in the refrigerator, covered tightly, for up to a week. Yep, a full week of glorious, creamy chocolate mousse waiting for you!
Now, a quick word on temperature. Because this delicious treat relies on chilled, stabilized whipped cream for its beautiful, airy structure, you absolutely want to serve it cold straight from the fridge. Serving temperature is key here for that perfect texture. Do NOT try to reheat chocolate mousse!
Reheating is just going to completely deflate all the beautiful air we folded into that cream, turning your airy cloud back into thick, warm, slightly greasy liquid. Since this is an effortless dessert, we want to keep it effortless all the way through to eating it. If it’s been in the fridge for a long time, just let it sit on the counter for about 10 minutes before digging in—that slightly softer texture is divine. For more make-ahead ideas that save you stress, check out my post on easy no-bake ice cream pie!
Frequently Asked Questions About Making Chocolate Mousse
I know when you first look at a recipe, especially one as elegant as this chocolate mousse, you get a million little questions popping up. That’s totally normal! I’ve gathered the ones I hear most often about achieving this velvety chocolate dessert at home. Ask away, but first, let’s get these common worries out of the way so you can get that quick chocolate treat chilling!
If you have even more questions after reviewing these, don’t hesitate to reach out through my contact page. I love hearing from fellow bakers!
Can I make this chocolate mousse without heavy cream?
Oh, if only it were that simple! For this specific three-ingredient, no-egg method, the answer is really no. Heavy whipping cream is absolutely crucial here because it contains the right amount of fat needed to whip up into those stiff peaks, which then get folded in to create that magnificent light and airy chocolate mousse texture. If you substitute milk or half-and-half, it just won’t whip up properly; it’ll be thin and runny, and you’ll end up with a thin chocolate soup instead of a proper mousse! Stick to the heavy cream for success.
How long does the chocolate mousse need to chill?
You absolutely need to respect the chilling time for this dish. The recipe calls for a minimum of two hours, but honestly, I always aim for three or even four hours if I can manage it. This time isn’t just for making it cold; it’s non-negotiable because that chilling time is what allows the melted chocolate to firm up just enough to hold the structure of the whipped cream. If you try to serve it too early, you’ll end up with a lovely, but very soft, pudding consistency, not the defined, silky chocolate mousse recipe texture we are aiming for!
Can I make this dessert ahead of time?
Yes! This is one of the best things about this easy chocolate mousse! As I mentioned before, it holds up beautifully. You can prepare the mousse completely, spoon it into your serving dishes, cover them tightly with plastic wrap (try to keep the wrap from touching the surface if you can), and keep it in the fridge for up to two days. It honestly tastes better on the second day! It’s the ultimate plan-ahead decadent mousse dessert for parties.
What kind of chocolate should I use for the deepest flavor?
For the absolute *best* results showcasing a truly gourmet chocolate dessert flavor, use bittersweet or dark chocolate that is between 60% and 72% cacao. Anything less sweet gives you that wonderful depth that balances the richness of the cream. If you use milk chocolate, your mousse might become too sweet and struggle to set properly, so stick to the darker stuff!
Nutritional Estimates for This Quick Chocolate Treat
Now, I know some of you are curious about the numbers! While I always say that tracking calories is the least fun part of baking, it’s helpful to have a general idea, especially when you’re enjoying something this rich. Keep in mind these numbers are just estimates based on the exact ingredients listed above—your actual results might vary slightly based on the exact chocolate brand you use.
But hey, for an indulgent, melt-in-your-mouth chocolate dessert that feels truly luxurious, these figures aren’t bad at all! Here’s a quick rundown of what you’re looking at per serving in this quick chocolate treat, based on yields of 4 servings:
- Serving Size: 1 serving
- Calories: Approximately 350
- Total Fat: About 28g (with 17g being saturated fat)
- Carbohydrates: Around 25g
- Sugar: Roughly 22g
- Protein: About 5g
See? A perfect balance for a delightful, yet satisfying, end to any meal! Enjoy every spoonful of this easy chocolate mousse!
PrintEasy, Rich, and Creamy No-Bake Chocolate Mousse
Make this decadent chocolate mousse with simple ingredients. This no-bake recipe delivers a silky, light texture perfect for beginners or elegant dinner parties.
- Prep Time: 15 min
- Cook Time: 0 min
- Total Time: 2 hours 15 min
- Yield: 4 servings 1x
- Category: Dessert
- Method: No-Bake
- Cuisine: American
- Diet: Vegetarian
Ingredients
- 6 ounces bittersweet chocolate, chopped
- 1 cup heavy whipping cream, divided
- 2 tablespoons granulated sugar
Instructions
- Place the chopped chocolate in a medium, heatproof bowl.
- In a small saucepan, heat 1/4 cup of the heavy whipping cream over medium heat until it just begins to simmer around the edges. Do not boil.
- Pour the hot cream over the chopped chocolate. Let it stand for 5 minutes without stirring.
- Whisk the chocolate and cream mixture until it is completely smooth and glossy. Set aside to cool to room temperature.
- In a separate large bowl, whip the remaining 3/4 cup of heavy whipping cream and the granulated sugar using an electric mixer until stiff peaks form. This creates your light, airy base.
- Gently fold about one-third of the whipped cream into the cooled chocolate mixture to lighten it.
- Carefully fold in the remaining whipped cream until no white streaks remain. Work gently to keep the air in the mousse.
- Spoon the mousse into individual serving dishes or small glasses.
- Chill the chocolate mousse for at least 2 hours before serving to allow it to set to a velvety texture.
Notes
- For a double chocolate mousse, fold in 1/4 cup of mini chocolate chips just before the final fold of whipped cream.
- If you prefer a richer flavor, use high-quality dark chocolate.
- Garnish servings with fresh raspberries or a dusting of cocoa powder before presenting.
Nutrition
- Serving Size: 1 serving
- Calories: 350
- Sugar: 22
- Sodium: 35
- Fat: 28
- Saturated Fat: 17
- Unsaturated Fat: 11
- Trans Fat: 0
- Carbohydrates: 25
- Fiber: 3
- Protein: 5
- Cholesterol: 95