
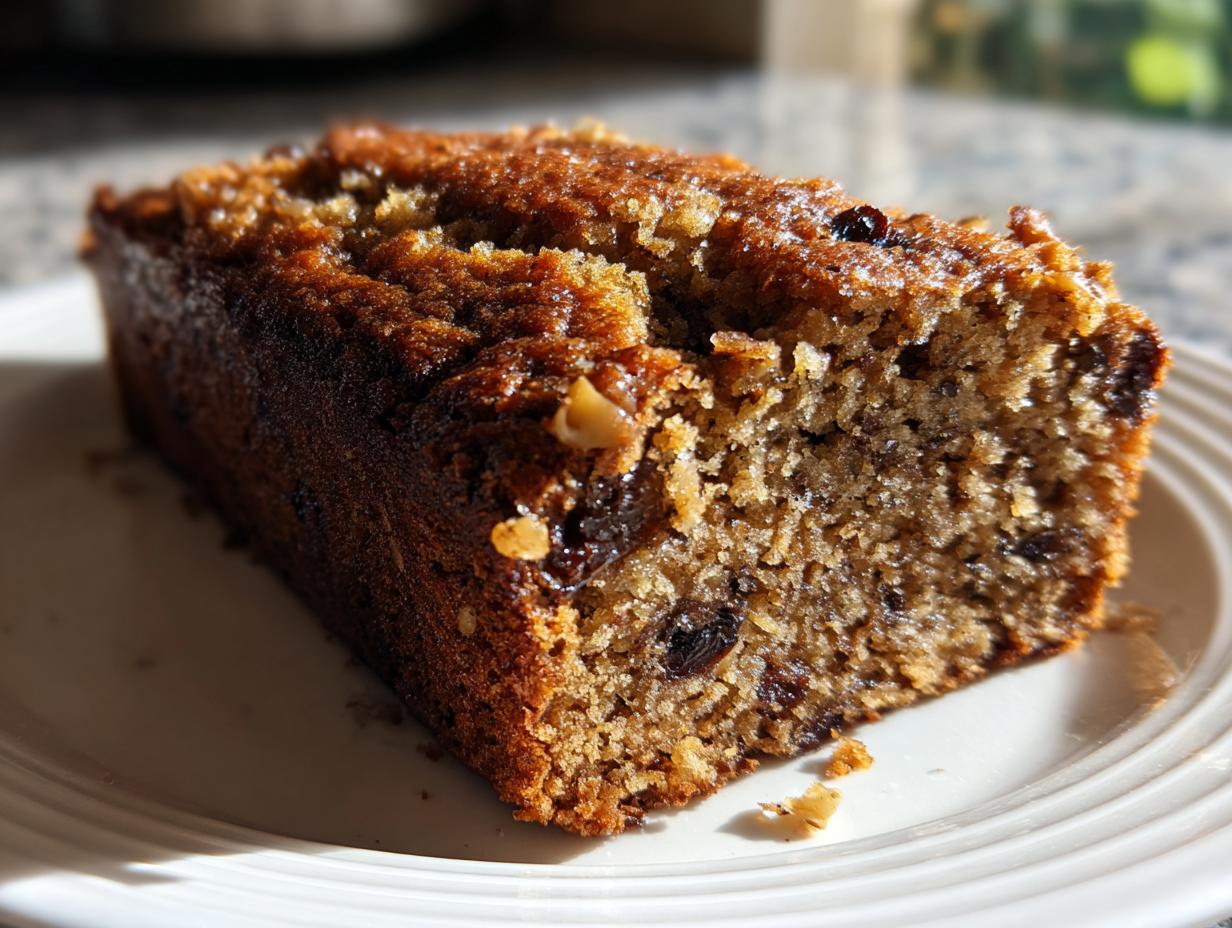
Oh, stop what you’re doing and pay attention, because I have found my absolute favorite quick bread recipe, and I just know it’s going to become a staple in your kitchen too! There’s something about the warm, sweet smell of baked dates and nuts that just brings me right back to my childhood kitchen, watching my grandmother bake. If you’ve been hunting for the perfect **date nut bread**—one that guarantees you a wonderfully moist loaf every single time without any fuss—you’re in the right place. Here at Cookin’ Corner, we keep things real and classic, just like the best American home recipes should be. Trust me; this **Easy Moist Old-Fashioned Date Nut Bread** is unbelievably simple, but you’d swear it took all day to make!
- Why This Is the Best Date Nut Bread Recipe You Will Ever Make
- Gathering Ingredients for Your Classic Date Loaf
- Step-by-Step Instructions for Perfect Date Nut Bread
- Tips for Success: Achieving the Best Date Nut Bread
- Variations on Classic Date Nut Bread
- Serving Suggestions for Your Comfort Food Baking
- Storage and Reheating Instructions for Homemade Date Loaf Recipe
- Frequently Asked Questions About Date Nut Bread
- Estimated Nutritional Data for Date Nut Bread
- Share Your Old Fashioned Quick Bread Experience
Why This Is the Best Date Nut Bread Recipe You Will Ever Make
I know, I know, everyone claims their recipe is the “best,” but hear me out on why this one wins. When you need a quick bread, you need reliability, and this homemade date loaf recipe delivers comfort and richness without stress. It is honestly foolproof!
Guaranteed Moist Date Nut Bread Texture
The secret sauce, which is actually soaking hot water, is what locks in that moisture you’re looking for. When we pour boiling water over the dates mixed with baking soda, it blossoms them open! This means they distribute perfectly, keeping the entire loaf soft and incredibly moist for days. You won’t find any dry edges here, I promise.
Simple Steps for an Easy Quick Bread Recipe
This truly is the definition of an Easy Quick Bread Recipe. You don’t need a fancy stand mixer or hours of creaming butter! We mix up the wet stuff, mix up the dry stuff, dump them together, and you’re done. This Old Fashioned Quick Bread technique means less fuss and more time for enjoying that freshly baked smell filling your home.
Gathering Ingredients for Your Classic Date Loaf
Before we dive into the magic, let’s look at what you’ll need for this incredibly satisfying **date nut bread**. I always rely on quality here because, honestly, simple quick breads really let the main flavors shine through. You don’t need anything exotic, but having soft butter and good dates makes a huge difference in the final texture of this Classic Date Loaf. Don’t stress about special equipment; a couple of bowls and a whisk will do the trick!
- 1 cup boiling water
- 1 cup packed pitted dates, chopped
- 1 teaspoon baking soda
- 1/2 cup (1 stick) unsalted butter, softened
- 1 cup packed light brown sugar
- 2 large eggs
- 1 teaspoon vanilla extract
- 1 3/4 cups all-purpose flour
- 1 teaspoon baking powder
- 1/2 teaspoon salt
- 1 cup chopped walnuts
Ingredient Notes and Substitutions for Date Nut Bread
A quick note on your dates: make sure they are pitted! Unless you want to accidentally blend a pit into your mixer, take the time to chop them yourself. I buy Medjool if I can find them because they are softer, but any soft, pitted date works great for soaking. As for the walnuts, they bring that perfect crunch to the party. If walnuts aren’t your favorite, feel free to swap them out for pecans or even slivered almonds. And hey, if you’re looking for some Healthy Quick Bread Ideas, try swapping out about half of that all-purpose flour for whole wheat—it adds a lovely depth!
Step-by-Step Instructions for Perfect Date Nut Bread
Ready to get that glorious loaf in the oven? It really doesn’t take long to pull this together. Remember, the key to following along is speed during the initial setup, but patience during the soak time. We want a beautiful, evenly baked, and wonderfully spiced result that we can all enjoy as the ultimate homemade date loaf recipe.
Preparing the Dates: The Secret to Moist Date Nut Bread
This is the critical first step, so don’t skip it or rush it! First, preheat your oven to 350°F (175°C) and make sure you’ve greased and floured up that standard 9×5 inch loaf pan so you don’t have any scary sticking moments later. Now, grab your chopped dates and put them in a small bowl. Pour that full cup of boiling water right over them and stir in the teaspoon of baking soda. You’ll see it fizz a little—that’s good! Let that sit for a solid 10 minutes. This step is what makes your moist date nut bread so spectacularly tender; the soda reacts with the hot water to soften those dates right down to their core.
Mixing Wet and Dry Components for this Easy Quick Bread Recipe
While those dates are taking their hot bath, move onto the main batter. In a big bowl, you need to cream your softened butter and brown sugar until it looks light and fluffy—think fluffy like a good cloud. Beat in your eggs one by one, making sure each one is fully incorporated before adding the next, and then swirl in that vanilla. In a separate bowl, whisk your flour, baking powder, and salt together. Now, add the dry mixture to the wet mixture in phases, mixing only until it’s *just* combined. Seriously, stop mixing when you still see a few little streaks of flour. If you overmix this easy quick bread recipe, you’ll get a tough loaf! Once combined, gently stir in the date mixture (liquid and all!) and those chopped walnuts for the final fold.
Baking and Cooling the Homemade Date Loaf Recipe
Pour all that beautiful batter right into your prepared pan. Pop it into that preheated 350°F oven and plan on baking it for about 55 minutes, maybe up to 65 minutes, depending on your oven. You know it’s done when a wooden skewer stuck right into the center pulls out clean—no wet batter clinging on! Patience is needed again here: let that homemade date loaf recipe cool in the pan for about 10 minutes before you try to wrestle it out onto a wire rack to finish cooling down completely. If you’re looking up usage rights for this recipe, you can check out our terms here: Check our Terms of Use.
Tips for Success: Achieving the Best Date Nut Bread
Making great **date nut bread** is all about those little habits that separate good baking from gorgeous baking. Since this recipe is so straightforward, these small points really make the difference between a fine loaf and the ultimate slice of comfort food baking.
First off, let’s talk about serving temperature. While you absolutely must let the loaf cool for at least 10 minutes in the pan, I strongly recommend slicing it slightly warm. When you cut into it while it’s still cozy, it’s the perfect time to smear a little butter on top—maybe even some cream cheese if you’re feeling decadent! That first warm slice is pure happiness, trust me. If you’re looking for other classic inspiration around this style of baking, I always love what my friends at The Baking Chocolatess do with their old-fashioned favorites.
Another thing to watch out for is your oven door. Quick breads hate being checked on too early! Keep that oven closed tight until you hit that 50-minute mark. Peeking causes temperature drops, and that can sometimes lead to a sunken center, especially in quick breads loaded with dense ingredients like dates and nuts. If you think it needs more time, just set the timer for an extra five minutes instead of opening the door repeatedly.
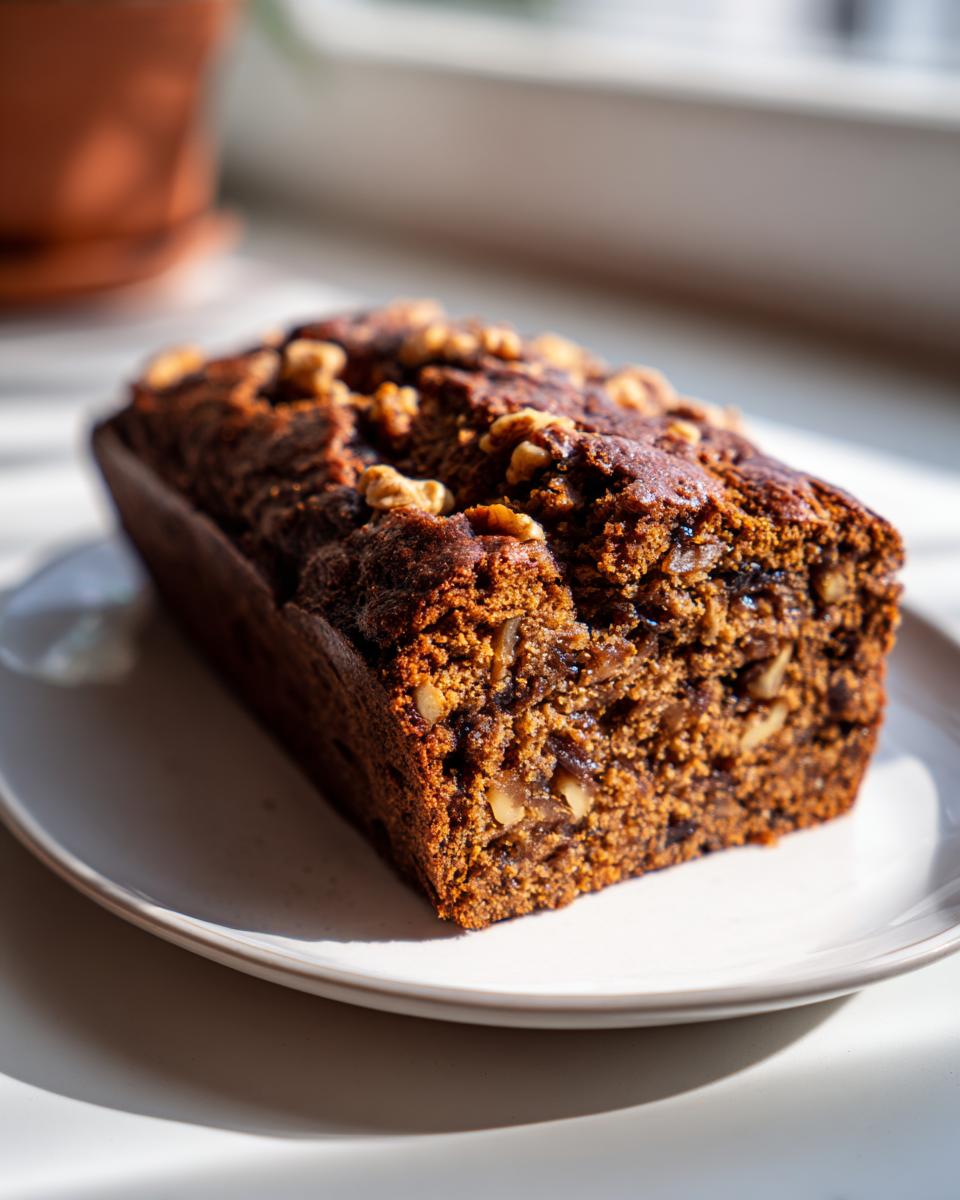
Finally, if you use nuts other than walnuts, make sure they are lightly toasted before chopping, even if the recipe doesn’t call for it. Toasting wakes up those essential oils and gives your walnut date bread (or pecan date bread!) a much deeper, richer flavor in the final bake. It’s a tiny step, but wow, does it pay off!
Variations on Classic Date Nut Bread
Part of the fun of baking something as classic as this **date nut bread** is knowing that you can make it your own! This recipe is a staple, but sometimes you need a little twist, right? We can easily bump up the spice level or introduce some creamy fruit without losing that wonderful moist texture we worked so hard to achieve earlier.
Banana Date Nut Bread Variation
Oh, if you have some slightly overripe bananas hanging around, definitely throw them in! This is where we can pivot toward a sweeter, almost cake-like feel. For a fantastic Banana Date Nut Bread Variation, simply mash up one large, very ripe banana. When you add the banana, you should scoop out about half of the boiling water and dates mixture—maybe cut down that water by about a half cup—because the banana is adding its own moisture.
Just stir that mashed banana in with your wet ingredients when you add the eggs. It works beautifully with the brown sugar. If you’re curious about taking the banana route or looking for other ways to sweeten things naturally, I saw a great take on it over at Wake Up & Kale that handles the banana integration perfectly. It keeps that wholesome vibe but gives you a richer flavor profile, perfect for a weekend breakfast bread.
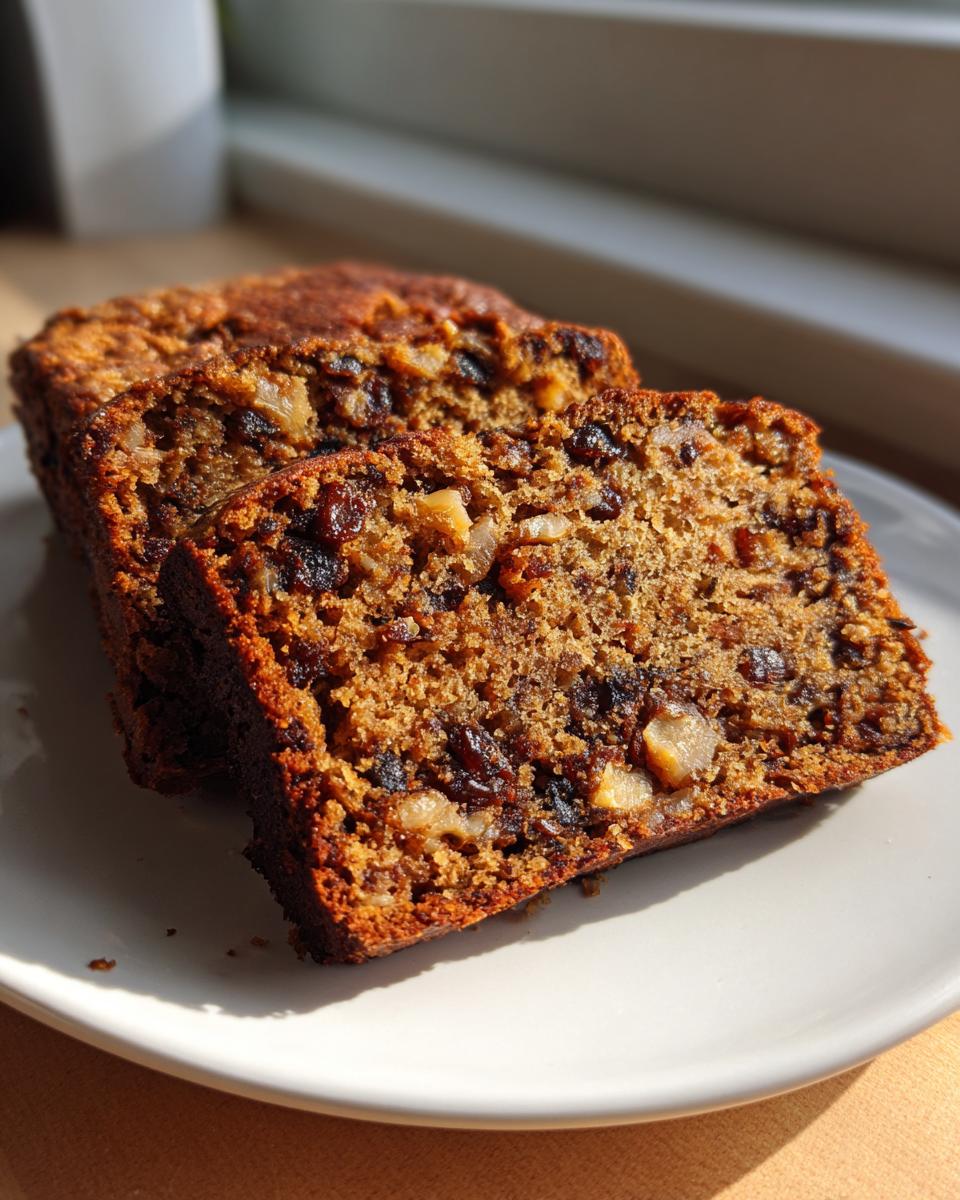
If fruit isn’t your thing but you want more flavor, try adjusting those spices! A little extra cinnamon, or maybe a pinch of ground allspice, turns this into a wonderfully festive **spiced date bread**. That extra warmth really shines when you serve it toasted in the morning!
Serving Suggestions for Your Comfort Food Baking
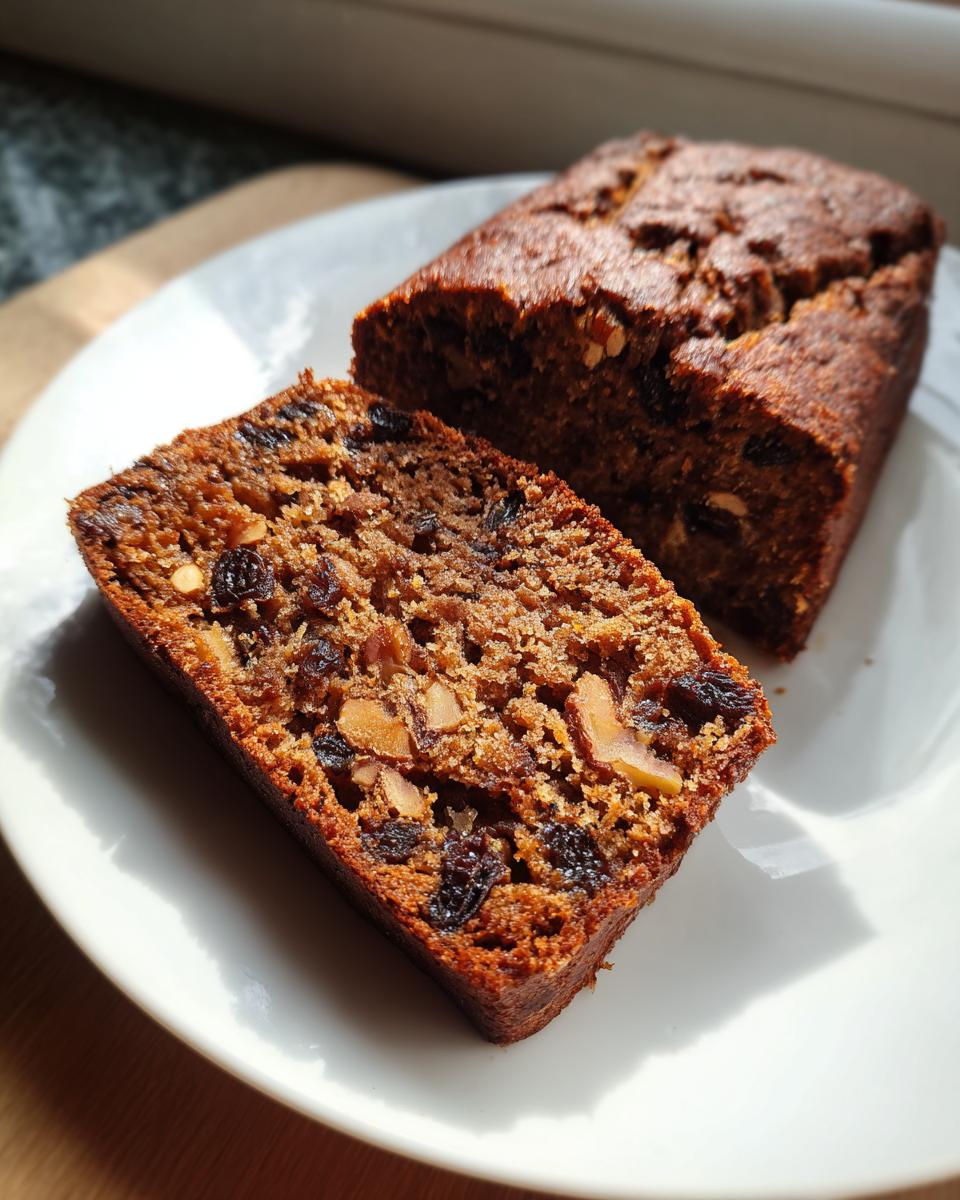
Now that you have the most perfect, warm, heavily spiced **date nut bread** sitting here cooling, the real question begins: how do we eat it? Honestly, this bread is amazing all by itself, but when you dress it up just a little bit, it goes from a simple snack to a real centerpiece. It’s so versatile, which is why it’s such a great recipe for holidays!
For me, the ultimate experience is slicing a thick piece when it’s still slightly warm and just spreading really high-quality, soft butter on it. The butter melts instantly into those little pockets of date goodness. That’s my go-to for a simple breakfast or a satisfying afternoon snack. It’s such easy **comfort food baking**!
But if company is coming, especially around the holidays—this definitely works as a lovely holiday fruit bread appetizer next to cheeses on a platter—you can definitely elevate it. Try serving thin slices toasted and topped with a thin smear of softened cream cheese mixed with just a tiny bit of maple syrup. Wow! That’s elegant.
This loaf is also the perfect companion for a quiet moment. Brew yourself a strong cup of coffee or black tea; this bread shines as a wonderful tea time loaf cake. It’s hearty enough for a weekend brunch, or cut it small and serve it on a platter as a sweet, wholesome ending to a big meal. If you’re looking for even more comforting ways people enjoy this loaf, check out the great serving ideas shared over at I Am Winfred—they have some fantastic inspiration!
No matter how you slice it—thick for breakfast, thin for tea, or warmed up right from the counter—this hearty, sweet loaf is too good to save just for special occasions. It’s perfect for today!
Storage and Reheating Instructions for Homemade Date Loaf Recipe
We certainly don’t want to rush the enjoyment of this perfect **date nut bread**, but you might actually have leftovers, although I sincerely doubt it! Keeping this homemade date loaf recipe tasting bakery-fresh for days—or even weeks—is super easy, which is another reason I love quick breads so much. No fussy pastry to worry about here, just simple wrapping!
When the loaf has *completely* cooled down—and I mean totally cool to the touch, not even a little warm in the middle—it’s time to wrap it up tight. Don’t just toss it in a zip-top bag; that traps moisture unevenly and can make the crust soggy later. Instead, aim for a double wrap.
- First, wrap the entire cooled loaf snugly in plastic wrap. Use two layers just to be safe and press out as much air as possible.
- Then, slip that plastic-wrapped loaf into a container or a foil wrapping. This double barrier keeps the air out and locks in that essential moisture we created earlier.
Stored this way on your counter at room temperature, this moist date nut bread will stay wonderfully fresh for about four to five days. If you need it to last longer, or if your kitchen is really warm, freezing is your best friend! Wrap it tightly just as described, put it in a freezer-safe bag, or wrap it again in foil, and stick it in the freezer. It will keep perfectly for up to three months. And don’t worry about cleanup later; if you ever have questions about site usage, you can review the policy here: Our Privacy Policy.
To reheat? That’s the most comforting part! If it’s a room-temperature slice, a quick 10 seconds in the microwave warms it right up, bringing back that freshly baked softness. If you’re thawing a frozen slice, letting it sit on the counter for an hour usually works, but you can also wrap the slice in foil and warm it in a 300°F oven for about 10 minutes. You get the best texture that way, especially if you plan on topping it with butter, just like we talked about before!
Frequently Asked Questions About Date Nut Bread
It always seems like there are a few little hiccups when baking a new recipe the very first time, even an easy quick bread recipe like this one! People often have the same thoughts when they first look at making a classic **date nut bread**, so I thought I’d answer the most common ones right here for you. Hopefully, this clears up any last-minute doubts before you head to the store!
Can I freeze this Homemade Date Loaf Recipe?
Yes, absolutely! Freezing is my favorite trick for keeping this **homemade date loaf recipe** on hand for unexpected guests or just when a craving hits. Once the bread is completely cool, wrap it tightly in two layers of plastic wrap and then slip it into a freezer-safe bag or wrap it again in foil. It keeps beautifully for about three months. When you want a slice, just let it thaw on the counter or microwave it briefly—it comes back to life so easily!
What types of dates and nuts work best in Date Nut Bread?
When it comes to dates, you want soft ones because they hydrate best during that hot water soak. Medjool dates are my first choice, but any soft, pitted variety will work wonderfully. For the nuts, the recipe calls for walnuts, which pair perfectly with the sweetness of the dates, making a beautiful flavor combination in your **walnut date bread**. If you aren’t a fan of walnuts, try pecans, or perhaps even slivered almonds for a crunchier texture. Just make sure whatever nut you use is raw, or give them a quick toast beforehand to really bring out their oils!
Can I easily make this a healthier Quick Bread Idea?
You sure can dip your toes into the world of healthy quick bread ideas with this base recipe! As I mentioned before, substituting about half of the all-purpose flour with whole wheat flour is a simple swap that adds fiber without ruining the texture too much, thanks to that soaking liquid we use. You could also swap the brown sugar for maple syrup, but you’ll want to reduce the boiling water slightly if you do that, because maple syrup adds liquid too. For those looking for fully vegan options, it’s tricky with this specific recipe because of the eggs holding the structure, but you can find specialized vegan versions out there! If you’re interested in how we generally approach our classics, I always refer back to our foundational beliefs over on our About Page.
How far in advance can I prepare this bread?
This is such a fantastic breakfast bread idea because it tastes even better the next day! Seriously, the flavors—the spices, the butter, the dates—meld together overnight. I usually bake it in the afternoon, let it cool, wrap it up, and we enjoy the first slices the next morning for breakfast or brunch. It holds up wonderfully, and the texture seems to settle nicely overnight!
Estimated Nutritional Data for Date Nut Bread
Now, I never want all the deliciousness of **date nut bread** to make you worry too much! This is comfort food baking, after all, and we bake to enjoy ourselves, right? But since so many of you ask about making healthier choices or tracking your macros, I pulled the estimates straight from the recipe calculations. This is for guidance only, so please remember these numbers are based on using all the ingredients exactly as written in this classic date loaf recipe.
Since every ingredient brand and every slice size can shift things slightly, treat this as a general guide. If you used a healthier swap, like whole wheat flour or cutting back on the brown sugar, your numbers will change! I always feel better knowing generally where I stand with my favorite old fashioned quick bread.
- Serving Size: 1 slice
- Calories: 280
- Sugar: 25g
- Fat: 13g
- Saturated Fat: 5g
- Carbohydrates: 39g
- Protein: 5g
- Sodium: 180mg
See? Not too bad for something that tastes this rich and wonderful! But just to be crystal clear—because I want you to bake with confidence—these are estimates for one slice calculation. If you end up cutting the loaf into 12 slices instead of the 10 we planned on for this homemade date loaf recipe, the numbers per slice will look a little better! Cook with joy, and don’t let the math ruin the moment!
Share Your Old Fashioned Quick Bread Experience
Alright, friend, you’ve made it to the end! You’ve got your gorgeous, fragrant loaf of **date nut bread** cooling on the rack, and that smell is probably intoxicating your whole kitchen. Now, this is where the fun really starts for me—hearing from you!
I put all my heart and soul (and a lot of practice!) into making sure this recipe for an old fashioned quick bread works perfectly for you, whether it’s your first time baking or you’re a seasoned pro. So, I really, really want to know how it turned out when you made it!
Did it stay super moist? Did you use walnuts or pecans? Are you eating it warm with butter right now (I hope so!)? Don’p be shy! Head down to the comments section and leave me a rating—five stars if it made you feel cozy! Tell me what you thought, and if you snapped a picture of your beautiful homemade date loaf recipe, please share it with us! It truly makes my day to see these classics making memories in other kitchens.

If you hit any snags or just have a burning question that I missed in the FAQs, don’t hesitate to reach out to me directly through the contact page here: Let’s Chat! Happy baking, and enjoy every last, crumbly, sweet bite!
PrintEasy Moist Old-Fashioned Date Nut Bread
Bake a comforting, moist date nut bread using this easy, old-fashioned quick bread recipe. It delivers classic, rich flavor perfect for breakfast or an afternoon snack.
- Prep Time: 15 min
- Cook Time: 60 min
- Total Time: 75 min
- Yield: 1 loaf (about 10 servings) 1x
- Category: Breakfast
- Method: Baking
- Cuisine: American
- Diet: Vegetarian
Ingredients
- 1 cup boiling water
- 1 cup packed pitted dates, chopped
- 1 teaspoon baking soda
- 1/2 cup (1 stick) unsalted butter, softened
- 1 cup packed light brown sugar
- 2 large eggs
- 1 teaspoon vanilla extract
- 1 3/4 cups all-purpose flour
- 1 teaspoon baking powder
- 1/2 teaspoon salt
- 1 cup chopped walnuts
Instructions
- Preheat your oven to 350°F (175°C). Grease and flour a standard 9×5 inch loaf pan.
- Place the chopped dates in a small bowl. Pour 1 cup of boiling water over the dates and stir in the baking soda. Let this mixture sit for 10 minutes.
- In a large bowl, cream together the softened butter and brown sugar until light and fluffy.
- Beat in the eggs one at a time, mixing well after each addition. Stir in the vanilla extract.
- In a separate medium bowl, whisk together the flour, baking powder, and salt.
- Gradually add the dry ingredients to the wet ingredients, mixing until just combined. Do not overmix.
- Stir the date mixture (including the liquid) and the chopped walnuts into the batter until evenly distributed.
- Pour the batter into the prepared loaf pan.
- Bake for 55 to 65 minutes, or until a wooden skewer inserted into the center comes out clean.
- Let the bread cool in the pan for 10 minutes before turning it out onto a wire rack to cool completely.
Notes
- Serve this homemade date nut bread warm with butter spread on top for the best comfort food experience.
- For a variation, substitute half the all-purpose flour with whole wheat flour for a healthier quick bread idea.
- If you prefer a sweeter loaf, you can add a simple sugar glaze on top after the bread has cooled.
Nutrition
- Serving Size: 1 slice
- Calories: 280
- Sugar: 25g
- Sodium: 180mg
- Fat: 13g
- Saturated Fat: 5g
- Unsaturated Fat: 8g
- Trans Fat: 0.1g
- Carbohydrates: 39g
- Fiber: 2g
- Protein: 5g
- Cholesterol: 55mg