
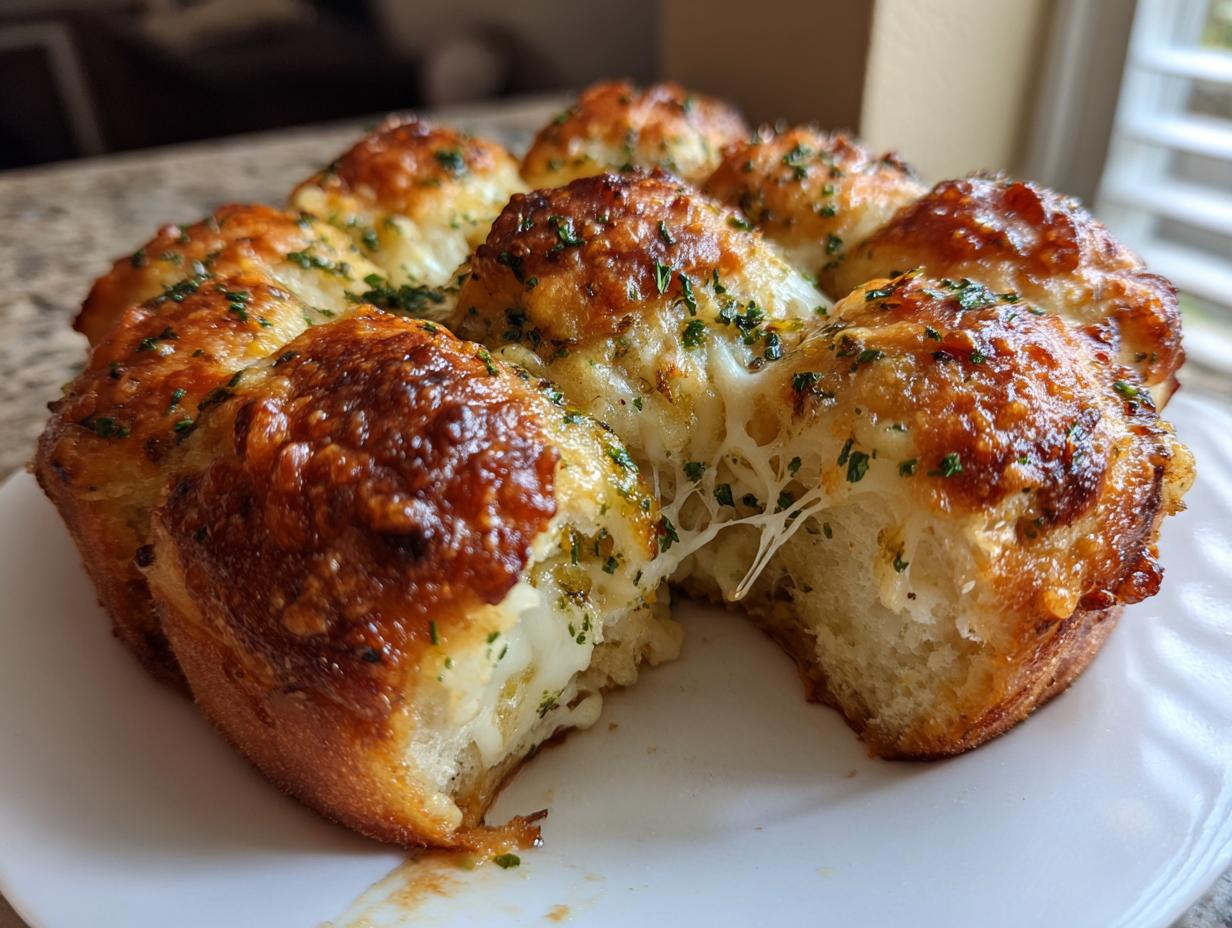
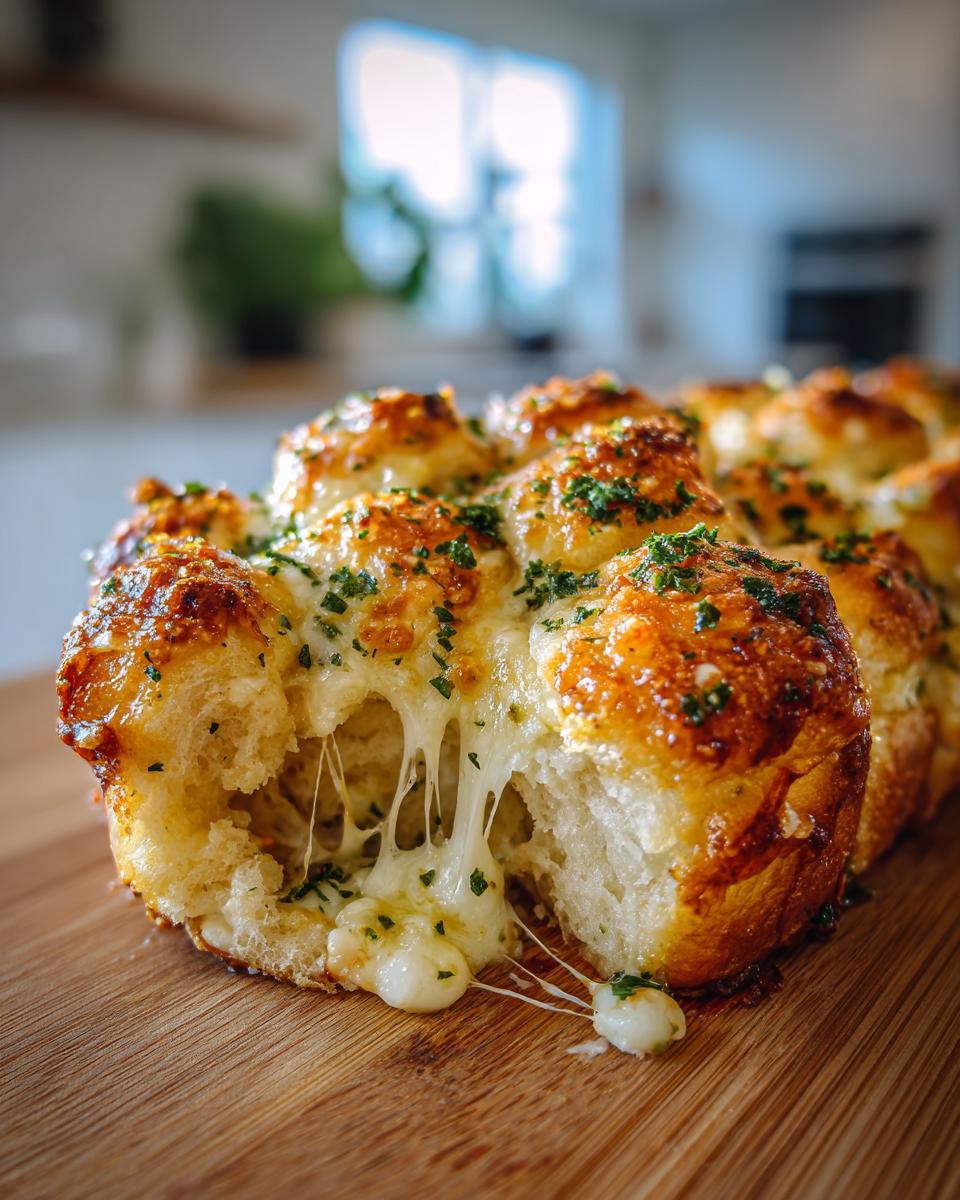
Sometimes, you just need that perfect side dish, right? Something warm, something buttery, and something that disappears instantly when you set it on the table. Forget fumbling with stiff French bread! We at Cookin’ Corner know that comfort food should be foolproof, and that’s exactly what we’ve got here. This **hawaiian roll garlic bread** is, quite simply, the easiest and cheesiest way to upgrade your weeknight dinner or holiday spread. It takes those famously sweet rolls and transforms them into a garlicky, pull-apart masterpiece. Trust me, if you need a reliable side that tastes like you spent hours on it but actually takes minutes, this is the recipe you’ll bookmark!
- Why This Cheesy Hawaiian Roll Garlic Bread is a Must-Make
- Ingredients for the Best Hawaiian Roll Garlic Bread
- Step-by-Step Instructions for Perfect Hawaiian Roll Garlic Bread
- Tips for the Ultimate Soft Garlic Rolls
- Serving Suggestions for Your Hawaiian Roll Garlic Bread
- Storage and Reheating Hawaiian Roll Garlic Bread
- Frequently Asked Questions About This Quick Appetizer Recipe
- Nutritional Estimates for Cheesy Hawaiian Roll Garlic Bread
- Share Your Experience Making This Comfort Food Side
Why This Cheesy Hawaiian Roll Garlic Bread is a Must-Make
Honestly, this bread is cheating, but in the best possible way! Since we use store-bought sweet rolls, this becomes the ultimate Store Bought Roll Hack. Everyone expects garlic bread to be a fuss; this recipe proves it isn’t!
- It hits that perfect sweet-and-savory note that just makes your mouth water.
- It’s cheesy—we can’t forget the glorious, gooey melted mozzarella and Parmesan topping.
- It is unbelievably fast, which means less time waiting and more time eating!
Quick Prep Time for Hawaiian Roll Garlic Bread
If you’re looking for a 15 Minute Side, you’ve found it! Seriously, the total time to get this amazing hawaiian roll garlic bread onto your counter is only about 22 minutes total. Five minutes to mix up the butter and cheese, and about 17 minutes in the oven. That kind of speed makes it perfect for a last-minute Quick Appetizer Recipe when guests pop over unexpectedly.
Ingredients for the Best Hawaiian Roll Garlic Bread
Okay, listen up, because the magic of this Cheesy Bread Side Dish starts right here with the ingredients. Since we are relying on that sweet base, we need strong savory flavors to balance it out! You only need a few simple things using that package of famous sweet dinner rolls. Remember, we are aiming for that perfect balance of sweet and savory, and the cheese blend is crucial for making this truly special.
- One whole package of Hawaiian sweet rolls—make sure it’s the 12-count size!
- Melted unsalted butter (half a cup is what I use).
- Four glorious cloves of garlic, minced super fine.
- Fresh parsley, chopped, about a quarter cup.
- Dried oregano (just a half teaspoon).
- Salt (a tiny pinch).
- Mozzarella cheese, shredded, one full cup.
- And finally, grated Parmesan, because cheese needs cheese, about a quarter cup.
Ingredient Notes and Substitutions
My number one rule for great buttery garlic rolls is using real butter—don’t try to cheat here; the flavor difference is huge! If you totally forgot to buy minced garlic, don’t panic! You can swap in about one teaspoon of garlic powder, but give the butter an extra minute to bloom before you brush it on the rolls.
Also, trust me on the fresh parsley—those dried flakes just don’t give you the same brightness. The fresh stuff really wakes up the whole flavor profile of the hawaiian roll garlic bread when it melts under that cheese!
Step-by-Step Instructions for Perfect Hawaiian Roll Garlic Bread
Alright, this is where the fun really starts! Making this incredible hawaiian roll garlic bread is so straightforward you’ll wonder why you didn’t start making it years ago. It’s all about layering those flavors before they head into the heat. This recipe is always a winner, and it’s one of my favorites to make when I check in with the Cookin’ Corner story—it just tastes like home.
First things first, before you get any butter melted, you have to preheat your oven to 350°F (175°C). Always do that first! Then, line a baking sheet with parchment paper. I know the rolls come in a tray, but trust me on this paper; it catches the glorious melted cheese drips so clean-up isn’t a total nightmare later.
Creating the Signature Buttery Garlic Spread
This spread is the heart and soul of our amazing soft garlic rolls. You need a small bowl for this! Combine your melted butter with the minced garlic, the fresh parsley, the oregano, and the salt. You need to mix this really well together until everything seems totally combined.
Here’s my little move—and this is just for the best flavor penetration: right after the butter melts, I let it sit for about thirty seconds before stirring in the dry herbs and garlic. It lets those sharp edges of the garlic soften just a tiny bit before it hits the heat, making a much better spread for our hawaiian roll garlic bread.
Now, the rolls! You need to keep them connected if you can, or just line them up nice and cozy on that prepared pan. Take a pastry brush—or if you’re like me and can’t find one, use the back of a spoon—and brush that buttery mixture generously. Get the tops, but make sure you swipe down the sides of those sweet little rolls, too!
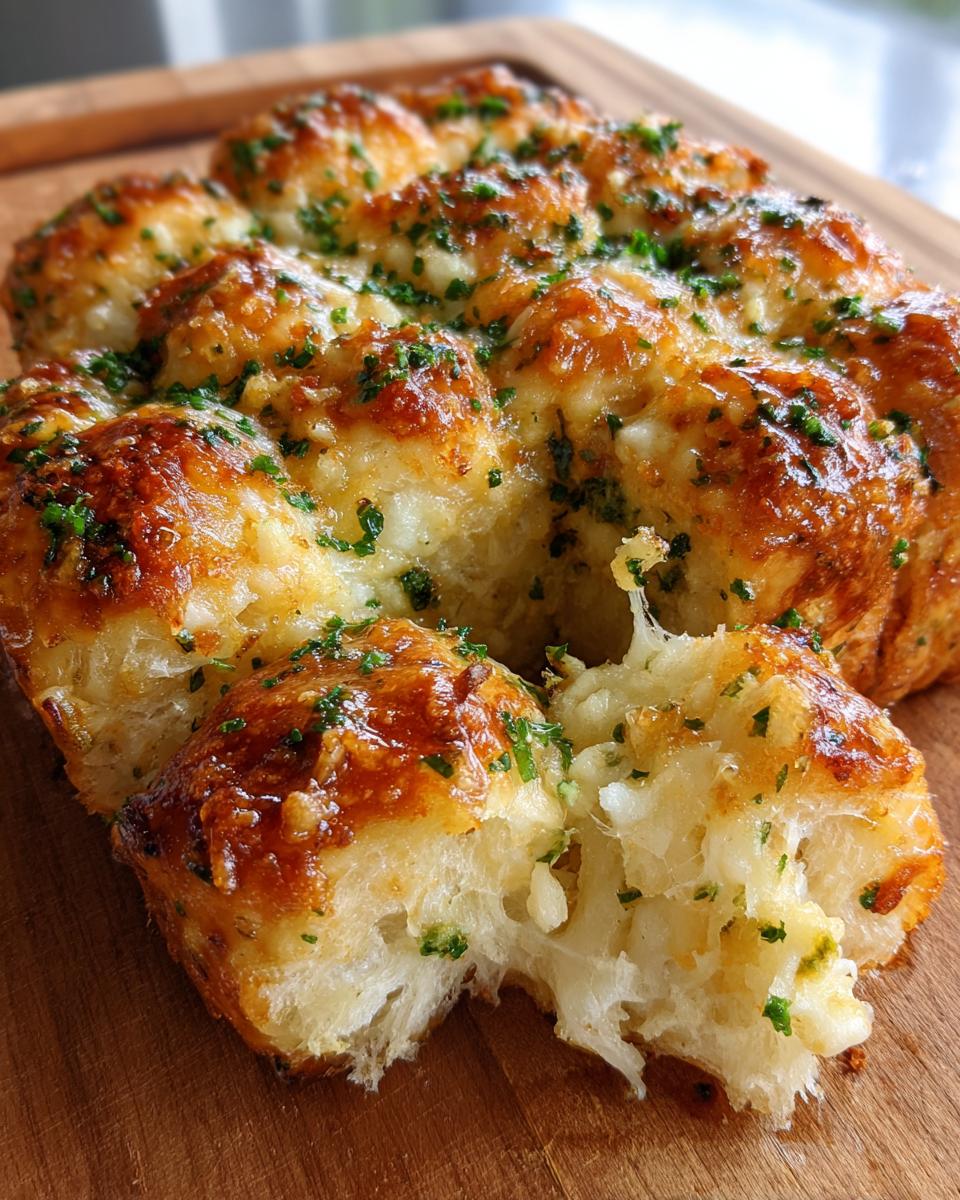
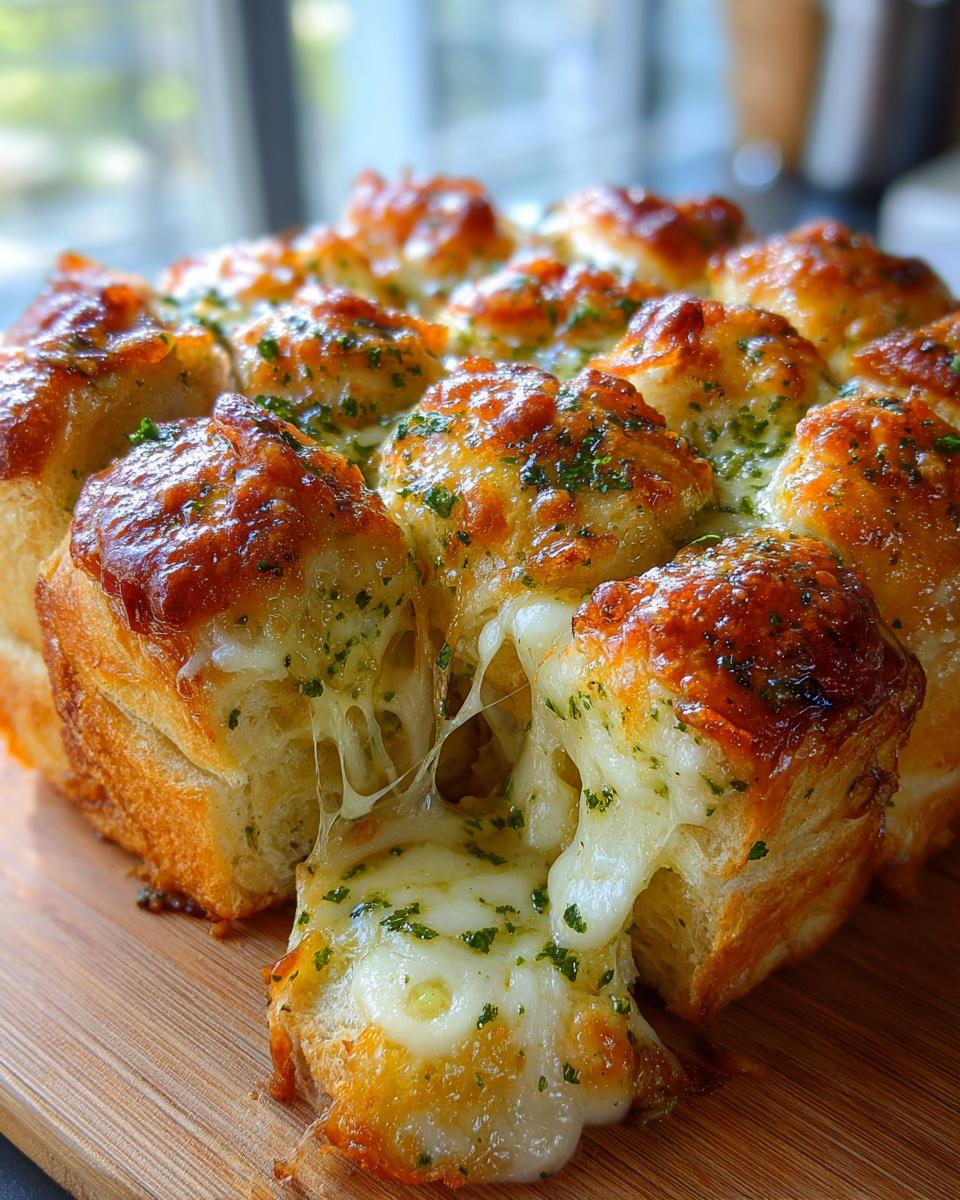
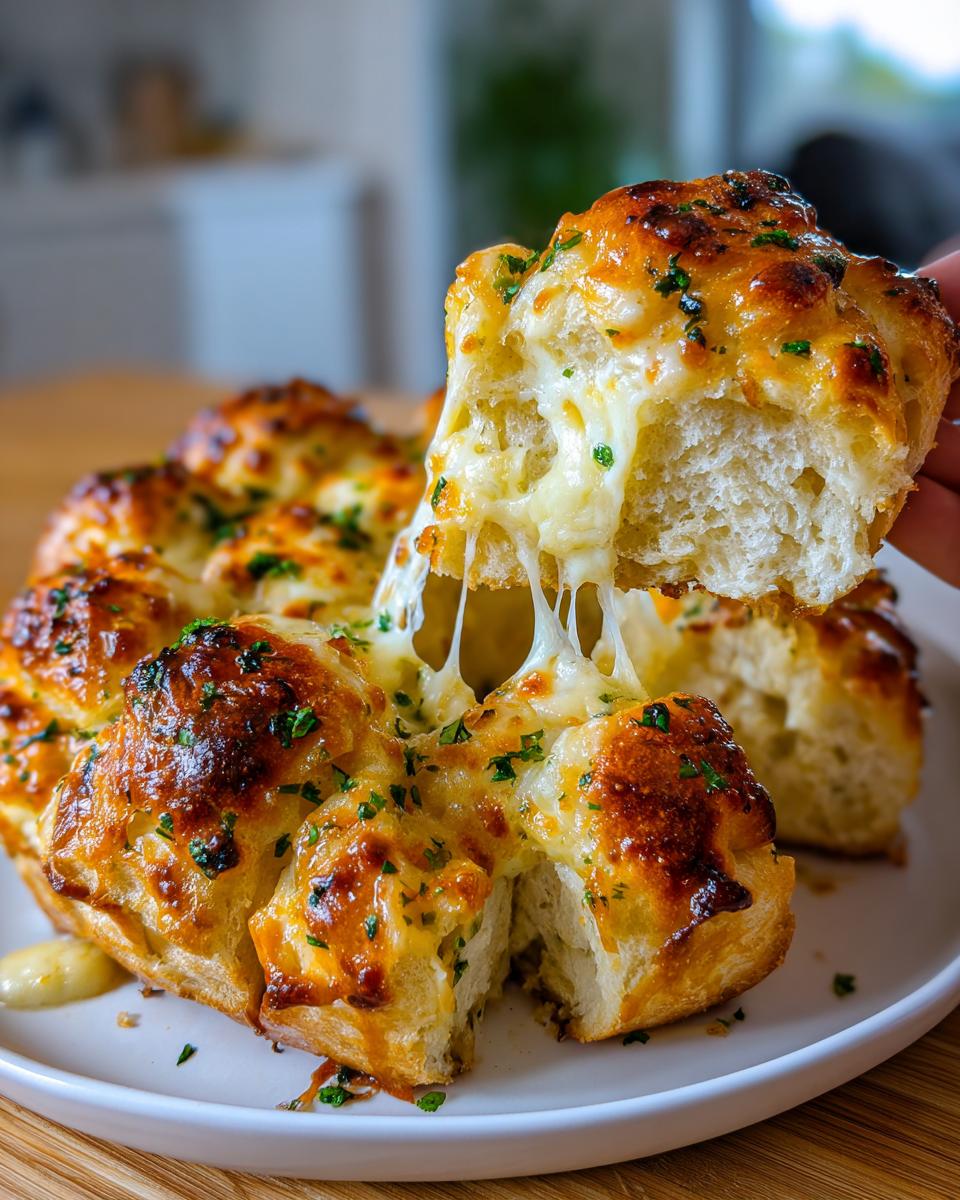
Once they are coated, grab that mozzarella and sprinkle it everywhere. Then, top it all off with the grated Parmesan. They should be completely covered but not drowning.
Baking Technique for Soft Garlic Rolls
This part is critical for keeping these sweet dinner rolls pillowy soft while the cheese gets caramelized and bubbly. You need foil for the first stage!
Cover the baking sheet loosely with aluminum foil. Seriously, loose! You don’t want the foil touching the cheese. Bake them covered like this for exactly 10 minutes. This steams them just slightly, locking in that buttery moisture.
After those 10 minutes are up, carefully take off the foil—watch out for the hot steam! Then, pop them back in for another 5 to 7 minutes. This second phase is only to get that mozzarella melted, bubbly, and just starting to turn that perfect golden brown color. Pull them out immediately when they look right. You want gooey, not crispy!
Tips for the Ultimate Soft Garlic Rolls
I’m so happy you made it this far! You’ve got your lovely, cheesy, garlicky bread, but let’s talk about making sure every single bite is cloud-soft, not dry disaster zone. Since this is such a popular recipe—I swear, everyone on the internet is making some version of this hawaiian roll garlic bread—I’ve gathered a few tricks for when things don’t come out 100% perfect on the first run.
These little refinements are what separate a good side dish from the one people ask you to bring to every party. Don’t settle for anything less than perfect pull-apart goodness!
Troubleshooting Common Hawaiian Roll Garlic Bread Issues
It happens! Maybe your oven runs a little hot, or maybe you couldn’t resist peeking during the foil stage. If you do run into a slight snag with your hawaiian roll garlic bread, don’t sweat it. We can usually fix it!
- Rolls feel dry on the very edges: This usually happens if the cheese covers them too loosely and the corners dry out while the middle steams. Next time, make sure you use extra butter right on those outer edges before you put the cheese on! If they are already dry, take any extra melted butter you might have left—especially if you made extra of that garlic mix—and generously brush only the dry parts right when the foil comes off. It’ll reintroduce moisture before the cheese sets.
- Cheese started burning before the middle heated up: Rookie mistake when dealing with that glorious cheese topping! If you notice the Parmesan or Mozzarella starting to brown before the 10-minute foil mark is up, pull them out immediately, cover them with the foil, and put them back in for the rest of that covered baking time. The top needs that foil tent to melt beautifully without turning into a crisp.
- The buttery flavor isn’t strong enough: Remember, we are competing with the sweetness of the rolls! If you used powdered garlic instead of fresh, you might need a boost. My quick fix? Once they come out of the oven, drizzle just a teaspoon of plain, melted butter over the top right before serving. It adds a fresh, aromatic punch that really screams “garlic bread” in a lovely way.
The goal for these soft garlic rolls is that slightly sweet, salty, garlicky center that pulls away easily. If you watch your time on that second, uncovered bake, you’ll nail it every time!
Serving Suggestions for Your Hawaiian Roll Garlic Bread
Now that you have this glorious, cheesy, buttery, sweet, and savory hawaiian roll garlic bread sitting hot on your counter, the only real question is: What are we eating it with? Honestly, this bread is basically a main course on its own, but it loves company!
Because these are pull-apart rolls, they make fantastic Party Food Ideas—just set them out with little tongs and watch them vanish. No one needs a knife or plate; it’s instant finger food heaven!
Of course, they are perfect alongside soupy dinners. If you are making spaghetti, lasagna, or a hearty bowl of chili, you need these rolls right there for dipping. They soak up all the sauce! They make the best Dinner Side for Pasta because the sweetness of the roll cuts through the acidity of the tomato sauce so nicely.
- Soup Night: Amazing with creamy tomato soup or a vegetable chili.
- Holiday Tables: It’s a crowd-pleasing upgrade from plain rolls for Thanksgiving or Christmas. Since it’s so fast, you can whip this up while the oven is full of other things!
- Appetizer Spreads: Serve it warm alongside a charcuterie board or a veggie platter because it offers that carb reward everyone secretly wants.
Speaking of viral recipes, I saw a pin on Pinterest about this bread that made me laugh because it was labeled a viral TikTok dish! Whether you saw it online or your grandma has been making a version forever, make sure you serve it right away. The cheese sets up pretty fast once it cools down!
Storage and Reheating Hawaiian Roll Garlic Bread
Listen, if you *actually* have leftovers of this incredible hawaiian roll garlic bread, you deserve a round of applause! Generally, this bread is at its absolute peak the minute it comes out of the oven. Those soft garlic rolls can sometimes stiffen up a bit once they cool down, especially once the cheese solidifies.
You want to store any leftovers sealed up tight, ideally in an airtight container or wrapped very well in plastic wrap and then foil. Because this recipe relies on those soft rolls, you want to prevent them from drying out in the fridge, so make sure they are well-covered. They should be fine in the counter for a few hours if you are having an all-day party, but for longer storage, the fridge is best.
Now, for reheating! This is where you bring the clouds back to your hawaiian roll garlic bread. Don’t just microwave it—that makes them gummy and weirdly chewy. We need the softness back without making them soggy!
The Best Way to Reheat Leftover Garlic Rolls
I have a two-step method that brings these back to life, making them seem almost freshly baked. You need a little bit of moisture and a little bit of dry heat.
- Step One: The Quick Steam. Take the amount of hawaiian roll garlic bread you want to eat and wrap it loosely in a paper towel, then give it a quick zap in the microwave—maybe 15 to 20 seconds, just until it starts to feel warm throughout. This softens the bread back up.
- Step Two: The Oven Crisp. Immediately after the microwave hits, transfer the rolls onto a small sheet of foil and pop them into a cooler oven, maybe 300°F (150°C), for about 5 to 8 minutes. This dries off the excess moisture from the microwave and warms the cheese up perfectly without turning the whole thing crunchy.
If you skip the microwave step and just bake them, they take way too long to heat up in the center, and the edges get hard before the middle is soft. This quick one-two punch is the secret to enjoying leftover sweet dinner rolls garlic style the next day!
Frequently Asked Questions About This Quick Appetizer Recipe
It’s normal to have questions bounce around when you find a great new recipe, especially one this popular! People often ask if they can swap out ingredients or how to tweak these famous little rolls for different needs. I’ve answered the most common things I hear about making this hawaiian roll garlic bread below. Check through these, and if you still have a burning question, feel free to check out our user guidelines!
Can I use regular sweet rolls instead of Hawaiian rolls for this recipe?
Oh, you totally can! If you get to the store and they are completely sold out of the King’s Hawaiian brand, any soft, slightly sweet dinner roll will work just fine. However, I have to be honest—the primary keyword recipe is popular for a reason! Regular rolls usually don’t have that specific hint of tanginess mixed with the sweetness that Hawaiian rolls have. That sweetness is what cuts through the strong garlic and cheese so beautifully! So, while a swap is fine for an emergency Comfort Food Side, if you want *this* exact flavor profile, stick to the real deal when you can.
How do I make this hawaiian roll garlic bread dairy-free?
I totally understand wanting to adapt recipes! Making this quick appetizer recipe dairy-free requires a couple of simple swaps. First, the obvious one: replace the butter with a high-quality vegan butter stick. Make sure you melt this down separately, as vegan butter can sometimes separate differently than dairy butter.
The cheese is the next hurdle. You will need a good melting dairy-free mozzarella blend and a dairy-free Parmesan substitute. Finding a non-dairy Parmesan that grates well can be tricky, or you can skip the hard cheese entirely and just double up on the mozzarella substitute. It won’t have that extra salty/nutty punch, so you might want to add just a tiny bit more salt to your garlic butter mixture to compensate. It still makes a fantastic, soft pull apart bread!
Nutritional Estimates for Cheesy Hawaiian Roll Garlic Bread
I know, I know, no one is digging into this amazing hawaiian roll garlic bread counting calories, but sometimes it’s good to have an idea of what we’re working with when we make this irresistible side dish, right? Since this recipe is packed with butter and cheese—which is exactly what makes it so good—it definitely leans into the comfort food category! But hey, everything in moderation, especially when it tastes this good!
The estimates below are based on serving the recipe as written, yielding 12 rolls total. So, if you eat two rolls instead of one, just double up on these numbers! Keep in mind that these figures are based on the standard ingredients listed above, so if you swap out butter brands or use a different cheese blend, the actual numbers might shift slightly. This is just our best guess for this fantastic cheesy bread side dish.
- Serving Size: 1 roll
- Calories: 180
- Fat: 10g (Of that, about 6g is Saturated Fat—the butter and cheese are working hard!)
- Carbohydrates: 18g
- Protein: 5g
- Sugar: 7g (That sweetness comes straight from those famous rolls!)
- Sodium: 250mg
See? Not too scary, especially when you consider how much joy this easy garlic bread brings to the dinner table! Remember, this is just a friendly estimate for your planning, not a hard rule. Enjoy every single bite!
Share Your Experience Making This Comfort Food Side
Whew! We made it through the butter, the cheese, and the tricky foil timing. Now that you’ve pulled this magnificent **hawaiian roll garlic bread** out of the oven and your kitchen smells like heaven, I really want to hear about it!
Honestly, seeing the way you all serve up these recipes is the best part of running Cookin’ Corner. Did you manage to save any leftovers, or did they vanish straight off the pan? Tell me everything!
If you followed along and made this quick, cheesy side dish, please do me a huge favor and leave a little rating right down there where the comments usually are. It takes two seconds, but it lets me know that this recipe is reliable and that I’m sending you home cooks the best, most dependable advice for that perfect 15 Minute Side.
And seriously, snap a picture! Did you serve these buttery garlic rolls alongside a big pot of red sauce? Did you bring them to a party or manage to sneak them onto a busy holiday side dish table? Tag us or drop a note in the contact form. Knowing you’ve created a little bit of comfort for your family table using this delicious **hawaiian roll garlic bread** makes all the recipe testing worth it!
PrintCheesy Hawaiian Roll Garlic Bread (Quick & Easy)
Make this crowd-pleasing, pull-apart garlic bread using sweet Hawaiian rolls. It is buttery, garlicky, and topped with melted cheese for a fast side dish or appetizer.
- Prep Time: 5 min
- Cook Time: 17 min
- Total Time: 22 min
- Yield: 12 servings 1x
- Category: Side Dish
- Method: Baking
- Cuisine: American
- Diet: Vegetarian
Ingredients
- 1 package (12 count) Hawaiian sweet rolls
- 1/2 cup unsalted butter, melted
- 4 cloves garlic, minced
- 1/4 cup fresh parsley, chopped
- 1/2 teaspoon dried oregano
- 1/4 teaspoon salt
- 1 cup shredded mozzarella cheese
- 1/4 cup grated Parmesan cheese
Instructions
- Preheat your oven to 350°F (175°C). Line a baking sheet with parchment paper.
- In a small bowl, combine the melted butter, minced garlic, parsley, oregano, and salt. Mix well to create the garlic butter.
- Keep the Hawaiian rolls connected in their original packaging or arrange them close together on the prepared baking sheet.
- Using a pastry brush or spoon, generously brush the garlic butter mixture over the tops and sides of all the rolls.
- Sprinkle the shredded mozzarella cheese evenly over the tops of the rolls. Then, sprinkle the Parmesan cheese over the mozzarella.
- Cover the baking sheet loosely with aluminum foil.
- Bake for 10 minutes covered.
- Remove the foil and bake for an additional 5 to 7 minutes, or until the cheese is melted, bubbly, and lightly golden brown.
- Serve immediately while warm as a pull-apart bread.
Notes
- For extra flavor, add a pinch of onion powder to the butter mixture.
- If you prefer a crispier top, skip the foil for the entire baking time, but watch closely to prevent burning.
- This bread pairs well with pasta dishes or soup.
Nutrition
- Serving Size: 1 roll
- Calories: 180
- Sugar: 7
- Sodium: 250
- Fat: 10
- Saturated Fat: 6
- Unsaturated Fat: 4
- Trans Fat: 0.2
- Carbohydrates: 18
- Fiber: 1
- Protein: 5
- Cholesterol: 25