
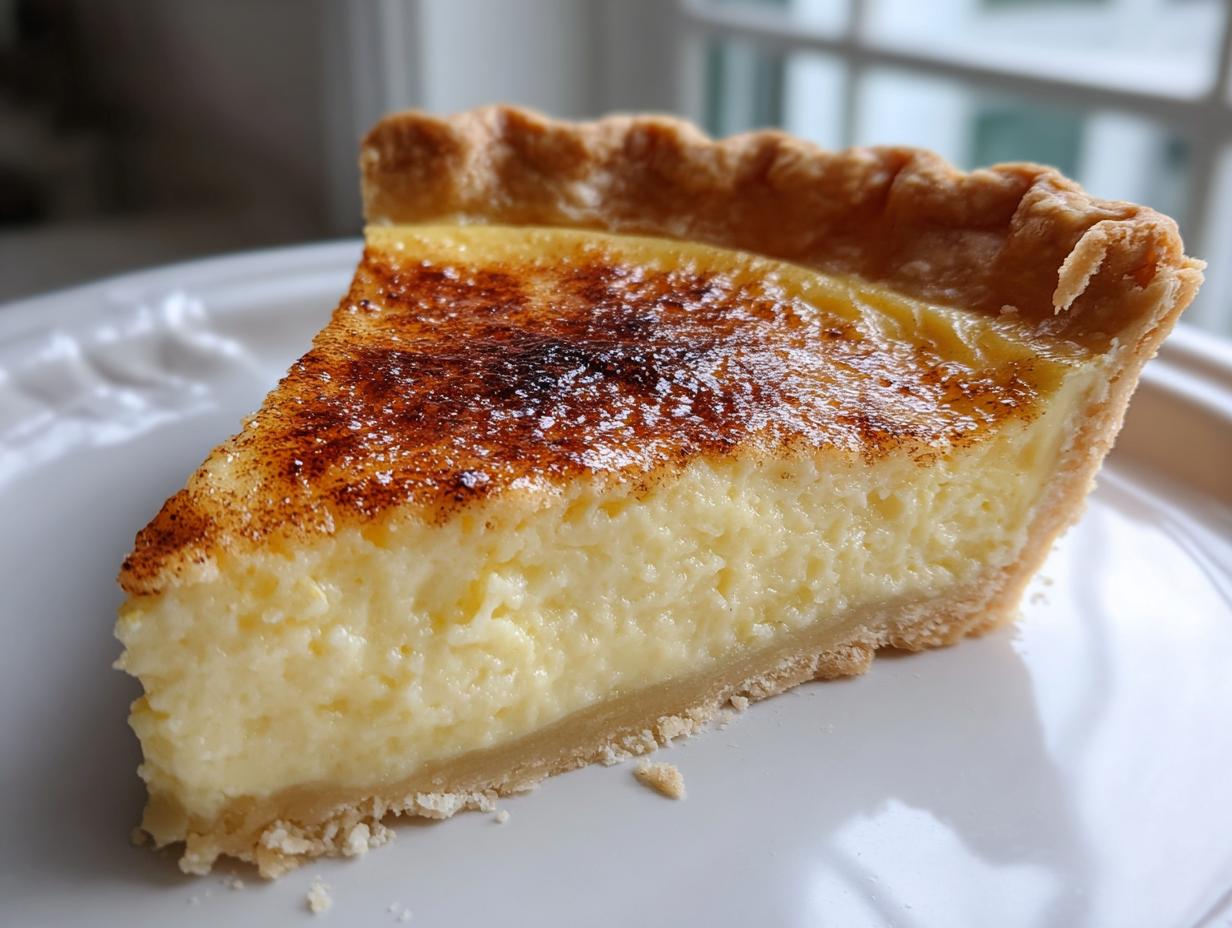
Some desserts just scream ‘home’ louder than others, don’t they? When I think of true comfort food, I picture that beautiful, shimmering surface of a perfectly baked custard pie. It’s a flavor that reaches right back into childhood, a taste of tradition and quiet Sundays. But let’s be honest—getting that filling perfectly creamy and completely crack-free feels like a culinary magic trick that most people never master. Well, that ends today! Here at Cookin’ Corner, Sarah Jane Thompson is sharing the heritage recipe she learned with her grandmother. This isn’t just another recipe; it’s our time-tested, foolproof technique for delivering a wonderfully silky smooth, old fashioned custard pie that sets up beautifully without ever showing stress cracks on top. You’re going to love how simple this is!
- Why This Old Fashioned Custard Pie Recipe Works Every Time
- Gathering Ingredients for Your Classic Custard Pie Recipe
- Step-by-Step Instructions for the Perfect Custard Pie
- Tips for How to Make Custard Pie Without Cracking
- Ingredient Notes and Substitutions for This Custard Pie
- Serving Suggestions for Your Homemade Dessert Pie
- Storage and Reheating Instructions for Leftover Custard Pie
- Frequently Asked Questions About Making Custard Pie
- Share Your Perfect Custard Pie Experience
- Share Your Perfect Custard Pie Experience
Why This Old Fashioned Custard Pie Recipe Works Every Time
When you’re aiming for that beautiful, velvety texture in a homemade dessert pie, baking anything custard-based can feel like walking on eggshells—pun intended! We’ve taken this classic custard pie recipe and refined every tricky step so you get incredible results, not disappointment. This is what sets our method apart and gives you that confidence in the kitchen.
- We skip aggressive whisking! That’s the secret to a perfectly silky smooth pie filling. No air means no bubbles, and no bubbles mean no unsightly cracks.
- The crust rests patiently. By using an unbaked crust, we let the gentle heat of the oven work its magic slowly, setting the eggs without shocking them.
- We use simple, high-quality ingredients—mostly eggs, milk, and vanilla. It’s an absolute celebration of simplicity that lets the custard shine through.
If you’re looking for the most reliable version of this traditional favorite, I truly think you’ll find it here right here.
Achieving a Silky Smooth Pie Filling
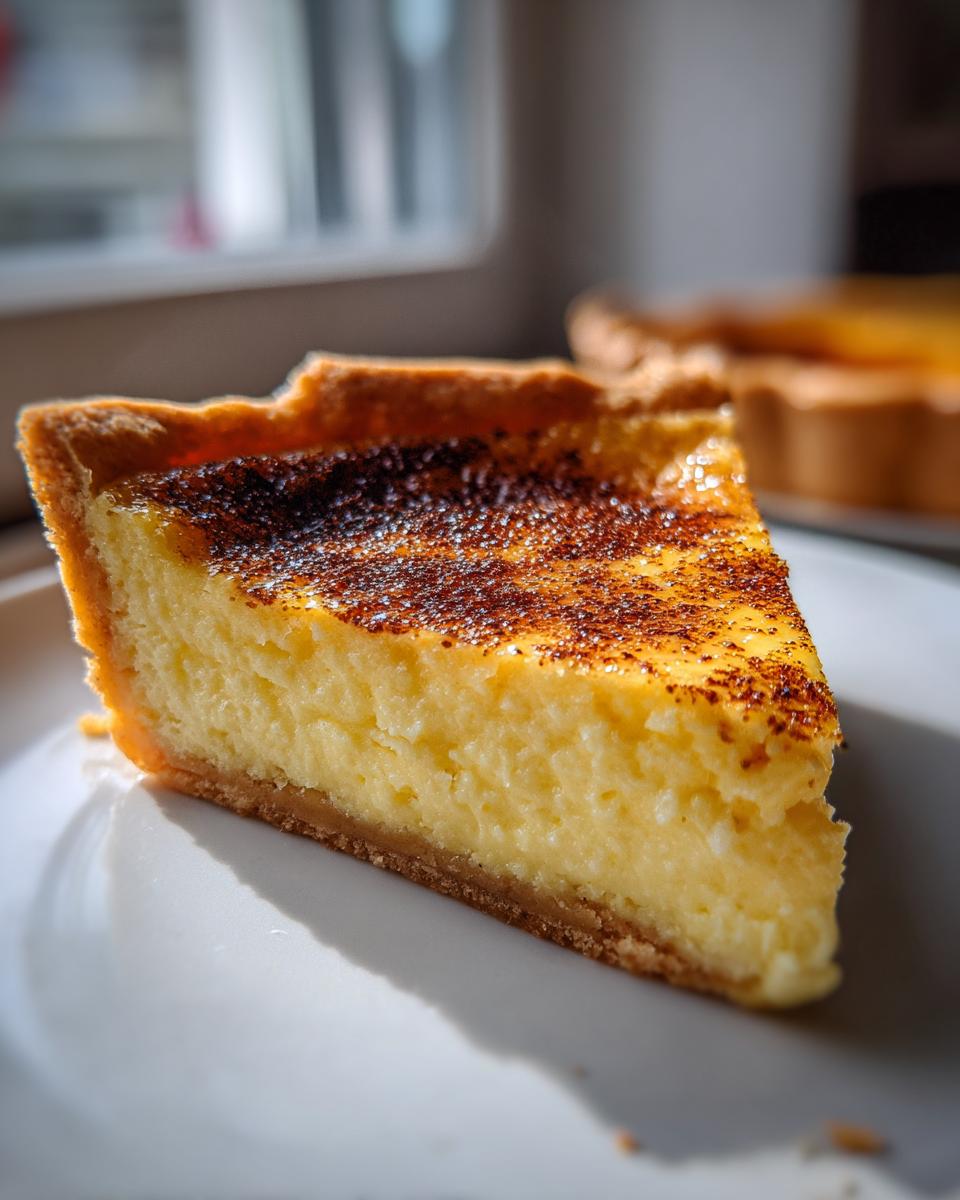
The biggest mistake people make when whipping up a custard is treating it like a cake batter. You’re not trying to incorporate volume; you’re just trying to combine ingredients! When I mix up the eggs, sugar, and milk, I’m barely moving the whisk. Think slow, gentle swirls. If you see suds or foam forming on top of that liquid, you’ve added too much air. That trapped air expands in the oven, hits the top, and pops, leaving you with a crater. We want gentle integration—that’s the real key to that dreamy texture.
The Foolproof Baking Method for Your Custard Pie
This two-stage baking process is non-negotiable for a crack-free top! We start the custard pie hot, at 375 degrees, for just 15 minutes. That initial burst of heat helps the edges of the crust and the very outside layer of the custard set up quickly. Then, we drop the temperature way down to 325 degrees for the rest of the time.
Reducing the heat slows everything down inside the oven. This slow, gradual bake ensures the center of the perfectly baked custard firms up without the edges cooking too fast and pulling away from the crust before the middle is ready. It’s gentle cooking for a delicate result!
Gathering Ingredients for Your Classic Custard Pie Recipe
The beauty of this old fashioned custard pie is that it’s mostly pantry staples! You don’t need anything fancy, which is why it was such a reliable favorite for generations. We are using simple ingredients to create that incredible creamy vanilla custard filling, but the quality matters even here.
Make sure you have: three large eggs—no substitutes here!—sugar, salt, vanilla, and importantly, 1 1/2 cups of whole milk. That whole milk really works wonders for richness, trust me. Don’t forget just a tiny pinch of ground nutmeg to sprinkle over the top before baking; that’s the traditional finish. If you want guidance on achieving that truly velvety interior, check out these great tips on making a silky smooth pie filling that sets just right.
Step-by-Step Instructions for the Perfect Custard Pie
Okay, now that we know the secrets—gentle mixing and dual temperature baking—here’s how we put it all together! Making this custard pie is really just a matter of following these precise steps without rushing, which is the true spirit of traditional comfort food desserts. I remember checking on my grandma’s pies, waiting for that warm scent of vanilla and nutmeg to drift past the kitchen door. You’ll know exactly when yours is almost done because the aroma is just heavenly!
Preparing the Crust and Oven for Your Custard Pie
First things first: get that oven ready at 375 degrees Fahrenheit. Grab your unbaked 9-inch pie crust and carefully place it right into your pie plate. Listen, don’t pre-bake it! We want everything to cook together gently so the crust doesn’t get too crispy before the liquid filling is set. Just get that shell sitting there, ready for its liquid gold!
Mixing the Creamy Vanilla Custard Filling Base
This is where we are super gentle. Take your three eggs and just barely whisk them in a medium bowl. I mean *barely*! You just want to break the yolks and whites up; think ‘comforting swirl’ not ‘vigorous beating.’ If you incorporate air, you’re inviting cracks later on. Once those eggs look uniform, stir in your sugar and set aside to dissolve for about 30 seconds. Then, just fold in your vanilla and the whole milk until everything is mixed through. Don’t panic if you see a tiny bubble or two, but remember: the goal is that silky smooth pie filling!
Baking Your Old Fashioned Baked Pie
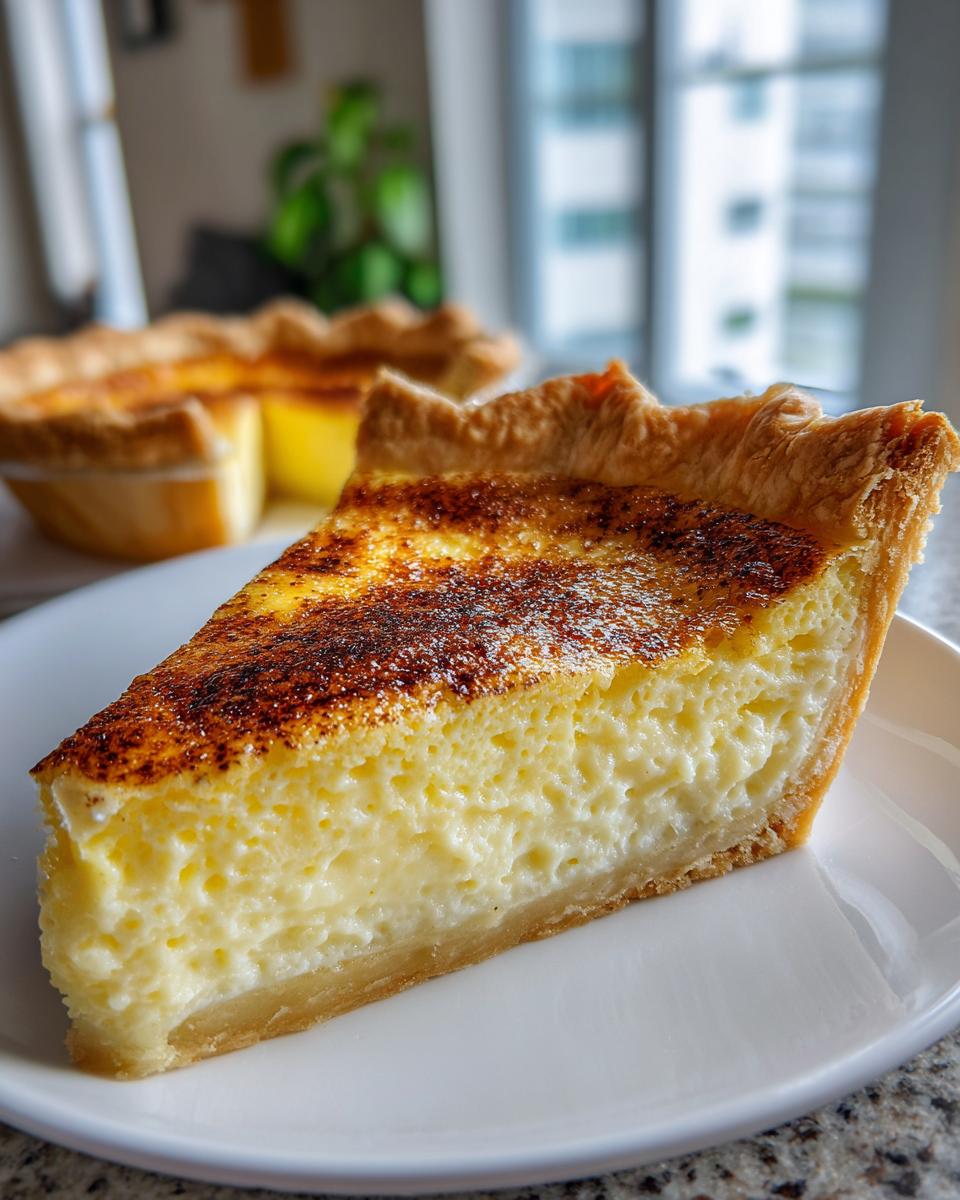
Pour that lovely liquid mixture right into your crust. Now, do the finishing touch: sprinkle a tiny pinch of ground nutmeg right over the top—that’s the traditional way for an old fashioned baked pie. Pop it into the 375-degree oven for exactly 15 minutes. Once that time is up, you MUST turn the heat down to 325 degrees Fahrenheit. Keep baking for another 30 to 40 minutes.
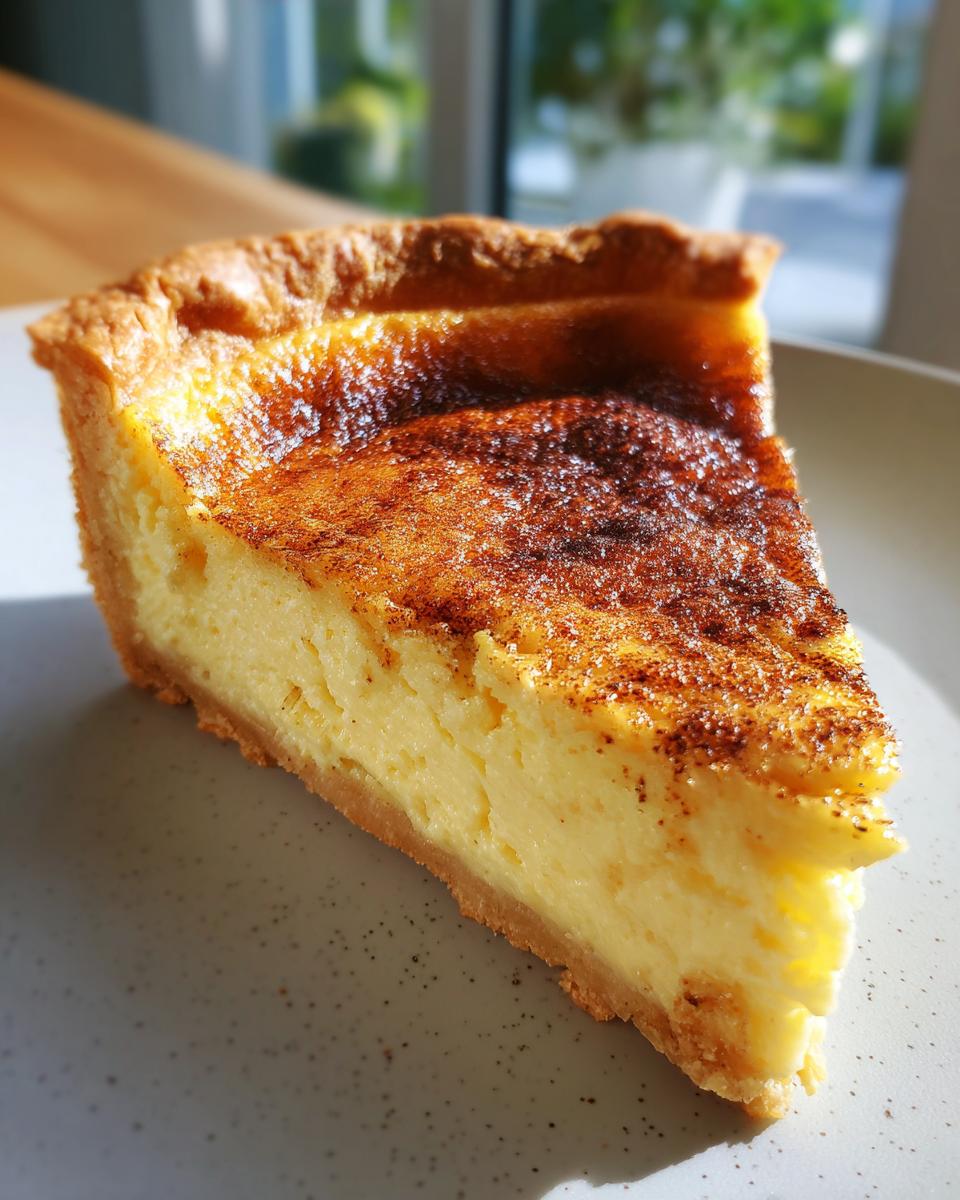
How do you check for doneness? Don’t rely on a knife! Carefully nudge the pie plate. The edges should look set, but the very center needs a little wobble, like soft gelatin. If it’s firm all the way through, it’s overdone and you’ll have cracks. Trust that slight jiggle; it finishes setting as it cools. For more foolproof advice on avoiding those tops, you can look up great tips here!
Tips for How to Make Custard Pie Without Cracking
Oh, the dreaded crack! It’s the one thing that can turn a beautiful, classic custard pie recipe into a baking failure in our eyes. I hear you, and I know how frustrating it is to pull out a dessert that looks perfect only to find a spiderweb crack across the top once it cools. The good news is that this particular problem is almost always caused by too much heat, too fast!
Remember how I said gentle mixing is key? Keep that rule locked in your mind! But the real, real secret—the one that guarantees a perfectly baked custard—is creating steam in your oven. This is my absolute favorite trick to keep things calm and even in there.
Here’s what you do during the baking process: once you’ve settled your pie into the oven at the lower temperature (325 degrees), take a shallow, oven-safe metal pan—a broiler tray works great—and carefully place it on the rack *below* your custard pie. Fill that pan about halfway up with boiling hot water. That steam acts like a gentle blanket around your pie, insulating it and preventing the edges from baking drastically faster than the center. It equalizes everything. This process keeps the entire pie temperature stable, ensuring that smooth, silky surface stays intact. Try this, and I promise you’ll never have a cracked top again! For more on getting that ideal texture, you can always revisit those mixing tips we talked about earlier.
Ingredient Notes and Substitutions for This Custard Pie
Since this is such a simple, classic recipe, every ingredient really pulls its own weight, so don’t think you can sneak in substitutions without changing the result! For that ultimate richness in your creamy vanilla custard filling, I specified whole milk, but if you’re feeling decadent, swap out half of that milk for heavy cream. It adds body without making the filling too heavy!
Now, let’s talk crust. This recipe assumes you’re using a nice, flaky pie crust recipe for the base. If your own go-to recipe for homemade crust needs a refresh, you can definitely find a fantastic, buttery one somewhere else on the site—just search for our pastry section! We don’t want to distract from the beautiful custard itself, but a good crust is essential for this homemade dessert pie.

Serving Suggestions for Your Homemade Dessert Pie
Patience is the hardest part, I know! But after all that careful baking, you absolutely must let this custard pie chill completely. When I say chill, I mean really chill—at least four hours, or honestly, overnight is best. It allows that silky smooth pie filling to fully stabilize so you get clean slices. Serving it cold really brings out that lovely nutmeg and vanilla flavor. While it’s already a perfect traditional comfort food dessert on its own, if you want a little something extra, a tiny dollop of fresh, unsweetened whipped cream is just heavenly. Or, for a fun twist, check out how we dress up our other creamy pies like the banana cream over here!
Storage and Reheating Instructions for Leftover Custard Pie
Okay, you’ve managed to save some—good job! Since this is an egg-based dessert, cooling and chilling are essential for safety and texture. You absolutely *must* let your custard pie cool completely on the counter first, then cover the plate lightly with plastic wrap or foil and move it to the fridge. We need it to chill for at least four hours for that perfect slice, but it keeps beautifully for two or three days.
Now, here’s the tough part: please don’t try to reheat leftover old fashioned custard pie! Warming it up just won’t do that lovely silky filling any favors; it tends to get kind of rubbery when reheated. Keep it cold, enjoy it straight from the fridge, and know that the flavor just gets better the next day!
Frequently Asked Questions About Making Custard Pie
I always get so many questions after sharing this recipe, which just shows how much people love a good, comforting slice of nostalgia! If you’re worried about making your first custard pie, don’t be. These common worries pop up a lot, but once you know the trick, you’ve got it made!
Can I use a store-bought pie crust instead of homemade?
Absolutely, you can! Don’t let anyone tell you otherwise. If you need a totally easy egg custard pie experience, store-bought works perfectly fine. Just remember the rule from our main instructions: do not pre-bake it! Put that crust straight into the plate, pour in the filling, and bake it all together. It makes the whole process speed right along, though personally, I still think nothing beats a truly flaky pie crust recipe made from scratch!
Where should I put the cinnamon—in the filling or on top?
For this specific old fashioned custard pie, the nutmeg goes right on top of the liquid filling *before* baking. This gives you that beautiful, speckled, golden appearance that screams ‘classic.’ If you want a stronger cinnamon base, like you find in some holiday versions, you can add a half teaspoon of ground cinnamon directly into the milk and egg mixture when you’re making your creamy vanilla custard filling. Just play around with it! If you’re looking for other spiced pies we love, check out how we handle spice in our easy pumpkin pie!
How do I know when the pie is truly done without cracking it?
This is the million-dollar question! We bake this pie until the edges look firm and maybe just *barely* start to pull away from the crust. But the center? It should still have a gentle, almost liquid jiggle when you nudge the pan. I call it the ‘gelatin wobble.’ If you wait until the center is firm, you’ve baked it too long, and that’s where the cracks happen as it cools down. That slight movement means the carry-over heat will finish the job perfectly, leaving you with that amazing silky smooth pie filling. If you are new to baking custards, you might also find our tips on making a buttermilk pie—which uses a similar technique—helpful!
Does this custard pie need to be served cold?
It really does! For that quintessential, clean-slicing, perfectly baked custard consistency, chilling is mandatory. If you try to slice this warm, it will look more like soup than pie! Don’t rush the cooling process. Once it’s cool on the counter, wrap it tight and let it firm up in the fridge for at least four hours. That chill time is what sets the structure that makes this homemade dessert pie so satisfying to eat.
Share Your Perfect Custard Pie Experience
I am just so thrilled that you’re going to try out this vintage gem. Honestly, baking is all about connection—connection to the past and connection to the people we feed. When you pull that beautiful, uncracked, golden-topped custard pie out of your oven, I want to know about it!
Take a picture of your slice and tag us! Let me know in the comments below how that silky smooth texture turned out for you. Did you manage to avoid those dreaded cracks using the steam trick? Hearing your success stories keeps me inspired here at Cookin’ Corner every single day. You can always read more about our culinary adventures right here!
PrintFlawless Old Fashioned Egg Custard Pie: Silky Smooth Filling

Make a truly classic, old-fashioned custard pie with a velvety smooth vanilla filling and a buttery, flaky crust. This simple, trusted recipe guarantees a creamy dessert pie every time. Learn the technique to avoid cracks.
- Prep Time: 15 min
- Cook Time: 45 min
- Total Time: 5 hours
- Yield: 8 servings 1x
- Category: Dessert
- Method: Baking
- Cuisine: American
- Diet: Vegetarian
Ingredients
- 1 unbaked 9-inch flaky pie crust recipe
- 3 large eggs
- 1/2 cup granulated sugar
- 1/4 teaspoon salt
- 1 teaspoon vanilla extract
- 1 1/2 cups whole milk
- Pinch of ground nutmeg for topping
Instructions
- Preheat your oven to 375 degrees Fahrenheit. Place your unbaked pie crust into a 9-inch pie plate. Do not pre-bake the crust.
- In a medium bowl, whisk the eggs lightly. You want to break up the yolks and whites without incorporating too much air, which can cause cracking.
- Add the sugar and salt to the eggs. Whisk until the sugar begins to dissolve, about 30 seconds.
- Stir in the vanilla extract and the whole milk until just combined. Do not overmix the filling.
- Pour the liquid custard mixture carefully into the unbaked pie shell.
- Sprinkle a small pinch of ground nutmeg evenly over the top of the liquid filling.
- Bake the pie at 375 degrees Fahrenheit for 15 minutes.
- Reduce the oven temperature to 325 degrees Fahrenheit. Continue baking for 30 to 40 minutes more, or until the edges are set and the center has a slight jiggle (like gelatin). Avoid overbaking to prevent cracks.
- Carefully remove the pie from the oven. Let it cool completely on a wire rack before slicing. The custard will finish setting as it cools.
- Chill the pie for at least 4 hours before serving for the best, silky texture.
Notes
- To achieve a silky smooth pie filling, avoid whipping air into the eggs. Gentle mixing is key.
- For a foolproof method to prevent cracking, place a shallow pan of hot water on the bottom rack of the oven while the custard bakes; this creates steam and gentle, even heat.
- If you prefer a richer flavor, substitute 1/2 cup of the whole milk with 1/2 cup of heavy cream.
- This recipe uses a standard pie crust; if you need a recipe for a flaky pie crust, search our archives.
Nutrition
- Serving Size: 1 slice
- Calories: 280
- Sugar: 22
- Sodium: 180
- Fat: 14
- Saturated Fat: 5
- Unsaturated Fat: 9
- Trans Fat: 0
- Carbohydrates: 28
- Fiber: 1
- Protein: 9
- Cholesterol: 110