
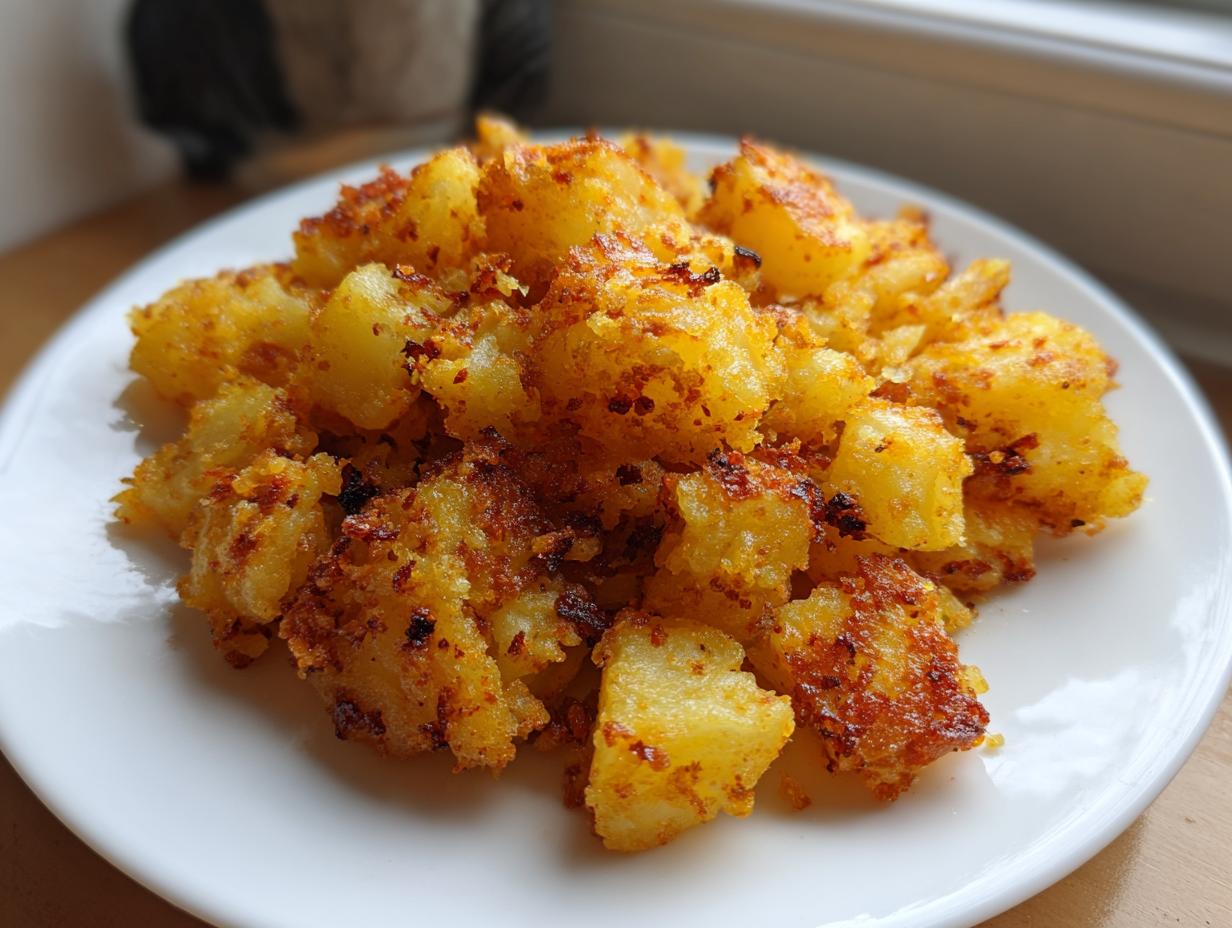
If there’s one thing I learned watching my grandmother cook in that old Midwest kitchen, it’s that plain food done perfectly is better than fancy food done poorly. And let me tell you, nothing sets the tone for a fantastic breakfast or brunch like achieving that perfect, shatteringly crisp exterior on your potatoes. Forget soggy, sad excuses for hash browns; we’re here to conquer those!
That’s why I put together this guide on the ultimate crispy breakfast potatoes. Because we all want that golden brown goodness, right? This isn’t just one way, either. I’ve broken down my family’s tried-and-true techniques across the three biggest workhorses in the modern kitchen: the trusty stovetop skillet, the hands-off oven roast, and the hyper-efficient air fryer. Learning these three methods means you’ll never have to settle for less than the best breakfast potatoes, no matter how little time you have.
As someone who bases all our recipes here at Cookin’ Corner on what works reliably in a real home kitchen—just like my grandmother taught me—I promise these techniques deliver. These aren’t restaurant secrets; these are pure, home-tested methods designed to give you those fluffy inside, crispy outside potatoes every single time you need a savory side dish.
- Why You Will Make These Crispy Breakfast Potatoes Every Time
- The Best Breakfast Potato Seasoning Blend
- How to Prepare Fluffy Inside Crispy Outside Potatoes
- Cooking Methods for Perfect Breakfast Potatoes Compared
- Tips for Success Making Your Breakfast Potatoes
- Serving Suggestions for Your Family Favorite Potato Recipe
- Storage & Reheating Instructions for Make Ahead Breakfast Potatoes
- Frequently Asked Questions About Breakfast Potatoes
- Share Your Golden Brown Potatoes Recipe Experience
Why You Will Make These Crispy Breakfast Potatoes Every Time
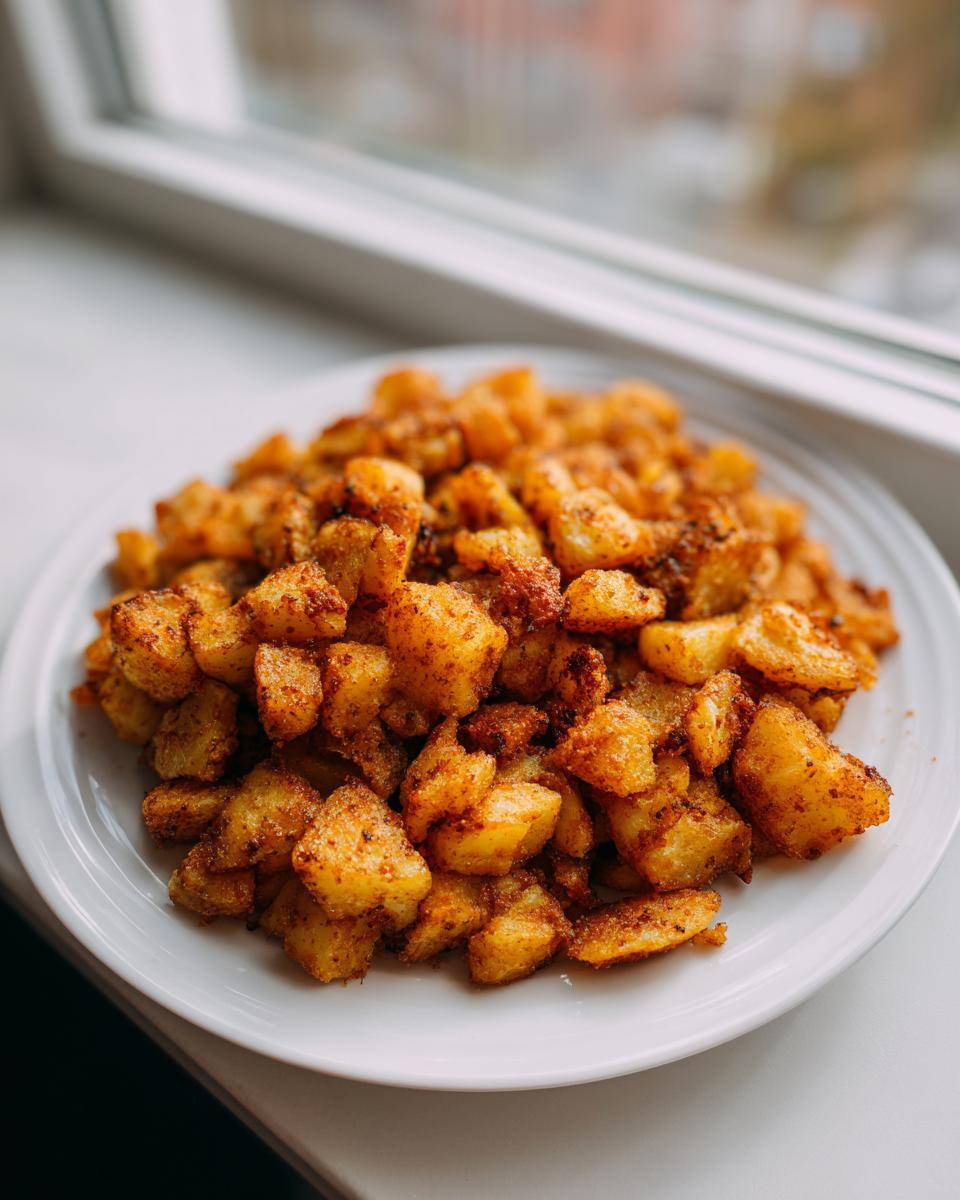
Honestly, once you nail this texture, you won’t go back. These aren’t just any potatoes; they are the staple side dish that makes everyone happy at brunch. What’s not to love?
- You get that unbeatable contrast: crispy breakfast potatoes that shatter a little when you bite them, giving way to a perfectly soft pillow inside.
- They work for every scenario: perfect as a standalone side, great mixed into a huge skillet scramble, or even packed up for lunch later.
- We give you options! Whether you have ten minutes for the skillet or plan to set the timer on the oven, there’s a path to perfection here.
Fluffy Inside Crispy Outside Potatoes Guaranteed
This is the holy grail, right? It all comes down to ditching that excess surface starch through rinsing and drying the cubes *very* well. That lack of moisture on the outside means the hot oil or hot air has nothing left to do except focus on creating that gorgeous, golden-brown crust.
Quick and Easy Breakfast Sides
You can’t beat the speed, especially if you’re using the skillet. Seriously, on a good day, I have these seasoned and browning before the coffee is even done brewing! That makes them an ideal candidate when you need quick and easy breakfast sides that feel incredibly satisfying.
The Best Breakfast Potato Seasoning Blend
Okay, let’s talk flavor. Because honestly, even the crispiest potato falls flat if it tastes like cardboard. This seasoning mix is what elevates these from just ‘potatoes’ to the *best breakfast potato seasoning* you’ll ever use. It’s savory, it’s warm, and it hits all the right notes without being overpowering. Forget bland piles of starch!
We rely on a simple but powerhouse combination: salt and pepper, of course, but the real magic comes from garlic powder, a touch of sweet paprika for color, and dried thyme and rosemary. I always lightly crush the rosemary between my fingers before tossing it in; it just wakes up the oils, you know? This blend is how we guarantee you get those totally savory breakfast potatoes that pair perfectly with eggs or steak.
I’ve seen people try to use fancy spice blends, but trust me, sticking to these basics lets the potato shine. For more amazing techniques on achieving golden perfection, check out this guide. It really dives deep into the crispiness factor.
Ingredient Notes/Substitutions for Savory Breakfast Potatoes
When you’re aiming for incredible texture, the base ingredients matter a huge amount. We use Russet potatoes here because they have the most starch, which is essential for that fluffy interior we talked about.
If you use something like Yukon Golds, they might stay slightly creamier rather than fluffy, but they’ll still taste amazing! For the oil, you absolutely need a high smoke-point oil—olive oil works fine, but avocado oil is my real favorite because it handles high heat like a champ without smoking up the kitchen. Oh, and good news: this recipe is naturally completely gluten-free and vegan, so everyone at the table can dig in!
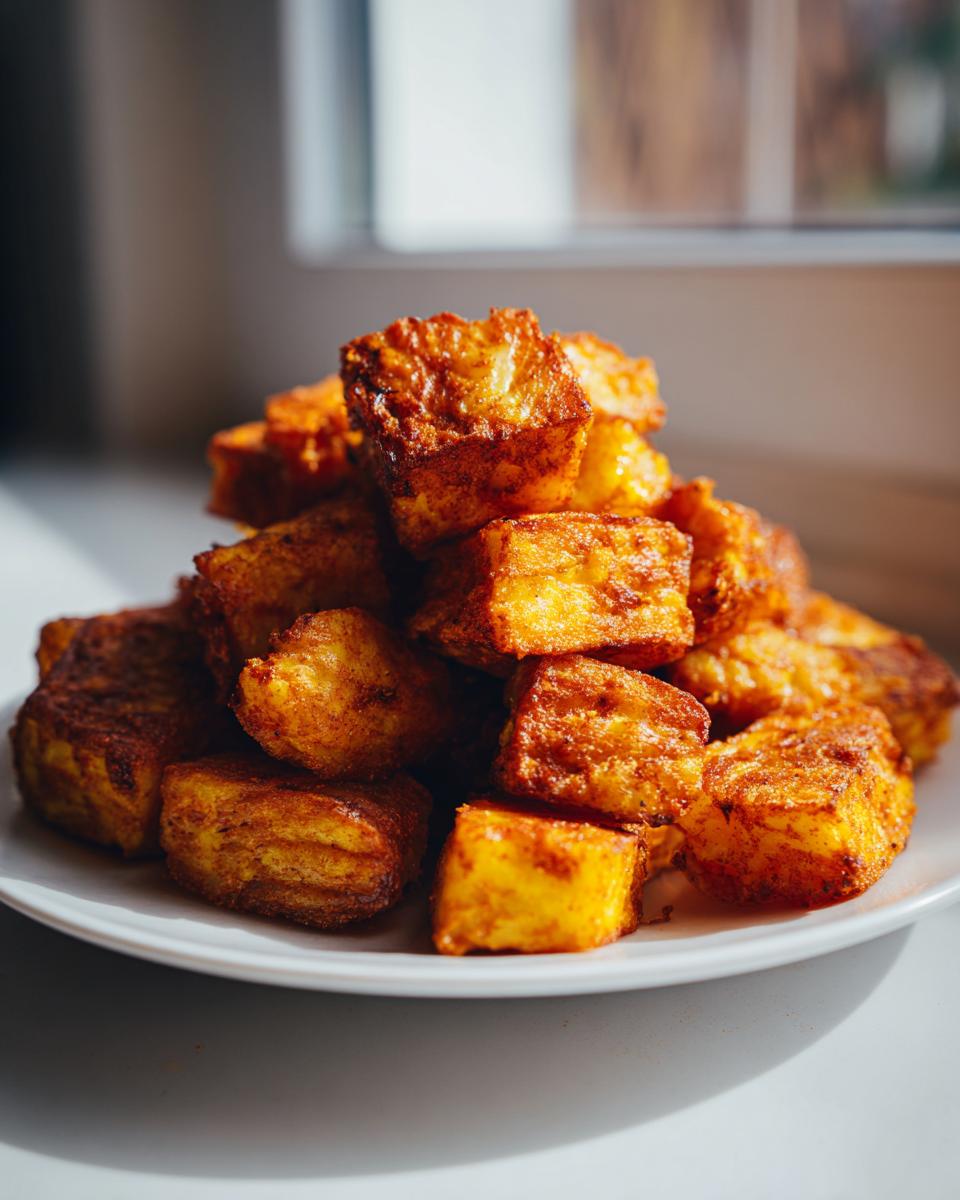
How to Prepare Fluffy Inside Crispy Outside Potatoes
Alright, you’ve got your big bag of potatoes, but before we even think about turning on a burner or oven, we have to do the prep work. This step is non-negotiable if you want those perfect breakfast potatoes that are fluffy inside and outrageously crispy on the outside. Seriously, don’t skip a thing here!
First up, wash them really well—you can leave the skin on, which I highly recommend for that rustic, home-fry style look. Dice them up into uniform cubes, about half an inch is perfect. Uniformity helps everything cook at the same rate, which stops you from having burnt corners next to raw centers.
Now for the trick that separates the amateurs from the pros: rinse those cubes. Put them in a big bowl, run cold water over them, and swirl them around. You’ll see the water turn milky white almost instantly. That’s all starch! You want to keep rinsing and stirring until the water runs nearly clear. That starch creates steam instead of crispiness, so we have to get rid of it!
Next, and this is the one I always forget when I’m rushing—you have to dry them completely. I mean, use a big, clean kitchen towel and just pat, press, and toss those spuds until they feel dry to the touch. I once rushed this step because I was trying to get dinner on the table fast, and the whole batch steamed instead of searing. Oops! A damp potato is a soggy potato, trust me on this one.
If you want to really go the extra mile for that ultimate fluffiness, there’s a little kitchen technique you can borrow. Take those perfectly diced and dried potatoes and drop them into boiling water for about five minutes. Just five! This is called par-boiling. It starts softening the interior just enough to make it fluffy later on. Pull them out quickly, drain them like your life depends on it, and make sure they dry off again because we still need that dry, starchy exterior ready to crisp up when it hits the heat!
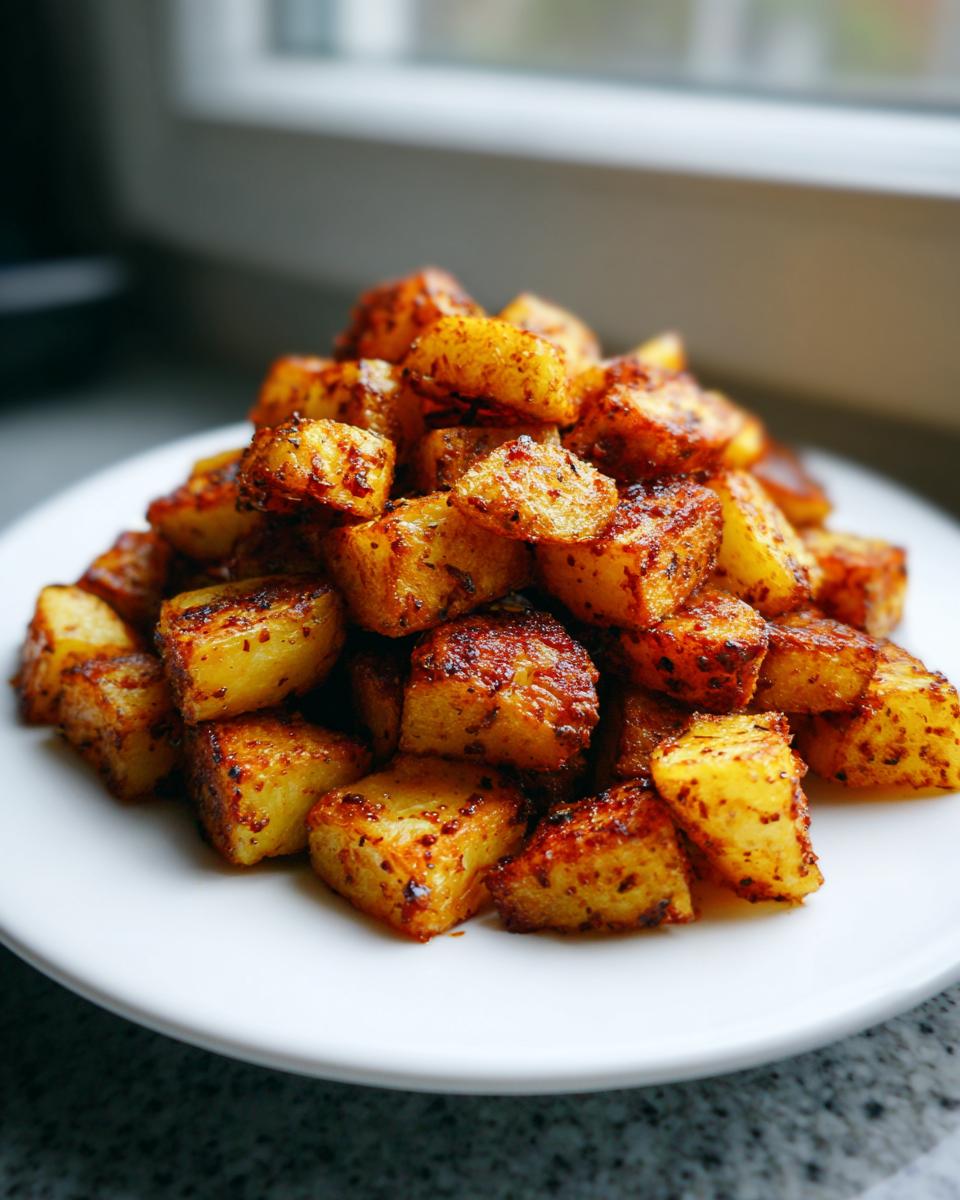
Cooking Methods for Perfect Breakfast Potatoes Compared
Now that our potatoes are prepped, seasoned, and ready to go, it’s time for the fun part: cooking them! Because the best thing about this guide is that it adapts to whatever equipment you prefer. I’m going to walk you through the three ways I make my breakfast potatoes, whether I need them lightning fast or perfectly hands-off. Remember, since we did all that starch rinsing, whichever method you choose, you are already miles ahead toward that crispy goal!
I’ve always believed in giving people options, which is why we cover everything here on Cookin’ Corner—it’s all about making reliable food that works for your life, just like my founder’s philosophy stressed. So, pick your weapon of choice below for these amazing breakfast potatoes.
Skillet Breakfast Potatoes Recipe: The Quickest Way
If you’re short on time or just love that classic diner feel, the skillet is your best friend. Get a big, heavy skillet—cast iron if you have it—nice and hot over medium-high heat and add a good slick of oil. The key here is to lay those seasoned cubes in a nice, single layer. Don’t dump them all in and try to crowd them, or you’ll end up steaming them again! This is how you get those authentic Home Fry Style Potatoes. You need to resist the urge to stir for a good four or five minutes, let them sear, and then turn them every few minutes until they are deeply golden brown all over. It takes patience, but it’s fast!
Oven Roasted Breakfast Potatoes: Hands-Off Roasting
When I’m serving a crowd or just need to manage the stove traffic, the oven is my go-to. Preheat your oven to a ripping 425°F (220°C). Spread those beauties out on a parchment-lined baking sheet—again, single layer is the goal here folks! If they are piled up, they steam. You’re going to let them roast for about 30 to 35 minutes total, but you absolutely have to flip them halfway through. That flip is crucial for getting that gorgeous, even bROWNING. These Oven Roasted Breakfast Potatoes are your easiest option for a huge batch.
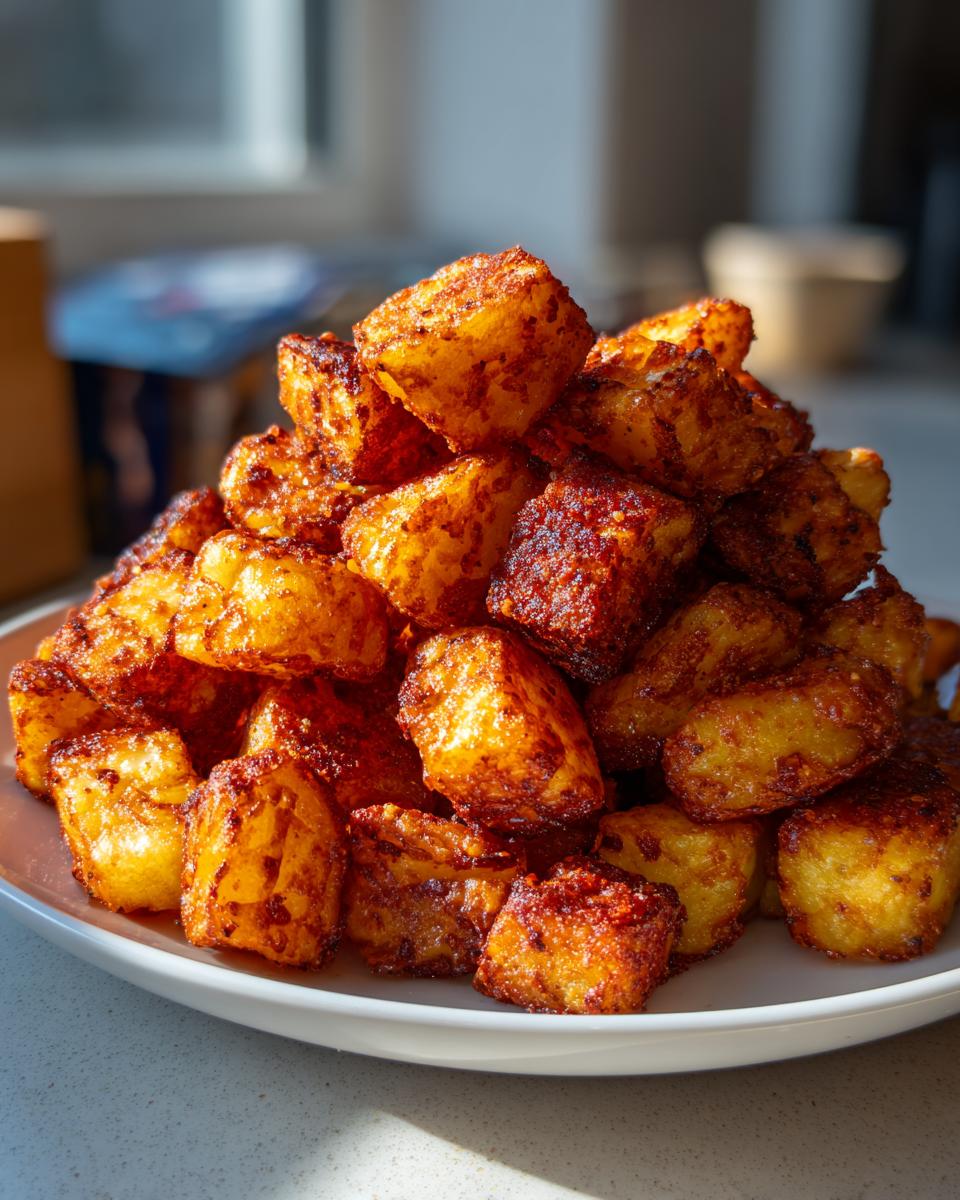
Air Fryer Breakfast Potatoes: Maximum Crispness
If crispiness is what you crave above all else, honey, pull out the air fryer. Preheat it to 380°F (195°C). You want the potatoes in a single layer, or maybe just slightly overlapping, but resist the temptation to pack that basket full! The air needs to circulate constantly to achieve that Golden Brown Potatoes Recipe look. Cook for about 15 to 20 minutes, but set a timer to shake the basket every five minutes. That constant movement prevents hot spots and guarantees every side of the potato cube gets crisp. You can read more about our reliable, home-tested recipes over on our About Page!
Tips for Success Making Your Breakfast Potatoes
Look, even though I mapped out three perfect methods for you, success really hinges on managing two things: heat and moisture. If you get those two sorted out, you win the breakfast game every time.
First tip, and this sounds so simple, but it’s huge for preventing soggy potatoes: Don’t season them until they are totally dry, right before they hit the oil. If you season them and then leave them sitting around for 20 minutes, the salt starts drawing out moisture from the potato flesh, making them sit in a little pool of salty water before they even start cooking. We want that seasoning to stick right to the dry, starchy outside layer.
Second, manage your heat! This is especially true for the skillet method. If you put the potatoes in a pan that isn’t hot enough, they’ll just fry lazily in the oil, soaking it up and becoming greasy instead of crispy. You want that immediate sizzle when they land. If you are oven roasting, make sure that oven is fully preheated—don’t rush it! The high heat shock is what sets the crust.
I learned this the hard way. Remember how I mentioned drying them completely? Once, I was trying to make a huge batch of savory breakfast potatoes for a family brunch, and I got distracted while drying the potato cubes. I probably left them sitting on the counter for a good half hour while I wrestled with the kids. When I finally tossed them in oil, they absorbed twice as much oil as usual and just refused to brown evenly. It was a texture nightmare—greasy in the middle, never quite crisp on the outside. Total flop! From that day on, I treat the drying step like it’s holding the secret to the universe. Test out what works best for your timeline, and definitely check out some other great tips over here for crispy results! These techniques are fantastic.
Serving Suggestions for Your Family Favorite Potato Recipe
So, you’ve got a big pile of piping hot, golden brown perfection staring back at you. What do you do with these glorious breakfast potatoes? Well, they are versatile enough to be the star of the show, but I think they truly shine when paired with the right companions. This is where they become that comforting, full meal.
Naturally, the most classic pairing is going to involve eggs. I mean, crispy potatoes and eggs are practically married, aren’t they? Whether you fry them sunny-side up so the bright yolk mixes right in with the crispy edges, or scramble them up, you can’t go wrong. This makes the perfect potatoes with eggs side dish combination that screams weekend brunch.
But don’t stop there! If you’re making a big spread, you need to have some bacon or sausage sizzlin’ on the side. The salty, savory punch from cured meat is the ultimate balancing flavor for the mild earthiness of the potato. If you’re feeling ambitious, try folding a handful of those finished potatoes right into your final scramble! Toss in some shredded cheddar and call it done—it’s an easy way to turn a side dish into a hearty breakfast skillet.
They are also fantastic sprinkled over strong coffee, or even used as a base for something a little different, like a vegetarian take on huevos rancheros. Seriously, once you have this easy potato side dish ready, just pile on your favorite things!
Storage & Reheating Instructions for Make Ahead Breakfast Potatoes
I know for a fact that most people making this recipe are hoping they can sneak some leftovers into their lunch tomorrow, or maybe tackle a whole week’s worth of breakfasts on Sunday afternoon. That’s totally smart! Preparing these delicious breakfast potatoes ahead of time is a fantastic way to make your mornings way smoother.
The crucial first step for any Make Ahead Breakfast Potatoes is cooling them down completely before they ever see a container. Never, ever rush to put hot or even warm potatoes into an airtight container. That trapped steam is the enemy of crispness! Let them cool down fully on a sheet pan for about 30 minutes until they aren’t radiating any heat anymore.
Once they are completely cooled, you can transfer them into an airtight container. I prefer layering them between sheets of parchment paper if I’m stacking them deep—it keeps them from sticking together disastrously. Stored this way in the fridge, they hold up really well for about three or four days. They’re still perfectly safe after that, but the texture starts to fade a bit.
How to Reheat for Maximum Crispness
This is where people get sad, because microwaving these glorious golden items just turns them into mushy, chewy disappointments. We absolutely must avoid the microwave if we want to restore that golden brown perfection we worked so hard for!
My absolute favorite way to bring these back to life is the air fryer if you have one, just like the method we detailed above! Pop them in at about 380°F (195°C) for about 5 to 7 minutes. They heat through fast and that circulating hot air sucks all the external moisture right back out, making them crispy all over again. It’s magic!
If the air fryer is busy, the oven works just as well. Spread your leftovers out on a clean baking sheet—don’t crowd them!—and put them back into a relatively hot oven, maybe 400°F (200°C), for about 8 to 10 minutes. They’ll crisp right back up, ready to go. It’s so satisfying to pull out these supposedly “make-ahead” potatoes and have them taste like they just came off the skillet!
For those of you who love prepping meals for the week, you can find some excellent ways to organize this process over on this great resource for making your schedule easier right here. Planning ahead really pays off when it comes to serving up amazing breakfast potatoes!
Frequently Asked Questions About Breakfast Potatoes
Can I use sweet potatoes instead of Russets for breakfast potatoes?
Oh, you totally can, but be warned—sweet potatoes are different! Russets are starchier, which is what gives us that fluffy inside when cooked correctly. Sweet potatoes are naturally much softer and have less starch, so they tend to get softer overall rather than super crispy, and they cook down a bit faster too. They make a wonderful, sweeter side, but they won’t have that classic texture you get with these breakfast potatoes.
What is the secret to getting truly crispy breakfast potatoes?
The absolute, non-negotiable secret is the prep work! You must rinse those diced potatoes until the water runs almost clear to get rid of the surface starch, and then you have to dry them thoroughly—I mean bone dry, like you scrubbed them with a towel! That dry surface is what allows high heat to immediately start browning and crisping instead of steaming everything up. Don’t skip that step!
Are these easy potato side dish recipes suitable for meal prepping?
Yes, definitely! This is designed to be an easy potato side dish for busy mornings. We have a whole section dedicated to how to store them for up to four days. The key is reheating them in the oven or air fryer, not the microwave, to bring that crispiness right back. Check out the storage section if you need the full details on freezing or fridge prep!
Share Your Golden Brown Potatoes Recipe Experience
Now that you’ve got all the secrets to achieving those unbelievably crispy breakfast potatoes—whether you went the skillet route, the oven roast, or decided to trust the air fryer—it’s time for you to cook them up for your family!
I always get so excited when I hear from you all. Did you manage to get that perfect golden brown potatoes recipe look? Which method did you settle on for your batch? Sometimes the skillet gives that perfect char, but other times the uniformity of the oven wins out.
Please, please, please let me know in the comments below! Leave a rating so other home cooks know just how much they need to make this easy potato side dish for their next brunch. If you snap a picture of your perfect, savory breakfast potatoes piled high next to your eggs, tag me on social media! I absolutely love seeing your creations. Happy cooking, and enjoy that crunch!
PrintThe Ultimate Crispy Breakfast Potatoes: Skillet, Oven, and Air Fryer Methods Compared

Learn how to make perfectly crispy breakfast potatoes with a fluffy inside using three simple cooking methods: skillet, oven-roasting, and air frying. This easy potato side dish is seasoned for savory flavor.
- Prep Time: 15 min
- Cook Time: 20 min
- Total Time: 35 min
- Yield: 6 servings 1x
- Category: Breakfast
- Method: Combination (Skillet, Oven, Air Fryer)
- Cuisine: American
- Diet: Gluten Free
Ingredients
- 3 lbs Russet potatoes, diced into 1/2 inch cubes
- 3 tablespoons olive oil or avocado oil
- 1 teaspoon salt
- 1/2 teaspoon black pepper
- 1 teaspoon garlic powder
- 1/2 teaspoon paprika
- 1/4 teaspoon dried thyme
- 1/4 teaspoon dried rosemary (optional)
- 1 small onion, diced (optional)
Instructions
- Prepare the potatoes: Wash and dice the potatoes into uniform 1/2 inch cubes. Do not peel them for maximum crispiness.
- Rinse the diced potatoes under cold water until the water runs clear. This removes excess starch. Dry them completely using a clean kitchen towel or paper towels. Complete drying is key for crispiness.
- Season the potatoes: In a large bowl, toss the dried potatoes with olive oil, salt, pepper, garlic powder, paprika, thyme, and rosemary until evenly coated. If using onion, add it now.
- Choose your cooking method:
- Skillet Method (Quickest): Heat 2 tablespoons of oil in a large, heavy-bottomed skillet over medium-high heat. Add potatoes in a single layer (work in batches if necessary). Cook for 15-20 minutes, turning every 4-5 minutes until golden brown and crispy on all sides. Reduce heat if potatoes brown too quickly before cooking through.
- Oven-Roasted Method (Hands-off): Preheat your oven to 425°F (220°C). Spread the seasoned potatoes in a single layer on a large baking sheet lined with parchment paper. Roast for 30-35 minutes, flipping halfway through, until golden brown and crisp.
- Air Fryer Method (Most Crispy): Preheat the air fryer to 380°F (195°C). Place potatoes in the air fryer basket in a single layer or slightly overlapping (do not overcrowd). Cook for 15-20 minutes, shaking the basket every 5 minutes until they reach your desired crispness.
- Serve immediately as a perfect side dish for eggs or bacon.
Notes
- For the fluffiest inside and crispiest outside, you can par-boil the diced potatoes for 5 minutes before seasoning and cooking. Drain and dry them thoroughly before proceeding with your chosen method.
- This recipe works well for meal prep. Store cooled leftovers in an airtight container in the refrigerator for up to 4 days. Reheat in an oven or air fryer to restore crispness.
- This recipe is naturally Gluten Free and Vegan.
Nutrition
- Serving Size: 1 cup
- Calories: 220
- Sugar: 1
- Sodium: 350
- Fat: 10
- Saturated Fat: 1.5
- Unsaturated Fat: 8.5
- Trans Fat: 0
- Carbohydrates: 32
- Fiber: 4
- Protein: 4
- Cholesterol: 0