
Honestly, ditch the fancy bakery boxes! I’m here to tell you that creating a restaurant-quality dessert right in your own kitchen is totally possible, and it’s not nearly as scary as everyone makes it sound. I remember the first time I attempted crème brûlée; my heart was pounding waiting for that torch to light. But trust me, once you master this unbelievably simple, rich vanilla custard and achieve that signature, shattering caramelized sugar topping—that *crack*—you will feel like a culinary sorceress.
This guide is going to walk you through every single, tiny detail, especially how to get silkiness instead of scrambled eggs. That moment when you torch the sugar and watch it bubble into that perfect amber glass? It’s pure kitchen magic, and it’s why this classic French dessert remains one of my absolute favorites to serve when I want to really wow someone. Come on, let’s make something elegant!
If you love hearing about how these timeless recipes came to be, you can read more about our own kitchen philosophy over on my About Page. It all starts with care!
- Why You Will Master This Classic Creme Brulee Recipe
- Gathering Ingredients for Your Perfect Vanilla Custard Dessert
- Essential Equipment for Making Creme Brulee
- Step-by-Step Instructions for the Best Creme Brulee
- Tips for Success When Making Creme Brulee
- Storing and Reheating Your Vanilla Custard Dessert
- Variations on the Classic Creme Brulee
- Frequently Asked Questions About Creme Brulee
- Nutritional Estimates for This Creme Brulee
- Share Your Experience Making This Elegant French Dessert
Why You Will Master This Classic Creme Brulee Recipe
I know you can do this! Seriously, making this dessert for your guests isn’t about complicated pastry skills; it’s about careful timing. Once you see how simple the ingredients are, you stop worrying. And honestly, achieving that textural contrast—the cold, smooth custard against the warm, brittle crust—is the biggest reward a home baker can ask for.
- The ingredients list is shockingly short. It’s all pantry staples, elevated!
- The chilling time means you can totally make this gorgeous dessert the day before your party. Stress-free hosting, people!
- That satisfying *CRACK* when you tap it with a spoon feels incredibly professional. It’s pure elegance on a plate.
Gathering Ingredients for Your Perfect Vanilla Custard Dessert
Okay, grab your apron because this is where simplicity shines. Making a truly top-tier vanilla custard dessert doesn’t require imported truffle oil or anything crazy like that. What it *does* require is high-quality basics handled with respect. Remember, we are aiming for that rich, creamy mouthfeel that screams luxury! The heavy cream is truly non-negotiable here—don’t try swapping it for half-and-half, or you’ll lose the richness we are aiming for.
And please, for the love of all things dessert, use real vanilla extract. Cheap imitation stuff sticks out like a sore thumb when the custard is this simple. Since the flavor profile is so focused, every single ingredient counts toward making this elegant French dessert truly shine. A tiny pinch of salt is my little secret—it just wakes the flavor of the cream and the egg yolks right up!
Essential Components for the Creme Brulee Custard
- 6 large egg yolks
- 2 cups heavy cream
- 1/2 cup granulated sugar, plus extra for topping
- 1 teaspoon vanilla extract
- Pinch of salt
Essential Equipment for Making Creme Brulee
You don’t need a whole fancy pastry setup, thank goodness! But there are a few non-negotiables for getting that perfect bake and that amazing crisp top. You’ll want six small ramekins, which are those perfect little ceramic dishes. Also, grab a large, deep baking pan—that’s essential for our water bath technique. And absolutely make sure you find a fine-mesh sieve; this is how we guarantee zero lumps!
And, of course, you’ll need my favorite noisy toy: the kitchen torch. It’s the tool that separates the good custard from the *amazing* crackly crown!
Step-by-Step Instructions for the Best Creme Brulee
Alright, let’s get down to business! This is the part that separates the dreaming from the doing. Don’t let the fancy French title scare you; the steps for this vanilla custard dessert are super methodical. The key to avoiding that grainy or curdled texture everyone fears is precision, especially when we mix the eggs. You’ll want to make sure your oven is preheated to 300°F (150°C) before you even start heating the cream!
First, get your ramekins inside that large baking pan. We pre-set them up so they don’t crack when the hot water hits them later! In a saucepan, gently warm up that heavy cream and the pinch of salt until you see tiny little bubbles just starting to form around the edges. You absolutely do not want a rolling boil—that’s too harsh for this delicate mixture.
While the cream is warming, whisk your six egg yolks and the 1/2 cup of sugar together in a separate bowl until the mixture is smooth and pale yellow. Now comes the most important part for texture: tempering! Very slowly, stream about one cup of your hot cream into that yolk mixture while whisking constantly, non-stop, like your life depends on it! This gentle introduction warms the eggs without cooking them instantly—no scrambled egg surprise here, thank you very much!
Once tempered, pour that yolk mixture right back into the saucepan with the rest of the cream. Whisk it very softly just to check it’s all combined, and then we strain it! Pour the whole thing through a fine-mesh sieve into a large measuring cup. This step catches any little bits of chalazae or egg membrane, guaranteeing that smooth, luxurious feel. Whew! I have to tell you, This classic creme brulee recipe delivers an elegant French dessert experience.
Preparing the Custard Base and Baking in a Water Bath
Carefully divide that beautiful, velvety custard evenly amongst your prepared ramekins. Now for the water bath, sometimes called a *bain-marie*—and this is non-negotiable for achieving a restaurant texture. The water bath surrounds the ramekins with gentle, steamy heat. This prevents the sides from setting too fast while the middle stays runny, which causes cracking and dryness.
Once the ramekins are settled in the big pan, carefully pour boiling or very hot water into the pan until it comes about halfway up the sides of the little dishes. Pop the whole assembly into the 300°F oven. You’re looking for signs of doneness after about 30 minutes. You’re not looking for stiff solidness! Watch them closely: the edges should look set, but when you gently nudge the pan, the exact center should still have a tiny, visible jiggle. That little wobble means they are done. If you bake until completely solid, they will be rubbery when chilled.
Chilling and Achieving the Perfect Caramelized Sugar Topping
Once they pass the jiggle test, carefully lift the ramekins out of that hot water—use tongs, they are hot! Let them cool on a wire rack before covering them tightly with plastic wrap. They need a serious chill session; at least four hours, but honestly, overnight is when the magic really happens. Cold custard helps protect it from the torch!
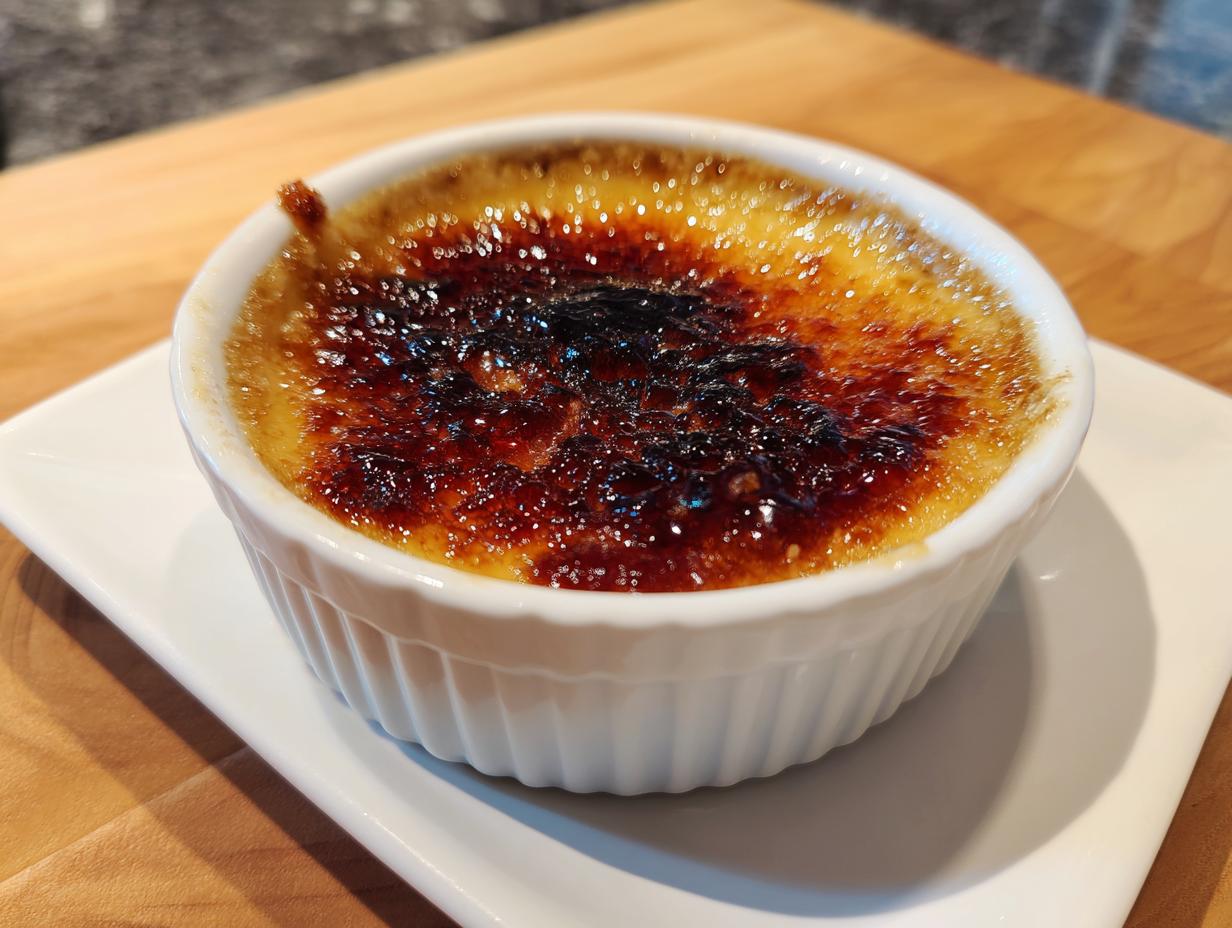
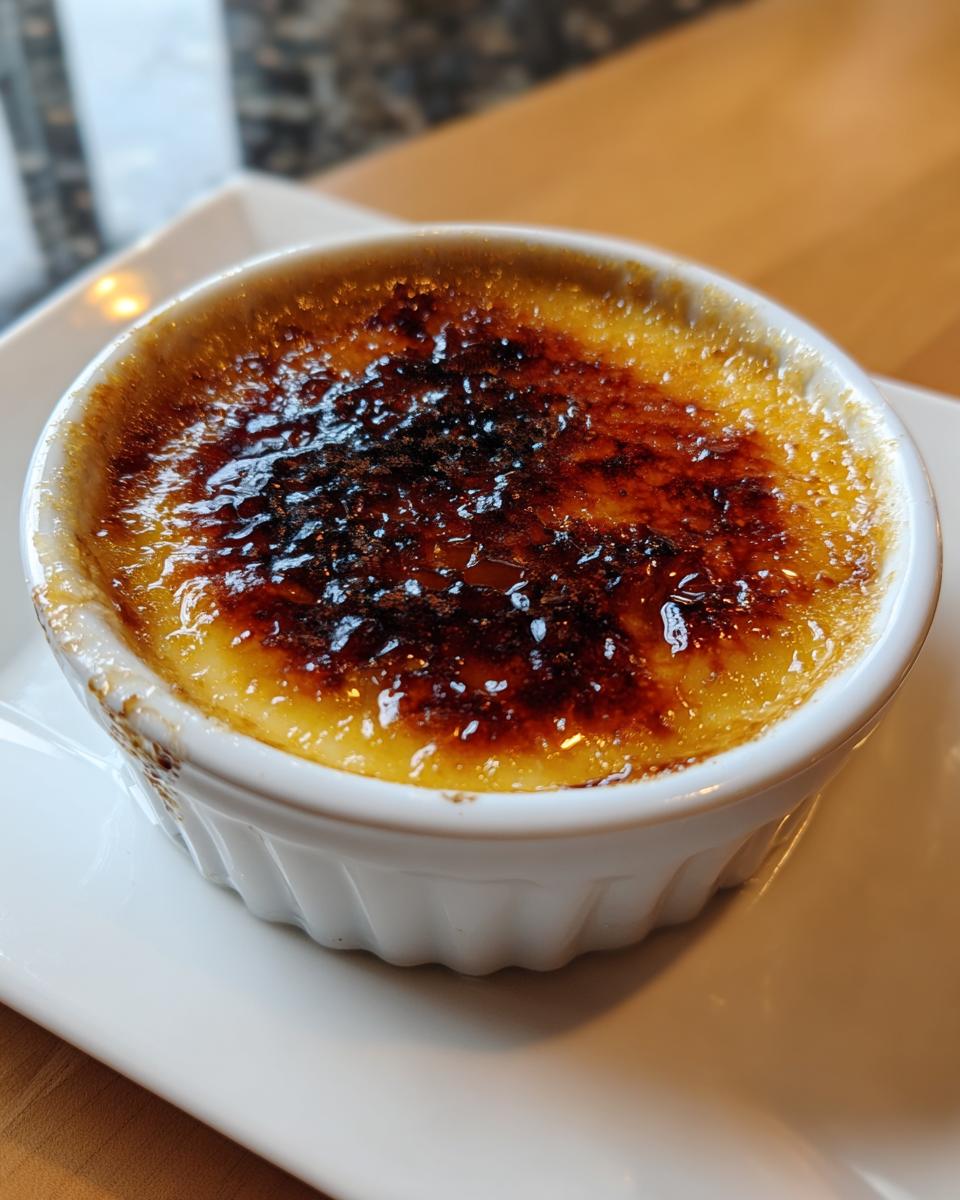
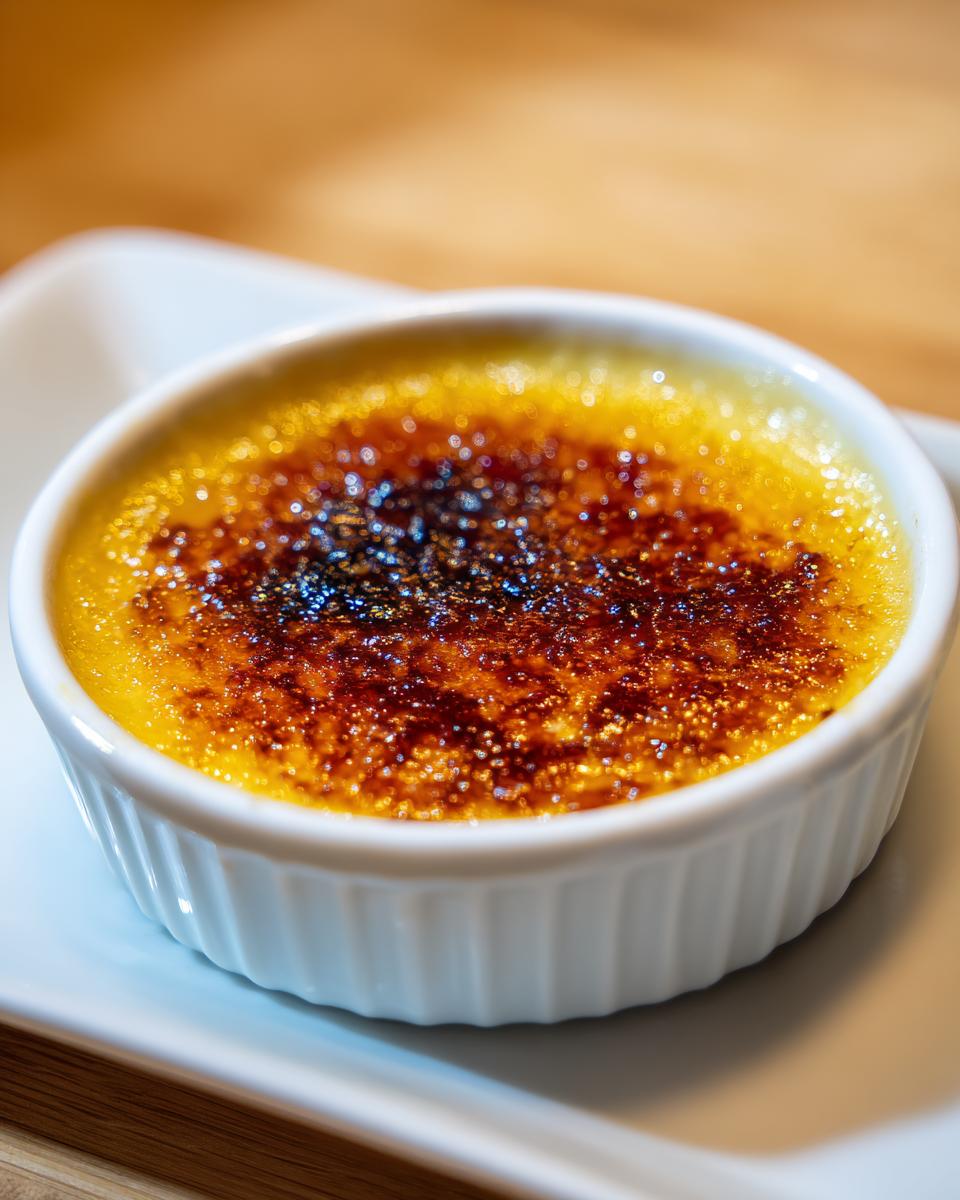
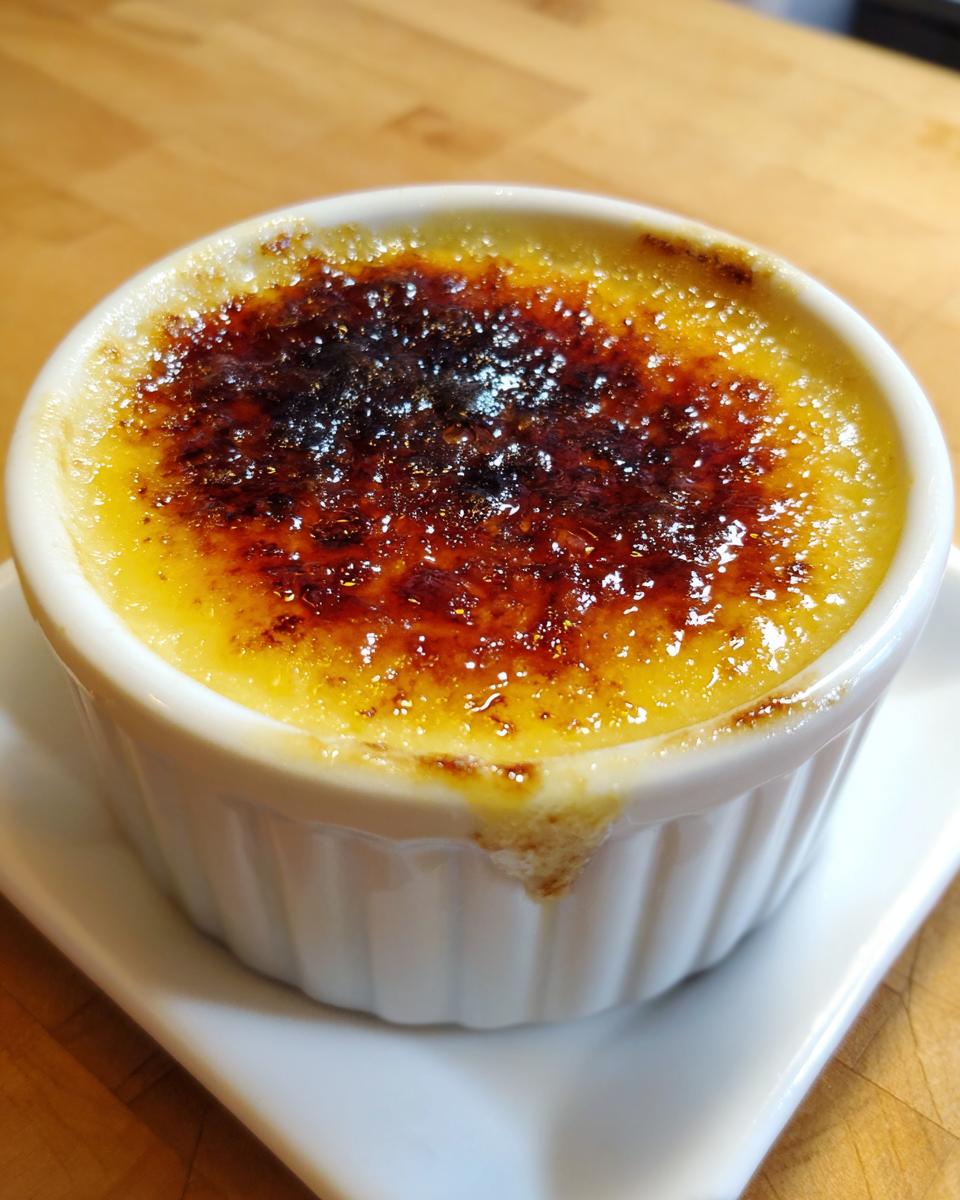
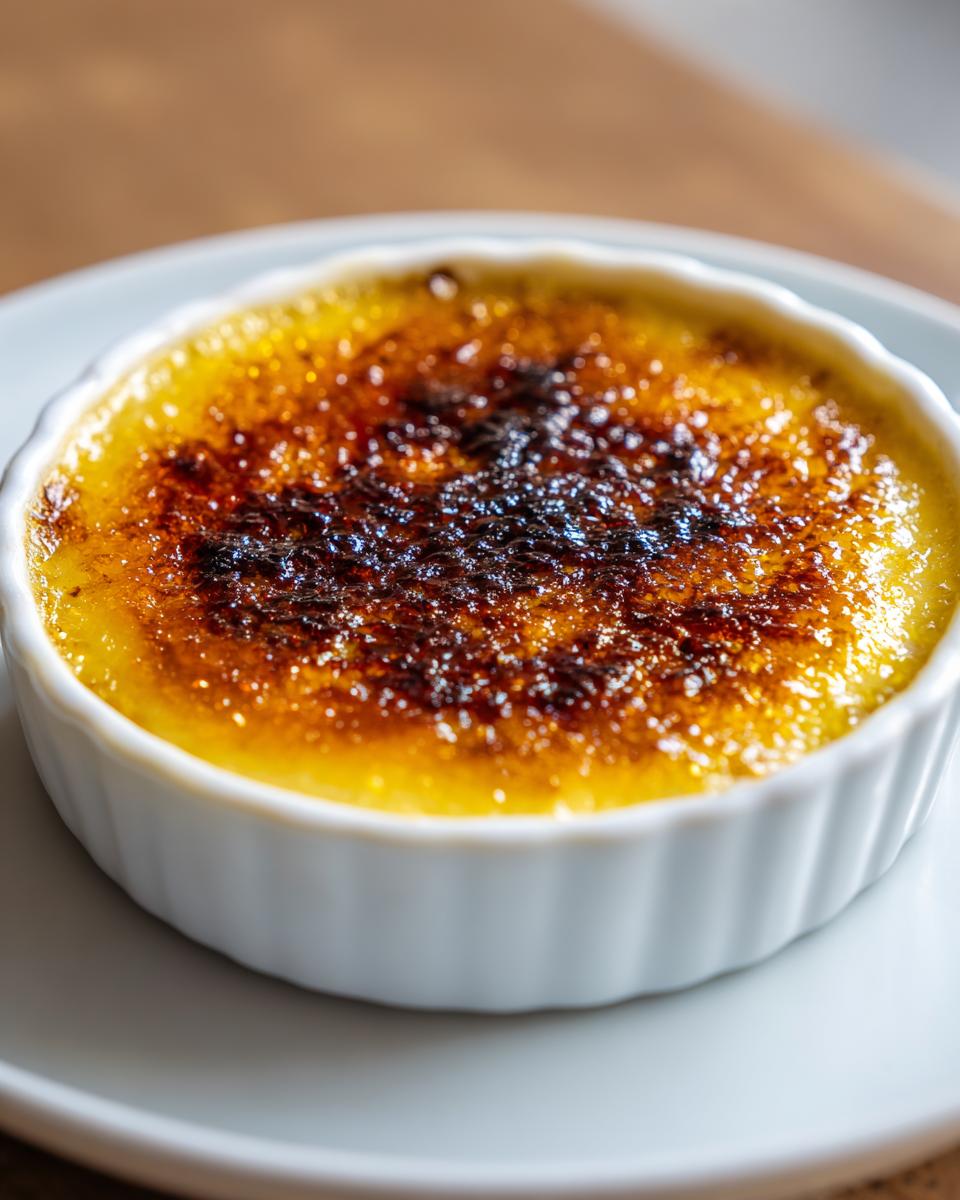
When you are ready to serve, uncover them and pat down any condensation on the surface—we need a dry surface for crispness! Sprinkle a thin, even layer of granulated sugar over the top. You want just enough to cover, not a big mound. Now, grab your kitchen torch. Hold the flame about three inches above the sugar and move constantly in small circles. Watch it bubble and turn deep amber. Work fast so you don’t heat the custard below! As soon as it looks like dark, crackly caramel, stop! Let it sit for just a minute or two so that crust hardens into that perfect, brittle layer. If you don’t have a torch, you can carefully place them under a screaming hot broiler for just 60–90 seconds, but you have to watch them every single second, or you’ll burn it to charcoal!
- Preheat your oven to 300°F (150°C). Place six 6-ounce ramekins in a large baking pan.
- In a medium saucepan, heat the heavy cream and salt over medium heat until it just simmers around the edges. Do not boil. Remove from heat.
- In a separate bowl, whisk the egg yolks and 1/2 cup of sugar together until the mixture is pale yellow and smooth. Whisk in the vanilla extract.
- Temper the egg yolks: Slowly pour about one cup of the hot cream mixture into the yolk mixture while whisking constantly. This prevents the eggs from scrambling.
- Pour the tempered yolk mixture back into the saucepan with the remaining cream. Whisk gently until just combined.
- Strain the custard mixture through a fine-mesh sieve into a large measuring cup or bowl to remove any lumps.
- Divide the custard evenly among the six ramekins.
- Carefully pour hot water into the baking pan until the water reaches halfway up the sides of the ramekins. This creates a water bath.
- Bake for 30 to 40 minutes, or until the edges are set but the centers still have a slight jiggle when gently shaken.
- Carefully remove the ramekins from the water bath and let them cool completely on a wire rack. Then, chill them in the refrigerator for at least 4 hours, or preferably overnight.
- Before serving, sprinkle an even, thin layer of granulated sugar over the top of each chilled custard.
- Use a kitchen torch to melt and caramelize the sugar until it forms a dark amber, brittle crust. Work quickly to avoid heating the custard underneath.
- Let the caramelized sugar cool and harden for a few minutes before serving.
If you ever need to review the legal side of things, like how we use shared content, you can check out our Terms of Use page. Anyway, back to the delicious stuff!
Tips for Success When Making Creme Brulee
I’ve made enough batches of this custard to know exactly where things can go sideways, and I want to save you the panic! Follow these little pointers, and you’ll get that flawless, silky texture every time. It’s all about slow, gentle cooking!
First, let’s talk about bubbles. If you see any foam or bubbles forming on the surface of the custard *after* you’ve poured it into the ramekins but *before* it goes into the oven, don’t just ignore them! They will bake into craters looking like lunar landscapes. You want to gently skim those bubbles off the top with a spoon, or you can carefully run a small culinary torch over the top just to pop them before baking. It’s a quick step, but it really improves the final look.
My second big tip is about the water bath temperature. Remember I told you to use hot water when you pour it in? Don’t just use warm tap water! You want the water to already be hot so it starts steaming immediately and brings the oven temperature back up quickly. If the water isn’t hot, the custard sits there in lukewarm bath for too long, and that’s when you risk the edges overcooking before the center is even close to setting.
Finally, resist the urge to check on it every five minutes! Opening the oven door lets out all that lovely steam, which interrupts the gentle, even cooking process the water bath is trying to create. Trust the jiggle test we talked about earlier. Pull them out when they wobble slightly. If you wait until they look completely firm in the oven, they are guaranteed to be overdone once chilled. Patience is truly the secret sauce here!
Storing and Reheating Your Vanilla Custard Dessert
This is a great make-ahead dessert, which is why I love it for entertaining! You can totally make the rich vanilla custard dessert base days ahead of time. Just make sure those ramekins are wrapped up tight with plastic wrap—like a little present—and keep them tucked away in the fridge for up to three or four days.
Here is the crucial part, though: Do NOT sprinkle the sugar on top until about 10 minutes before you plan to serve them. That beautiful, hard caramelized sugar topping doesn’t like sitting around. It absorbs moisture from the cold custard and basically turns into sticky goo instead of glass. So, bake, chill, cover, and only torch when you hear the dinner bell!
Variations on the Classic Creme Brulee
While the basic recipe is perfection—hello, pure egg yolk and cream richness!—I always love giving things a little spin, especially when I’m making a big batch. These simple additions let you tailor your vanilla custard dessert without messing up that delicate bake or that amazing cool temperature.
Citrus zest is probably my favorite way to jazz things up! Before you heat your cream, take a vegetable peeler and strip off a few long pieces of orange or lemon zest—make sure you only get the colored part, not the bitter white pith underneath. Heat the cream with the zest inside, then let it steep for about 15 minutes off the heat before straining out the peel pieces. The resulting custard has this incredible, bright floral note that cuts through the richness so nicely.
If you’re looking for deeper, warmer tones instead of brighter ones, try adding a teaspoon of good quality espresso powder right into your sugar and yolk mixture when you start whisking. It doesn’t make it taste like coffee, exactly, but it gives the custard this gorgeous, earthy depth that pairs beautifully with the caramelized topping. We call that Coffee Crème Brûlée!
And for the grown-up gatherings, a teaspoon of liqueur is an absolute treat. You want something smooth that won’t curdle the cream. Grand Marnier (orange) or a splash of good quality bourbon or dark rum added right at the very end, once the custard is already strained, works wonders. You only need a tiny bit—say, half a teaspoon per cup of cream—to add complexity without changing the overall structure. Just remember to whisk gently after adding any alcohol!
Frequently Asked Questions About Creme Brulee
I know you’ve got questions! When you’re aiming for that perfect restaurant result, little details matter so much. I’ve done a bunch of trial runs over the years, so let’s tackle the most common hiccups people run into when trying to achieve this gorgeous classic creme brulee.
If you ran into technical trouble, or if you just want to send me a note to tell me how shiny your sugar crust turned out, please don’t hesitate to reach out via my Contact Page. I check them all!
Why is my Creme Brulee curdled or scrambled?
Oh, that heart-stopping moment! This almost always happens because the hot cream was poured into the egg yolks too quickly, essentially scrambling them before they could adjust to the heat. You have to temper them slowly! Pour the hot liquid in a very thin, continuous stream while whisking the yolks aggressively the entire time. If you stop whisking even for a second, those yolks tighten up—and bam, you’ve got little bits of cooked egg instead of smooth custard.
Can I make the Creme Brulee ahead of time?
Yes, you absolutely can, and I highly recommend it! The base custard needs a good, long rest in the fridge—that’s what ensures the texture sets up perfectly cold and silky. I always aim for at least four hours, but honestly, if you can let it chill overnight, you’ll get the best result. Just remember, you only sprinkle the sugar on top and do the torching right before you serve it. Never torch too early!
What is the best sugar for the caramelized sugar topping?
For the absolute most reliable, thick, and shatteringly crisp top, stick with plain old granulated white sugar. It melts, bubbles, and hardens exactly how you want it to. However, if you are serving a crowd and need that crust to form super fast right under the torch, some folks swear by using superfine or caster sugar because the smaller crystals melt a little quicker. But for that classic, thick layer of brittle glass, standard granulated sugar is my tried-and-true recommendation for this vanilla custard dessert!
Nutritional Estimates for This Creme Brulee
Now, look, I’m a home cook, not a registered dietitian, so these numbers are just estimates based on what I know goes into this glorious, rich dessert. This is definitely an indulgent treat—it’s heavy cream and egg yolks, after all! If you divide the entire recipe by six servings, you’re looking at roughly 380 calories per ramekin. That fat content is high, which is what makes the custard so incredibly smooth and decadent; that’s about 30 grams of fat, with 18 of those being saturated fat.
You’ll be getting about 26 grams of carbohydrates, most of that being the sugar we use both in the custard and for that fabulous topping. On the plus side, you get a decent amount of protein from those six egg yolks, usually around 7 grams. I always say, when you’re making an elegant French dessert like this, you have to embrace the richness!
Just remember, these figures—Calories: 380, Sugar: 25g, Sodium: 45mg, Fat: 30g, Saturated Fat: 18g, Carbohydrates: 26g, Protein: 7g—are based on the ingredients listed in the recipe. They are a guide, not gospel, but they remind us this is a special occasion treat!
Share Your Experience Making This Elegant French Dessert
Now the fun part happens! You’ve done the hard work—you’ve tempered the eggs, you’ve baked to the perfect jiggle, and you’ve mastered that glorious, shattering crack on top of your crème brûlée. I just absolutely love hearing from you folks when you nail a dessert that feels totally fancy!
So, please, jump down into the comments below! I want to know everything. Did your kitchen smell amazing while that vanilla custard was baking? Did you manage to torch that sugar crust into perfect, crunchy amber glass on the first try, or did you have a little drama with the broiler? Be honest!
If you loved this recipe—and I really hope you did—give it a rating right below. Five stars if you’re feeling spoiled! And if you still have questions about that tempering step or if your custard seemed too firm, leave those in the comments too. I read every single one, and I’m happy to troubleshoot!
Creating something this timeless and elegant makes me so proud for all of you. Go ahead and brag a little about your success with this amazingly simple recipe for an elegant French dessert!
PrintClassic Crème Brûlée Recipe
Make a restaurant-quality crème brûlée featuring rich vanilla custard and a crisp, caramelized sugar topping.
- Prep Time: 15 min
- Cook Time: 40 min
- Total Time: 55 min
- Yield: 6 servings 1x
- Category: Dessert
- Method: Baking and Torching
- Cuisine: French
- Diet: Vegetarian
Ingredients
- 6 large egg yolks
- 2 cups heavy cream
- 1/2 cup granulated sugar, plus extra for topping
- 1 teaspoon vanilla extract
- Pinch of salt
Instructions
- Preheat your oven to 300°F (150°C). Place six 6-ounce ramekins in a large baking pan.
- In a medium saucepan, heat the heavy cream and salt over medium heat until it just simmers around the edges. Do not boil. Remove from heat.
- In a separate bowl, whisk the egg yolks and 1/2 cup of sugar together until the mixture is pale yellow and smooth. Whisk in the vanilla extract.
- Temper the egg yolks: Slowly pour about one cup of the hot cream mixture into the yolk mixture while whisking constantly. This prevents the eggs from scrambling.
- Pour the tempered yolk mixture back into the saucepan with the remaining cream. Whisk gently until just combined.
- Strain the custard mixture through a fine-mesh sieve into a large measuring cup or bowl to remove any lumps.
- Divide the custard evenly among the six ramekins.
- Carefully pour hot water into the baking pan until the water reaches halfway up the sides of the ramekins. This creates a water bath.
- Bake for 30 to 40 minutes, or until the edges are set but the centers still have a slight jiggle when gently shaken.
- Carefully remove the ramekins from the water bath and let them cool completely on a wire rack. Then, chill them in the refrigerator for at least 4 hours, or preferably overnight.
- Before serving, sprinkle an even, thin layer of granulated sugar over the top of each chilled custard.
- Use a kitchen torch to melt and caramelize the sugar until it forms a dark amber, brittle crust. Work quickly to avoid heating the custard underneath.
- Let the caramelized sugar cool and harden for a few minutes before serving.
Notes
- For the best texture, do not overbake. The custard should look mostly set.
- If you do not have a kitchen torch, you can place the sugared ramekins under a preheated broiler for 1-2 minutes, watching constantly to prevent burning.
- Use high-CPC phrases: This classic creme brulee recipe delivers an elegant French dessert experience.
Nutrition
- Serving Size: 1 ramekin
- Calories: 380
- Sugar: 25
- Sodium: 45
- Fat: 30
- Saturated Fat: 18
- Unsaturated Fat: 12
- Trans Fat: 1
- Carbohydrates: 26
- Fiber: 0
- Protein: 7
- Cholesterol: 280