
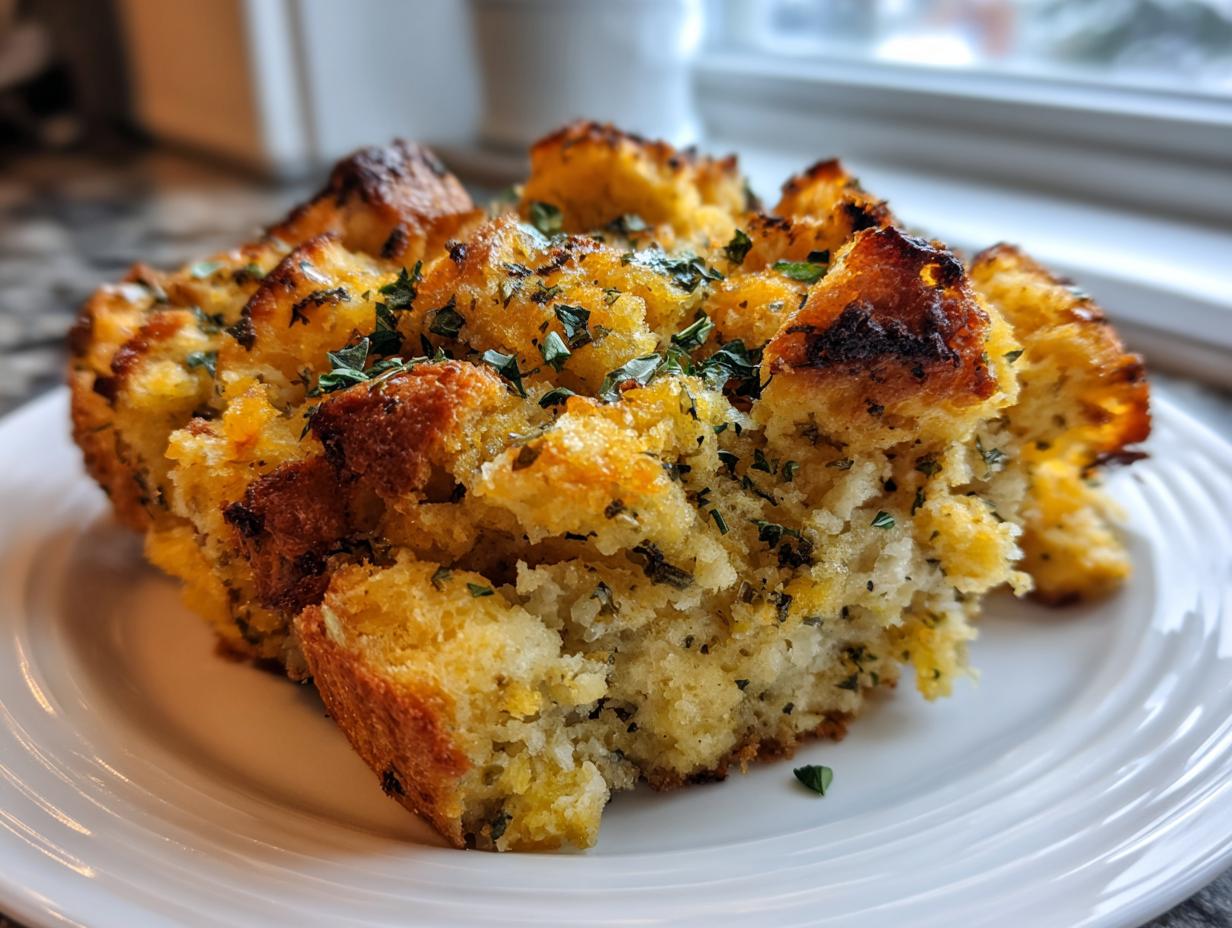
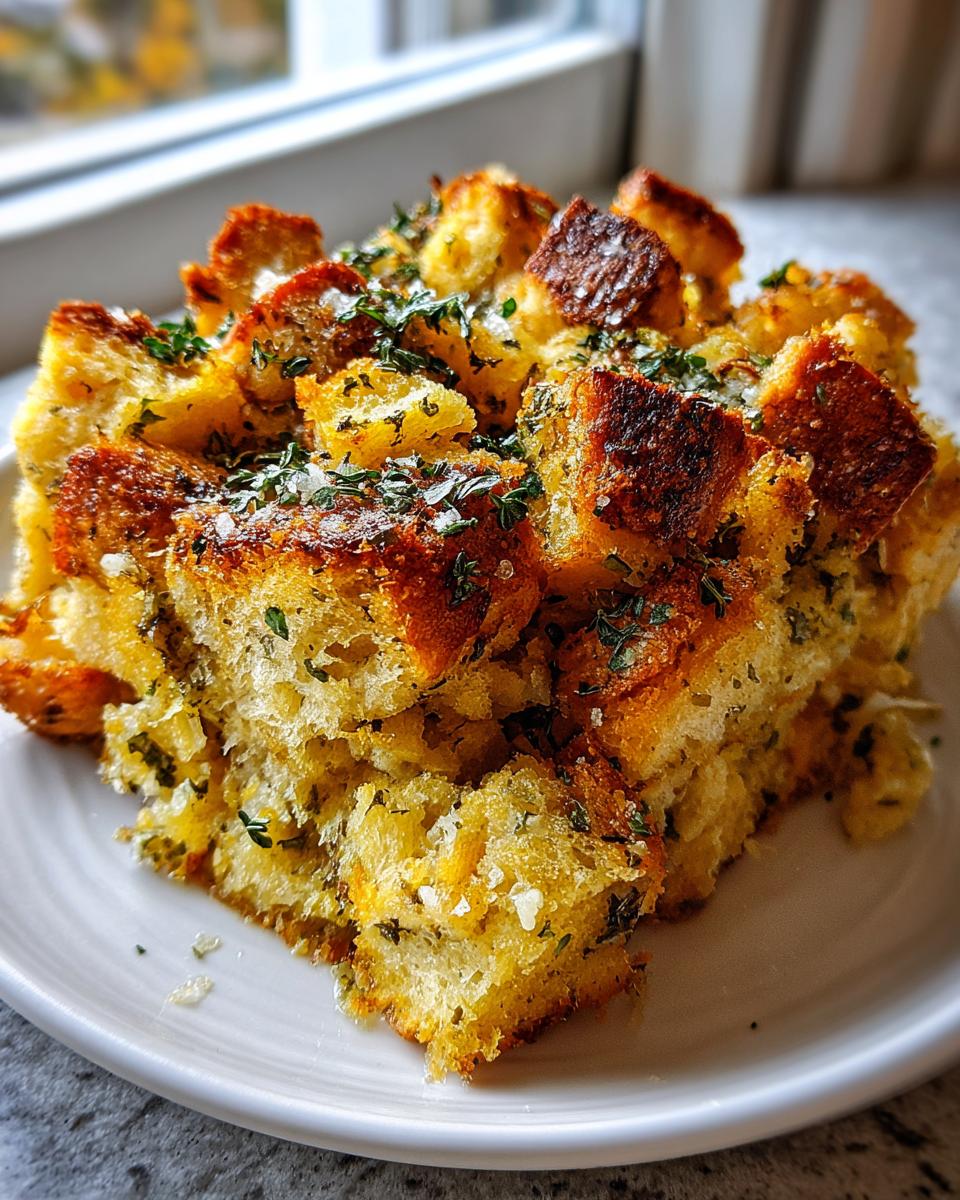
When the air gets crisp and the leaves start turning gold, you just know it’s time for that glorious moment when the oven timer finally sounds. For me, nothing screams ‘home’ louder than a pan of perfect savory bread stuffing. Forget the box; this recipe for our Classic Homemade Thanksgiving Stuffing is what brings everyone running to the table. It’s all about getting that incredible contrast—soft, unbelievably moist crumbs hugging a golden, crispy top layer. Trust me, this is the comfort food that connects me directly back to my grandmother’s kitchen in the Midwest. It’s more than just a side dish; it’s tradition baked right in!
- Why This is the Best Stuffing Recipe Ever
- Ingredients for Your Homemade Stuffing Recipe
- Ingredient Notes and Substitutions for Perfect Stuffing
- How to Prepare This Classic Thanksgiving Stuffing
- Tips for Making Ahead Stuffing
- Serving Suggestions for Your Savory Bread Stuffing
- Storing and Reheating Your Delicious Stuffing
- Frequently Asked Questions About This Stuffing
- Share Your Best Stuffing Recipe Experience
Why This is the Best Stuffing Recipe Ever
I’m telling you right now, once you make this, you won’t go back. This isn’t some fancy restaurant dressing; this is a tried-and-true classic from the Cookin’ Corner kitchen, perfected right here at home. It’s a staple because it delivers exactly what you want in a holiday side dish, every single time.

- The flavor is huge thanks to using tons of fresh herbs—you can really taste the difference!
- It’s surprisingly easy to pull together, even when the roast is already in the oven.
- It nails that perfect texture that everyone fights over at the dinner table.
We’ve been making this style of stuffing for ages because it just works!
Achieving Moist and Crispy Stuffing Texture
The secret to that heavenly textural contrast is all in the liquid ratio, honestly. We only add enough broth so the bread cubes are just moistened, not swimming! Plus, baking it in a proper dish means the top gets to toast up beautifully in the heat. That thin, crispy layer covering the soft, savory interior is pure magic. It’s a simple method, but it takes zero guesswork to get that wonderful contrast.
If you want to see another amazing example of a wonderful holiday side, check out the traditional Thanksgiving stuffing recipe over at this great site—it really shows how classic flavor wins every time!
Ingredients for Your Homemade Stuffing Recipe
Gathering your ingredients for this homemade stuffing recipe is half the fun! Honestly, having everything ready to go makes the assembly process smooth as silk. Remember, this is all about the quality of the fresh stuff, so don’t skimp on those beautiful herbs!
Here is what you’ll need to pull off the best stuffing you’ve ever made. I’ve added the link to this recipe resource just in case you need to double-check amounts while you’re shopping!
- 1 pound dry bread cubes (that usually ends up being about 12 packed cups—don’t stress the exact weight too much!)
- 1 cup unsalted butter (Don’t substitute this! Butter is non-negotiable for flavor.)
- 2 cups chopped celery
- 1 large yellow onion, chopped
- 2 cloves garlic, minced (Please mince it; don’t just smash it!)
- 1 tablespoon fresh sage, chopped
- 1 teaspoon fresh thyme leaves
- 1 teaspoon fresh rosemary, chopped
- 1 teaspoon salt
- 1/2 teaspoon black pepper
- 2 large eggs, lightly beaten
- 2 to 3 cups chicken or vegetable broth
That’s it! Simple, classic stuff that comes together to create the most incredible flavor profile. The fresh herbs really make this savory bread stuffing sing!
Ingredient Notes and Substitutions for Perfect Stuffing
Okay, so those fresh herbs are what make this stuffing sing—seriously, don’t even think about reaching for that dried stuff! But let’s talk bread for a minute. You absolutely need dry bread cubes. If yours aren’t bone dry, they will soak up too much liquid and you’ll end up with mush, not that lovely texture we’re aiming for. Toast them up first!
When it comes to the liquid, the full 3 cups of broth is usually not necessary. You want it moist, not wet. Also, if you’re roasting a turkey or chicken, save those lovely pan drippings! You can swap out half that broth for those drippings—it’s such a simple trick for richer flavor, and honestly, using those **pan drippings** is what separates holiday cooking from everyday meals.
And hey, if you’re craving something heartier, this is easily tweaked into a fantastic Sausage Stuffing Recipe! Just brown up some good breakfast sausage with the veggies. If you stick to just broth, this stays vegetarian, which is nice and flexible.
How to Prepare This Classic Thanksgiving Stuffing
Alright, let’s get this amazing stuffing assembled! This is where all that prep work pays off. First things first, get your oven humming along at 350°F (175°C) and make sure you lightly grease that 9×13 inch baking dish. Don’t try to rush the heat; we need that steady temperature!
If your bread cubes are fresh—and I hope they are dry!—you still might want to pop them on a sheet pan to toast for about 10 to 15 minutes until they look nice and thirsty. Once that’s done, grab your biggest skillet. Melt that whole cup of butter—yes, the whole thing!—over medium heat. Toss in your chopped celery and onion and cook them until they’re soft, which takes about 8 minutes. That sweet perfume is starting to fill the kitchen, right?
Next up, the flavor bombs! Throw in the minced garlic, sage, thyme, and rosemary. Let that hang out with the veggies for just one minute until you can really smell those savory herbs. Take it off the heat immediately! Now, gently fold in your toasted bread cubes, along with the salt and pepper. The key step that people often mess up is the liquid. Lightly beat those two eggs with 2 cups of broth, pour it over the bread, and toss until it’s *just* moistened. Seriously, stop adding broth when it looks like it might hold together but isn’t soupy. If you need a bit more, add just splashes at a time. We want that perfect texture!
After you gently transfer the whole mixture to your ready dish—and if you want more tips on keeping things neat, check out this great guide on how to make homemade stuffing—you’re ready for the oven!
Baking Your Oven Baked Stuffing
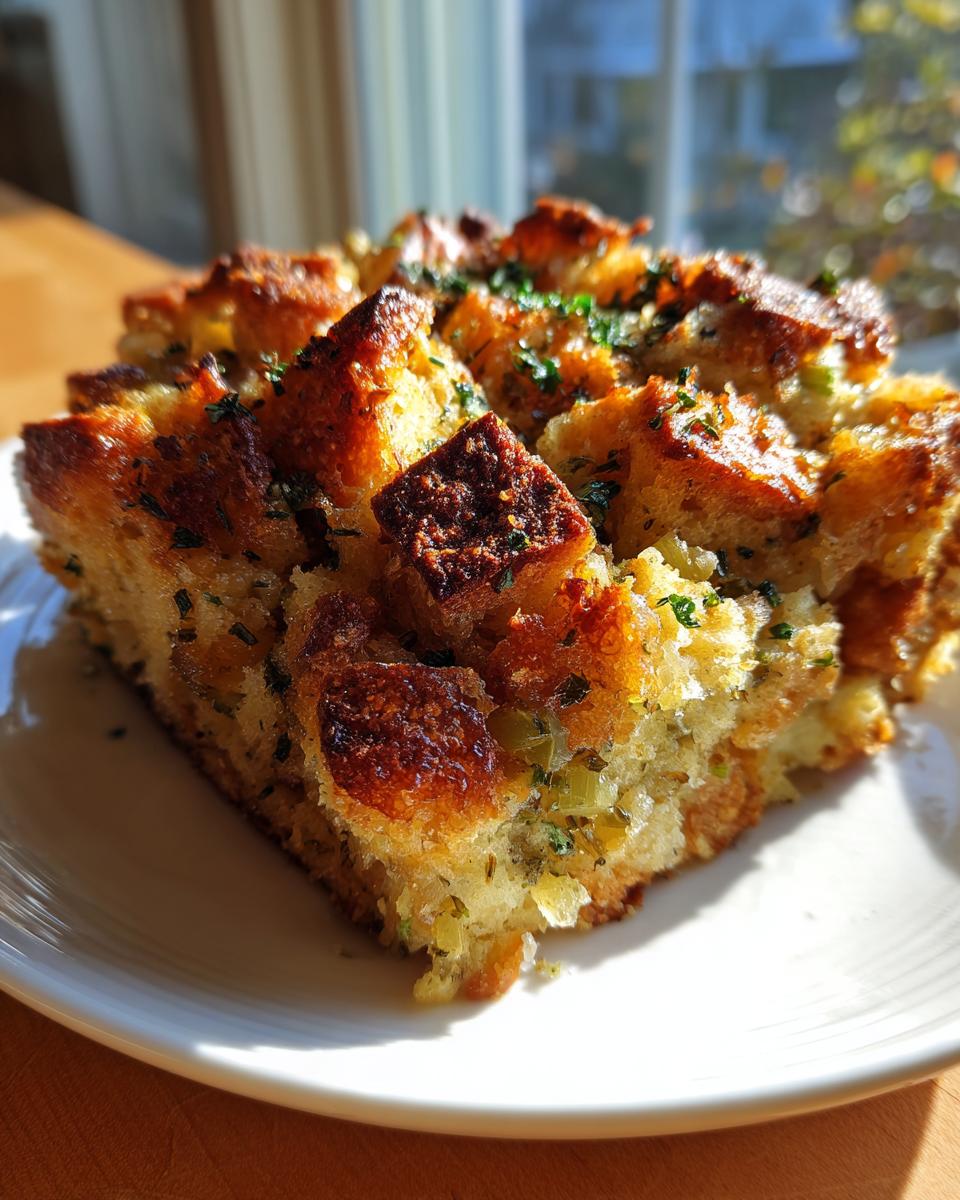
This is where the magic happens for that crispy top. Bake your stuffing for between 30 to 40 minutes. You’re looking for two big signs: the top needs to be gorgeously golden brown, and if you poke a knife near the center, it should feel really hot all the way through. Don’t forget this little step: pull it out and let that delicious holiday dressing rest for 5 minutes before you dive in. That tiny wait ensures everything settles right where it should be!
Tips for Making Ahead Stuffing
I know the day of the big meal is hectic, so I absolutely love that this recipe is fantastic for making ahead! Getting most of the work done the day before is the secret weapon for a calm Thanksgiving morning. You can totally prepare the entire stuffing mixture—all the chopping, sautéing the veggies, adding the bread, and mixing in the broth and eggs (that’s steps 1 through 6 in the instructions)—the day before you plan to bake it.
Once it’s all mixed, just scoop it into your ready baking dish, cover it tightly with plastic wrap, and tuck it into the fridge overnight. It helps the flavors keep mingling, too!
Now, here’s the crucial adjustment for when you pull it out of the fridge the next day: the bread will have absorbed a ton of moisture while sitting. Before you put that **Make Ahead Stuffing** into the oven, you must check it. It will likely look drier than you remember, so plan on stirring in a little extra cold broth—maybe a quarter cup to start—until it looks just moistened again, like you want it right before the very first bake. Don’t skip that little refresh!
And just a quick tip from my kitchen back in the Midwest: when assembling it the day before, try to feel the moisture level. If the bread feels heavy or super soggy even before chilling, that’s a sign you might have added too much broth initially. It’s always better to under-moisten before the chill time. For more great make-ahead holiday guides, you should take a peek at what the folks at The Food Charlatan suggest for planning your dressing!
Serving Suggestions for Your Savory Bread Stuffing
Now that you have this incredible, flavorful stuffing ready to go, the question is, what does it sit next to on the plate? Because this is the ultimate comfort food side dish, it begs for rich, traditional pairings!
First and foremost, if you’re making this for a holiday feast, it simply must accompany a beautifully roasted bird. Whether you went with turkey, chicken, or even a simple pork loin, the herbs in our dressing are designed to complement that savory roast meat wonderfully.
But don’t stop there! This stuffing handles bold flavors like a champ. Make sure you have your tart cranberry sauce nearby to cut through the richness of the butter. A dollop of that bright red jelly right on top of a forkful of stuffing is just divine.
For a truly complete plate experience, I always try to add something green, maybe some quick steamed green beans tossed with toasted almonds, or perhaps some creamy mashed potatoes underneath everything else. This savory bread stuffing is the star, but these traditional Thanksgiving side dish companions only make it taste even better!

Storing and Reheating Your Delicious Stuffing
We always end up with way too much stuffing because it’s just that good! Handling the leftovers is almost as important as the baking, since we want to keep that perfect texture combination intact.
First off, leftovers need to be stored safely, no exceptions! Once the stuffing has cooled down a bit—maybe 30 minutes on the counter is okay, but no longer than two hours—you need to get it airtight and into the fridge. It should last great for about 3 to 4 days in a tightly sealed container. If you are in a rush, I sometimes just dump the remainder into zip-top bags right in the dish, press all the air out, and chill. We want to avoid drying it out!
When it comes to reheating, the microwave is fast, but it turns everything squishy, which defeats the purpose of having that crispy top, right? For the best results, I highly recommend reheating in the oven. Take the stuffing out of the fridge and let it sit on the counter for about 20 minutes while the oven preheats to 325°F. Put it back into the original baking dish, sprinkle just a tiny bit of broth or water over the top—like a tablespoon or two—and cover it loosely with foil. This traps the steam underneath to re-moisten the inside.
Bake it covered for about 15 to 20 minutes. Then, for the grand finale, yank that foil off and pop it back in for the last 5 minutes. This quick blast of direct heat revives that golden crust we worked so hard to create! It’s important to always ensure whatever you eat is safely heated all the way through. If you want more details on handling food safely, you should always review the guidelines over at our Terms of Use page.
Frequently Asked Questions About This Stuffing
I get so many lovely questions over on the contact page about this recipe—it means so much that you’re making it your own! Here are a few things people usually ask when trying to nail down the perfect Holiday Dressing Recipe.
Can I use store-bought bread cubes for this stuffing?
Oh, absolutely you can! But here is my golden rule for using those pre-cut packages: you *must* dry them out first if they feel even a tiny bit soft. Those cubes need to be thirsty before they hit the butter and veggies. Spread them right onto a baking sheet and toss them into the 350°F oven for about 10 to 15 minutes until they feel light and crunchy. This step guarantees you won’t end up with gummy stuffing, no matter how good the brand is. It really helps nail that crispy top!
How do I ensure my stuffing stays moist?
This is the most common worry! The dampness comes from the balance, not from drowning the bread. Stick to the instructions and only add enough broth until the bread is *just* moistened. If you can still see dry spots, that’s okay—the eggs help bind things, and the liquid hanging out at the bottom of the pan gets absorbed as it bakes. If you over-soak it initially, even the best oven can’t save you from a soggy bottom. Aim for that ‘just damp’ feeling when you toss everything together.
Is this recipe suitable for a vegetarian diet?
The base recipe I shared here is totally vegetarian, provided you use vegetable broth instead of chicken broth. It’s a wonderful Vegetarian Stuffing Idea on its own! All those fresh herbs, onions, and celery pack a huge punch of savory flavor even without meat. If you do decide to add sausage, remember that moves it clearly out of the vegetarian category, but if you stick to broth, you’re good to go!
I love seeing how people adapt these classics; it reminds me of those creative home cooks from the past, sort of like what these clever tricks for making packaged food taste amazing show. You can read all about that over here: clever ways to make packaged food taste better!
If you have more burning questions, feel free to reach out through the Cookin’ Corner contact page anytime!
Share Your Best Stuffing Recipe Experience
I truly hope this recipe helps you bring some amazing comfort food to your table this year! After all the chopping and stirring, the greatest reward is hearing how much your family loved the final product.
If you made this Classic Homemade Thanksgiving Stuffing, please do me a favor and stop back by to leave a rating! A five-star rating lets me know that my dedication to sharing tried-and-true classics is hitting the mark. I love hearing about your holiday successes—did you try the sausage variation, or did you stick with the pure herb version?
Leave a comment below telling me how your **stuffing** turned out. If you snapped a picture of your golden roast and your perfectly baked side dish, I’d love for you to share it online and tag us! It warms my heart to see these traditions living on in your kitchens.
And if you’re curious about why I carry on these old family recipes, always remember that flavor is memory! You can read a little more about where these traditions started and our whole Cookin’ Corner philosophy over on the About page. Happy cooking, everyone!
PrintClassic Homemade Thanksgiving Stuffing with Fresh Herbs

Make the best homemade stuffing from scratch. This recipe yields a savory bread stuffing that is moist inside and crispy outside, perfect for your holiday table.
- Prep Time: 20 min
- Cook Time: 40 min
- Total Time: 60 min
- Yield: 10 servings 1x
- Category: Side Dish
- Method: Baking
- Cuisine: American
- Diet: Vegetarian
Ingredients
- 1 pound dry bread cubes (about 12 cups)
- 1 cup unsalted butter
- 2 cups chopped celery
- 1 large yellow onion, chopped
- 2 cloves garlic, minced
- 1 tablespoon fresh sage, chopped
- 1 teaspoon fresh thyme leaves
- 1 teaspoon fresh rosemary, chopped
- 1 teaspoon salt
- 1/2 teaspoon black pepper
- 2 large eggs, lightly beaten
- 2 to 3 cups chicken or vegetable broth
Instructions
- Preheat your oven to 350°F (175°C). Lightly grease a 9×13 inch baking dish.
- If your bread cubes are not dry, spread them on a baking sheet and bake for 10-15 minutes until lightly toasted. Set aside.
- Melt the butter in a large skillet over medium heat. Add the celery and onion. Cook until softened, about 8 minutes.
- Add the minced garlic, sage, thyme, and rosemary to the skillet. Cook for 1 minute until fragrant.
- Remove the skillet from the heat. Add the toasted bread cubes, salt, and pepper to the vegetables. Toss gently to combine.
- In a separate bowl, whisk together the eggs and 2 cups of broth. Pour this mixture over the bread mixture. Toss until the bread is just moistened. Add more broth if needed, but avoid making it soggy.
- Transfer the stuffing mixture to the prepared baking dish.
- Bake for 30 to 40 minutes, or until the top is golden brown and crispy and the center is heated through.
- Let the stuffing rest for 5 minutes before serving.
Notes
- For a richer flavor, substitute half the broth with reserved pan drippings from roasted poultry.
- To make this a sausage stuffing recipe, cook 1 pound of crumbled breakfast sausage with the celery and onion, draining excess fat before adding herbs.
- You can prepare the entire mixture (steps 1-6) a day ahead. Cover and refrigerate. Add the extra broth if needed before baking.
Nutrition
- Serving Size: 1 cup
- Calories: 320
- Sugar: 3
- Sodium: 450
- Fat: 18
- Saturated Fat: 10
- Unsaturated Fat: 8
- Trans Fat: 0.5
- Carbohydrates: 35
- Fiber: 2
- Protein: 7
- Cholesterol: 55