
Oh my gosh, are you ever just dreaming about that amazing crunchy, creamy Tex-Mex flavor but deciding you absolutely *cannot* deal with the mess and grease that comes from deep frying? Me too! That’s why I’m so thrilled to share these **Baked Cream Cheese Chicken Taquitos** with you today. They deliver that perfect, satisfying crunch you crave, but they come right out of the oven, which is just so much simpler.
Here at Cookin’ Corner, founded on the simple belief that food is the language of love and memory, we test our recipes until they are absolutely dependable. You don’t need fancy equipment or complicated skills here—just reliable instructions that work every single time. These rolls are super easy, packed with that scrumptious **Cream Cheese Chicken Filling**, and trust me, they are totally kid-approved!
- Why These Baked Cream Cheese Chicken Taquitos Are Your New Favorite
- Gathering Ingredients for Perfect Cream Cheese Chicken Filling
- Step-by-Step Guide to Assembling Your Baked Cream Cheese Chicken Taquitos
- Baking Instructions for Crispy Baked Chicken Rolls
- Tips for Making Freezer Friendly Taquitos
- Serving Suggestions for Your Shredded Chicken Appetizer
- Frequently Asked Questions About Baked Cream Cheese Chicken Taquitos
- Storage and Reheating Instructions for Leftover Baked Cream Cheese Chicken Taquitos
- Share Your Experience Making This Recipe
Why These Baked Cream Cheese Chicken Taquitos Are Your New Favorite
Look, we all want that classic taquito texture without spending half the afternoon scrubbing oil out of the fryer basket. That’s the beauty of this recipe! These are a healthier alternative, but I promise you, they don’t taste like a compromise. They are fast, they hold together beautifully, and the cream cheese inside stays wonderfully soft.
- They skip the frying entirely—we’re using the oven for that perfect golden crisp!
- The filling comes together faster than you can argue with your kids about finishing their veggies.
- They are completely family-approved, meaning weeknight dinner saved!
Quick Prep Time for Easy Baked Chicken Taquitos
Seriously, I timed myself last week. You’re looking at just 15 minutes of hands-on prep. From there, they only need about 20 minutes in that hot oven. That’s why I call them my top choice for **Easy Baked Chicken Taquitos** when I need something delicious fast. You won’t believe how quick this **Oven Baked Taquito Recipe** comes together!
Gathering Ingredients for Perfect Cream Cheese Chicken Filling
Okay, let’s talk ingredients because even though this is simple, the quality really matters here to get the best crunch! When assembling these **Cream Cheese Filled Tortillas**, I always make sure I have everything laid out before I even think about mixing. Remember, this filling needs to be so easy to spread, which is why we can’t skip the softening step for the cheese.
You need that lovely cooked and shredded chicken—don’t use the stuff that’s still chunky; we want it smooth! The magic happens when you mix in the four ounces of *softened* cream cheese with the Monterey Jack. We add just a little kick with the spices like chili powder, cumin, and garlic powder, plus some fresh green onions for color.
Ingredient Notes and Substitutions for Cream Cheese Filled Tortillas
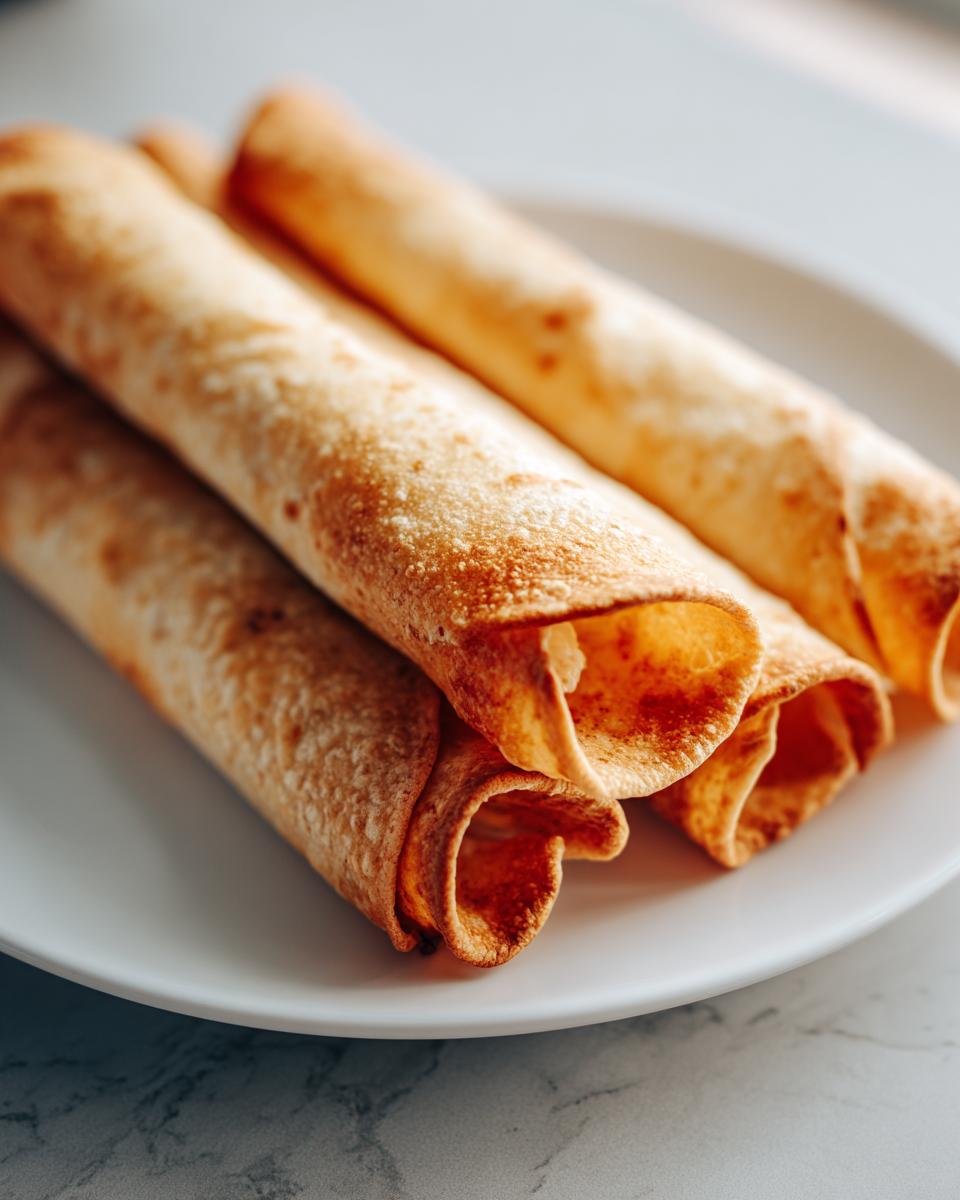
The tortillas are absolutely critical if you want **Crispy Baked Chicken Rolls** and not sad, crumbly messes! Please, please, please take the time to warm your corn tortillas first. I toss mine in the microwave for maybe 20 seconds—just until they become completely pliable. If you skip this step, they crack like glass the second you try to roll them, and honestly, watching that happen is the least fun part of this recipe!
If you don’t have Monterey Jack, sharp cheddar works just fine for extra flavor, but don’t try to substitute the cream cheese. That’s the glue and the moisture provider for this whole operation!
Step-by-Step Guide to Assembling Your Baked Cream Cheese Chicken Taquitos
This is where the fun starts—the assembly! We are moving past the filling and getting ready to roll these babies up tight so that delicious **Cream Cheese Chicken Filling** stays exactly where it belongs during baking. Remember what I said about warming those tortillas up? That’s step one for a reason!
Once they are soft and floppy, you want to spoon just a little bit of that filling—about a tablespoon and a half—right near one edge. You don’t want to overfill them, or they’ll burst open! Roll it up snugly, like you’re tucking in a tiny baby burrito. Since we are making an **Oven Baked Taquito Recipe**, things can sometimes come undone in the heat, so don’t be shy about securing that seam with a toothpick. It’s my little trick to guarantee they stay sealed shut until they hit your plate.
Achieving the Best Baked Taquito Crunch
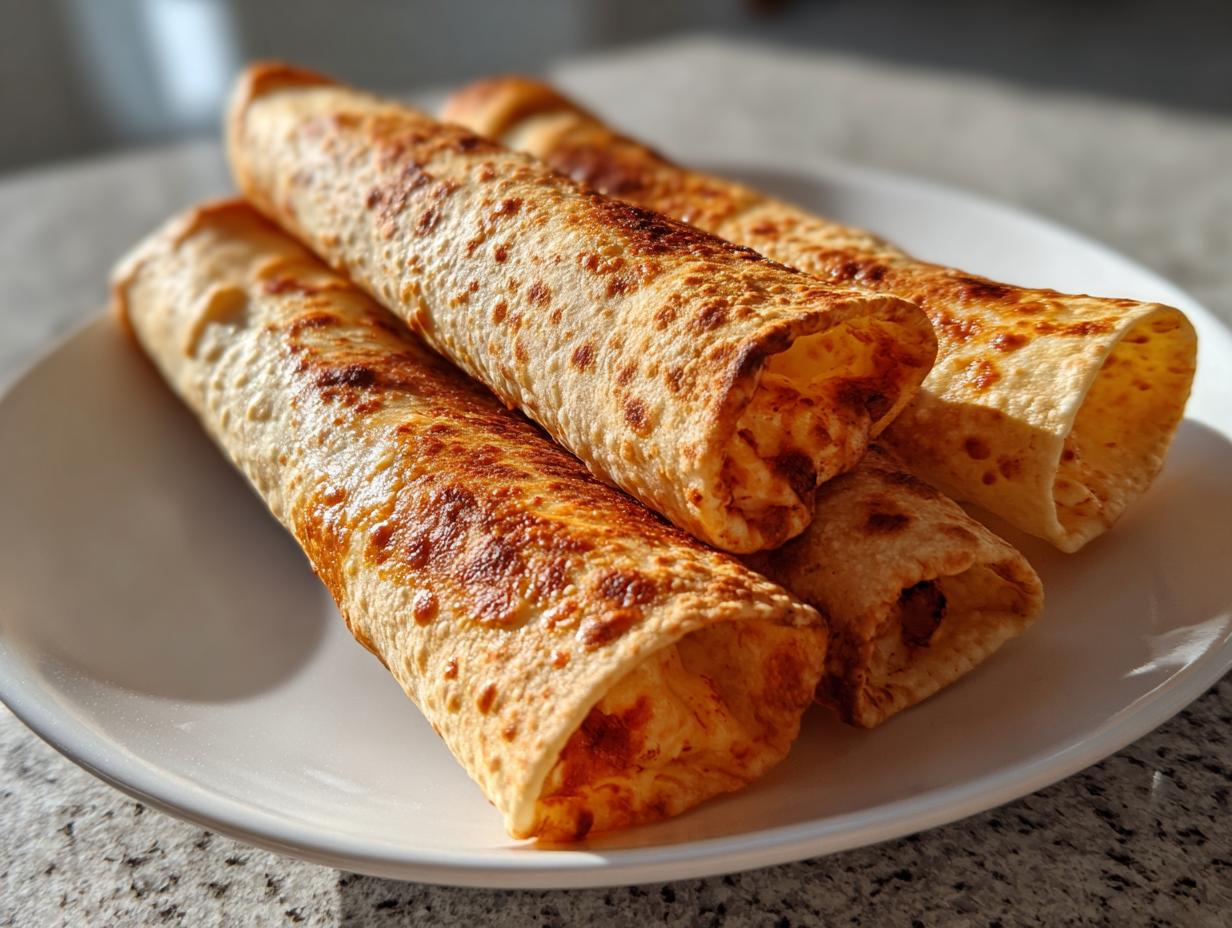
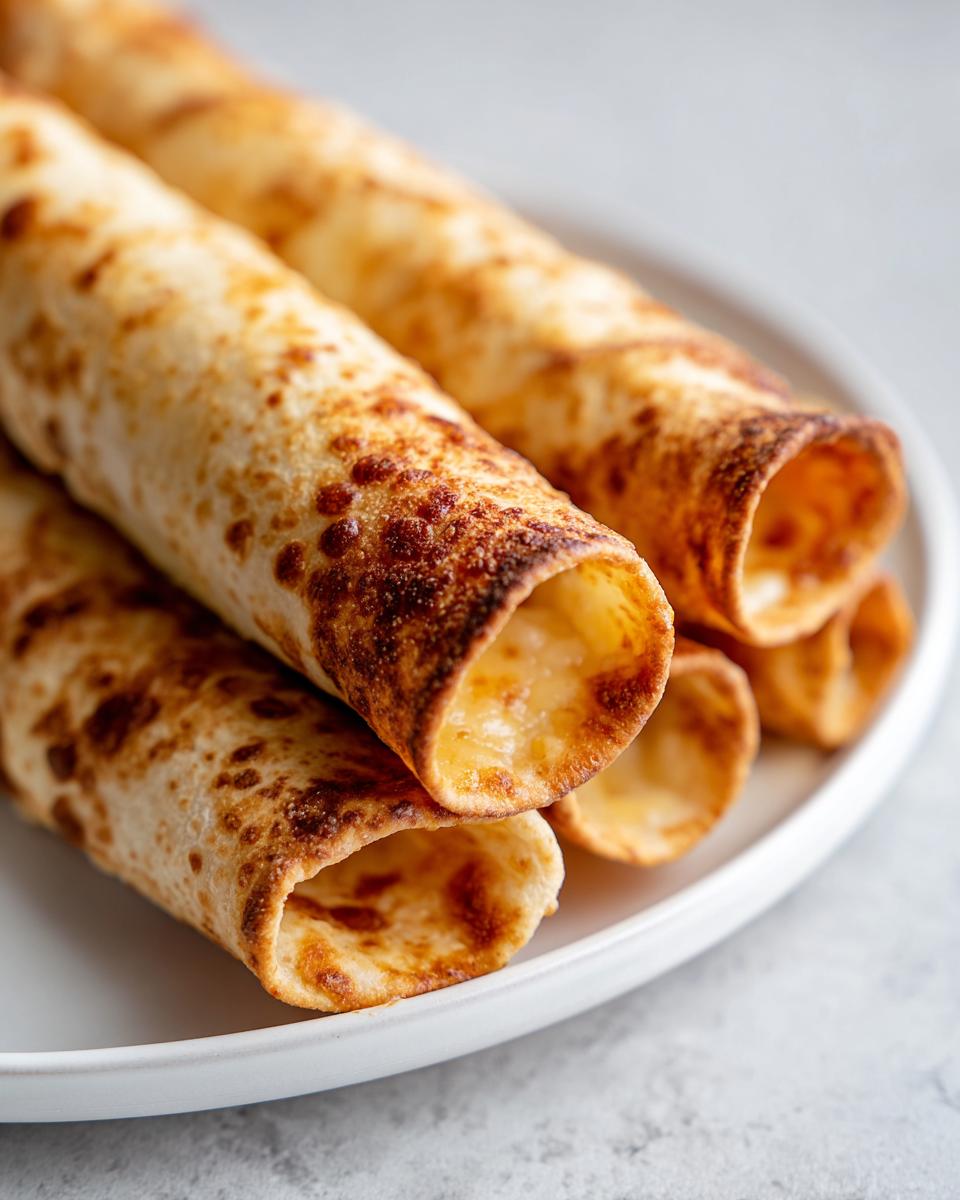
Okay, now for the payoff! To get that signature **Best Baked Taquito Crunch**, make sure your oven is screaming hot at 400 degrees Fahrenheit before they even think about going in. Once you place those rolled taquitos seam-side down on your baking sheet, grab your olive oil—or even better, use cooking spray if you have it—and give the tops a nice, even coating. This light layer of fat helps them turn golden and wonderfully crunchy!
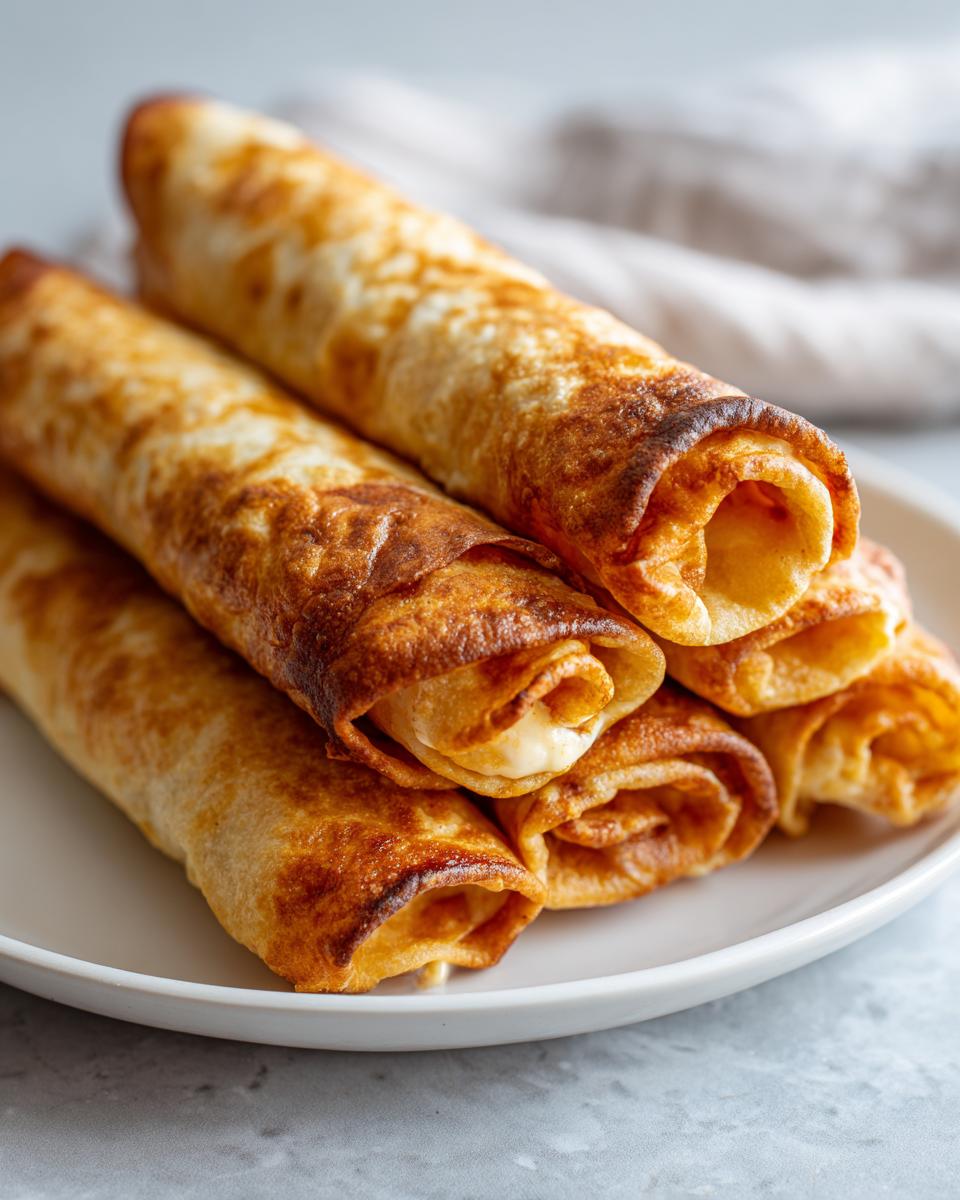
If you really want to take this crunch factor up a notch, try placing your baking sheet on top of a wire rack inside the oven. That lets the heat circulate underneath, guaranteeing crispness everywhere. Seriously, don’t skip oiling the tops!
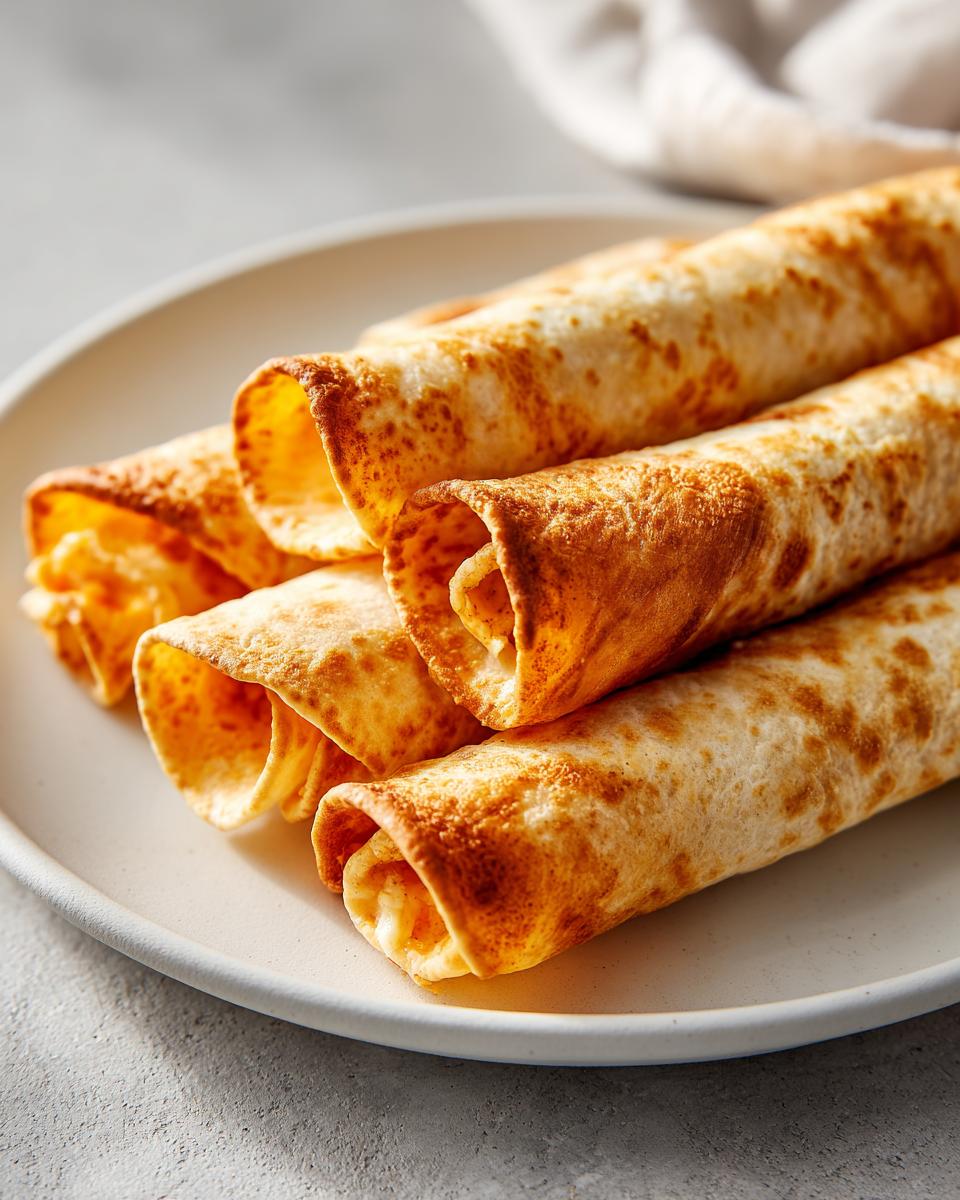
Baking Instructions for Crispy Baked Chicken Rolls
We’ve done the work assembling them, so now it’s time for them to bake into those beautifully **Crispy Baked Chicken Rolls**! Remember, we want that oven sizzling hot—400 degrees Fahrenheit is exactly where we need to be. Place your prepared taquitos on that baking sheet and let them bake for about 15 to 20 minutes total.
The very best trick here is to flip them halfway through the bake time. This ensures both sides get that gorgeous golden-brown color and maximum crunch! Keep an eye on them, though, because every oven is a little different. Before you even think about serving these gems, please do me a huge favor: take out every single toothpick. We want deliciousness, not a surprise poking hazard!
Tips for Making Freezer Friendly Taquitos
I get it—sometimes you have a burst of energy, and other times, you just need dinner to magically appear. That’s why knowing how to make **Freezer Friendly Taquitos** is absolutely essential for a busy home cook like me! The flexibility these offer for lunch boxes or emergency dinners is just wonderful.
If you’re making a double batch, or maybe just prepping for a wild week, sealing them up before they hit the freezer is key. After you roll those taquitos and secure them with toothpicks—don’t forget that part!—lay them out on a baking sheet in a single layer. You want them to be totally separate because you’re going to freeze them solid just like that. If you pile them when they are still soft, you’ll end up with one giant, delicious, but completely unusable frozen brick!
Once they are rock hard—usually an hour or two, depending on your freezer—you can pop them all into a heavy-duty freezer bag or an airtight container. When you get the craving, you don’t even need to thaw them! Just toss them straight into the 400-degree oven when you’re ready. Since they are starting frozen, you just need to add an extra 5 to 10 minutes onto that usual baking time. It’s such a lifesaver! This way, you always have that **Shredded Chicken Appetizer** ready to go!
Serving Suggestions for Your Shredded Chicken Appetizer
Phew! The **Baked Cream Cheese Chicken Taquitos** are out of the oven, crispy, and totally irresistible. But what do we eat them with? Honestly, they are a perfect standalone party snack—set them out on a platter and they disappear in minutes! But if you are serving these up as a **Quick Weeknight Dinner Idea** for the family, you’ll want some things to dip them in, right?
My go-to trio, which covers just about every craving, includes cool ranch dressing, bright, chunky salsa, and, of course, sour cream. I often play around myself, but those three are the non-negotiables for getting the best dips! If you’re looking for how to make those dips even better, I hear mixing the sour cream with a little lime juice is fantastic. You can see some of my favorite ways to reach out and connect with readers over recipes on my contact page right here.
Pairing Baked Cream Cheese Chicken Taquitos with Sides
When I serve these as a main meal, I try to balance the richness of the cream cheese with something light and fresh. We often serve them alongside a simple mixed greens salad with a vibrant cilantro-lime vinaigrette. It tastes so fresh and cuts through the savory chicken and cheese perfectly!
If you want to really lean into the Tex-Mex vibe, a small side of black beans jazzed up with some cumin and onion flakes makes this a wonderful **Family Friendly Mexican Food** dinner. They are so versatile; you can serve them any way you like, but please, don’t forget those toppers!
Frequently Asked Questions About Baked Cream Cheese Chicken Taquitos
We’ve covered the assembly and the baking magic, but I know you might have a few lingering questions before you dive into the dipping sauces! Cooking should feel stress-free, so I’ve gathered up the most common things folks ask me about tweaking this recipe. If you’re wondering about texture or substitutions, check here first! If I didn’t cover your specific question, you can always check out more about our testing philosophy over on my About page.
Can I use flour tortillas instead of corn tortillas in this Oven Baked Taquito Recipe?
That is such a common question! Technically? Yes, you can wrap the **Cream Cheese Chicken Filling** up in a flour tortilla. But I really, really encourage you to stick with corn tortillas for this specific **Oven Baked Taquito Recipe**. Flour tortillas, when baked, tend to get chewy rather than truly crispy. Corn tortillas are thinner and just develop that amazing, shatteringly crisp shell we are aiming for when we skip the fryer. It makes all the difference in the final texture!
How do I keep my Baked Cream Cheese Chicken Taquitos warm before serving a crowd?
Oh yes, entertaining is always the tricky part—you want them hot, but you can’t keep taking them out of the oven every ten minutes! Since these are **Healthy Tortilla Roll Ups** and not deep-fried, they don’t hold heat as long. My best trick is this: once they are all baked and golden brown, transfer them to a baking sheet and pop them into an oven set *very* low, around 170 degrees Fahrenheit. If you cover them loosely with foil, they will stay perfectly warm and ready to go for about an hour. If you have one, a gentle warming tray works like a charm too!
Storage and Reheating Instructions for Leftover Baked Cream Cheese Chicken Taquitos
Now, if you happen to have any of these amazing **Baked Cream Cheese Chicken Taquitos** left (which shocked me the first time!), storing them is super simple. Pop any leftovers into a good airtight container. They’ll keep perfectly well in the fridge for about three or four days. Don’t let them sit out forever; we want them safe!
When you get ready to eat them the next day, please skip the microwave! The microwave turns them sad and soggy. Instead, reheat them in your oven—still at 400 degrees—for just about 5 to 7 minutes. That little blast of heat brings back almost all of that original crispiness we worked so hard for. If you need more general site details, I keep all that info available on my Terms of Use page!
Share Your Experience Making This Recipe
Whew! That’s everything you need to know to get these gorgeous **Baked Cream Cheese Chicken Taquitos** crispy and amazing right in your own oven. But I absolutely love hearing how things turn out in your kitchen! Did they get eaten too fast? What dipper was the absolute star of your sauce spread?
When you get a moment, swing back over and give this recipe a rating out of five stars right below this section. I especially want to know: Did you try making these as a **Lunchbox Meal Prep Chicken** option for the week? Tell me everything! Your feedback helps me know what to test next. For general site information, I keep all the legal stuff handy on the privacy policy page!
PrintBaked Cream Cheese Chicken Taquitos

Make crispy, flavorful chicken taquitos in the oven using a simple cream cheese filling. This recipe provides a healthier alternative to frying.
- Prep Time: 15 min
- Cook Time: 20 min
- Total Time: 35 min
- Yield: 12 taquitos 1x
- Category: Appetizer
- Method: Baking
- Cuisine: Tex-Mex
- Diet: Vegetarian
Ingredients
- 1 cup cooked, shredded chicken
- 4 ounces cream cheese, softened
- 1/2 cup shredded Monterey Jack cheese
- 1/4 cup chopped green onions
- 1/2 teaspoon chili powder
- 1/4 teaspoon cumin
- 1/4 teaspoon garlic powder
- 12 small corn tortillas
- 1 tablespoon olive oil or cooking spray
Instructions
- Preheat your oven to 400 degrees Fahrenheit. Lightly grease a baking sheet or line it with parchment paper.
- In a medium bowl, combine the shredded chicken, softened cream cheese, Monterey Jack cheese, green onions, chili powder, cumin, and garlic powder. Mix well until the filling is uniform.
- Warm the corn tortillas briefly in the microwave (about 20 seconds) or in a dry skillet until they are pliable. This prevents cracking when rolling.
- Spoon about 1 1/2 tablespoons of the filling near one edge of a warm tortilla.
- Roll the tortilla tightly around the filling. Secure the seam with a toothpick if necessary to keep the taquito closed during baking.
- Place the rolled taquitos seam-side down on the prepared baking sheet.
- Lightly brush the tops of the taquitos with olive oil or spray them evenly with cooking spray for crispness.
- Bake for 15 to 20 minutes, flipping halfway through, until the taquitos are golden brown and crisp.
- Remove the toothpicks before serving. Serve hot with your preferred dipping sauces.
Notes
- If you want a crispier result, you can bake the taquitos directly on a wire rack placed over a baking sheet.
- For freezer-friendly preparation, assemble the taquitos, secure with toothpicks, and place them on a baking sheet to freeze solid. Once frozen, transfer them to a freezer bag. Bake directly from frozen, adding 5 to 10 minutes to the baking time.
- Serve these with salsa, ranch dressing, or sour cream for dipping.
Nutrition
- Serving Size: 2 taquitos
- Calories: 250
- Sugar: 1
- Sodium: 350
- Fat: 14
- Saturated Fat: 7
- Unsaturated Fat: 7
- Trans Fat: 0
- Carbohydrates: 18
- Fiber: 2
- Protein: 15
- Cholesterol: 45