
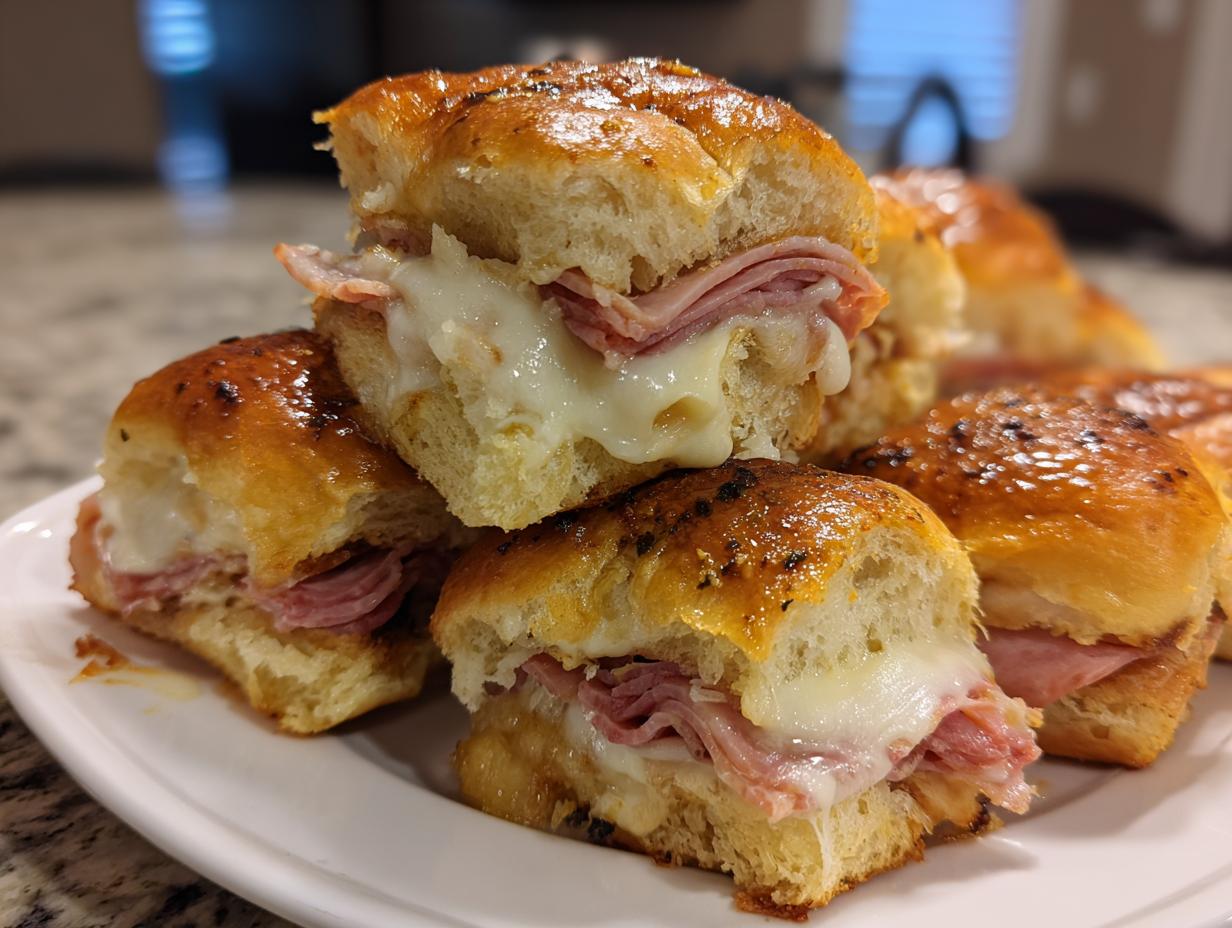
If you’re anything like me, football season—or any gathering, really—demands appetizers that are easy to handle, taste incredible, and seriously cut down on the time you spend slaving over a stove. Well, I’ve got the absolute winner for you today. Forget fussy little bites; we are diving headfirst into the glorious world of grinder sliders! Seriously, these are the easiest, most crowd-pleasing Italian Grinder Sliders you will ever bake, and they’re destined to become a tradition in your house just like they are in mine. You can even pair them with my easy 10-minute fresh peach salsa if you need something bright on the side!
Back in my Midwest kitchen, Sarah Jane Thompson taught us that reliability is everything, especially when hosting. She never settled for a recipe that needed luck to turn out perfectly. That heritage of tested, true flavors is baked right into this recipe. We are talking savory meats, melted cheese, and that signature, zesty garlic butter glaze all baked together on soft rolls. They are perfection, I promise you that! When you need something simple that tastes like you spent hours on it, this is the keeper.
- Why These Italian Grinder Sliders Are Your New Go-To Party Appetizers
- Gathering Ingredients for Your Grinder Sliders
- Step-by-Step Instructions for Hot Italian Sliders Recipe
- Expert Tips for Perfect Grinder Sliders Every Time
- Serving Suggestions for Your Garlic Butter Glazed Sliders
- Storage and Reheating Instructions for Leftover Grinder Sliders
- Frequently Asked Questions About Hawaiian Roll Sliders
- Nutritional Estimates for These Cheesy Baked Sandwiches
- Share Your Experience Making Our Grinder Sliders
Why These Italian Grinder Sliders Are Your New Go-To Party Appetizers
Listen, I know the pressure of game day. You want incredible flavors, but you also want to actually watch the game, right? That’s where these grinder sliders swoop in like culinary superheroes. They hit every single mark you could ask for in a perfect party food, and they freeze up my hosting anxiety instantly! I first made these when my cousins showed up unannounced before a huge championship game, and I didn’t have time to do anything fancy. These saved the day, and now everyone asks for them.
They are hands-down the ultimate Crowd Pleasing Appetizer because they look complex but are ridiculously simple. Plus, they travel wonderfully if you’re heading to a tailgate!
- They fit perfectly into the category of essential Game Day Food Ideas—easy to grab while standing and mingling.
- Because the rolls stay connected until the last minute, cleanup is a dream. No messy single small sandwiches everywhere!
- These count as wonderful Easy Slider Sandwiches; you are layering, not flipping burgers or rolling individual appetizers. It’s efficient home cooking at its finest!
If you’re looking for other easy dips to serve alongside them, you have to try my caramelized onion dip next time. Or, if you need a heartier side, you can’t go wrong with my easy cornbread casserole. But trust me, start with these sliders!
Gathering Ingredients for Your Grinder Sliders
Okay, let’s talk about what you need to grab from the store, because for these grinder sliders, the quality of your deli meats really makes the difference. Remember, we are aiming for that amazing flavor profile of the Best Grinder Sandwich Recipe, just shrunk down for a party! Don’t skimp on the meat here; it’s the star of the show when it comes to these savory, Cheesy Baked Sandwiches.
I’ve laid out everything precisely below. When you’re measuring, pay close attention to the notes like “thinly sliced” because that’s what allows everything to melt together so beautifully when we bake them.
The Essential Components for Delicious Grinder Sliders
- 1 (12 count) package sweet slider rolls (like Hawaiian rolls)
- 1/2 pound thinly sliced ham
- 1/2 pound thinly sliced turkey
- 1/2 pound thinly sliced salami
- 8 slices provolone cheese
- 4 slices Swiss cheese
- 1/4 cup butter, melted
- 2 tablespoons mayonnaise
- 1 tablespoon Dijon mustard
- 1 teaspoon Italian seasoning
- 1/2 teaspoon garlic powder
- 1/4 teaspoon onion powder
- 1/4 teaspoon dried oregano
Step-by-Step Instructions for Hot Italian Sliders Recipe
Are you ready to see how fast these Hot Italian Sliders Recipe come together? Honestly, the assembly is almost too easy, which is why I love them for last-minute Game Day Food Ideas. First things first: get that oven preheated to 350 degrees Fahrenheit. That’s the starting point for any good Baked Sliders Recipe!
Next, take your entire package of rolls—the whole connected block of them—and carefully slice them horizontally, like you’re cutting a giant loaf of bread in half, but don’t separate the individual rolls! You want the top section to stay connected, and the bottom section to stay together in the pan. I lightly grease a 9×13 pan, then nestle the bottom layer of rolls inside. Then it’s time for the layering!
I layer the meats right on top of that bottom roll section: ham first, then turkey, and finally the salami goes on last. This heavy layer placement helps distribute the flavor evenly. Then, we pile on the provolone and the Swiss cheese until that whole bottom layer is covered. This strategic layering is my little secret—it ensures every single one of the grinder sliders gets a perfect meat-to-cheese ratio!
Assembling and Glazing the Grinder Sliders
Now for the magic topping that makes these so savory! In a small bowl, whisk together the melted butter and the mayonnaise—yes, mayo! It sounds weird, but it keeps the topping from drying out. Then throw in your Dijon mustard, Italian seasoning, garlic powder, onion powder, and oregano. Whisk it until it looks like a smooth, beautiful gold sauce.
Place the top half of the rolls gently over the cheese stack. Now, take that incredible butter glaze and drizzle it slowly and evenly over the entire top surface of the rolls. Make sure every little square gets some of that herbal goodness! If you’re making these for a party later, this is the perfect time to cover them tight with foil and pop them in the fridge; they handle it like a charm. Just remember to add a little extra baking time if they go in cold.
Baking Method for Perfect Baked Sliders Recipe
Cover that whole baking dish tightly with aluminum foil. We bake it covered first for about 15 minutes at 350°F. This steams the rolls perfectly and melts the cheese beautifully into those meats. Don’t peek too much!
When 15 minutes are up, strip that foil off! We need that final blast of heat to turn the tops golden brown and get a tiny bit crispy—bake for another 5 to 10 minutes uncovered. You’ll know they are done when the cheese is totally gooey underneath and the tops smell like heaven. Once they come out, let them sit for just a minute, and then carefully slice them apart between the rolls. Serve them warm immediately while they are wonderfully cheesy!
If you’re interested in another easy baked dinner idea that uses similar speed and prep for weeknights, check out my Hawaiian Chicken Sheet Pan Recipe—it tackles that soft roll base in a totally different, but equally delicious, way!
Expert Tips for Perfect Grinder Sliders Every Time
Now that you’ve mastered the main steps for these amazing grinder sliders, I want to give you some pointers that push them from “great” to “OMG, what is on this?!” Making reliable Party Appetizers means knowing when you can tweak things and when you must hold the line. Since these are inspired by a classic, we have a few tweaks that really amplify that authentic Italian flavor without adding any fuss.
If you loved how easy the main bake was, wait until you see how easy it is to make some fun, low-effort additions. My goal here is making sure you get the best result for your next Hosting event. Maybe try these after you make my easy homemade pretzel dogs for a full appetizer spread!
Ingredient Notes and Substitutions for Deli Meat Sliders
The recipe listed Provolone and Swiss, which I swear by for achieving that perfect salty, savory melt, but you certainly aren’t locked into only those two. If you want something sharper, a mild Provolone works great, or you could try Fontina for an even smoother texture. Just make sure they are good melting cheeses—no one wants a firm, waxy slider!
Also, let’s revisit the rolls. While those sweet Hawaiian Roll Sliders are my favorite because they hold up well to the savory glaze, if you prefer a less sweet profile for your Deli Meat Sliders, grab any soft, plain slider bun. Just know you might need to brush the tops with a little extra butter before adding the glaze, just to keep things moist.
Here’s the biggest flavor booster taken right from my own recipe variation notes:
- For an authentic zing, add a very thin layer of sliced pepperoncini peppers or banana peppers right on top of the cheese before you place the top roll on. They add a little tang that cuts through the richness of the meats and cheese beautifully. Trust me, this is a game-changer for these Italian Grinder Sliders!
- If you happen to have leftover Italian dressing in the fridge, you can actually swap out the mayo and Dijon in the glaze for about 3 tablespoons of that dressing. It gives it a slightly different zip, but it’s still fantastic.
Serving Suggestions for Your Garlic Butter Glazed Sliders
These Garlic Butter Glazed Sliders truly are amazing all by themselves, especially when they’re fresh out of the oven and totally gooey. But if you’re putting them out as part of a spread for game day or serving them up for a Quick Weeknight Dinner, you need a few things to balance out all that amazing meat and cheese!
Since they are so rich and savory, I always reach for something bright and acidic. They pair wonderfully with fresh salads—it just cuts right through that delicious fat. My favorite thing to serve on the side is my quick and zesty cucumber tomato salad when it’s warm outside. It’s so refreshing!
If you’re loading up a buffet with these Party Appetizers, try adding some crispy potato chips or maybe a bowl of simple, salty pickles. Whatever you choose, just make sure you have plenty of napkins ready, because these grinder sliders are finger-lickin’ good!
Storage and Reheating Instructions for Leftover Grinder Sliders
Oh, boy, if you have leftovers—that means they were a hit! But let’s be real, sometimes you just can’t finish a whole pan of these amazing grinder sliders in one go. The good news is they keep really well, though you might notice the rolls soften a bit overnight because of that glorious glaze.
When saving them, the trick is to keep all that moisture locked in. I take my leftovers and place them back into the original baking dish or an airtight container. Make sure they are completely cooled down before you seal them up. Then, cover them tightly with plastic wrap or foil and put them right into the refrigerator. They should stay good for three, maybe four days, but honestly, they rarely last that long in my house!
Now for the best part: reheating! You definitely don’t want to use the microwave here unless you *love* soggy bread. To bring back that delightful texture and melt that cheese again, the oven or even a toaster oven is your best friend. Place the sliders (still connected if you can!) on a baking sheet. Cover them loosely with foil—we want to trap the steam to melt the insides, but we need the foil loose enough to let the top dry out a little.
Heat them at about 325°F for maybe 10 to 15 minutes. Check them around the 10-minute mark. You’re looking for that gooey cheese pull and a slightly crisper top roll. If you only have one or two sliders left, just pop them in a toaster oven for about five minutes! That blast of dry heat brings back the magic, making these leftovers taste almost as good as when they first came out of the oven. Enjoy those second-day Cheesy Baked Sandwiches!
Frequently Asked Questions About Hawaiian Roll Sliders
I get so many questions every time I share these grinder sliders, especially when football season rolls around! It means you all are loving them, and I want to make sure every batch you pull from the oven is perfect. Remember, these tips come straight from my kitchen experience recreating my family’s classics. If you’re ever looking for another reliable bun base, you should check out my recipe for easy condensed milk bread—it’s fluffy but sturdy!
Can I make these grinder sliders ahead of time?
Oh, yes, you absolutely can, and I highly recommend it when you are prepping for a big party! This recipe is fantastic for making ahead. You should assemble everything—layer the meats, cheese, and put the top roll on—but leave the glaze off for storage. Cover the entire assembled sandwich block tightly with plastic wrap and keep it in the fridge for up to four hours. This prep work is a lifesaver!
When you are ready to bake, place the whole thing in the oven covered first (remember that instruction? Add about five to ten minutes to that initial covered bake time since the rolls are cold).
What cheese works best in these Italian Grinder Sliders?
For these specific Italian Grinder Sliders, I stick to Provolone and Swiss because they give you that wonderful blend of slightly salty and creamy melt. They soften beautifully without getting greasy, which is key for great Cheesy Baked Sandwiches!
However, if you’re out of one or just want to experiment, Mozzarella is a fantastic replacement for the Provolone—it gives you that super long cheese pull. Mild Cheddar also melts nicely if you want to lean away from the traditional Italian flavors just a tiny bit, but stick to good melting varieties so everything stays gooey and holds the sandwich together!
Are these sliders too heavy for a light lunch?
They are definitely hearty because of all the delicious deli meats, but they make a wonderful, satisfying lunch! If you are serving them for a lighter midday meal instead of a huge appetizer spread, I suggest cutting the portions down. Instead of a full sandwich, cut the rolls into smaller squares after they cool down slightly. That way, you enjoy all the flavor of those Hawaiian Roll Sliders without feeling overly stuffed!
Nutritional Estimates for These Cheesy Baked Sandwiches
Now, I know what you’re thinking when you look at all those layers of meat and glorious cheese in these grinder sliders: “Are these wildly bad for me?” Well, honey, they are packed with flavor, which means they are packed with richness, but I always believe in knowing what you’re eating! Keep in mind that these numbers are just estimates based on the ingredients listed, so they might vary depending on exactly which brand of deli meat or rolls you use.
These aren’t meant to be diet food; they are what you eat when you are celebrating something big, like the Super Bowl or just surviving a Monday! When I made a batch recently, I tracked the macro breakdown just out of curiosity. You can see the main details below, but the takeaway is that these Cheesy Baked Sandwiches pack a punch of protein, which is certainly a bonus!
For a full, satisfying meal on a less exciting night, I sometimes pair a half slider with a light, fresh side, like my creamy one-pot chicken pesto pasta if I’m feeling ambitious, but usually, they stand alone perfectly well as a centerpiece appetizer.
- Serving Size: 1 slider
- Calories: Around 350 (Wow, right?)
- Protein: 19 grams (That’s thanks to all that good deli meat!)
- Fat: 18 grams
- Carbohydrates: 28 grams
If you’re worried about sodium for a big gathering, that’s the one spot where you have a little control—choosing lower-sodium ham or turkey makes a difference, even in something as perfect as these Hot Italian Sliders. It’s all about balance, right?
Share Your Experience Making Our Grinder Sliders
Now that you see just how simple it is to bring this amazing dish to your table, I truly hope you give these grinder sliders a try! From my nonna’s kitchen philosophy to yours, the greatest reward is seeing these recipes become part of your own family traditions. I’ve put everything I know into making this recipe straightforward and delicious, whether you need Game Day Food Ideas or just a quick, comforting dinner.
When you make these Italian Grinder Sliders, I would absolutely love to hear about it! Did you stick strictly to the recipe, or did you add a little flair or extra pickle to the glaze? Did you serve them for a huge watch party, or were they a lifesaver for a busy Tuesday night dinner? Tell me everything!
Head down to the comments below and leave a rating. If you loved these Baked Sliders Recipe, please give them a solid five stars—that helps other home cooks find this tried-and-true favorite! And if you tried one of the variations I mentioned, like tossing in banana peppers, let us know how that turned out for you!
If you want to see more about the traditions that inspired these recipes, you can always read more on the “About Us” page. And hey, if you happened to stumble upon this recipe from my good friend sharing her amazing version, you can check out her fantastic Italian Grinder Sliders here. Happy cooking, and I can’t wait to see your creations!
PrintEasy Italian Grinder Sliders: The Ultimate Game Day Food

Make these easy Italian Grinder Sliders, baked on soft Hawaiian rolls with deli meats, provolone, and a savory garlic butter glaze. They are perfect party appetizers and a crowd-pleasing choice for game day or quick weeknight dinners.
- Prep Time: 15 min
- Cook Time: 25 min
- Total Time: 40 min
- Yield: 12 servings 1x
- Category: Lunch
- Method: Baking
- Cuisine: American
- Diet: Vegetarian
Ingredients
- 1 (12 count) package sweet slider rolls (like Hawaiian rolls)
- 1/2 pound thinly sliced ham
- 1/2 pound thinly sliced turkey
- 1/2 pound thinly sliced salami
- 8 slices provolone cheese
- 4 slices Swiss cheese
- 1/4 cup butter, melted
- 2 tablespoons mayonnaise
- 1 tablespoon Dijon mustard
- 1 teaspoon Italian seasoning
- 1/2 teaspoon garlic powder
- 1/4 teaspoon onion powder
- 1/4 teaspoon dried oregano
Instructions
- Preheat your oven to 350 degrees Fahrenheit. Lightly grease a 9×13 inch baking dish.
- Slice the entire package of slider rolls horizontally, keeping the rolls connected in one piece. Place the bottom half of the rolls in the prepared baking dish.
- Layer the deli meats evenly over the bottom half of the rolls: ham, turkey, and salami.
- Place the provolone and Swiss cheese slices over the meats, covering the entire surface.
- Place the top half of the rolls over the cheese layer.
- In a small bowl, whisk together the melted butter, mayonnaise, Dijon mustard, Italian seasoning, garlic powder, onion powder, and oregano to create the glaze.
- Pour the butter glaze evenly over the top of the assembled sliders.
- Cover the baking dish tightly with aluminum foil.
- Bake for 15 minutes.
- Remove the foil and bake for another 5 to 10 minutes, or until the cheese is fully melted and the tops of the rolls are golden brown.
- Carefully slice the sliders apart between the rolls. Serve warm immediately.
Notes
- For extra flavor, you can add a thin layer of pepperoncini peppers or banana peppers over the cheese before adding the top roll.
- If you do not have Hawaiian rolls, use any soft, small slider bun.
- You can assemble these grinder sliders up to four hours ahead of time and keep them covered in the refrigerator before baking. Add 5-10 minutes to the covered baking time if baking straight from the fridge.
Nutrition
- Serving Size: 1 slider
- Calories: 350
- Sugar: 8
- Sodium: 850
- Fat: 18
- Saturated Fat: 8
- Unsaturated Fat: 10
- Trans Fat: 0.5
- Carbohydrates: 28
- Fiber: 1
- Protein: 19
- Cholesterol: 55