
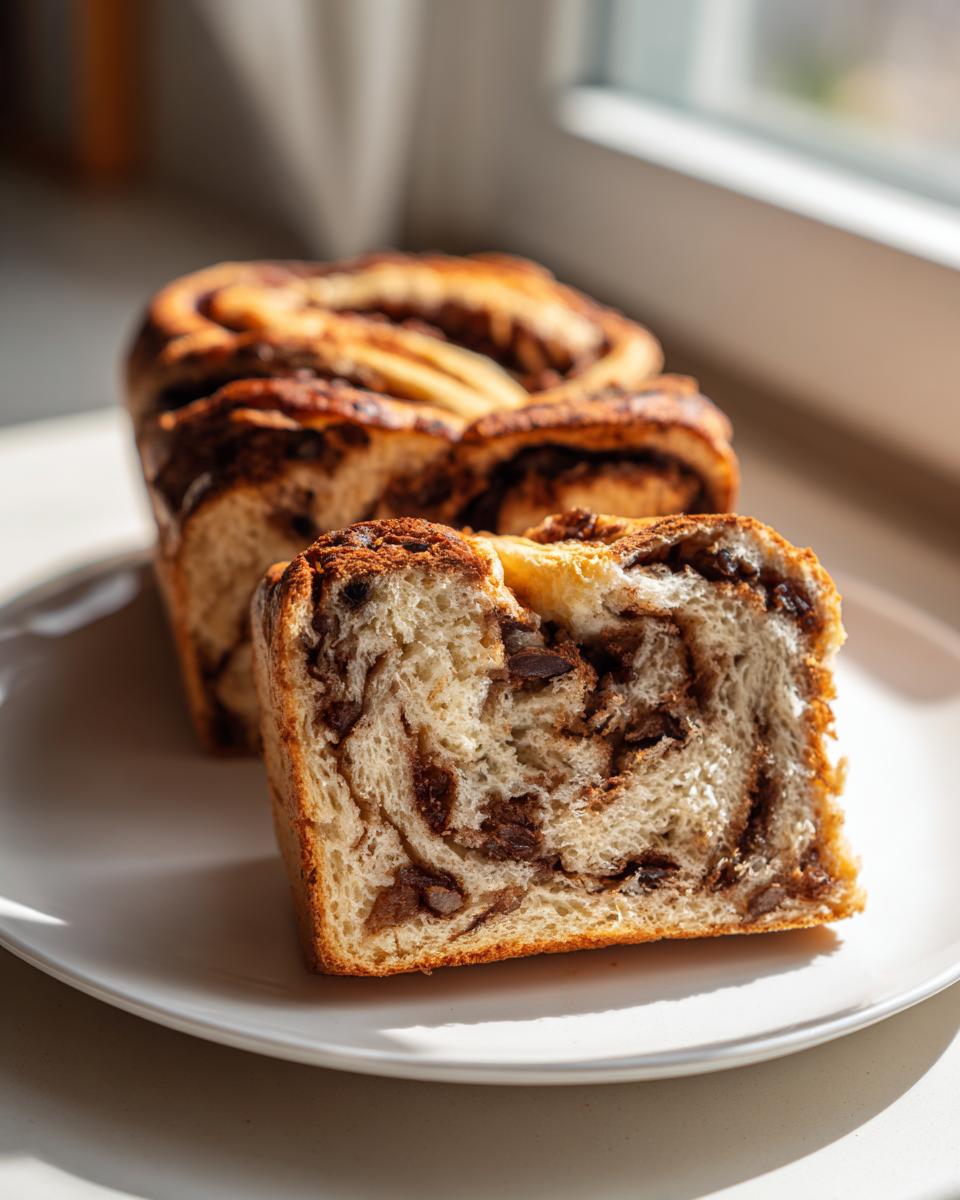
There is simply nothing that captures the feeling of home quite like the warm aroma of bread baking on a quiet morning. Here at Cookin’ Corner, we’re dedicated to bringing those classic, comforting tastes of the American kitchen right to your oven, just like my grandmother taught me. Forget those dry, skimpy store-bought loaves!
Today, we are diving into what I believe is the absolute best way to make a true classic: the Homemade Ultra-Soft Cinnamon Raisin Bread with a Perfect Cinnamon Swirl. This isn’t just any raisin bread; it’s designed to have that unbelievably fluffy texture and a gorgeous, distinct swirl that makes every slice feel earned. Trust me, this dependable recipe is going to become your go-to.
- Why This Homemade Raisin Bread Recipe Delivers Softness and Flavor
- Gathering Ingredients for Your Best Cinnamon Raisin Bread
- Step-by-Step Instructions for Easy Raisin Bread Baking
- Baking and Cooling Your Homemade Raisin Bread Loaf
- Tips for Success When Making Artisan Style Raisin Bread
- Serving Suggestions for Your Sweet Bread for Breakfast
- Storage and Reheating Instructions for Raisin Bread
- Frequently Asked Questions About Making Raisin Bread
- Estimated Nutritional Information for This Raisin Bread
Why This Homemade Raisin Bread Recipe Delivers Softness and Flavor
I’ve tried every quick trick out there, but nothing beats the texture you get when you treat the dough right. This recipe cuts through the bakery nonsense to give you a loaf that stays incredibly soft raisin bread-tender even after a few days. And that swirl? It’s not an accident; it’s pure technique!
We bake this bread for the satisfying smell, the rich buttery taste, and because it makes the best slice of toast you’ve ever had. When you bake from scratch, you control the magic.
Key Attributes of Our Soft Raisin Bread
- The ratio of warm milk and melted butter creates a richer, more tender crumb than water-based doughs.
- We knead just long enough to build structure, resulting in that beautiful, airy, fluffy cinnamon bread texture.
- The required double rise ensures maximum volume, meaning you get that tall, proud loaf instead of a sad, flat one!
If you’re ready to elevate your breakfast game, check out the recipe for the whole wheat honey sandwich loaf next time!
Gathering Ingredients for Your Best Cinnamon Raisin Bread
Baking seriously good bread starts with respecting your ingredients. You can’t just toss things in willy-nilly and expect that perfect, fluffy result. For this recipe, we need high-quality basics, especially since we are making a sweet, enriched dough. Remember, we are aiming for that classic homemade raisin bread recipe!
Here’s what you’ll need to have ready before you even touch the flour:
- 1 cup warm milk (this needs to be between 105°F and 115°F—not too hot, or you kill your yeast!).
- 2 1/4 teaspoons active dry yeast.
- 1/4 cup granulated sugar plus 1 teaspoon reserved for the yeast.
- 1 large egg, and this is key—it needs to be at room temperature.
- 1/4 cup unsalted butter, melted, but cooled slightly.
- 1 teaspoon salt.
- 3 1/2 to 4 cups all-purpose flour (you might not use all of it!).
- 1 cup raisins (they must be plumped first!).
- For the swirl: 1/2 cup packed light brown sugar, 2 tablespoons ground cinnamon, and 2 tablespoons softened unsalted butter.
Ingredient Notes and Substitutions for Classic Raisin Bread
Okay, let’s talk about the details that make the difference between good and great. First, the raisins! You absolutely must plump them first. Just soak them in hot water for about ten minutes and then drain them really well—pat them dry with a paper towel. If they go in wet, they’ll just make your dough gummy.
The egg and the milk need to be warm or room temperature because we are activating dry yeast. Cold ingredients slow that yeast way down, and we want it happy and foamy! If you don’t have whole milk, 2% works just fine, but avoid skim if you can; we need that fat content for flavor and texture. If you want a richer flavor sometimes, I’ve even tried substituting half the milk with buttermilk—it adds a lovely little tang that complements the sweet swirl. You can find a simple recipe for homemade cinnamon butter to put on top later, too!
Step-by-Step Instructions for Easy Raisin Bread Baking
Okay, now for the fun part! This is where we take those fantastic ingredients and turn them into something amazing. Don’t let the yeast scare you; this is one of the most forgiving beginner bread recipes out there. We’ll move through this methodically so your loaf rises beautifully every single time.
I always recommend having your pan greased and ready to go before the first rise, so you aren’t scrambling later!
Activating Yeast and Mixing the Dough for Fluffy Cinnamon Bread
First things first: the yeast needs a snack! In your main bowl, mix the warm milk, that little teaspoon of sugar, and the yeast. You must wait five to ten minutes until it gets super foamy—that’s how you know your yeast is alive and ready to work its magic. Once it’s bubbly, stir in the rest of your sugar, the room-temperature egg, the melted butter, and the salt.
Next, start adding the flour gradually. Mix it until it just looks shaggy, like a messy coat of dough. Don’t dump it all in at once; we want to see how much flour the dough can really handle!
Kneading and First Rise: Developing the Structure of Your Raisin Bread
Turn that shaggy mass out onto a lightly floured spot on your counter. Now, you gotta knead it! You’re looking for 5 to 7 minutes of good, solid work. It should feel smooth, and when you poke it, it should spring back slowly—that’s what we mean by elastic. If it’s still sticking to your hands like glue, add a tiny bit more flour, but resist the urge to add too much!
Get that nice dough ball into an oiled bowl, flip it over so it gets coated, cover it with plastic wrap or a damp cloth, and pop it somewhere warm. I mean genuinely warm, like near a sunny window or in a slightly warm oven that’s turned off. It needs a good 1 to 1.5 hours to double in size. Patience leads to that soft raisin bread texture!
Creating the Perfect Cinnamon Swirl Bread Recipe Filling
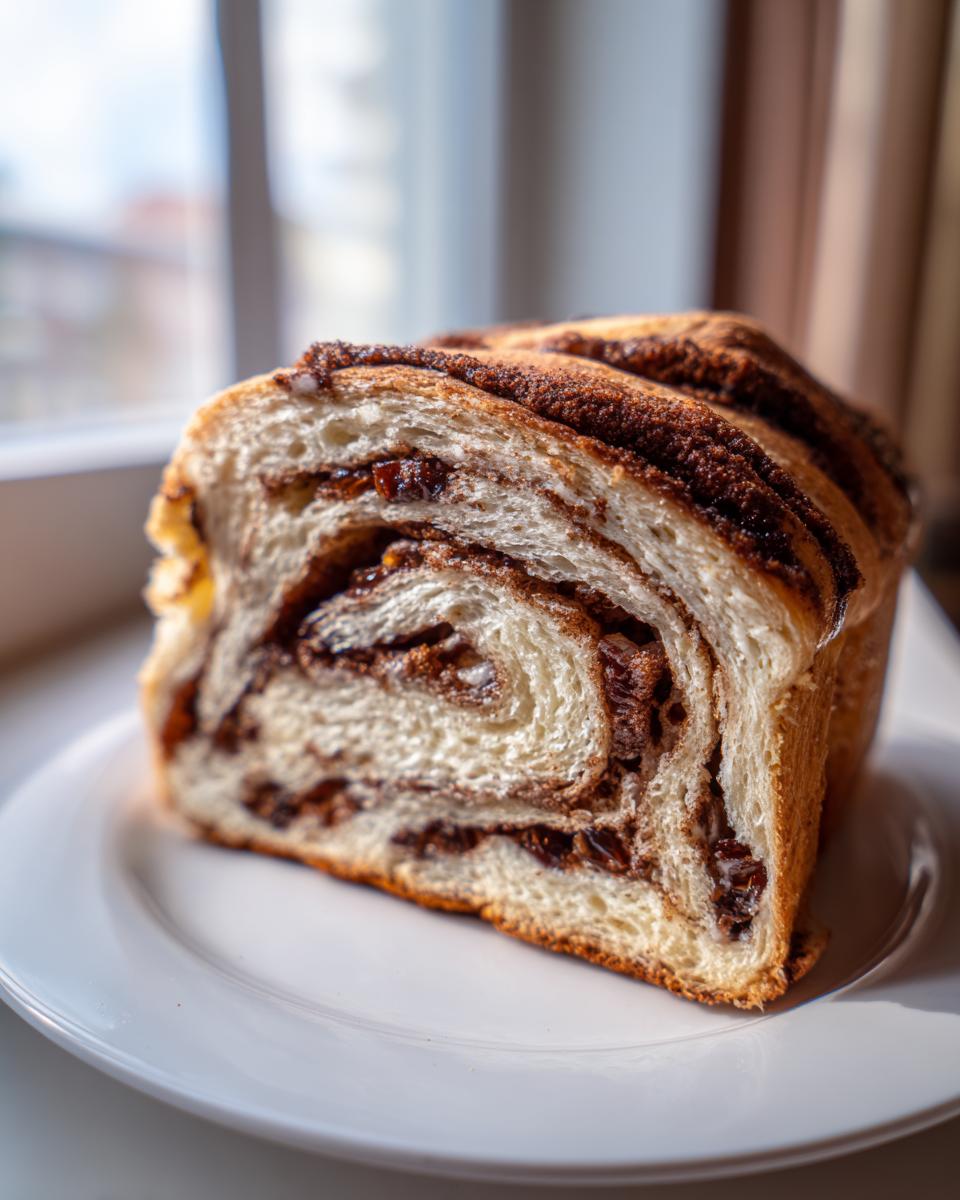
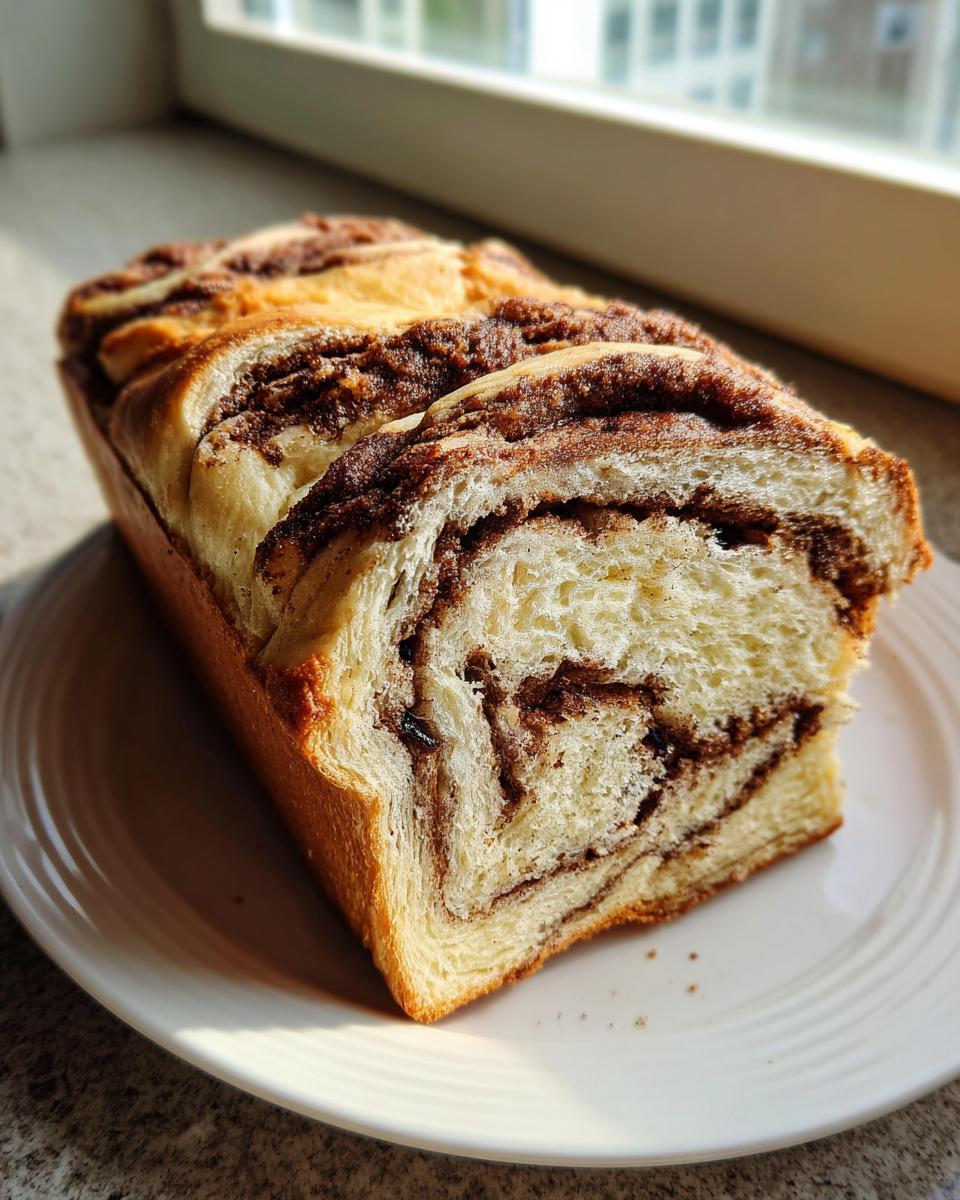
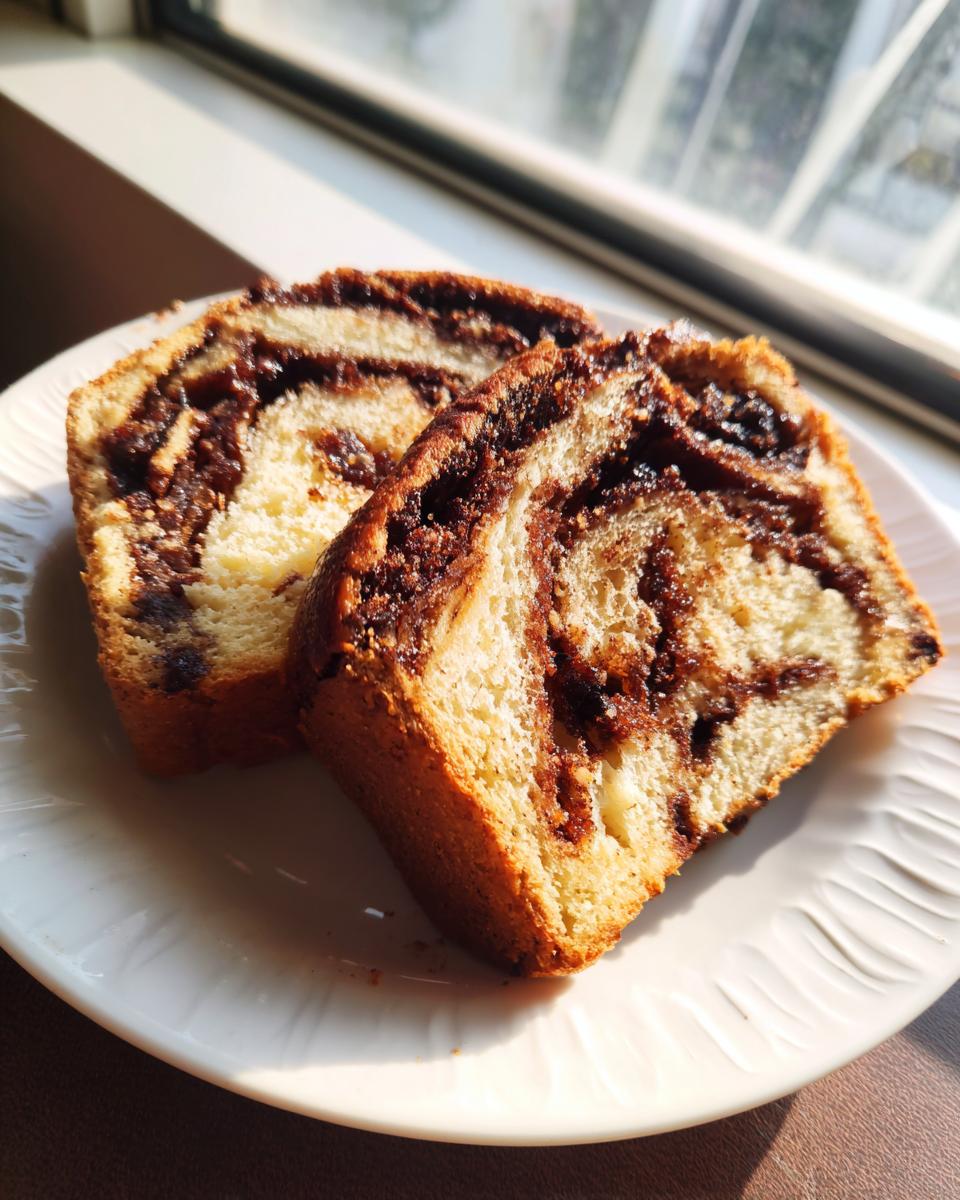
While that dough is growing, let’s make the filling that guarantees that beautiful interior ribbon. Mix your brown sugar and cinnamon together really well. Once the dough has risen, gently punch it down—it should deflate with a satisfying *whoosh*.
Roll that dough out into a big rectangle, about 12 by 18 inches. Brush the entire surface evenly with the 2 tablespoons of softened butter—make sure you get it right to the edges! Then, sprinkle that cinnamon-sugar mix over everything, followed by your pre-plumped raisins. Starting from the long side, roll it up super tight, like you’re rolling a yoga mat. Pinch that final seam closed and tuck it seam-side down into your greased loaf pan. If you want a lovely treat for later, check out this easy traditional Irish soda bread recipe!
Baking and Cooling Your Homemade Raisin Bread Loaf
We’re almost there! You’ve rolled that gorgeous swirl into a tight log, and now it’s nestled into your greased 9×5 inch pan. This needs one last nap—the second rise. You just cover it loosely and let it sit somewhere warm for about 30 to 45 minutes. You’re looking for it to have crowned about an inch over the rim of the pan when it’s ready. If it’s not proud, it won’t bake up proud!
While it’s taking that final puff, go ahead and crank your oven up to 375°F (190°C). Now, for baking: slide that beauty in for 30 to 35 minutes. Your loaf is done when it’s golden brown all over and registers about 200°F inside. If I see the top getting too dark before the middle is done—and this happens sometimes—I just loosely tent a piece of foil over it. That keeps the color beautiful while the inside finishes baking.
The second it comes out, get it out of that pan immediately! Placing it straight onto a wire rack to cool completely is crucial for that perfect texture. Trust me on this one; it prevents the bottom from getting soggy. If you want to see another amazing warm-baked treat, you have to check out my recipe for moist coffee cake with cinnamon streusel!
Tips for Success When Making Artisan Style Raisin Bread
I’ve been through enough loaves of this sweet bread to know the little tricks that turn a good bake into a legendary one. You want that perfect, tender crumb that works so beautifully as raisin bread for toast, right? These tiny details ensure you nail that rich, buttery flavor every single time.
When that loaf comes out of the oven—and you manage to wait the agonizing time for it to cool—you need to know how to treat it right! This sweet bread for breakfast tastes amazing straight out that feeling of home baking.
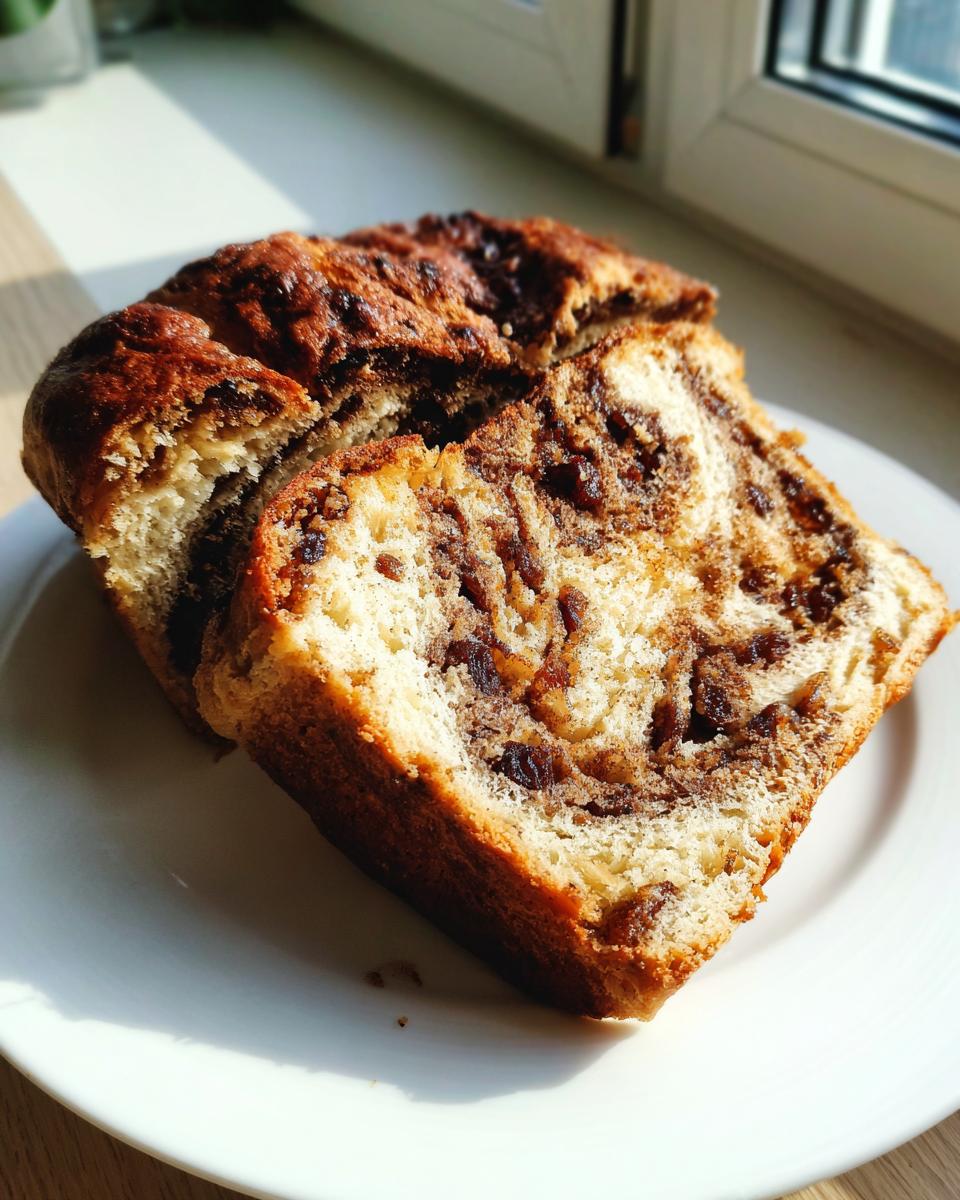
Also, and this is hard for impatient people like me, you must wait until it’s *completely* cool to slice it. If you cut into warm bread, all those lovely air pockets we worked so hard to create collapse, and you end up with dense patches instead of that beautiful, even texture.
If you’re feeling brave and want to try something different than a standard loaf pan, you can absolutely treat this dough like an artisan style raisin bread. Keep the mixing and rolling the same, but instead of putting it in a pan, bake it in a preheated Dutch oven. It gives you that bakery-style crust, though you might miss out on some of the soft rise you get from the confinement of the pan. For more rustic baking ideas, you can always check out my easy beer bread recipe!
If you’re looking for more lovely, comforting homemade bread inspiration, you should definitely take a peek at what my friends are up to over at Cheerful Cook!
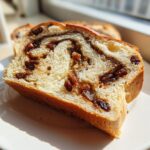
Serving Suggestions for Your Sweet Bread for Breakfast
When that loaf comes out of the oven—and you manage to wait the agonizing time for it to cool—you need to know how to treat it right! This sweet bread for breakfast tastes amazing straight out that feeling of home baking.
Forget the toaster the first time around; you MUST eat the first couple of slices warm, just after slicing. Smother it with real butter—I like a thick smear of my homemade cinnamon butter recipe, but anything works. That sweetness and warmth make it the absolute best breakfast bread imaginable.
Once it’s completely cool, warming those slices later in a toaster or under the broiler is fantastic too. That slight crisping on the edges complements the soft, spiced interior perfectly. It’s such a comforting treat!
Storage and Reheating Instructions for Raisin Bread
This glorious homemade raisin bread is so tender, it really doesn’t like to stay fresh for super long at room temperature, so don’t plan on keeping it out for too many days! I find it stays beautifully soft for about two to three days if you wrap it tightly in plastic wrap or foil after it has fully cooled.
If you need it to last longer, definitely slice it and pop it into the freezer. The best part about freezing it? When you want that glorious warm aroma bread feeling back, just take out a slice and pop it right into the toaster or give it 10 seconds in the microwave. It tastes like it just came out of the oven! Honestly, I doubt it will last long enough to make it to the freezer, though!
Frequently Asked Questions About Making Raisin Bread
Can I use active dry yeast instead of instant yeast for this recipe?
Oh, absolutely! That was the traditional way most of our grandparents made their yeast bread recipes anyway. The main difference is how you treat it at the start. If you are using active dry yeast, you must follow Step 1 perfectly: proof it in the warm milk with a little sugar until it gets frothy. That proves it’s ready. Instant yeast is more forgiving and can usually be mixed right in with the dry ingredients, but for this homemade raisin bread recipe, active dry works beautifully if you give it that initial warm bath.
I’m new to baking. Can I skip the kneading part for this fluffy cinnamon bread?
I totally get wanting to try a no knead raisin bread method; it sounds easier! However, for this specific recipe designed to be ultra-soft and stand up to that heavy swirl filling, kneading is a tough step to skip. Kneading builds the gluten structure we need to trap those gasses during rising, which is what gives you that fluffy texture instead of a dense brick. Think of the 5 to 7 minutes of kneading as developing the structure for the perfect slice of raisin bread for toast later on. You can see some great tips for simplified baking, even for this loaf, over at Easy Recipe Cook.
Can I adapt this recipe for a bread machine raisin bread?
That’s a great question, as a bread machine makes things super convenient! You can certainly adapt it, but you can’t just dump this dough in and walk away. The machine cycle is designed for standard, non-enriched doughs. If you use the machine, you’d typically use the “dough cycle” only. Once the cycle finishes mixing and the first rise is done, you would remove the dough, punch it down, roll out your swirl filling, roll it up, and then place it in a greased loaf pan for the second rise and bake it in the regular oven. It defeats the *easy* purpose a little, but you get the flavor!
My swirl always disappears! How do I keep the cinnamon visible in my loaf?
This happens to everyone who tries to master the cinnamon swirl bread recipe! The key is the butter barrier. When you roll out your rectangle, that layer of softened butter must cover the entire surface edge-to-edge. The butter acts like glue for the cinnamon-sugar mix and holds it against the dough better during the tight roll-up. If you leave even a half-inch unbuttered at the edges, that part sticks to itself in the center instead of creating that beautiful ribbon. Also, make sure you’re rolling the log *tightly*.
How can I make sure my raisins are nice and plump?
If you use dried-out raisins in your classic raisin bread, they will suck up moisture from your beautiful, soft dough while it bakes! That’s how you end up with dry spots. The simple fix is what I detailed earlier: soak them. Hot tap water is perfect, just ten minutes. Drain them really well, and then the most important part: pat them until they feel dry on the outside before adding them to the dough. This keeps them juicy inside the bread but prevents them from causing trouble during the mix. If you’re looking for other quick baking ideas, maybe try my no-bake ice cream pie for a change of pace!
Estimated Nutritional Information for This Raisin Bread
Now, I’m always the first to say that when you bake something this comforting from scratch, you shouldn’t worry too much about the numbers. This is home cooking, not a science experiment! However, because people always ask about it, here is an estimate for this homemade sweet bread.
Please remember that since every kitchen uses slightly different ingredients—was your butter sweeter? did you use 3.5 cups or 4 cups of flour?—this chart is just a guide based on the ingredients listed in the recipe. Treats are meant to be enjoyed!
- Serving Size: 1 slice
- Calories: 250
- Total Fat: 6g
- Saturated Fat: 3.5g
- Carbohydrates: 45g
- Sugar: 14g
- Protein: 5g
- Fiber: 2g
That rich flavor comes mostly from the melted butter and the brown sugar in the swirl, which is totally worth it for that perfect slice of raisin bread for toast!
PrintHomemade Ultra-Soft Cinnamon Raisin Bread with a Perfect Cinnamon Swirl
Bake this soft, fluffy cinnamon raisin bread from scratch. This recipe creates a loaf with a beautiful cinnamon swirl, perfect for toasting or enjoying warm with butter for breakfast.
- Prep Time: 30 min
- Cook Time: 35 min
- Total Time: 2 hr 40 min
- Yield: 1 loaf (about 12 slices) 1x
- Category: Breakfast
- Method: Baking
- Cuisine: American
- Diet: Vegetarian
Ingredients
- 1 cup warm milk (105-115°F)
- 2 1/4 teaspoons active dry yeast
- 1/4 cup granulated sugar plus 1 teaspoon for yeast
- 1 large egg, room temperature
- 1/4 cup unsalted butter, melted
- 1 teaspoon salt
- 3 1/2 to 4 cups all-purpose flour
- 1 cup raisins, plumped
- 1/2 cup packed light brown sugar for swirl
- 2 tablespoons ground cinnamon for swirl
- 2 tablespoons unsalted butter, softened for swirl
Instructions
- In a large bowl, combine the warm milk, 1 teaspoon of sugar, and yeast. Let stand for 5 to 10 minutes until foamy.
- Stir in the remaining 1/4 cup sugar, egg, melted butter, and salt into the yeast mixture.
- Gradually add the flour, mixing until a shaggy dough forms. Turn the dough onto a lightly floured surface.
- Knead the dough for 5 to 7 minutes until it is smooth and elastic. Add more flour only if the dough is too sticky to handle.
- Place the dough in a lightly oiled bowl, turning to coat. Cover the bowl and let it rise in a warm place for 1 to 1.5 hours, or until doubled in size.
- While the dough rises, prepare the filling: In a small bowl, mix the brown sugar and cinnamon.
- Gently punch down the risen dough. Turn it out onto a lightly floured surface and roll it into a large rectangle, about 12×18 inches.
- Brush the surface of the dough evenly with the 2 tablespoons of softened butter. Sprinkle the cinnamon-sugar mixture evenly over the buttered surface. Scatter the plumped raisins over the sugar mixture.
- Starting from the long edge, tightly roll the dough into a log. Pinch the seam closed.
- Carefully place the dough log, seam-side down, into a greased 9×5 inch loaf pan.
- Cover the pan loosely and let the dough rise again in a warm spot for 30 to 45 minutes, or until the dough has crowned about 1 inch over the rim of the pan.
- Preheat your oven to 375°F (190°C) during the last 15 minutes of the second rise.
- Bake for 30 to 35 minutes, or until the top is golden brown and the internal temperature reaches 200°F (93°C). If the top browns too quickly, loosely tent it with foil.
- Remove the loaf from the pan immediately after baking and cool completely on a wire rack before slicing for the best texture.
Notes
- To plump raisins, soak them in hot water for 10 minutes, then drain and pat them completely dry before adding to the dough.
- For an artisan style raisin bread, bake this dough in a preheated Dutch oven instead of a loaf pan.
- Brush the top of the loaf with melted butter immediately after it comes out of the oven for a softer crust.
Nutrition
- Serving Size: 1 slice
- Calories: 250
- Sugar: 14g
- Sodium: 280mg
- Fat: 6g
- Saturated Fat: 3.5g
- Unsaturated Fat: 2.5g
- Trans Fat: 0g
- Carbohydrates: 45g
- Fiber: 2g
- Protein: 5g
- Cholesterol: 30mg