
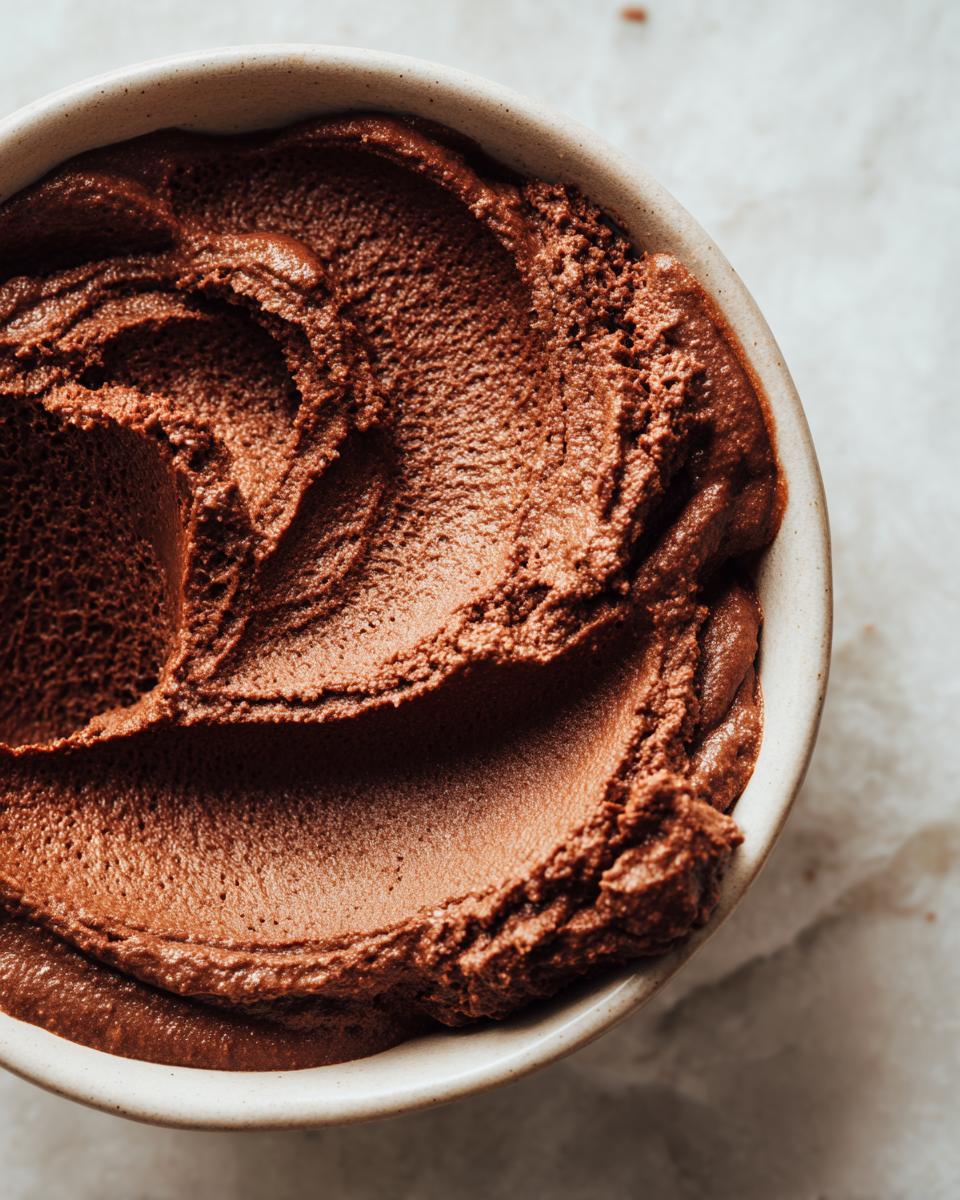
Some flavors just wrap you up like the best kind of cozy blanket, and that’s exactly what this recipe does. We’re talking about the ultimate comfort food, the kind of homemade chocolate pudding that makes you forget those dry, dusty boxed mixes ever existed. Trust me when I say this is the best, silky, homemade chocolate pudding from scratch you’ll ever scoop! Here at Cookin’ Corner, we believe the true heritage of the American kitchen lies in taking simple pantry ingredients and coaxing magic out of them. This dessert is quick, ridiculously creamy, and ready to bring a smile to your face after any weeknight dinner. If you’re looking for that authentic, rich chocolate moment, you’ve found your forever recipe. You can find more simple dessert ideas over in my general dessert section. Click here for more classics.
- Why This Homemade Chocolate Pudding Recipe Works Every Time
- Gather Your Ingredients for Rich Chocolate Pudding
- Simple Steps to Make Chocolate Pudding From Scratch
- Finishing Touches for the Best Chocolate Pudding
- Tips for Making Foolproof Chocolate Pudding
- Serving and Storing Your Silky Smooth Pudding
- Frequently Asked Questions About Chocolate Pudding
- Estimated Nutritional Data for Homemade Chocolate Pudding
- Share Your Classic Comfort Food Dessert Experience
Why This Homemade Chocolate Pudding Recipe Works Every Time
You asked why this simple stovetop pudding recipe stands up against every boxed mix out there, and honestly, it’s all about technique and trust. This isn’t some fussy, complicated bake; it’s a time-honored classic from the Cookin’ Corner heritage, made to be reliable. When you make your own chocolate pudding from scratch, you control the richness. The result is this incredibly satisfying, easy creamy dessert idea that has a deep, true chocolate flavor that store-bought stuff just can’t touch. It’s pure comfort, made elegantly simple.
Achieving Silky Smooth Pudding Texture
The secret to that luscious, velvety feel—the absolute non-negotiable for me—is twofold. First, we use just enough cornstarch to give it structure, which thickens beautifully without getting gluey. Second, we use egg yolks, but we treat them gently! Tempering them correctly, like I show you in the next section, means you won’t end up with scrambled bits floating in your lovely, silky smooth pudding. That’s how we ensure perfection every single time.
Gather Your Ingredients for Rich Chocolate Pudding
Honestly, the magic of this chocolate pudding is that you probably have almost everything you need right now! Because we’re making this rich, velvety dessert from scratch, we rely on standard pantry heroes. Make sure you’ve got your 1/2 cup of sugar and your cocoa powder ready to go. Those two large egg yolks are going to provide incredible depth later on, so don’t skip them! Having two tablespoons of good unsalted butter waiting will ensure that last step is absolutely decadent. It’s what turns a good pudding into the best chocolate pudding.
- 1/2 cup granulated sugar
- 1/4 cup unsweetened cocoa powder
- 1/4 cup cornstarch
- 1/4 teaspoon salt
- 2 cups whole milk
- 2 large egg yolks
- 2 tablespoons unsalted butter
- 1 teaspoon vanilla extract
Simple Steps to Make Chocolate Pudding From Scratch
Okay, getting this amazing chocolate pudding on the table is way faster than you think. We’re ditching the mixing bowls that come with the boxes because we’re making real dessert here! Just grab a medium saucepan, and we’ll move through this quickly. Always remember: constant motion is your best friend when cooking pudding on the stovetop. I promise, if you follow these steps precisely, you’ll have a rich, beautiful dessert ready for chilling in about 25 minutes total.
Combining Dry Ingredients and Milk
First thing’s first: we need zero lumps. In your saucepan—before you turn on the heat—whisk together the sugar, cocoa powder, cornstarch, and salt until they look like one uniform brown dust. Now, slowly pour in your whole milk while whisking constantly. Keep going until that mixture is totally smooth. Trust me, mixing the dry ingredients without liquid first prevents that awful powdery flour pocket at the bottom!
Cooking and Thickening the Stovetop Pudding Recipe
Now we turn up the heat to medium. You absolutely cannot walk away from this step! You need to stir constantly, scraping the bottom corners of the pot. After about 8 to 10 minutes, you’ll see it start bubbling. Once it hits a full, rolling boil, you must keep that stovetop pudding recipe going for one more full minute. This cooks out any starchy flavor from the cornstarch, which is key for that luscious taste.
Tempering Egg Yolks for Smooth Chocolate Pudding
This next part is vital so your lovely pudding base doesn’t turn into scrambled eggs! Take about half a cup of that hot pudding mixture and drizzle it *very slowly* into your lightly whisked egg yolks while whisking the yolks nonstop. This is called tempering. Once the yolks are warmed safely, pour that tempered mixture right back into the saucepan. Put it back on low heat and stir gently for one or two minutes until it thickens up again. Don’t let it boil once the yolks are in!
Finishing Touches for the Best Chocolate Pudding
We’re almost there, friend! Once you’ve taken that pan of beautiful, thickened mixture off the heat, it’s time for the flavor boosters that elevate this from good to the best chocolate pudding. Stir in those two tablespoons of cold butter—it melts right in and gives the pudding a gorgeous, glossy sheen and ultra-rich mouthfeel. Follow that immediately with your vanilla extract. Now for my most important kitchen secret for stovetop puddings: never let it form a skin! As soon as you pour your pudding into serving bowls or one large dish, cover the surface directly with plastic wrap. Press that wrap right onto the pudding’s top layer. This simple move guarantees that silky smooth texture you’re dreaming of. Pop it in the fridge for at least two hours. It needs that chill time to truly set up perfectly.
Tips for Making Foolproof Chocolate Pudding
If you follow the tempering steps, you’ve already made this a foolproof pudding recipe, but I always have a couple of extra little secrets tucked away for when you want to push that flavor even further! These aren’t mandatory, but they really help nail that deeply satisfying, rich velvety dessert feeling. Don’t be shy about adjusting things slightly—that’s what real home cooking is all about!
Ingredient Swaps for Deeper Flavor
For an extra luxurious treat on a special occasion, definitely swap out half of your whole milk for heavy cream. Just use 1 cup of whole milk and 1 cup of heavy cream. Also, if your cocoa powder selection allows, grab the Dutch-processed kind. It gives such a deep, almost intense chocolate note that really makes this whole thing sing!
Serving and Storing Your Silky Smooth Pudding
Once that beautiful chocolate pudding has chilled for at least two hours, it’s time for the reward! The chill time is super important because that’s when the starches lock everything into that silky smooth pudding texture we worked so hard to achieve on the stove. Seriously, don’t rush this part!
I love serving mine up in little glass jars—it turns a weeknight treat into something that feels special for the family. Since this keeps so well, it’s a fantastic make ahead dessert. You can easily cover and refrigerate leftovers for up to four days. Just remember to peel off that plastic wrap before serving to keep that perfect, unblemished top!
Frequently Asked Questions About Chocolate Pudding
I get so many messages about this recipe, which just proves how much we all crave that perfect bowl of chocolate pudding! It’s natural to have questions when you move away from a box mix, but don’t you worry. I’ve gathered the most common ones right here so you feel totally confident taking on this stovetop project. If it’s your first time making a dessert from scratch, this is a fantastic place to start!
Can I make this chocolate pudding without egg yolks?
You certainly can, but I’d prefer you didn’t! The yolks provide richness and help with emulsification—that’s what keeps your pudding stable. If you must skip them, add just one extra tablespoon of cornstarch to the dry mix, and whisk really vigorously when cooking to prevent lumps!
How can I make this a rich velvety dessert for a crowd?
Scaling up is easy, just double or triple the whole recipe! The trick is using a wider, heavier-bottomed pot so the bottom doesn’t scorch when you’re cooking. For the deepest flavor possible when making a big batch, definitely use Dutch-processed cocoa when you pull out that richer flavor profile.
Is this considered a No Bake Chocolate Dessert?
That’s a great question for anyone planning meals ahead! While the final chilling certainly requires no oven time, you do have to cook this on the stovetop to activate the cornstarch. So, it’s technically ‘no bake,’ but it does require active cooking time on the burner!
Estimated Nutritional Data for Homemade Chocolate Pudding
Now, I know some of you are tracking macros or just curious about what’s in that rich, velvety bowl, so here’s the basic nutritional snapshot for a single serving of this homemade chocolate pudding. Remember how I always say Grandma baked for love, not for charts? Well, these numbers are just estimates, and they can definitely change based on if you use whole milk or that heavy cream swap we talked about!
We’re looking at roughly 285 calories per serving, with about 30 grams of sugar coming naturally from the recipe components. It’s a decadent treat, for sure. But knowing what goes into your simple chocolate dessert recipe is always better than relying on a mystery box, right?
- Serving Size: 1 serving
- Calories: 285
- Sugar: 30g
- Sodium: 150mg
- Fat: 12g (with 7g of that being saturated fat)
- Carbohydrates: 40g
- Protein: 7g
Please keep in mind that because we are making this rich, decadent treat entirely from scratch, these values are estimates based on standard grocery store staples. If you use a different brand of cocoa or milk, those numbers will shift a little. That’s part of the fun of cooking homemade!
Share Your Classic Comfort Food Dessert Experience
Now that your rich, silky chocolate pudding is perfectly chilled and ready to eat, I really want to hear all about it! Creating these treasured family dishes is only half the fun; sharing the experience is the best part. Did you serve it in those cute little jars we talked about? Are your kids already asking for seconds tomorrow?
Please take a minute to leave a star rating for this recipe right down below. Knowing how this homemade chocolate pudding recipe turned out for you helps me keep sharing these classic comfort food desserts with the community. If you made any little adjustments—maybe you added an extra dash of vanilla—let me know in the comments! We’re all learning from each other here at Cookin’ Corner. I love seeing your photos if you share them online, tagging us so I can see your beautiful, velvety results. Happy scooping!
PrintThe Best Silky, Creamy, Homemade Chocolate Pudding From Scratch
Make rich, velvety chocolate pudding on the stovetop using simple pantry ingredients. This foolproof recipe delivers a classic comfort dessert that is far better than any boxed mix.
- Prep Time: 10 min
- Cook Time: 15 min
- Total Time: 25 min
- Yield: 4 servings 1x
- Category: Dessert
- Method: Stovetop
- Cuisine: American
- Diet: Vegetarian
Ingredients
- 1/2 cup granulated sugar
- 1/4 cup unsweetened cocoa powder
- 1/4 cup cornstarch
- 1/4 teaspoon salt
- 2 cups whole milk
- 2 large egg yolks
- 2 tablespoons unsalted butter
- 1 teaspoon vanilla extract
Instructions
- In a medium saucepan, whisk together the sugar, cocoa powder, cornstarch, and salt until combined.
- Gradually whisk in the milk until the mixture is smooth and there are no lumps.
- Place the saucepan over medium heat. Cook, stirring constantly with a whisk, until the mixture thickens significantly and begins to bubble. This usually takes 8 to 10 minutes.
- Once boiling, continue to cook and whisk for 1 minute to cook out the cornstarch flavor. Remove the pan from the heat.
- In a small bowl, lightly whisk the egg yolks. Temper the yolks by slowly whisking about 1/2 cup of the hot pudding mixture into the yolks.
- Pour the tempered yolk mixture back into the saucepan with the remaining pudding. Return the pan to low heat. Cook, stirring constantly, for 1 to 2 minutes until the pudding is thick. Do not let it boil after adding the yolks.
- Remove from heat. Stir in the butter and vanilla extract until the butter is fully melted and incorporated.
- Pour the pudding into individual serving dishes or a single bowl. Press plastic wrap directly onto the surface of the pudding to prevent a skin from forming.
- Chill in the refrigerator for at least 2 hours, or until completely cold and set. Serve cold for a truly silky smooth texture.
Notes
- For an extra rich flavor, substitute 1/2 cup of the milk with 1/2 cup of heavy cream.
- If you want a deeper chocolate taste, use Dutch-processed cocoa powder.
- This pudding is excellent served in small jars for easy make-ahead dessert portions.
Nutrition
- Serving Size: 1 serving
- Calories: 285
- Sugar: 30
- Sodium: 150
- Fat: 12
- Saturated Fat: 7
- Unsaturated Fat: 5
- Trans Fat: 0
- Carbohydrates: 40
- Fiber: 2
- Protein: 7
- Cholesterol: 85