
Oh, you’re here because you’re tired of flat, sad cookies, aren’t you? I get it! We’ve all been there, staring sadly at a baking sheet full of mediocrity. But listen, friend, the search is over. What I’m sharing today are the ultimate bakery style chocolate chip cookies—the kind that stand tall, have wonderfully crispy edges, and that core stays magically gooey. Here at Cookin’ Corner, my whole mission, guided by my grandmother’s wisdom, is passing down that trustworthy, authentic American kitchen magic. Sarah Jane Thompson started this corner because she believes the best recipes *always* work. Trust me, these homemade chocolate chip cookies are the ones you’ll be asked to make for every single event from now on. If you love this kind of rich flavor, you absolutely have to try my recipe for sourdough chocolate chip cookies too!
- Why This is the Best Chocolate Chip Cookie Recipe Ever (Thick & Chewy)
- Ingredients for Ultimate Chocolate Chip Cookies
- How to Prepare Thick Chocolate Chip Cookies
- Essential Chocolate Chip Cookie Tips and Tricks for Success
- Storage and Reheating Instructions for Homemade Chocolate Chip Cookies
- Variations on Classic Chocolate Chip Cookies
- Serving Suggestions for These Comfort Food Desserts
- Frequently Asked Questions About Making Chocolate Chip Cookies
- Estimated Nutritional Data for Our Chocolate Chip Cookies
- Share Your Ultimate Chocolate Chip Cookies Experience
- Estimated Nutritional Data for Our Chocolate Chip Cookies
- Share Your Ultimate Chocolate Chip Cookies Experience
Why This is the Best Chocolate Chip Cookie Recipe Ever (Thick & Chewy)
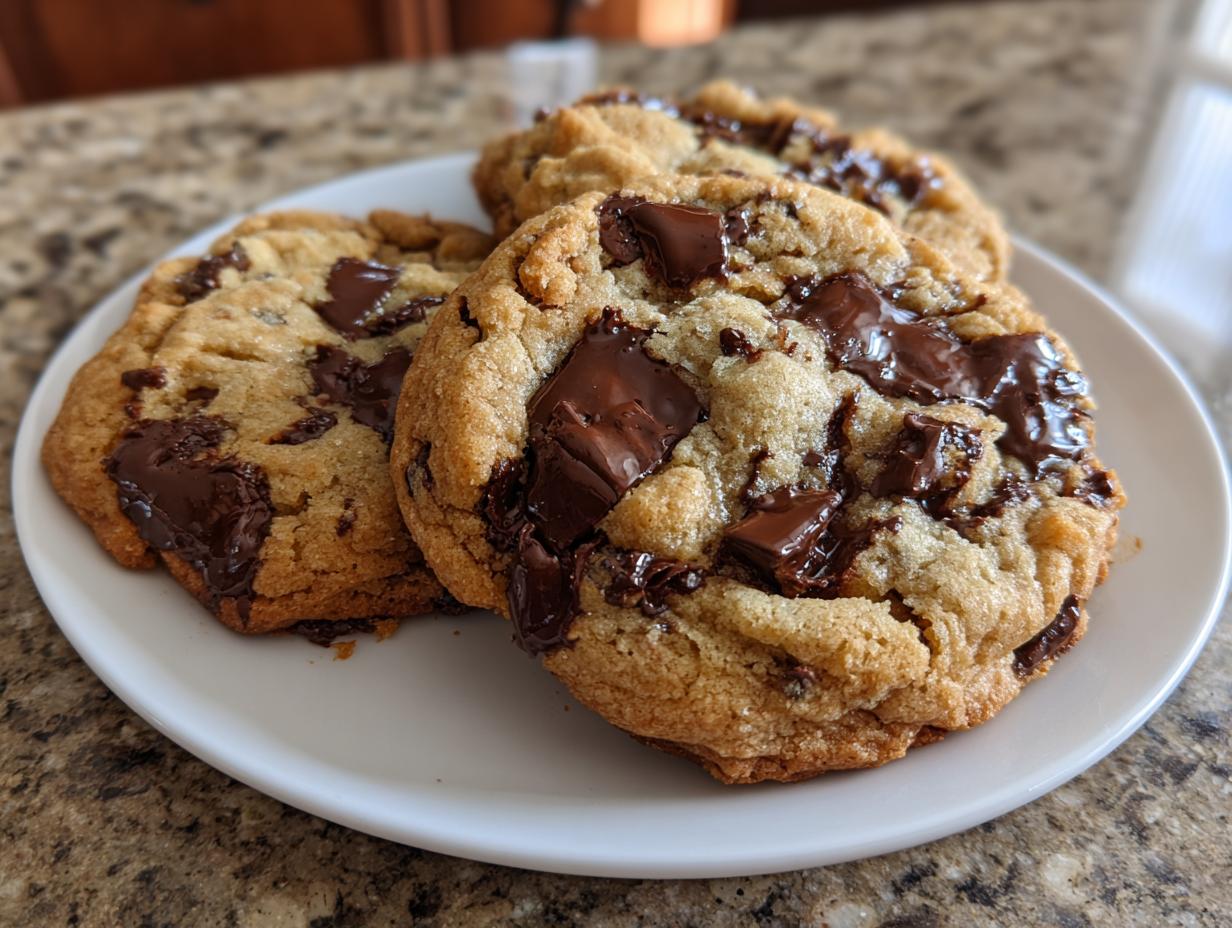
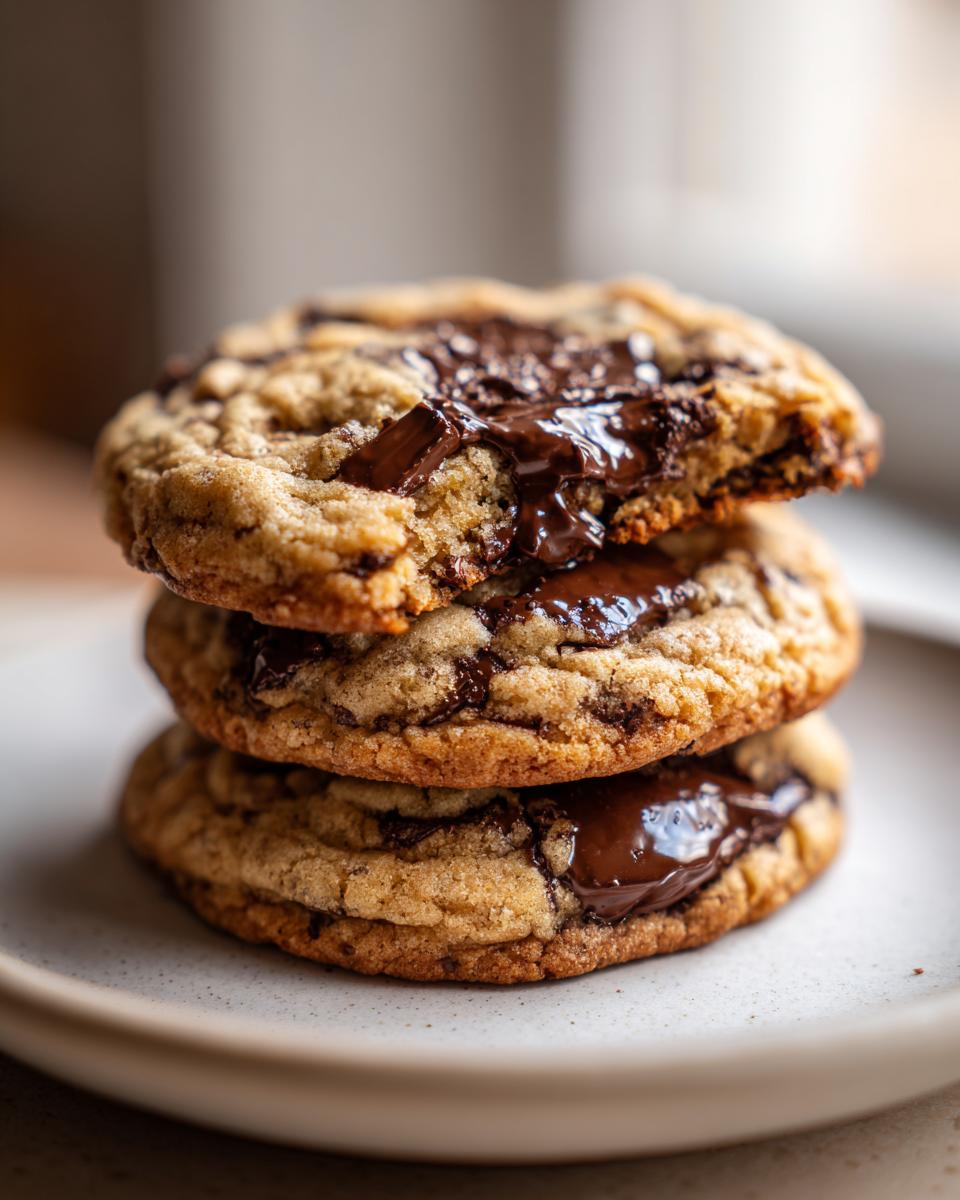
If you’re used to cookies that spread into thin, lacy things, prepare to be amazed. This isn’t your standard weeknight batch; this is how the pros do it. We are focusing intensely on texture here, which is why these become the thick chocolate chip cookies you’ve been dreaming about. Forget dry, crumbly results! This chewy chocolate chip cookies recipe guarantees a perfect balance of chewiness in the middle, meeting that delicate, buttery crispness right at the edge.
- These cookies never spread thin—they stay high and proud!
- The guaranteed soft, gooey center that melts in your mouth.
- A beautiful golden brown exterior that offers just the right snap.
This recipe demands respect for a couple of key steps. If you follow the technique, you get the best cookie. For more reliable results in other baking projects, check out my foolproof soft sugar cookie recipe, or see how I get chewy perfection in my lemon cookies.
The Secrets to Bakery Style Chocolate Chip Cookies
The difference between a good cookie and a five-star cookie comes down to technique, not ingredients (though those matter too!). For these bakery style chocolate chip cookies to succeed, you must pay attention to two things. First, the butter and sugars must be creamed until truly light and fluffy. Don’t rush that step; we are building air pockets! Second, the temperature of your ingredients needs to be right—we want the butter softened, not melted. Melted butter leads to soup, and soup leads to flat cookies. Simple as that!
Ingredients for Ultimate Chocolate Chip Cookies
Okay, let’s talk stuff! You don’t need anything weird or exotic for these ultimate chocolate chip cookies. The magic is in having the right balance of the basics, and using good quality ingredients where it counts. I listed everything out for you below. Remember, quality matters when you’re keeping the ingredient list this tight. We want that chocolate melt to be spectacular, so try to splurge a little here!
Here is what you need, exactly:
- 1 cup (2 sticks) unsalted butter, just softened (NOT melted, please!)
- ¾ cup granulated sugar
- ¾ cup packed light brown sugar (hello, chewiness!)
- 2 large eggs, room temperature is best
- 1 tablespoon vanilla extract (use the good stuff!)
- 2 ¼ cups all-purpose flour
- 1 teaspoon baking soda
- ½ teaspoon salt
- 1 ½ cups semi-sweet chocolate chips (or grab a few different kinds for texture!)
- Flaky sea salt, for topping (this is my little pro trick!)
Ingredient Notes and Substitutions for Perfect Chocolate Chip Cookies
I know things get swapped out in a pinch, but pay close attention here because these details keep your cookies thick and wonderful. Seriously, do not melt your butter! We need that butter *softened* so you can press an indent in it, but it shouldn’t look greasy or shiny. That creamed butter is what gives us structure.
When it comes to the chocolate, I always suggest using a mix of chips and chocolate chunks, or even chopping up a good quality bar. It gives you those lovely pockets of totally melted chocolate when you bite in. And that flaky sea salt on top? It just lifts all that richness. It’s optional, but it’s what separates the good cookies from the I-can’t-believe-I-made-these cookies!
How to Prepare Thick Chocolate Chip Cookies
Alright, let’s get baking! This part needs your full attention, but don’t stress. It’s all about gentle steps that build structure for the most amazing chocolate chip cookies you’ve ever made. First things first: get that oven humming at 350°F (175°C). Line up your baking sheets with parchment paper—it’s a lifesaver, trust me.
Now, grab your big bowl. We start by creaming the butter, granulated sugar, and that lovely brown sugar together. If you’re using a stand mixer, run it on medium for about three minutes until it looks genuinely light and fluffy, almost pale yellow. Stop and scrape down the sides! Then, add your eggs, one by one, making sure each one is fully incorporated before adding the next. Stir in that teaspoon of vanilla. Wow, the smell is already starting!
In a smaller bowl, whisk together the 2 ¼ cups of flour and that teaspoon of baking soda. We whisk the dry stuff separately so the leavening (the baking soda) is perfectly distributed. Slowly, add these dry ingredients into the wet mixture while mixing on low speed. And here’s a classic rule: stop mixing the second the streaks of flour disappear. Overmixing is the enemy if you want tenderness!
Next, fold in all those beautiful chocolate chips with a spatula. Time to scoop! I use a large cookie scoop—the one that yields about 3 tablespoons of dough per cookie. Place them about three inches apart. If you really want them thick, gently press the top of the dough ball down just a touch, but don’t flatten the whole thing. They’ll spread enough!
Bake these gems for 10 to 13 minutes. When 10 minutes hits, you need to peek. They should look golden brown around the edges, but the middle should still look a little doughy and soft. That’s the secret!
Here’s where you can find a few more tips on how to make other great treats, like my no-bake avalanche cookies, if you need a quick sugar fix, or you can check out a fantastic method for thick cookies over at The Food Journal.
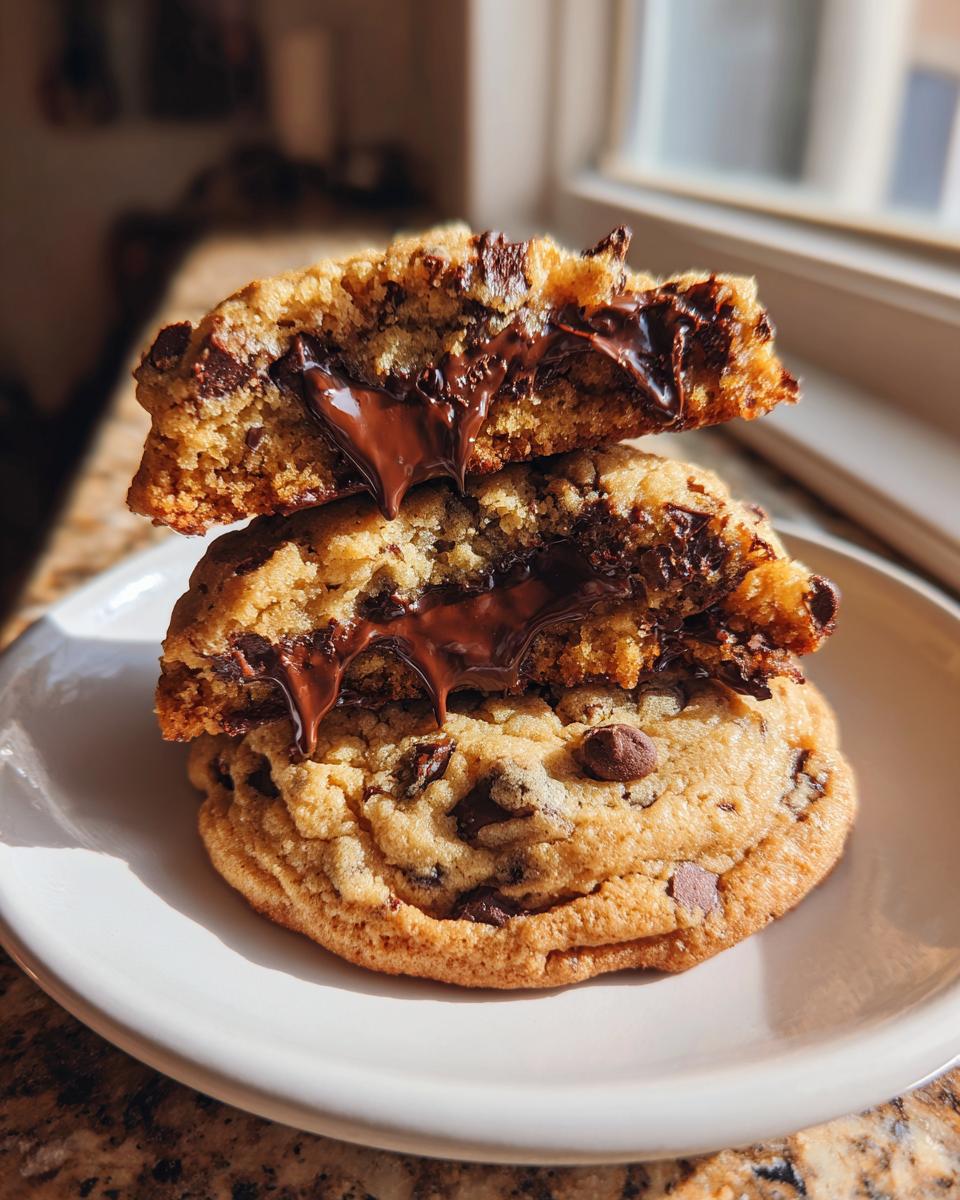
Achieving Crispy Edge Cookies and Gooey Center Cookies
Getting that perfect textural contrast is all about timing your pull from the oven. Remember I said they should look slightly underbaked at 10-13 minutes? That’s critical for the texture you crave. Don’t keep them in until the center looks dry! Those slightly soft centers morph into gooey center cookies as they rest, not while they bake.
When you pull them out, leave them on that hot baking sheet for a full five minutes. That residual heat finishes setting the dough just enough so you get those firm, crispy edge cookies you love, while the middle stays wonderfully soft. If you move them too early when they are piping hot, they sometimes collapse. Don’t skip that rest!
Essential Chocolate Chip Cookie Tips and Tricks for Success
Okay, now that you have the recipe, let me share a few seasoned secrets—these are the chocolate chip cookie tips and tricks that took me from occasionally great cookies to having my recipe requested every single time. These little adjustments truly separate the amateurs from the bakers who know what they’re doing!
First up, and this is crucial for thick cookies: Chill that dough! The recipe notes mention it, but I gotta tell you, don’t skip it. If you have time, let the dough rest in the fridge for at least 30 minutes. Honestly, overnight is even better. Why? Because chilling firms up the fat (the butter). When the fat is firm, the cookie is less likely to melt and spread out into a flimsy puddle before it has a chance to set up tall. It makes a HUGE difference in achieving that bakery style height.
Next, let’s talk scoops. Using a consistent scoop size is key for even baking. I always recommend a large cookie scoop—we’re making big, satisfying cookies here, not delicate little bites! If you use one scoop per cookie (about 3 tablespoons of dough), they bake up exactly right. If you use a tiny spoon, they will cook through too fast and won’t get the gooey center.
Also, please check your oven temperature! Home ovens lie, and when we’re aiming for that precise 10-minute bake window, an oven that’s 25 degrees too hot will ruin the texture. I keep an oven thermometer inside even now, after years of baking. It’s such a simple thing to check, but it ensures that perfect bake every time you pull out a fresh batch.
For more tips on creating soft treats that last, have a look at my guide on making soft gingerbread cookies. And if you’re looking for external validation on the importance of technique—especially regarding melty centers—check out the excellent baking advice provided by the experts at Butternut Bakery.
Storage and Reheating Instructions for Homemade Chocolate Chip Cookies
Now for the hardest part: waiting for them to cool! But once they are cooled down, you need to know how to keep these perfect creatures feeling fresh. Since we worked so hard to get those gooey center cookies just right, we absolutely do not want them drying out on the counter.
For short-term storage, keep your cooled cookies in a truly airtight container at room temperature. I usually layer them between sheets of parchment paper—that keeps them from sticking together, especially if they are still a little soft. They should stay delicious like this for a solid three to four days. If you’re storing them longer than that, you might find the texture starts to change a bit, which is just the nature of a homemade cookie, bless its heart.
If you want them to last longer, the freezer is your friend! You can actually freeze them baked or unbaked. Baked cookies wrap individually in plastic wrap first, then tuck them into a freezer bag. They are great for up to three months this way!
Restoring That Bakery Fresh Snap and Goo
The best part about these cookies is being able to revive that amazing texture. If they’ve been sitting around, don’t just microwave them—that turns them cakey! We need to bring back the contrast between the crispy edge and the soft middle.
Here’s my method: Pop one or two cookies onto a microwave-safe plate and heat them for just 10 to 15 seconds. That’s it! It warms the chocolate just enough to make it melty again without drying out the edges. For the absolute best result, I sometimes pop them on a baking sheet for about 4 minutes at 325°F in the oven. That little blast of dry heat crisps the outside back up, and the inside gets wonderfully soft and gooey again. It tastes like you just pulled them out of the oven!
If you’re looking for other reliable recipes that store well, you might want to check out my guide on an easy cowboy caviar, just so you have a nice savory break after all that chocolate!
Variations on Classic Chocolate Chip Cookies
While I stand by the fact that this base recipe for chocolate chip cookies is perfection on its own, sometimes you just need to mix things up a little, right? Especially when you’re baking for a crowd! I love experimenting once I’ve achieved that perfect thick cookie texture. If you’ve mastered the original, here are a few simple, high-impact twists that don’t mess with the structure we worked so hard to build.
The first easy change is all about the chocolate itself. If you find semi-sweet a little predictable, try swapping half of those chips for dark chocolate—I mean, maybe 60% cacao or higher. That slight bitterness cuts through the sweetness beautifully. Or, if you have little ones who are chocolate fiends, use milk chocolate chunks for extra puddles of melty goodness. You’re still getting those wonderful gooey center cookies; it just changes the depth of flavor!
Another fan favorite variation that I pull out when I want something a little richer is adding nuts. We’re talking walnuts or pecans. Toasting your nuts beforehand for about five minutes in a dry skillet wakes up their flavor so much! Just an extra cup folded in with the chocolate chips works perfectly. It gives you that satisfying textural crunch to pair with the chewiness!
Now, for my *favorite* flavor enhancer which takes these to the next level? Browning your butter. This sounds intimidating, but it is so easy and so worth it for an ultimate cookie flavor boost. You just melt the butter slowly until the milk solids toast and smell nutty—it’s glorious! Let it cool completely until it’s just barely soft again (like it was before you started), and use it to replace the soft butter in this recipe. It gives the cookie a deep, caramelly note that everyone asks about. It’s an insider move that really elevates these homemade chocolate chip cookies!
If you want to explore more ways to bring deep, comforting flavors into your baking, check out my recipe for moist Hawaiian banana bread. It has that same kind of cozy, rich vibe!
Serving Suggestions for These Comfort Food Desserts
A cookie this perfect shouldn’t just be eaten standing over the sink, bless your heart! These are genuine comfort food desserts, and they absolutely deserve the royal treatment when it comes to serving them up. We spent all that time making them thick, gooey, and perfectly balanced, so let’s honor that work with the right accompaniments.
First and foremost, you cannot beat the classic pairing: a big, cold glass of milk. Doesn’t matter if it’s whole milk, 2%, or even oat milk—that cold liquid cutting through the rich, warm chocolate is just heaven. It’s nostalgic, it’s simple, and it’s non-negotiable for that first-bite experience!
But if you want to elevate it just a touch? Try serving these slightly warmed (remember my reheating trick!) alongside a scoop of really good vanilla bean ice cream. The temperature contrast is amazing—the hot, melty edges contrasting with the cold, smooth ice cream. It turns a simple cookie into a real event. Sprinkle a few extra chocolate chips or maybe some chopped nuts over the top of the ice cream just before serving for extra texture.
Another great way to enjoy these for an after-dinner treat is right alongside a hot beverage. Forget weak coffee; you need something robust to stand up to all that butter and sugar. A strong black coffee or a deep espresso shot is fantastic. Or, for something truly special that fits our cozy theme, you must try sipping this alongside my recipe for velvety French hot chocolate. It’s decadent, sure, but when you’ve baked the best cookies, you deserve the best pairing!
Frequently Asked Questions About Making Chocolate Chip Cookies
I knew you’d have questions! When you’re aiming for the absolute best version of something classic, like these chocolate chip cookies, details matter. These are the things I always get asked about when people first try this recipe, especially when they are hunting for that perfect thick, chewy texture.
Why are my cookies spreading out too much?
This is my number one question, and usually, it comes down to fat temperature, or lack of chilling. If your butter was too warm or heaven forbid, melted, the structure collapses fast in the oven. Remember how I stress using softened butter? That’s vital! Also, make sure you’re chilling that dough for at least 30 minutes, even if you’re in a hurry. Chilling firms up the butter so the cookie holds its shape better. A short chill turns a good cookie into a great, thick chocolate chip cookie!
How can I make these an easy chocolate chip cookie recipe for a weeknight bake?
While I totally recommend chilling the dough for the *best* possible texture, I understand the need for instant gratification! You can absolutely skip the mandatory chill if you are making this an easy chocolate chip cookie recipe. Just make sure your ingredients are perfectly room temperature, cream that butter and sugar thoroughly to build air, and don’t over-mix the flour. You might lose a touch of height compared to the chilled batch, but they will still be leagues better than store-bought!
Can I get a softer batch cookie result from this recipe instead?
That’s a great adjustment if you prefer that pillowy texture over our signature crispy edge! To lean towards soft batch cookies, the main thing you need to do is pull them out just a minute sooner than I recommend. Look for the edges to be set, but the center needs to look almost completely raw, then let them cool on the sheet for the full five minutes. The slightly shorter bake time keeps the moisture locked in, resulting in that classic soft chew. If you want to look up other methods for comparison, I always recommend checking out the tips on Dishicious for chewy results!
What’s the secret to getting those perfect crispy edges?
It’s all about the sugars and the bake time window! The ratio of granulated sugar to brown sugar helps encourage spread and crispness on the outside. Then, you need high, even heat (which is why checking your oven calibration helps!). Pulling them out when the center looks slightly undone means the edges have enough time to completely caramelize and firm up before the middle sets. It’s a delicate dance, but once you hit that 11-minute mark right, you’ll nail it every time!
If you ever have problems with your dough, remember the fundamental steps we covered, but feel free to check out my guide on making easy chicken gravy next time you need a simple savory break!
Estimated Nutritional Data for Our Chocolate Chip Cookies
When baking something this rich and spectacular, we all know calories might clock in on the higher side, but honestly, who cares when they taste this good? Just remember that these values are estimates based on using the ingredients listed above exactly as written, assuming standard commercial ingredient brands. If you swap out butter for coconut oil or start adding an extra cup of pecans, those numbers are going to change!
Here’s the general breakdown for one large cookie:
- Serving Size: 1 cookie
- Calories: 250
- Sugar: 18g
- Sodium: 150mg
- Fat: 14g
- Saturated Fat: 8g
- Unsaturated Fat: 6g
- Trans Fat: 0g
- Carbohydrates: 30g
- Fiber: 1g
- Protein: 3g
- Cholesterol: 45mg
Share Your Ultimate Chocolate Chip Cookies Experience
I poured my heart into perfecting these chocolate chip cookies for you, and now I want to hear all about them! Did you achieve that incredible, thick structure? Did your edges get perfectly crisp while the center stayed soft? Don’t keep your masterpiece a secret!
Please, please, please leave a rating and a comment below once you’ve tried them. Telling me whether you chilled the dough or used brown butter helps other bakers decide how to approach the recipe next time. That feedback is how we keep the true spirit of American home cooking alive here at Cookin’ Corner. I love reading about your successes!
If you want to know more about how we test and share our recipes here, you can always head over to my About Page. Happy Baking!
Estimated Nutritional Data for Our Chocolate Chip Cookies
When baking something this rich and spectacular, we all know calories might clock in on the higher side, but honestly, who cares when they taste this good? Just remember that these values are estimates based on using the ingredients listed above exactly as written, assuming standard commercial ingredient brands. If you swap out butter for coconut oil or start adding an extra cup of pecans, those numbers are going to change!
Here’s the general breakdown for one large cookie:
- Serving Size: 1 cookie
- Calories: 250
- Sugar: 18g
- Sodium: 150mg
- Fat: 14g
- Saturated Fat: 8g
- Unsaturated Fat: 6g
- Trans Fat: 0g
- Carbohydrates: 30g
- Fiber: 1g
- Protein: 3g
- Cholesterol: 45mg
Share Your Ultimate Chocolate Chip Cookies Experience
I poured my heart into perfecting these chocolate chip cookies for you, and now I want to hear all about them! Did you achieve that incredible, thick structure? Did your edges get perfectly crisp while the center stayed soft? Don’t keep your masterpiece a secret!
Please, please, please leave a rating and a comment below once you’ve tried them. Telling me whether you chilled the dough or used brown butter helps other bakers decide how to approach the recipe next time. I really want to know if you nailed that perfect balance of chew and snap!
Seriously, drop a note and let me know how your batch turned out. This community thrives on sharing those little wins in the kitchen! If you want to know more about how we test and share our classic recipes here, you can always head over to my About Page. Happy Baking, friend!
PrintThe Ultimate Bakery Style Chocolate Chip Cookies: Crispy Edges and Gooey Centers
Make the best homemade chocolate chip cookies with this foolproof recipe. You get thick, chewy cookies with perfectly crispy edges and soft, gooey centers every time you bake.
- Prep Time: 15 min
- Cook Time: 13 min
- Total Time: 28 min
- Yield: 18 large cookies 1x
- Category: Dessert
- Method: Baking
- Cuisine: American
- Diet: Vegetarian
Ingredients
- 1 cup (2 sticks) unsalted butter, softened
- ¾ cup granulated sugar
- ¾ cup packed light brown sugar
- 2 large eggs
- 1 tablespoon vanilla extract
- 2 ¼ cups all-purpose flour
- 1 teaspoon baking soda
- ½ teaspoon salt
- 1 ½ cups semi-sweet chocolate chips (or a mix of chips and chunks)
- Flaky sea salt, for topping (optional)
Instructions
- Preheat your oven to 350°F (175°C). Line baking sheets with parchment paper.
- In a large bowl, cream together the softened butter, granulated sugar, and brown sugar until the mixture is light and fluffy. This takes about 3 minutes with an electric mixer.
- Beat in the eggs one at a time, mixing well after each addition. Stir in the vanilla extract.
- In a separate medium bowl, whisk together the flour and baking soda.
- Gradually add the dry ingredients to the wet ingredients, mixing on low speed until just combined. Do not overmix the dough.
- Fold in the chocolate chips using a spatula.
- Scoop the dough using a large cookie scoop (about 3 tablespoons per cookie) and place them 3 inches apart on the prepared baking sheets. For thicker cookies, gently press the dough balls slightly flatter on top, but do not flatten them completely.
- Bake for 10 to 13 minutes. The edges should look set and golden brown, but the centers should still look slightly underbaked and soft.
- Remove the sheets from the oven. If using, immediately sprinkle the tops of the cookies with flaky sea salt.
- Let the cookies cool on the baking sheet for 5 minutes before transferring them to a wire rack to cool completely. The centers will set as they cool, giving you that perfect gooey texture.
Notes
- For the best texture, chill the dough for at least 30 minutes before baking. This prevents the cookies from spreading too much.
- Use high-quality chocolate chips or chopped chocolate bars for superior melt and flavor.
- If you prefer a softer batch cookie, slightly reduce the baking time by one minute.
- If you want crispy edge cookies, ensure your butter is at the correct softened temperature, not melted.
Nutrition
- Serving Size: 1 cookie
- Calories: 250
- Sugar: 18g
- Sodium: 150mg
- Fat: 14g
- Saturated Fat: 8g
- Unsaturated Fat: 6g
- Trans Fat: 0g
- Carbohydrates: 30g
- Fiber: 1g
- Protein: 3g
- Cholesterol: 45mg