
If there’s one cookie that instantly whisks me back to my early days in the kitchen, watching Grandma move like a seasoned professional, it’s the perfect, buttery cookie. That comforting, rich smell? Nothing beats it. For years, I searched for a recipe that truly matched those tins of Danish delights, and finally, I cracked the code. Trust me when I say these butter cookies are the real deal—easy homemade cookies that are genuinely melt-in-your-mouth tender.
I learned from Sarah Jane Thompson’s belief that quality baking doesn’t need complicated tricks; it needs good butter and time. This simple recipe is pure nostalgia in a bite and proves you don’t need fancy equipment to make the best butter cookies ever. Check out the simple steps below, and then pop over to our ultimate soft sugar cookie guide for more simple baking magic!
- Why These Are the Best Butter Cookies Ever
- Gathering Ingredients for Classic Butter Cookies
- Step-by-Step Instructions for Easy Homemade Cookies
- Tips for Perfect Piped Butter Cookies
- Making These Butter Cookies Danish Style
- Storage and Keeping Your Butter Cookies Fresh
- Frequently Asked Questions About Butter Cookies
- Nutritional Estimate for These Simple Butter Cookie Recipe Treats
- Share Your Classic Butter Cookies Creations
Why These Are the Best Butter Cookies Ever
When I say these are the best butter cookies ever, I mean it. I keep coming back to this formula because it just *works* every single time. No fuss, just pure, delicious results.
- They are genuinely melt in your mouth cookies—tender, almost sandy, but they hold their shape beautifully.
- They shine because they use simple, basic ingredient cookies; nothing exotic needed!
- You get that rich, unmistakable, richly buttery flavor that defines great holiday baking.
- It’s one of the most easy homemade cookies recipes you’ll find, perfect for beginners.
Gathering Ingredients for Classic Butter Cookies
Before we even turn the oven on, we have to talk about our starting lineup. This recipe truly relies on just a few basic ingredient cookies heroes: flour, sugar, salt, baking powder, vanilla, and those crucial egg yolks. But the star? That’s the butter, folks! You absolutely must use unsalted butter, and it needs to be truly softened—think easy to press your finger into, but not greasy or melty on a warm day.
If you want that authentic tin taste, you’ll use one cup of butter, one cup of sugar, just two egg yolks (they add richness without making the dough too soft!), and three cups of flour. Measure carefully! If you want to see how we handle other key ingredients like lemon zest in another classic, check out this Ultimate Chewy Lemon Cookie Recipe.
Ingredient Notes and Simple Substitutions
The secret sauce for that amazing Danish butter cookies recipe vibe is adding just a half teaspoon of almond extract alongside your vanilla. It gives them that unmistakable nostalgic flavor. Remember, since butter is the main player here, using a good quality brand truly makes the best butter cookies ever. Don’t skimp on the butter; it’s what gives these cookies their signature richness!
Step-by-Step Instructions for Easy Homemade Cookies
Alright, now for the fun part! Making these easy homemade cookies is incredibly satisfying because the dough comes together so fast. First things first, get your stand mixer (or a good sturdy bowl and electric mixer) ready for creaming. Beat that softened butter and the sugar until they get light and fluffy—this usually takes a few minutes, and this trapping of air is key to getting those wonderful melt in your mouth cookies.
Next, we beat in the egg yolks and that beautiful vanilla. Once that’s blended, switch to your low speed and start adding the dry stuff—the flour, baking powder, and salt—gradually. This is where you have to listen to me: mix only until *just* combined. Seriously! Overmixing ruins the tenderness we worked so hard for in the creaming stage. You want a soft dough, not a tough one.
Now, you have two paths based on what style of Classic Butter Cookies you want. If you want that pretty, swirly look, load the dough into a piping bag fitted with a large star tip. If you prefer a simpler, buttery shortbread style cookie, cover the bowl and chill that dough for about 30 minutes. After chilling, roll it into little balls and flatten them lightly with the back of a fork.
Get that oven preheated to 350 degrees F (175 degrees C) and line up your baking sheets with parchment paper—this prevents sticking and makes cleanup a breeze. You can find my favorite no-bake guide, but these beauties need baking!
Shaping and Baking Your Butter Cookies
Pipe or drop your dough onto the sheets, making sure you leave about two inches between each one because they spread just a tiny bit. They bake fast, only 10 to 12 minutes. You aren’t looking for deep brown here! We want the edges to just barely turn golden. The centers should look pale; that’s how you guarantee you get those soft and tender cookies we love. Let them cool right there on the sheet for about five minutes before gently moving them to a wire rack.
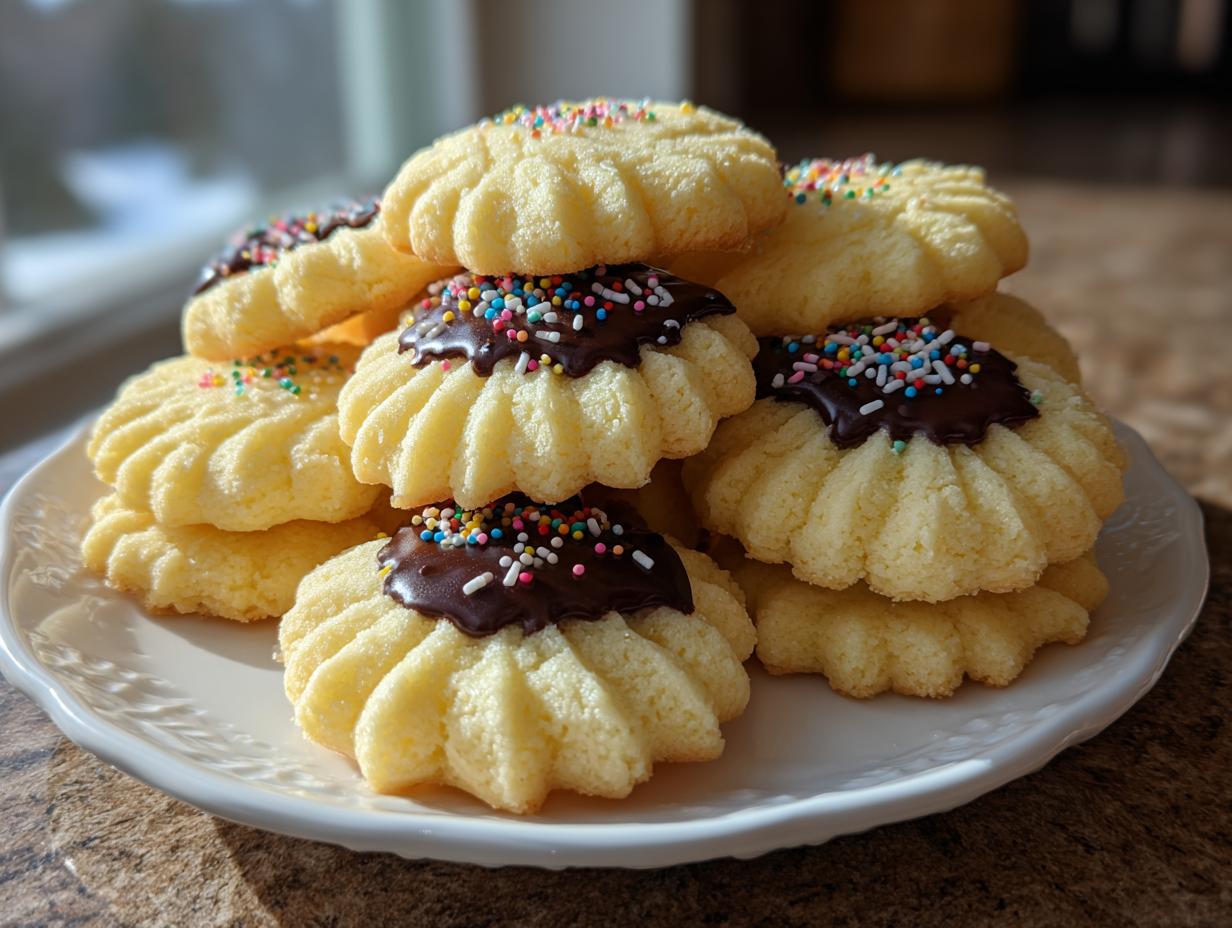
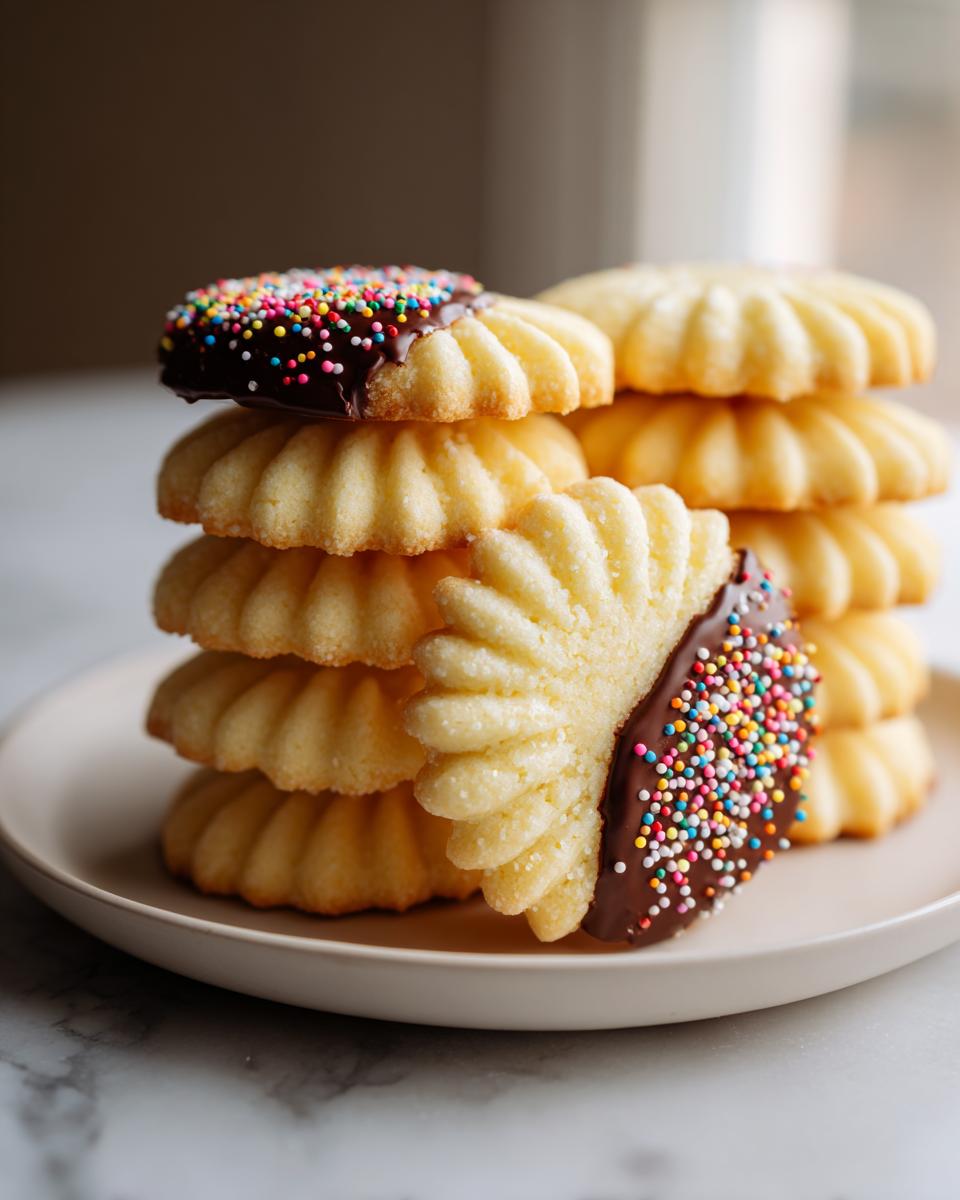
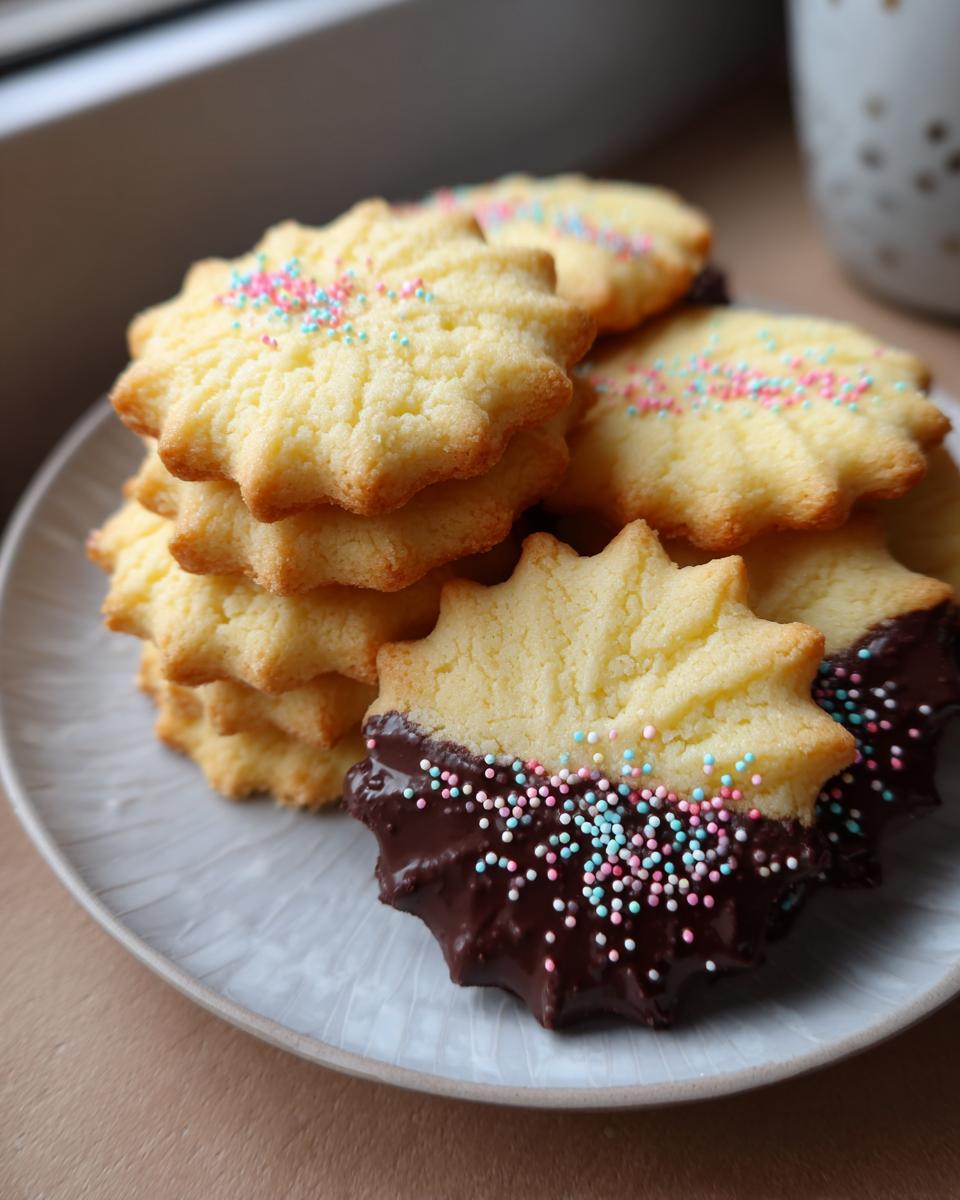
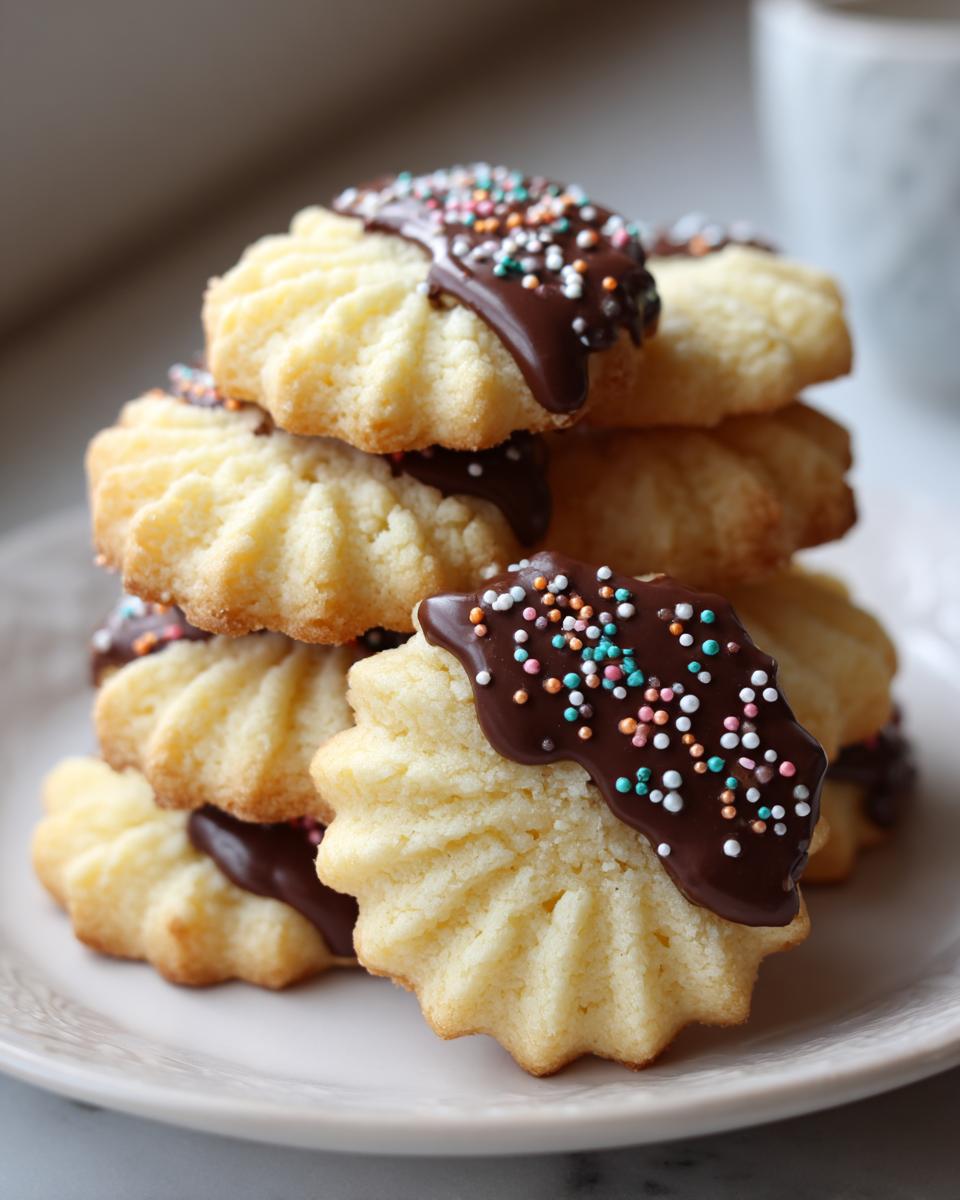
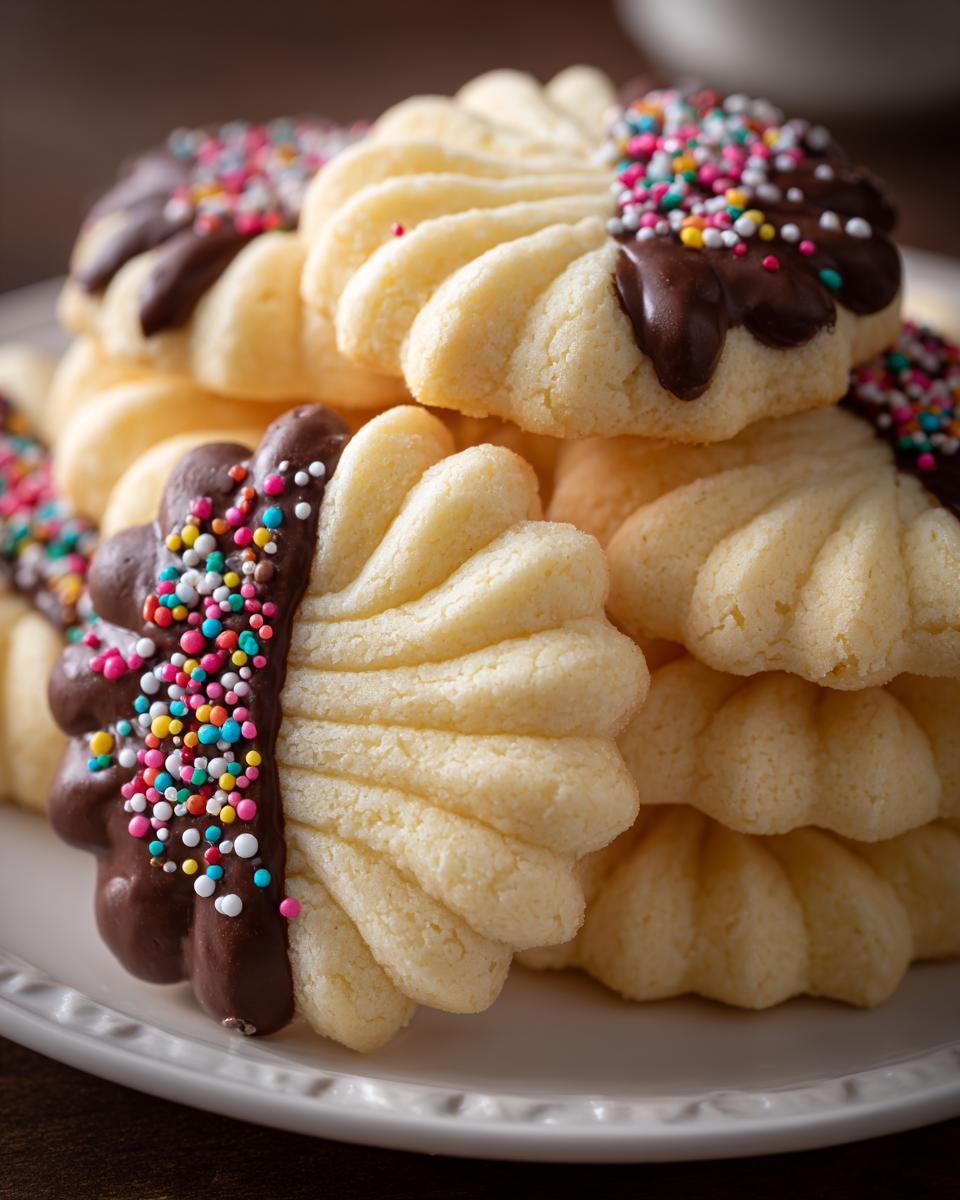
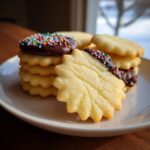
Finishing Touches: Making Chocolate Dipped Cookies
If you want to step these up for a fancy tray or as something special to give away—perfect for homemade holiday gifts—dunking them in chocolate is the way to go. Melt four ounces of good semi-sweet chocolate until it’s smooth. Once the cookies are completely cool, dip about half of the cookie into the melted chocolate. You can sprinkle on some festive sprinkles or chopped nuts right away. Work quickly before that chocolate sets up stiff!
Tips for Perfect Piped Butter Cookies
Piping these gorgeous butter cookies is my favorite method when I’m making a big batch for a holiday cookie exchange. It just looks so professional, but it’s surprisingly easy if you get the dough consistency right! For success, you really want that soft dough we talked about—not stiff like a drop cookie, but firm enough to hold that star shape when it comes out of the tip.
Use a large star tip; a smaller one tends to clog up too easily. Once your piping bag is loaded, if you notice the dough warming up too much and starting to spread right away on the baking sheet, don’t panic! Just pop the whole bag into the fridge for about ten minutes. That quick chill firms up the fat just enough so your piped swirls stand tall and proud.
If you’re looking for more decorative ideas, make sure you check out how I handle those beautiful swirls in my classic chocolate vanilla pinwheel cookies recipe. It uses similar dough control!
Making These Butter Cookies Danish Style
You mentioned the tins, and I totally get it! Those iconic blue tins of Danish butter cookies are a staple in many households, especially around the holidays. They have a flavor profile that’s just a little different from a standard American sugar cookie, and I figured out the simple trick to get that authentic taste right here in our own kitchen.
The secret, which I tucked into the notes section, is adding just a splash of almond extract right along with the vanilla. That little bit of nuttiness is what makes those commercial cookies so instantly recognizable. It totally elevates our already fantastic Classic Butter Cookies to feel special and imported, even though they’re homemade!
It’s funny how just one ingredient can change everything, isn’t it? I found that just 1/2 teaspoon works perfectly; any more and you start tasting marzipan, and we’re aiming for that buttery, slightly nutty crunch. If you want to see another cookie that uses a little hint of something unexpected for flavor, you might like checking out the recipe I found from our friends over at Beyond Frosting that inspired my own testing!
Storage and Keeping Your Butter Cookies Fresh
We worked hard to get those perfect, buttery textures, so we sure don’t want them going stale fast! The good news is that these simple butter cookie recipe treats store like a dream. You keep them airtight at room temperature—no need to chill them! They stay wonderfully fresh for up to a full week, which is fantastic because we all know they rarely last that long anyway.
This staying power makes them absolute gold for homemade holiday gifts. Package them up nicely with a little ribbon, and you’ve got something special ready to go. If you’re looking for another great edible gift idea, you have to try my Christmas Jam Canning Recipe!
Frequently Asked Questions About Butter Cookies
I always get so many questions when people try this recipe for the first time, which just proves how classic these treats are! Baking can sometimes feel tricky, but with these Classic Butter Cookies, the answers are usually simple fixes. Here are the ones I hear most often:
Can I use salted butter instead of unsalted butter?
Oh, I wouldn’t fuss with that if I were you! Since this is a simple butter cookie recipe, the butter flavor is front and center. Salted butter adds inconsistent salt levels depending on the brand, and we want total control over the salt, paired with the other basic ingredients. If you only have salted butter on hand, reduce the added salt in the dry ingredients section to just a tiny pinch, maybe 1/8 teaspoon, but really, grabbing that unsalted stick is worth it for the purity of flavor.
Why are my piped cookies spreading into flat puddles?
This is the #1 problem in piped butter cookies land! If they spread, it almost always means your butter was too warm when you started creaming, or the dough itself got too soft while you were piping. Remember how I said to chill the whole bag if the dough gets too mushy? Do that! Also, make sure you’re baking them on parchment paper, not directly on a greased pan, which encourages spreading. Chilling the filled piping bag briefly works wonders!
Why does the recipe call for egg yolks instead of whole eggs?
That’s another little trick to creating those amazing melt in your mouth cookies texture! Egg whites hold a lot of water and protein, and too much protein leads to a chewier, more structured cookie—think chewy chocolate chip. By using just the yolks, we boost the fat content, which tenderizes the dough beautifully, resulting in a richer, shorter, more buttery texture that crumbles perfectly.
How can I make sure I get those crisp edges?
If you love that slight snap on the outside while keeping the middle soft—addressing the desire for crisp edged cookies—you just need a minute or two of extra time in the oven. Watch them closely! When you see the edges turn the *lightest* shade of golden brown, let them bake maybe one or two minutes longer than the recommended ten. But be careful! These cookies go from golden to burnt so fast.
Can I skip the chilling step if I am rolling and cutting them?
Trust me, you really don’t want to skip that chill time if you plan to roll and cut them! If you skip chilling the dough after mixing, it will be sticky and greasy, making it impossible to handle for simple rolling. Thirty minutes is usually enough time for the flour to relax and the fat to firm up again, leading to perfect buttery shortbread style cookies.
If you’re looking for advice on icing decorations once these are totally cooled, check out my guide on how to get sugar cookie icing to dry hard!
Nutritional Estimate for These Simple Butter Cookie Recipe Treats
Now, I know we mostly bake for the pure joy of it, but sometimes people ask about the numbers! Because these are rich, buttery homemade treats using great ingredients, the nutrition reflects that wonderful flavor. Please remember, this is just an estimate based on the recipe components, calculated per single cookie serving. Don’t worry too much about the details when you’re just enjoying a couple of these fantastic simple butter cookie recipe delights!
- Serving Size: 1 cookie
- Calories: 120
- Sugar: 8g
- Sodium: 35mg
- Fat: 7g
- Saturated Fat: 4g
- Unsaturated Fat: 3g
- Trans Fat: 0g
- Carbohydrates: 13g
- Fiber: 0g
- Protein: 1g
- Cholesterol: 30mg
See? Just simple stuff made with quality butter and love. You deserve one right now!
Share Your Classic Butter Cookies Creations
Honestly, seeing your beautiful bakes is what keeps me excited about sharing these family classics! We spent all this time perfecting this Classic Butter Cookies recipe—getting that buttery, melt-in-your-mouth factor just right—and now I just can’t wait for you to try it.
If you followed along and it turned out just the way you hoped, please take a minute and leave a rating! Five stars for Grandma’s methods, right? It helps other home bakers trust that this recipe works just as well for them as it did for me.
I especially love seeing how you decorate them! Are you sticking to the simple powdered sugar dusting, or did you go all out with the chocolate dipping for the holidays? Snap a picture and share it in the comments below. I love hearing your stories about where you share these cookies—whether they are going into gift tins or just disappearing quickly on a Tuesday afternoon!
If you want to read a little more about our mission to keep these timeless American kitchen memories alive, you can head over to our About Page. Happy baking, and I hope these treats bring a little bit of my kitchen’s memories into yours!
PrintClassic Melt-in-Your-Mouth Butter Cookies
Make these easy homemade butter cookies that taste like the classic Danish variety. This simple recipe yields buttery, tender cookies perfect for holiday trays or everyday dessert.
- Prep Time: 20 min
- Cook Time: 12 min
- Total Time: 32 min
- Yield: About 3 dozen 1x
- Category: Dessert
- Method: Baking
- Cuisine: American
- Diet: Vegetarian
Ingredients
- 1 cup unsalted butter, softened
- 1 cup granulated sugar
- 2 large egg yolks
- 1 teaspoon vanilla extract
- 3 cups all-purpose flour
- 1 teaspoon baking powder
- 1/4 teaspoon salt
- Optional: 4 ounces semi-sweet chocolate, melted (for dipping)
- Optional: Sprinkles or chopped nuts (for decoration)
Instructions
- In a large bowl, cream together the softened butter and granulated sugar until the mixture is light and fluffy.
- Beat in the egg yolks and vanilla extract until fully combined.
- In a separate bowl, whisk together the flour, baking powder, and salt.
- Gradually add the dry ingredients to the wet ingredients, mixing on low speed until just combined into a soft dough. Do not overmix.
- Prepare the dough for shaping. You can either place the dough into a piping bag fitted with a large star tip for decorative cookies, or you can chill the dough for 30 minutes, then roll into small balls and flatten slightly with a fork for a simpler, shortbread style cookie.
- Preheat your oven to 350 degrees F (175 degrees C). Line baking sheets with parchment paper.
- Pipe or drop dough onto the prepared sheets, spacing them about 2 inches apart.
- Bake for 10 to 12 minutes, or until the edges are lightly golden brown. These cookies should remain pale in the center for a soft texture.
- Let the cookies cool on the baking sheet for 5 minutes before transferring them to a wire rack to cool completely.
- If desired, dip the cooled cookies halfway into melted chocolate and decorate with sprinkles before the chocolate sets.
Notes
- For a Danish Butter Cookies Recipe taste, add 1/2 teaspoon of almond extract along with the vanilla extract.
- To achieve crisp-edged cookies, bake for 1 to 2 minutes longer, watching carefully to prevent burning.
- Store these buttery sugar cookie recipes in an airtight container at room temperature for up to one week.
Nutrition
- Serving Size: 1 cookie
- Calories: 120
- Sugar: 8
- Sodium: 35
- Fat: 7
- Saturated Fat: 4
- Unsaturated Fat: 3
- Trans Fat: 0
- Carbohydrates: 13
- Fiber: 0
- Protein: 1
- Cholesterol: 30