
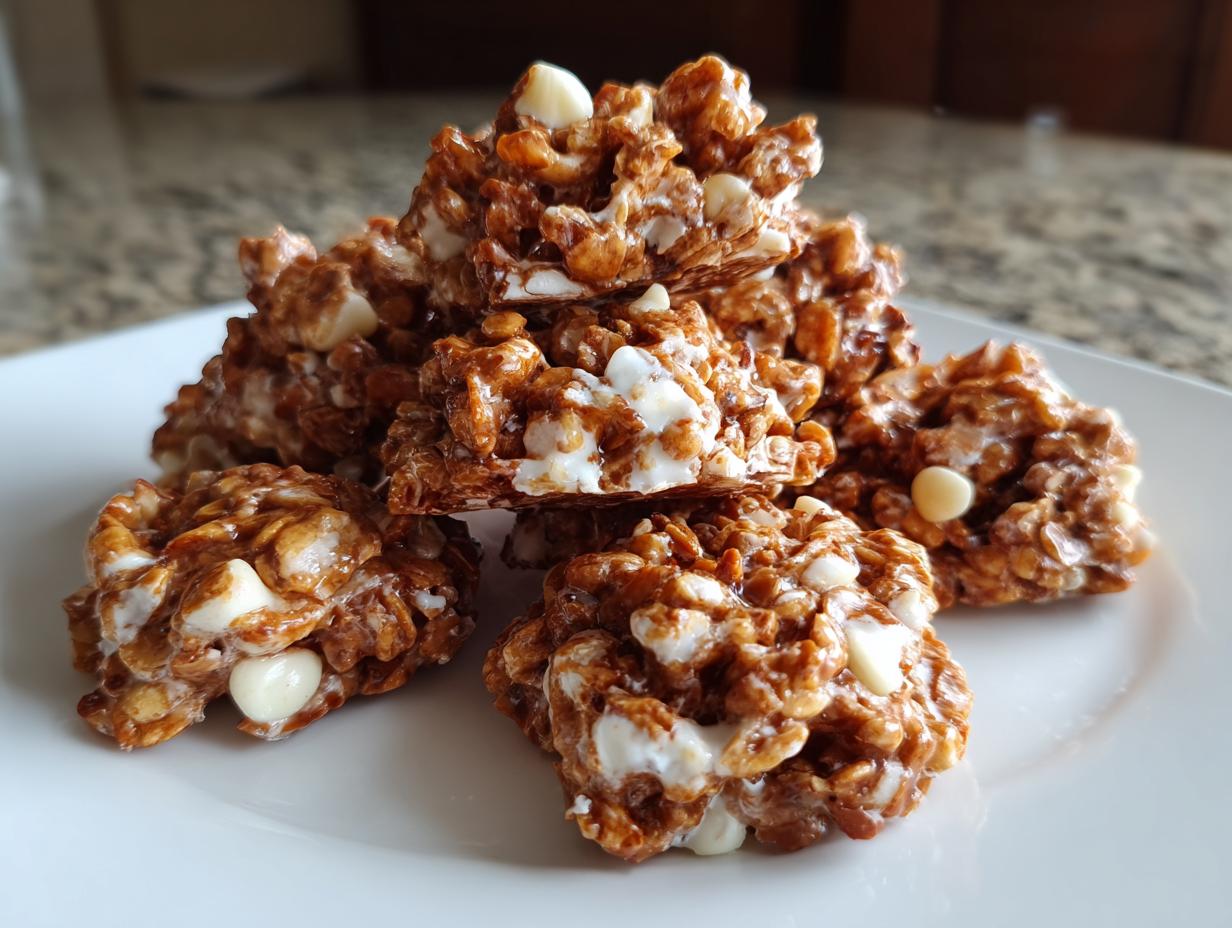
If you have ever stared longingly at your oven, wishing you could whip up something sweet without all the waiting, then oh boy, do I have a treat for you! Here at Cookin’ Corner, we truly believe that the best flavors come from recipes that skip the complicated steps and focus on pure, straightforward love. That’s exactly what we get with the ultimate easy, no-bake avalanche cookies. These little clusters hit that perfect spot between chewy and crunchy. I remember watching my own grandmother prioritize simple treats that didn’t require a fussy setup, much like how we rely on quick recipes for busy weeknights, like my suggestions over at easy dinner ideas. These avalanche cookies fit right into that philosophy! Seriously, they come together in mere minutes. We are talking about turning humble ingredients into a crowd-pleasing dream before you can even find the right container to store them in. Trust me, this is the sweet treat victory you’ve been waiting for.
- Why You Will Make These No-Bake Avalanche Cookies Again and Again
- Essential Ingredients for Perfect Avalanche Cookies
- Mastering the No-Bake Avalanche Cookies Technique
- Tips for Success When Making No Bake Avalanche Cookies
- Variations on Classic Avalanche Cookies
- Serving and Storing Your Easy Dessert Recipes
- Frequently Asked Questions About Avalanche Cookies
- Nutritional Estimates for These Quick Snack Ideas
- Share Your Favorite No Bake Avalanche Cookies Creations
Why You Will Make These No-Bake Avalanche Cookies Again and Again
Honestly, once you see how fast these come together, they’ll become your go-to stress reliever! I keep telling everyone that speed doesn’t mean sacrificing flavor, and these avalanche cookies prove it every time. They are the perfect answer when you need something impressive fast.
- They are truly no bake! Forget heating up the oven; these set right on the counter.
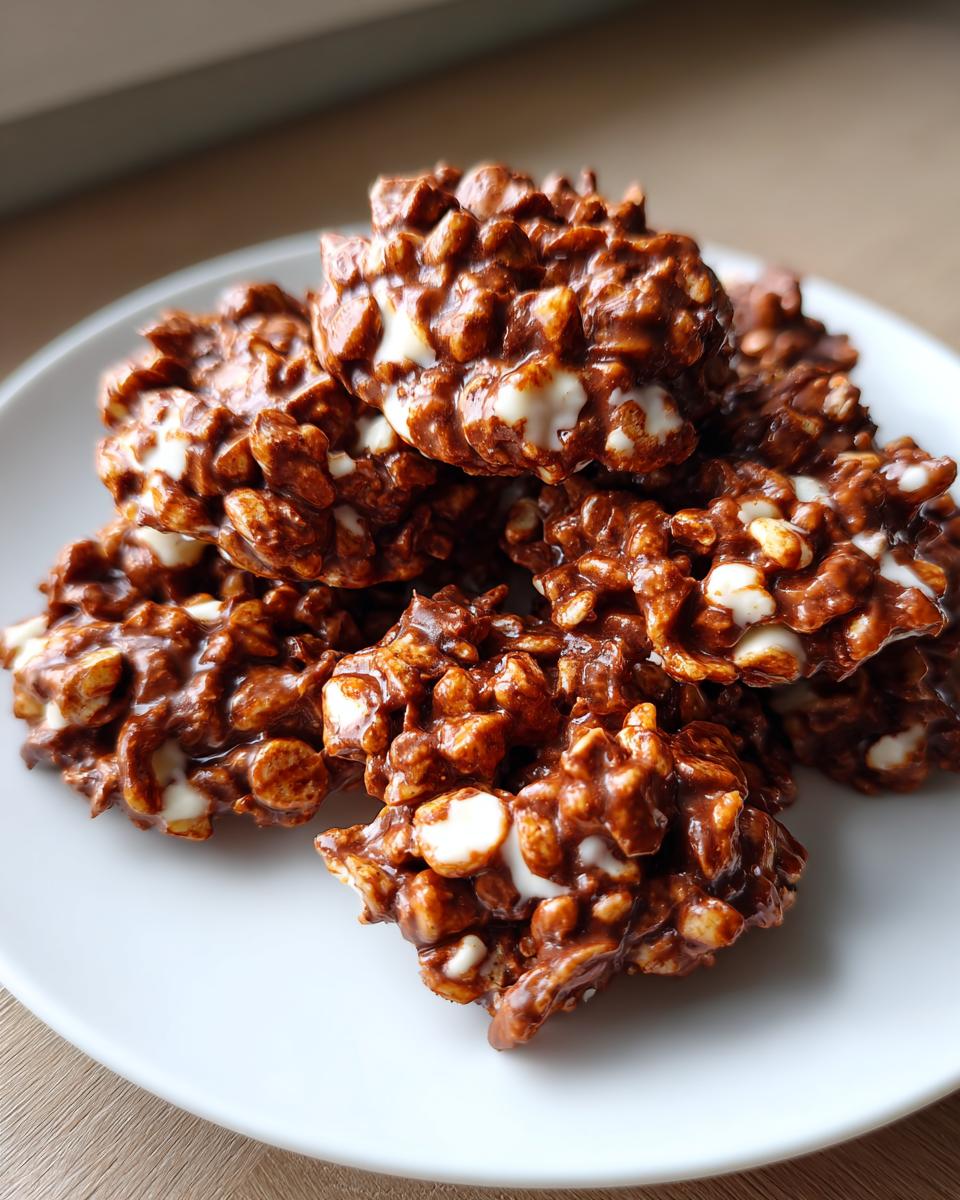
- That texture is insane—you get the creamy melt of peanut butter and white chocolate mixed with amazing crispy crunch.
- They are fantastic for gifting! Wrap a few up, and you’ve instantly created one of the best quick, easy recipes for neighbors or teachers.
- The mix of salty peanut butter and sweet binder is just magical, making them irresistible quick snack ideas.
Essential Ingredients for Perfect Avalanche Cookies
See? I told you this was easy! The beauty of these avalanche cookies is that they rely on pantry staples we usually have on hand. I’m a firm believer that you shouldn’t need a specialty shopping trip just to make a simple sweet treat. When you gather your supplies, make sure you’ve got the right type of white coating—almond bark is my choice because it melts like a dream, but I’ll tell you more about that later!
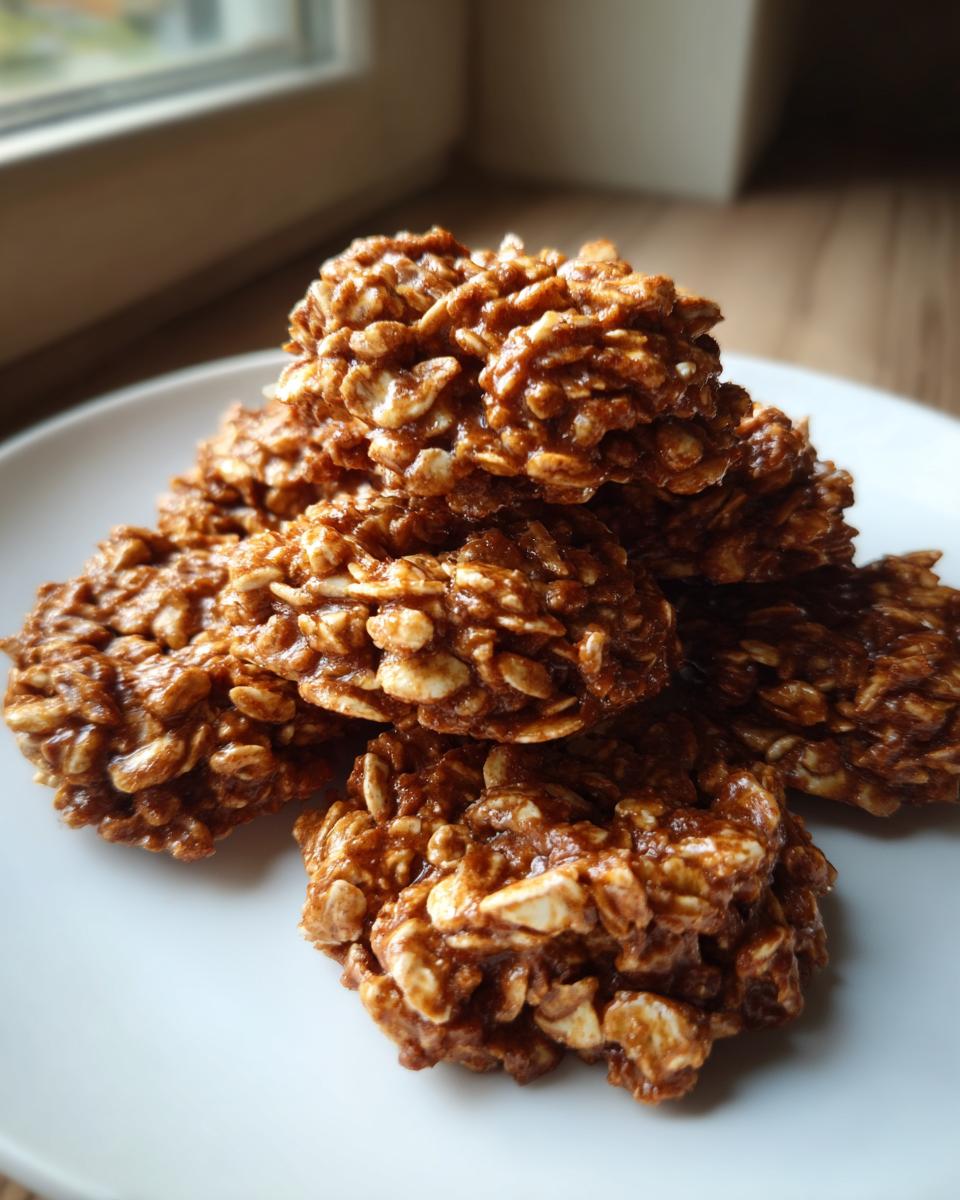
You are looking at the foundation of all great No Bake Cookies right here. We need that luxurious creamy peanut butter to bind everything, something crunchy, and those adorable little chew factor from the mini marshmallows. If you’re looking for even more foolproof recipes featuring peanut butter, you must check out my guide on easy peanut butter cookies. But for now, let’s see exactly what we need for these beauties to come together perfectly.
Here’s the lineup for about two dozen classic avalanche cookies:
- 12 ounces white chocolate almond bark, broken into pieces (this melts better than chips, trust me!)
- 1 cup creamy peanut butter (not the natural, oily kind, we need stability!)
- 6 cups crispy rice cereal (the classic crunch!)
- 2 cups mini marshmallows (mini are essential for even coating!)
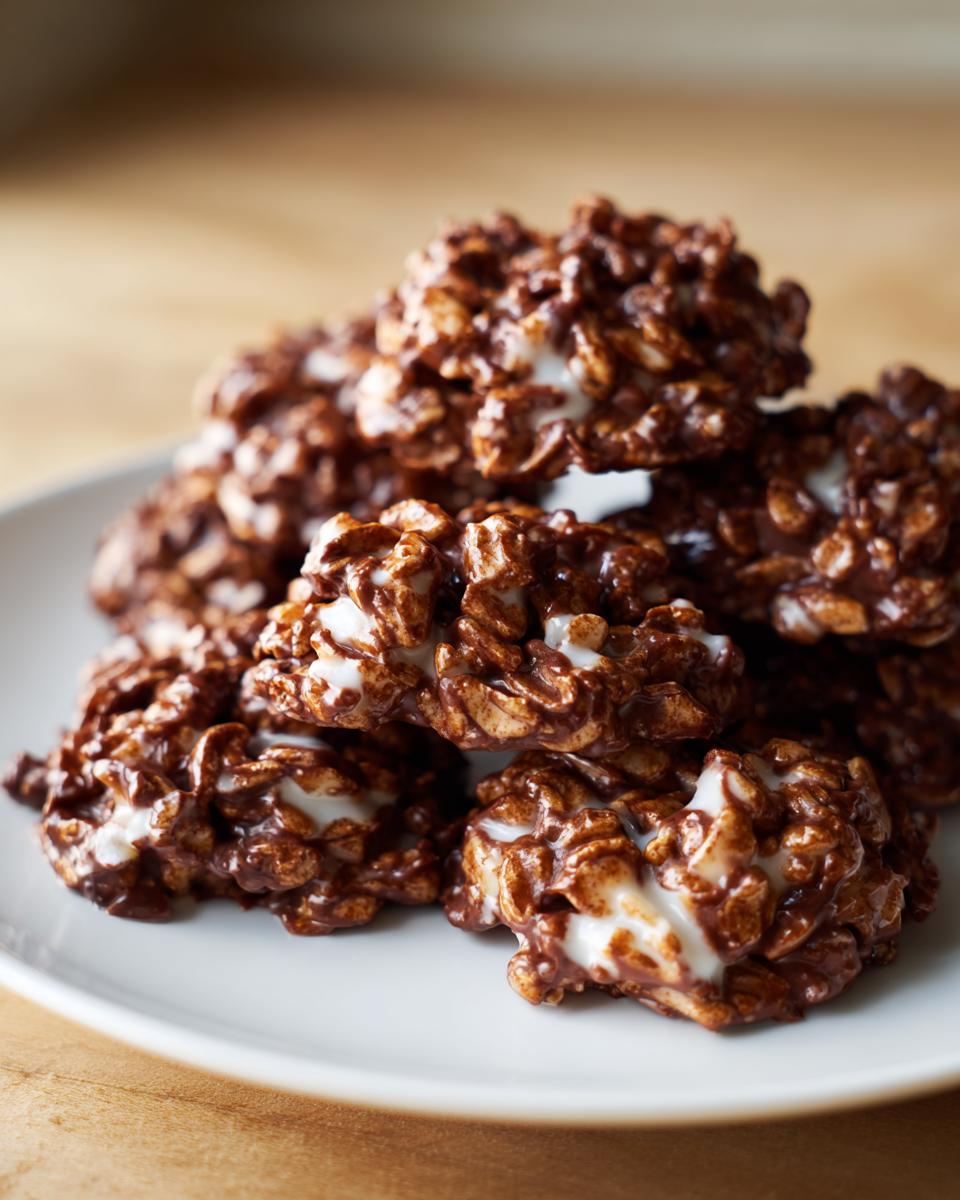
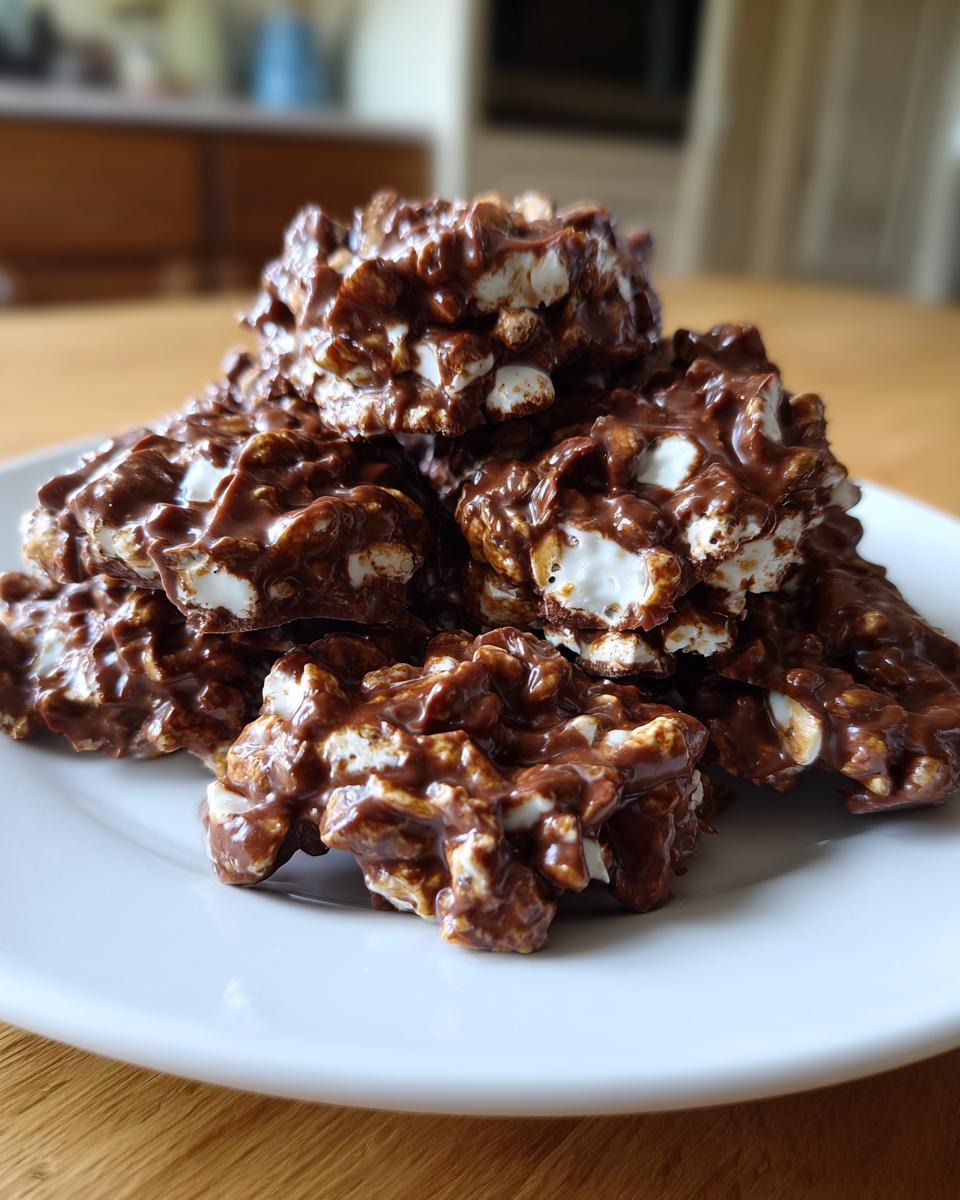
- 1 cup semi-sweet chocolate chips (totally optional, but highly recommended for extra chocolate goodness)
Mastering the No-Bake Avalanche Cookies Technique
Okay, deep breaths! Since this is a no-bake recipe, the ‘cooking’ part is really just melting, but we have to treat that binder with respect, or our avalanche cookies will turn into a hard, grainy mess! Total prep time is a speedy 10 minutes, and setting time is quick too, so speed is key once we get rolling. We want that perfect, slightly soft coating, not something that sets too fast.
Melting the White Chocolate Binder for Your Avalanche Cookies
First things first, line up that sheet pan—you’ll want it ready to go because once the cereal hits that melted white chocolate, things happen fast! For melting the almond bark and peanut butter, I insist on the microwave, using 30-second bursts. You absolutely cannot just zap it for two minutes straight. Why? Because the white chocolate will seize up on you, and you’ll end up with crumbly, sad little clumps instead of smooth, glossy coating. Stir well between every 30 seconds. You’re aiming for just barely melted and totally smooth. If you’re curious about other quick melting techniques, I’ve got a great guide on peanut butter fudge recipe that uses similar methods!
Combining Cereal and Marshmallows into the No Bake Cookies
This is where you need to rally your focus for about 60 seconds! As soon as that peanut butter and bark mixture is liquid gold, dump in your crispy rice cereal, marshmallows, and any optional chocolate chips you decided to use. Stir, stir, stir! You need to move quickly and gently, making sure every single crisp and marshmallow gets a hug from that melted binder *before* it starts cooling down on you. We are aiming for thick, gooey clusters. Get those spoonfuls quickly onto your prepared sheet. A small ice cream scoop works wonders for uniform avalanche cookies!
Tips for Success When Making No Bake Avalanche Cookies
Look, even the easiest No Bake Cookies can throw you a curveball if you aren’t prepared! My biggest tip for achieving top-tier avalanche cookies is respecting the almond bark. I know I suggested it, but if you absolutely have to substitute it for regular white chocolate chips—and I’ve done it out of desperation—you *must* add just a touch of coconut oil. Otherwise, those chips stiffen up way too fast when they cool, and your cookies end up tasting dry instead of heavenly. It drives me crazy!
Also, don’t let your marshmallows sit out getting stale before you mix them in. They need to be soft so they can cling beautifully to the cereal. For a truly gourmet touch, I sometimes fold in some chopped pretzels along with the cereal—it adds a salty complexity that cuts through the richness of the peanut butter and white chocolate. You can see a similar flavor profile in my white chocolate cranberry pecan clusters when you are looking for more ideas! Keep these tips in mind, and you’ll never have a runny or grainy batch!
Variations on Classic Avalanche Cookies
While the classic combination of peanut butter and white chocolate coating on these avalanche cookies is truly divine, I always encourage folks to make things their own! That’s the fun of home cooking, right? Think of this recipe as a fantastic base for all sorts of exciting Rice Krispie Treats Variations.
If you want to amp up the crunch, forget sticking only to rice cereal. Try swapping out half for Honey Nut Cheerios—that honey flavor blends beautifully with the peanut butter. Or, for a true explosion of flavor, toast some sliced almonds before adding them in. I also love adding a teaspoon of pure vanilla extract or even a tiny splash of almond extract right into the melted white chocolate binder. It just gives these avalanche cookies a little extra something that people can’t quite place. If you enjoy experimenting with creamy slow-cooker candies, you might also like my crockpot peanut clusters recipe as another fun ‘no-oven’ activity!
Serving and Storing Your Easy Dessert Recipes
So you’ve successfully made the most ridiculously easy avalanche cookies on the planet! Now what? Since these are absolutely perfect for those big holiday cookie trays or wrapping up for neighbor gifts, storage is key. You want to keep that crunch factor intact! I highly recommend letting them set up completely—about 30 minutes at room temperature usually does the trick—and then transferring them to an airtight container. They hold up so well, which is why they are such reliable Easy Dessert Recipes.
I find they keep beautifully on the counter for almost a week. You shouldn’t refrigerate them unless your house is blazing hot, because sometimes the cold can make the white chocolate coating look a little dull or sticky when it warms back up. If you’re making a huge batch for gifting, consider wrapping individual mounds loosely in cellophane bags secured with a cute ribbon—it’s way faster than wrapping fussy cookies! If you want to see how I wrap up other gifts from the kitchen, check out my tips on Christmas jam recipe canning gifts.
Frequently Asked Questions About Avalanche Cookies
I always get questions when I share this recipe because people are just amazed at how easy they are! It’s wonderful that so many of you are looking for straightforward No Oven Desserts that deliver huge flavor. Here are some of the things I get asked most often about these fantastic Peanut Butter Cookies that require zero bake time.
Ingredients and Substitutions
Oh, absolutely! I get it; sometimes you don’t have almond bark on hand, or maybe you just prefer chips. While almond bark is my go-to because it really melts down silky smooth for the best White Chocolate Treats, you can definitely use regular white chocolate chips in a pinch. The catch is they are formulated differently, so they don’t flow quite as nicely on their own. If you use store-bought chips, here’s my trick: melt them slowly with the peanut butter as planned, but stir in about one teaspoon of coconut oil or vegetable shortening. That little bit of extra fat helps prevent them from seizing up too quickly once they start cooling. It’s a small step that keeps our avalanche cookies from turning into hard lumps!
Making Them Fun for Everyone
Yes, these are absolutely fantastic for when you need Family Friendly Desserts! The kids love helping measure out the cereal and stirring it all together—it’s just fun, messy candy-making without the fuss. However, since we are dealing with melted chocolate and peanut butter, which gets quite hot, they definitely need your steady supervision during the melting phase. My rule of thumb is: the adult handles the microwave and the stirring of the hot binder, and once it’s mixed with the cereal, then the kids can take over the scooping onto the parchment paper. It keeps everyone safe while still letting them feel like they made these amazing avalanche cookies all by themselves, which is the best feeling!
Why did my cookies get greasy instead of set?
If your No Bake Cookies seem greasy or almost oily after setting, it usually means one of two things happened when you melted your binder. Either your peanut butter was a natural kind that separated too much in the heat, or you overheated the almond bark just a tiny bit. When melting the bark, if you see it start to look grainy instead of smooth, stop immediately! You’ve cooked it too long. For the best results, always use creamy peanut butter (stabilized, not the kind you have to stir) and definitely stick to those short 30-second microwave intervals. If you need more tips on perfect candy coatings, I talk about stabilizing fats in my guide for easy creamy white chicken enchiladas—just kidding! Check out my guide on easy creamy white chicken enchiladas for more tips on getting things perfectly smooth!
Nutritional Estimates for These Quick Snack Ideas
Now, I know we aren’t making these avalanche cookies for a nutrition competition, goodness no! They are a sweet treat, after all. But I always like to give you an idea of what you’re working with when you pull these Quick Snack Ideas together. Remember, these numbers are just estimates based on the standard recipe ingredients I listed above, and they are calculated per cookie.
- Calories: Approximately 210
- Fat: About 12g
- Carbohydrates: Roughly 25g
- Protein: Around 4g
Enjoying these without guilt is part of the charm! These truly are beginner cookie recipes that pack a punch for the minimal effort required to make these No Bake Candy clusters.
Share Your Favorite No Bake Avalanche Cookies Creations
Well, that’s it! We’ve covered everything you need to know to whip up a batch of the dreamiest avalanche cookies without ever turning on the oven. I truly hope you rushed into the kitchen right after reading about the simplicity of these No Bake Cookies. For me, Sarah Jane Thompson, creating this space has always been about connecting through food—and that connection doesn’t stop when the recipe ends!
I would be absolutely tickled pink if you gave these a try. Did you use Cheerios instead of rice cereal? Did you fold in extra peanut butter chips? Tell me everything! Please share your experience in the comments below. Hearing how this recipe has worked in *your* home kitchen means the world to me, and it gives me ideas for future versions.
If you had any issues or just want to send a quick note, you can always reach out via my contact page. I love seeing photos of what you all make, so tag us if you share them online! Until next time, keep stirring up love in your kitchens, one crunchy, chocolatey cluster at a time!
PrintThe Ultimate Easy No-Bake Avalanche Cookies: Crispy, Chewy, and Ready in Minutes

Make these irresistible No-Bake Avalanche Cookies for a quick, crowd-pleasing treat perfect for gifting or sharing. This simple recipe combines peanut butter, white chocolate, and crispy cereal for a delicious, fast sweet treat.
- Prep Time: 10 min
- Cook Time: 5 min
- Total Time: 15 min
- Yield: 24 cookies 1x
- Category: Dessert
- Method: No Bake
- Cuisine: American
- Diet: Vegetarian
Ingredients
- 12 ounces white chocolate almond bark, broken into pieces
- 1 cup creamy peanut butter
- 6 cups crispy rice cereal (like Rice Krispies)
- 2 cups mini marshmallows
- 1 cup semi-sweet chocolate chips (optional mix-in)
Instructions
- Line a baking sheet with parchment paper. Set aside.
- In a large, microwave-safe bowl, combine the white chocolate almond bark pieces and the peanut butter.
- Microwave in 30-second intervals, stirring well after each interval, until the mixture is completely smooth and melted. This usually takes 60 to 90 seconds total.
- Stir in the crispy rice cereal, mini marshmallows, and optional chocolate chips until all dry ingredients are evenly coated with the melted mixture. Work quickly before the chocolate sets.
- Drop rounded tablespoons of the mixture onto the prepared baking sheet, forming cookie shapes. You can use a small cookie scoop for uniform size.
- Let the cookies set completely at room temperature for about 30 minutes, or place them in the refrigerator for 15 minutes to speed up the process.
- Store your finished No Bake Cookies in an airtight container.
Notes
- For a variation, substitute the crispy rice cereal with Honey Nut Cheerios or a mix of both for added flavor.
- If you prefer a cleaner look, you can use white chocolate chips instead of almond bark, but you may need to add 1 teaspoon of coconut oil to help the chips melt smoothly.
- These are excellent for holiday cookie trays and make great neighbor gifts.
Nutrition
- Serving Size: 1 cookie
- Calories: 210
- Sugar: 18
- Sodium: 110
- Fat: 12
- Saturated Fat: 6
- Unsaturated Fat: 6
- Trans Fat: 0
- Carbohydrates: 25
- Fiber: 1
- Protein: 4
- Cholesterol: 5