
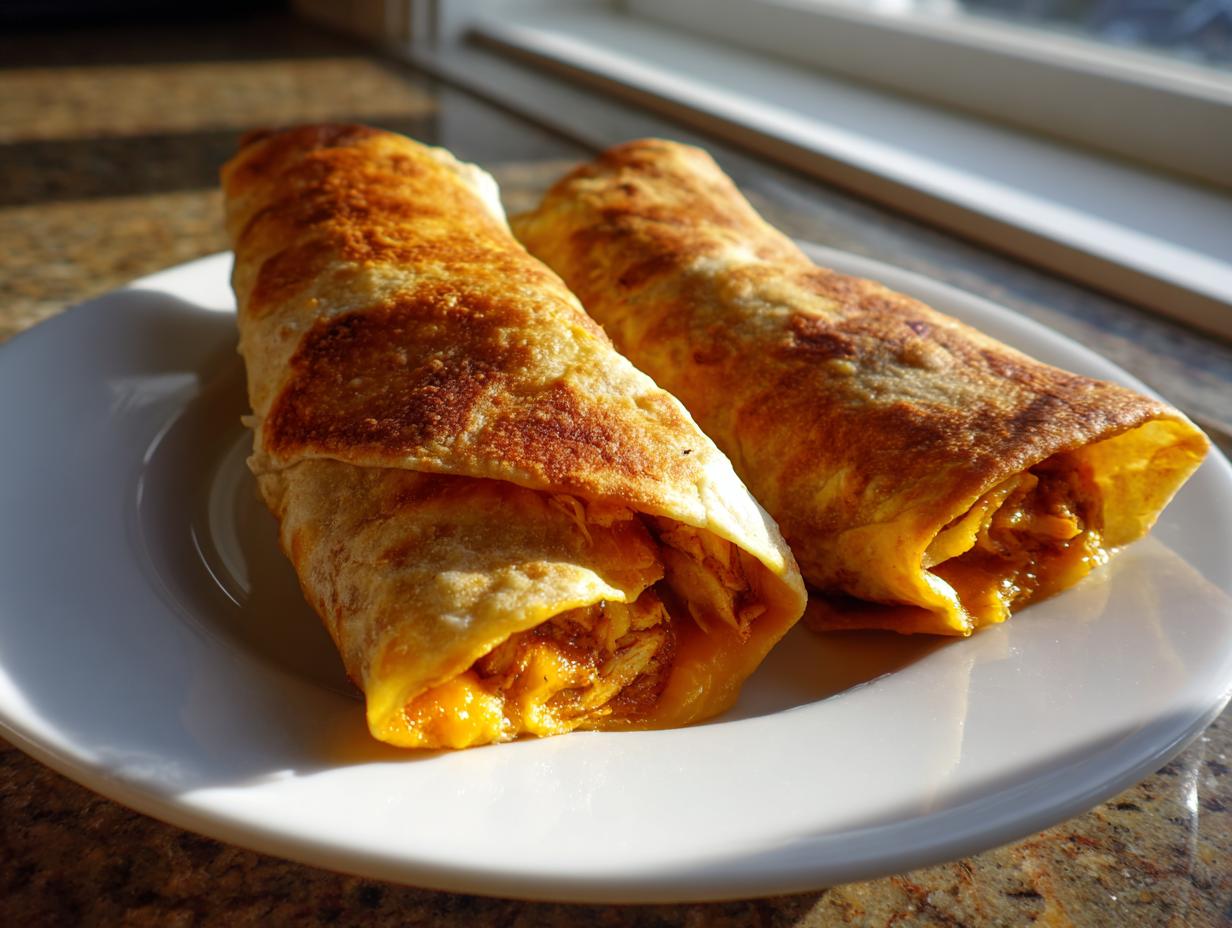
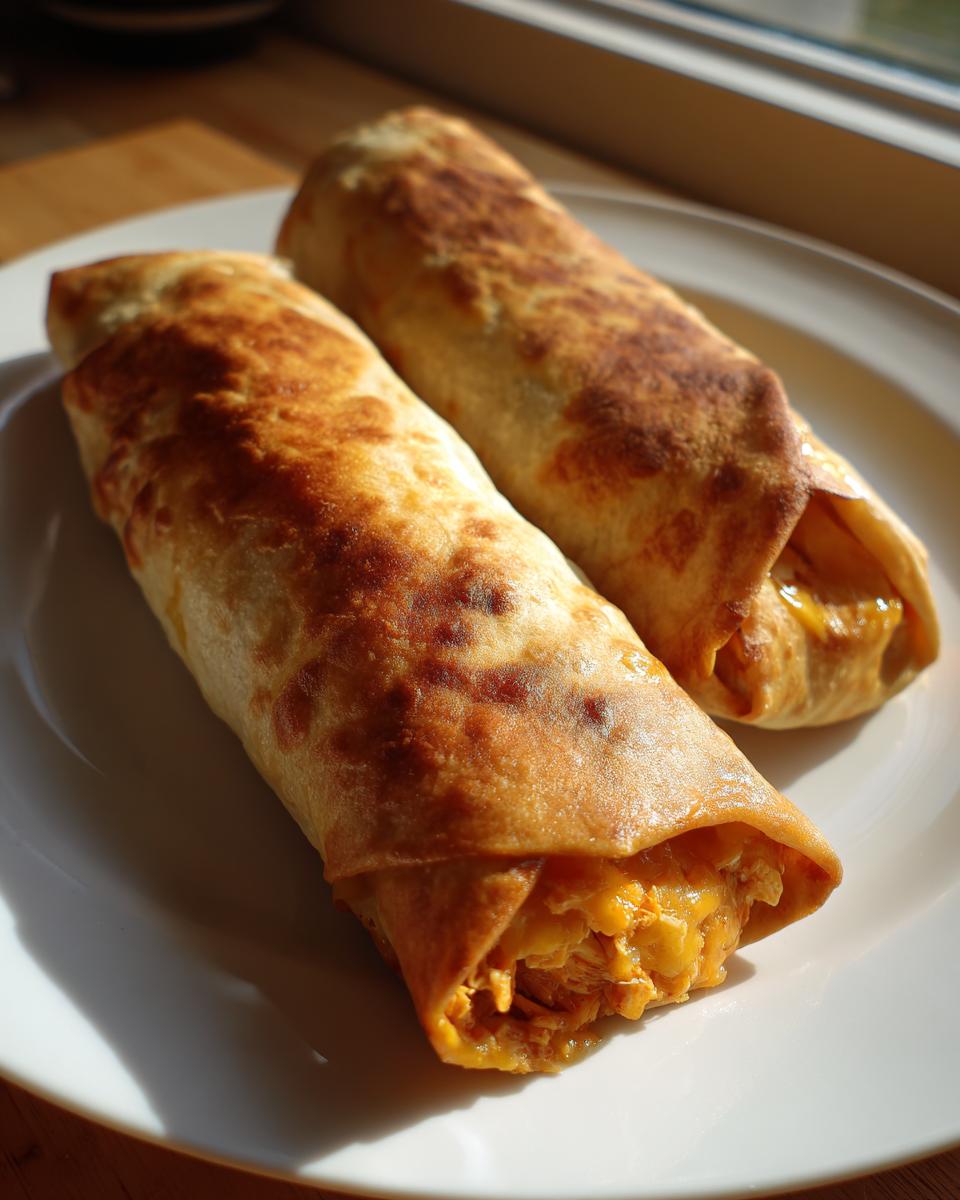
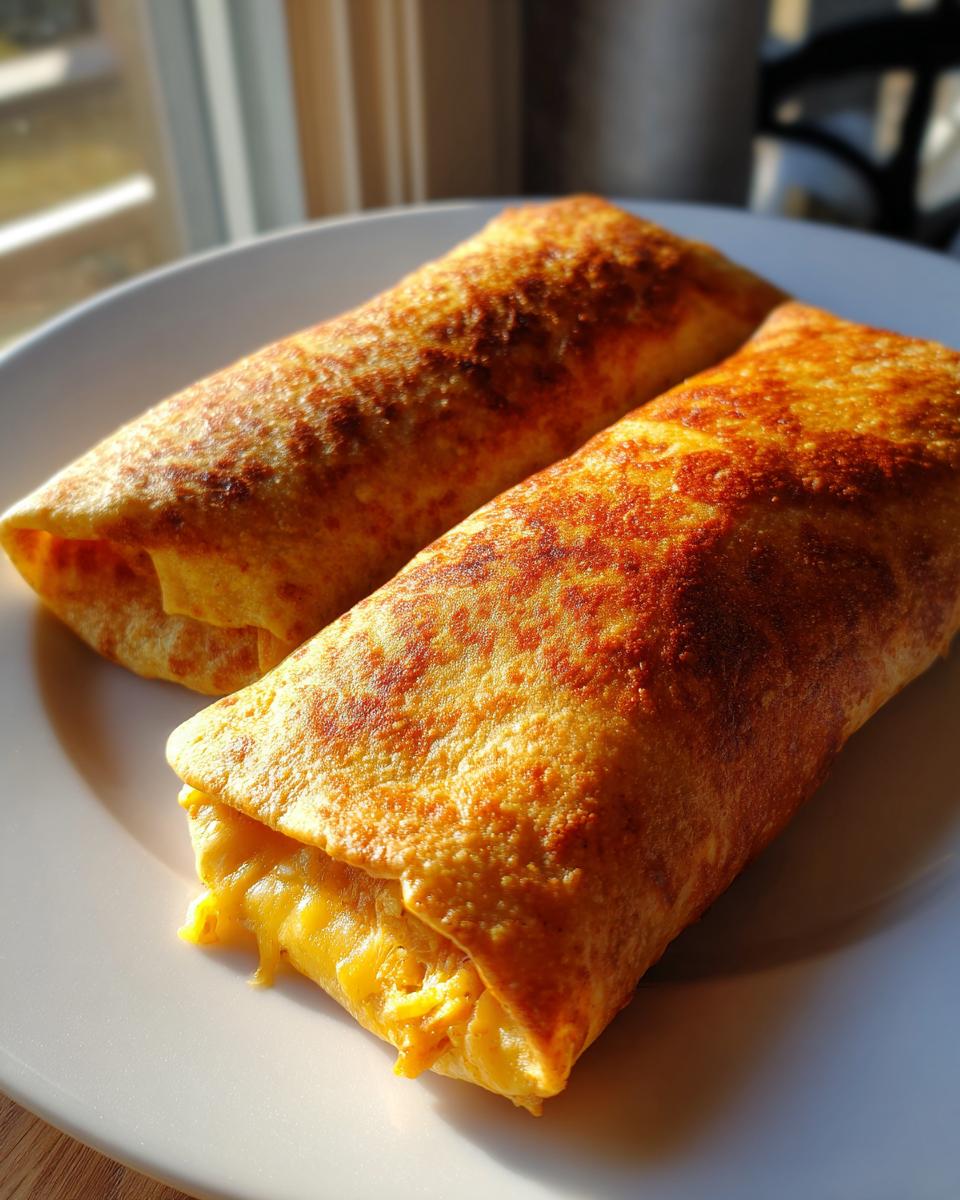
Oh my goodness, you know those nights? You’re craving that unbelievable crunch of a perfectly fried chimichanga, but you really don’t want to deal with a sink full of oil afterwards. Been there, done that, hated that. That’s why I am obsessed with these **Baked Chicken Chimichangas** because they deliver that satisfying, golden crispiness right out of the oven. It’s basically our Cookin’ Corner promise: taking those amazing, comforting classics and turning them into something you can feel good about serving up on a busy Tuesday. If you’re looking for fantastic easy dinner ideas that don’t skimp on flavor, you absolutely need to try this recipe!
- Why You Will Love These Easy Baked Chimichangas Recipe
- Ingredients for the Best Baked Chicken Chimichangas
- Expert Tips for Perfect Crispy Chimichangas Without Frying
- Step-by-Step Instructions for Healthy Chicken Chimichangas Oven
- Making Copycat Chi Chi's Baked Chicken Chimichangas
- Make Ahead Baked Chimichangas and Storage
- Serving Suggestions for Your Simple Mexican Dinner
- Frequently Asked Questions About Baked Chicken Chimichangas
- Nutritional Estimate for Lightened Up Mexican Comfort Food
- Share Your Experience Making Baked Chicken Chimichangas
- Nutritional Estimate for Lightened Up Mexican Comfort Food
- Share Your Experience Making Baked Chicken Chimichangas
Why You Will Love These Easy Baked Chimichangas Recipe
I know what you want: Mexican food that tastes authentic and satisfying but won’t weigh you down. This recipe is truly the answer to that call! It hits that sweet spot between comfort food and quick weeknight solutions. Seriously, once you master this method, you won’t even think about deep frying them again.
- These are definitely what I call guilt free chimichangas. You get all the amazing flavor and crunch without submerging them in oil. It’s a win-win, especially when you want a hearty meal during the week.
- This makes a fantastic weeknight Mexican dinner idea. We need meals that come together fast, and this one shines when time is short.
- The way we treat these tortillas is pure magic. They come out gorgeously golden, totally erasing the idea that you need oil to get that perfect texture.
Guilt Free Chimichangas Texture Secrets
Okay, let’s talk about the crunch. People always ask me, ‘How do you get things this crispy in the oven?’ It all comes down to giving the tortilla surface a bit of a friendly nudge! We use a generous coating of cooking spray—but it has to be a good spray!
Think of it this way: the spray creates a thin barrier that allows the tortilla to crisp up beautifully around that savory shredded chicken filling. It’s the shortcut to crispy chimichangas without frying, I promise you!
Quick Chicken Dinner Recipes Ready Fast
If you’ve got cooked chicken ready to go—and you know I always keep some in the freezer for just these moments—you are laughing. The prep work is super quick: season the chicken, roll them up, spray them, and boom!
From preheating to taking them out of the oven, we’re looking at less than 45 minutes total time. That honestly makes this one of my favorite quick chicken dinner recipes for those evenings when dinner needs to be on the table fast.
Ingredients for the Best Baked Chicken Chimichangas
When we talk about the best, we are talking about quality, friends! Getting the ingredients right ensures that your Healthy Chicken Chimichangas Oven outcome is perfect and packs that incredible, seasoned punch you are looking for. You don’t need a million complicated things, just the right core items.
Here’s what you’ll need to gather before we tackle the rolling process. Trust me, having everything measured out makes the whole assembly line go so much smoother.
Seasoning Components for Flavorful Baked Chicken Chimichangas
This is where we build the flavor foundation! Since we aren’t deep-frying, we need the chicken itself to sing. We are using simple pantry spices, but they combine into something amazing.
- 2 cups cooked, shredded chicken breast (Make sure it’s fully cooked, please!)
- 1 teaspoon chili powder
- 1 teaspoon cumin
- 1/2 teaspoon garlic powder
- 1/2 teaspoon onion powder
- 1/4 teaspoon dried oregano
- Salt and pepper to taste (Don’t skimp on the final seasoning check!)
Tortillas and Toppings for Your Oven Baked Tex Mex
The vessel matters! We are using standard burrito-sized flour tortillas. Warming them up before you stuff them is non-negotiable, or they will crack on you. Trust me, I learned that the hard way once!
And of course, the cheese and the garnish are what make this feel like restaurant-quality Oven Baked Tex Mex right at home.
- 1 cup shredded Monterey Jack or cheddar cheese (A mix is always great for meltiness!)
- 8 medium flour tortillas (These need to be the standard burrito size, about 10 inches wide.)
- Cooking spray (I prefer avocado or olive oil spray for a better flavor profile.)
- Optional toppings: Salsa, sour cream, guacamole (Go wild with whatever you love!)
Expert Tips for Perfect Crispy Chimichangas Without Frying
Listen, getting that deep-fried crunch without actually deep-frying is the major challenge here, but I’ve tested this dozens of times so you don’t have to! The secret isn’t just tossing them in the oven; it’s all about how we treat the exterior before they even see the 400-degree heat. You must make sure the tortillas are pliable first, I cannot stress this enough; a dry tortilla cracks when you roll it, and cracked means filling spills!
Also, be generous with your spray—don’t just mist lightly! We are aiming for total coverage so that every single part of that tortilla gets treated to the heat, turning it golden and crunchy. If you think you’ve sprayed enough, spray it one more time!
Achieving Golden Baked Tortillas Recipe Perfection
If you want that true, beautiful color, you can step up your game even more! While the cooking spray is fantastic, sometimes I want that extra richness. If you’re feeling a little decadent—or if you’re making these for a special occasion—try brushing them lightly with melted butter first before you hit them with the spray. It adds incredible flavor and really guarantees that gorgeous finish. We want them looking bakery-worthy!
For even more crispy potato inspiration, check out how I get my breakfast potatoes super crunchy; the principles for getting crispy exteriors are similar!
Step-by-Step Instructions for Healthy Chicken Chimichangas Oven
Alright, now we put it all together! Since we already mixed our filling, this part moves really fast. Remember, we are aiming for that beautifully sealed little package filled with seasoned chicken. If you’re rushing through dinner prep, bookmark this section because these steps are super clear. Head over to my page on quick, easy recipes if you need more ideas for speedy meals like this!
First thing’s first: get that oven hot! You need a good blast of heat to get the outside crispy quickly so the inside doesn’t dry out. Set your oven to 400°F (200°C). Also, grab your baking sheet. I like to line mine with parchment paper, but just lightly greasing it works too.
Preparing the Seasoned Chicken Filling
You’ve got your shredded chicken in a bowl, and now we play chef with the spices. This is where we make sure every single shred of chicken tastes amazing. You want an even coating because no one wants a bland bite!
Just toss in all your chili powder, cumin, garlic powder, onion powder, and oregano right over the chicken. Add a good pinch of salt and pepper. Then, use a fork or spoon and gently mix everything together until the chicken looks totally uniform—no big clumps of powder sticking to one piece.
Now, portion it out! Divide that beautifully seasoned chicken evenly among your eight tortillas. Then, sprinkle a bit of that shredded cheese right over the chicken in the center of each one. That cheese is our little flavor glue!
Rolling and Baking Your Baked Chicken Chimichangas
This rolling part is crucial, so be patient here—it’s worth it to avoid spillage later! Take one tortilla. Fold the narrow sides in slightly over the filling first. Then, you have to tuck the bottom edge up firmly over the folded sides and roll it up tight, like you’re wrapping a gift that absolutely cannot come undone.
Place the rolled-up chimichanga seam-side DOWN on your prepared baking sheet. Repeat until all eight are snug on the pan. Now, the magic step: spray the tops *generously* with your cooking spray. We hit them hard on the first side!
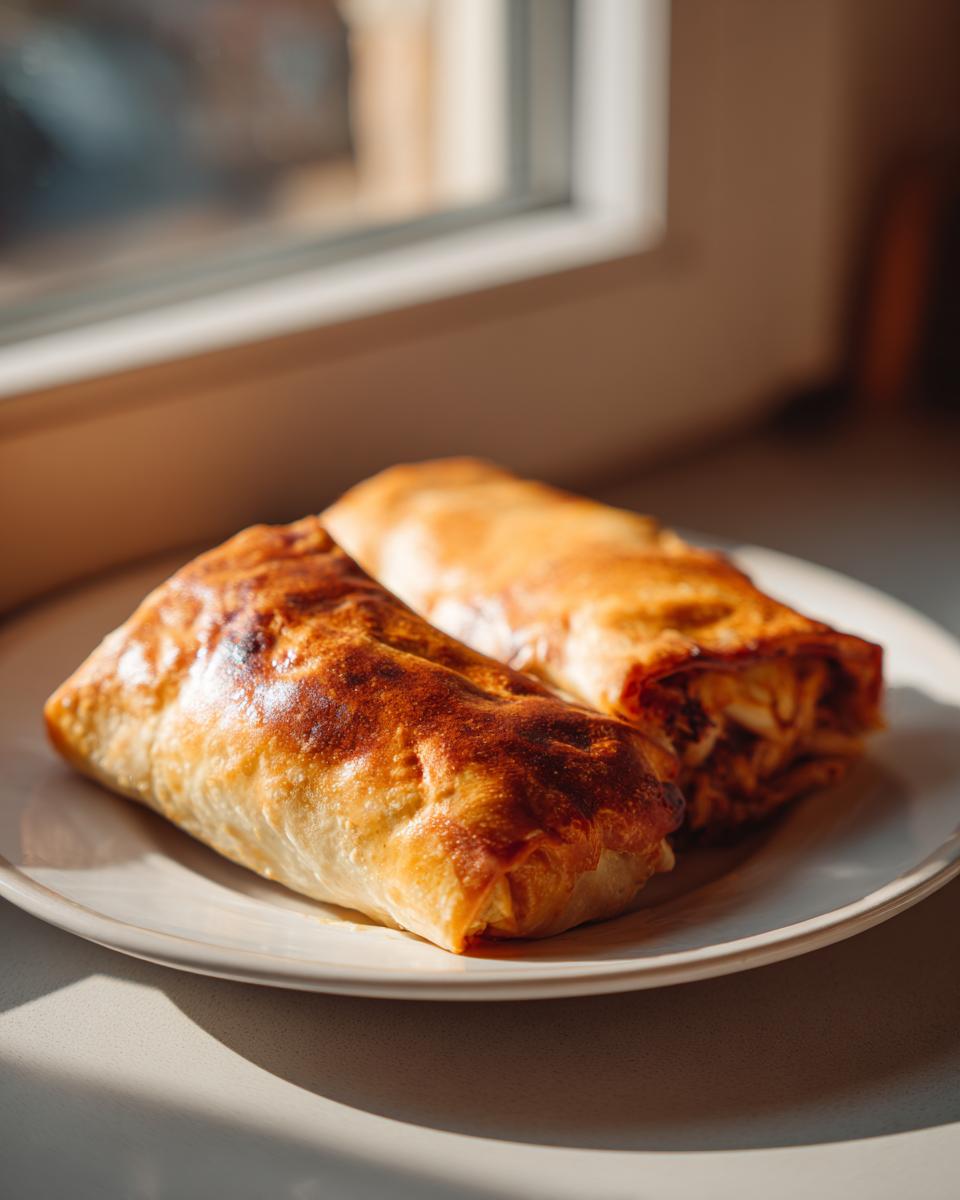
Bake them for about 12 to 15 minutes. When they look pale golden on top, carefully flip them over. Give that second side a quick, light spray of oil, and pop them back in for another 10 to 12 minutes. They’re done when they are gloriously golden brown and sound a little hollow when you tap them!

Making Copycat Chi Chi’s Baked Chicken Chimichangas
You know, a lot of folks ask me about replicating those classic restaurant flavors at home, especially that beloved Chi-Chi’s taste. And I get it! Those memories of dipping a crispy chimichanga into sour cream are just the best. The good news is that because our base chicken filling is so heavily seasoned with cumin and chili powder, these Baked Chicken Chimichangas truly hit that familiar Tex-Mex note.
The real difference, and this is important, is that we are achieving that fantastic flavor and texture using the oven instead of a hot vat of oil. We keep that rich, savory profile that made the original famous, but we make it lighter for family weeknights. If you want to see another great recipe that uses a creamy chicken filling, check out my easy creamy white chicken enchiladas! They bring that same craveable restaurant vibe.
We’ve managed to nail the essence of that famous dish while keeping it baked, crunchy, and quick. For another great take on that classic flavor profile, you should definitely look up this Chi-Chi’s Baked Chicken Chimichangas recipe too—it’s wonderful to see how others adapt these nostalgic favorites!
Make Ahead Baked Chimichangas and Storage
You know, sometimes the best thing about a weeknight Mexican dinner idea is when you *don’t* have to make it all on the weeknight! I am a huge fan of prepping things ahead of time, and these chimichangas freeze like a dream. It means you can have a crunchy dinner ready to go straight from the freezer on a night when you are too tired to even think about cooking.
My original notes mention a couple of ways we handle this, and honestly, they are game-changers for busy families. You can make the filling ahead of time, or you can assemble the whole thing and freeze them totally ready to bake!
For the filling itself, just mix the chicken and spices together, making sure it’s well coated. You can store that mixture in an airtight container in the fridge for up to three days. Pull it out the night before you plan to roll, and you’ve shaved ten minutes off your prep time!
Freezing for Later
If you want to freeze the fully assembled chimichangas, you need to use what I call the flash-freeze method. Roll up all your finished, unbaked chimichangas—don’t spray them with oil yet! Lay them seam-side up on a baking sheet.
Pop that sheet into the freezer until the chimichangas are rock solid. This stops them from squishing into a weird log shape. Once they are frozen solid, gently transfer them into a large, labeled freezer bag. They keep really well this way!
When it’s time to cook from frozen, don’t thaw them! You just need to add about 10 minutes onto the total baking time we listed. And remember to spray them really well with the cooking spray *after* you pull them from the freezer, right before they go into that hot oven. Seriously, having these on hand is the best planning I ever do!
If you’re looking for other make-ahead comfort meals, you might love my instructions for angel chicken and rice casserole—same idea, different flavor profile!
Serving Suggestions for Your Simple Mexican Dinner
Now that you have these incredibly crispy, perfectly seasoned **Baked Chicken Chimichangas** fresh out of the oven, the fun part begins: making it a full, delicious meal! Since the chimichanga itself is hearty—packed with chicken and that melty cheese—you want sides that are light, bright, and refreshing to cut through the richness. This is where we elevate a simple weeknight meal into something truly celebratory.
Honestly, you can’t go wrong with fresh toppings like dollops of cool sour cream, bright chopped cilantro, or maybe even some quick pico de gallo. But if you want to round out the plate, I have a couple of go-to companions that I always serve alongside these.
First up, you have to make some sort of rice! My absolute favorite pairing is my fluffy cilantro lime rice. The tanginess of the lime and the freshness of the cilantro is the absolute perfect counterpoint to the savory spices in the chimichanga filling. Plus, it makes the plate look ten times better!
If you want something green to balance everything out, a very simple side salad works wonders. Just some crisp romaine, perhaps a few black beans, and a light vinaigrette. Don’t overthink the salad—you want the chimichangas to be the star of this simple Mexican dinner, after all. Just having something cool and fresh next to that hot, crunchy tortilla is the key to the perfect bite!
Frequently Asked Questions About Baked Chicken Chimichangas
I always get questions when folks try this recipe because achieving supreme crispiness without frying seems like such a cheat! Let’s knock out a few common worries so you feel totally confident about making these this week.
Can I use a different protein besides chicken in these Baked Chicken Chimichangas?
Yes, absolutely! While this recipe shines with shredded chicken, you can swap it out. Ground beef works great; you’ll just want to brown it and season it well before rolling. If you use beans—black beans or pinto beans are lovely—just give them a good mash first so they don’t try to escape when you roll. If you change the protein, remember to taste the mix before you stuff the tortillas, as different meats or beans might need a little extra salt or chili powder!
What is the best way to reheat leftover Oven Baked Tex Mex?
This is super important for keeping that crunch! Please, please, please avoid the microwave. It will turn your perfect, crispy wrap into a sad, chewy sponge. For the best results with your Oven Baked Tex Mex leftovers, you should reheat them either in a conventional oven set to about 350°F (175°C) until heated through, or even better, pop them in an air fryer for about five minutes!
The air fryer brings that lovely crispness right back to life. It’s amazing for leftovers!
How can I make these a Family Friendly Chicken Casserole Alternative?
Oh, I love this idea for adapting it! If you want to turn this into something closer to a family friendly chicken casserole alternative, it’s really simple. Instead of rolling them up individually, layer them slightly overlapping in a 9×13 baking dish. Then, instead of spraying them before baking, you’d pour a little bit of enchilada sauce or even just some canned diced tomatoes mixed with a bit of taco seasoning right over the top.
Top generously with extra cheese and bake as directed, maybe adding an extra 5-10 minutes until the sauce is bubbly. It’s still lighter than a traditional casserole base, but it gives you that saucy, cheesy hug everyone loves!
If you have any other burning questions about making this recipe perfect, please don’t hesitate to reach out on my contact page!
Nutritional Estimate for Lightened Up Mexican Comfort Food
As someone who believes in enjoying comfort food without the guilt—that’s the whole point of our lightened up Mexican comfort food approach here!—I always like to give you a ballpark idea of what’s in a serving. Remember, these numbers are just estimates because we all use slightly different tortillas or cheeses, okay?
This estimate is based on one chimichanga using the standard ingredients listed above. If you are loading it up with extra sour cream and guacamole, those counts will jump up a bit, of course!
- Serving Size: 1 chimichanga
- Calories: 310
- Fat: 11g
- Protein: 18g
- Carbohydrates: 35g
- Sodium: 450mg
We are keeping the sugar super low here, too, which is great! It just goes to show you that you don’t need tons of oil or sugar to make something incredibly satisfying.
Share Your Experience Making Baked Chicken Chimichangas
I truly hope this recipe brings a little bit of that easy, crispy Mexican flavor into your busy week! I always tell people that the joy of home cooking comes from sharing it, so I would absolutely love to hear how yours turned out.
If you made these **Baked Chicken Chimichangas**, please take a moment right now to leave me a star rating right below this section. Your feedback means the world to me and helps other home cooks who are looking for reliable recipes!
Also, did you tweak the filling? Did you crush them into a casserole? Tell me all about it in the comments! And if you snapped a picture, tag us on social media; seeing your creations is the best part of running Cookin’ Corner. Happy baking!
Nutritional Estimate for Lightened Up Mexican Comfort Food
As someone who believes in enjoying comfort food without the guilt—that’s the whole point of our lightened up Mexican comfort food approach here!—I always like to give you a ballpark idea of what’s in a serving. Remember, these numbers are just estimates because we all use slightly different tortillas or cheeses, okay?
This estimate is based on one chimichanga using the standard ingredients listed above. If you are loading it up with extra sour cream and guacamole, those counts will jump up a bit, of course!
- Serving Size: 1 chimichanga
- Calories: 310
- Fat: 11g
- Protein: 18g
- Carbohydrates: 35g
- Sodium: 450mg
We are keeping the sugar super low here, too, which is great! It just goes to show you that you don’t need tons of oil or sugar to make something incredibly satisfying.
Share Your Experience Making Baked Chicken Chimichangas
I truly hope this recipe brings a little bit of that easy, crispy Mexican flavor into your busy week! I always tell people that the joy of home cooking comes from sharing it, so I would absolutely love to hear how yours turned out.
If you made these **Baked Chicken Chimichangas**, please take a moment right now to leave me a star rating right below this section. Your feedback means the world to me and helps other home cooks who are looking for reliable recipes! I always peek at those ratings to see if my tips worked for everyone.
Also, did you tweak the filling? Did you crush them into a casserole? Tell me all about it in the comments! I love hearing about your successful kitchen experiments. Maybe you found a topping that I haven’t even thought of yet! And if you snapped a picture, tag us on social media; seeing your creations is the best part of running Cookin’ Corner. Remember where you found this simple approach to American classics, and share the love!
Happy baking!
PrintEasy Oven-Baked Crispy Chicken Chimichangas

Make crispy, golden chicken chimichangas in the oven for a healthier, weeknight-friendly Mexican dinner. This recipe focuses on seasoned shredded chicken and a technique for maximum crispiness without deep frying.
- Prep Time: 15 min
- Cook Time: 27 min
- Total Time: 42 min
- Yield: 8 chimichangas 1x
- Category: Dinner
- Method: Baking
- Cuisine: Mexican
- Diet: Vegetarian
Ingredients
- 2 cups cooked, shredded chicken breast
- 1 teaspoon chili powder
- 1 teaspoon cumin
- 1/2 teaspoon garlic powder
- 1/2 teaspoon onion powder
- 1/4 teaspoon dried oregano
- Salt and pepper to taste
- 1 cup shredded Monterey Jack or cheddar cheese
- 8 medium flour tortillas (burrito size)
- Cooking spray (olive oil or avocado oil recommended)
- Optional toppings: Salsa, sour cream, guacamole
Instructions
- Preheat your oven to 400°F (200°C). Lightly grease a baking sheet or line it with parchment paper.
- In a medium bowl, combine the shredded chicken with chili powder, cumin, garlic powder, onion powder, oregano, salt, and pepper. Mix well until the chicken is evenly coated with the spices.
- Warm the tortillas briefly in the microwave or a dry skillet to make them pliable. This prevents tearing when rolling.
- Place about 1/4 cup of the seasoned chicken mixture and a sprinkle of cheese down the center of each tortilla.
- Fold the sides of the tortilla inward over the filling, then tightly roll the tortilla up from the bottom, creating a sealed cylinder. Place the seam-side down on the prepared baking sheet.
- Repeat the rolling process for all chimichangas.
- Lightly spray the tops and sides of the rolled chimichangas generously with cooking spray. This step is key for achieving a golden, crispy exterior.
- Bake for 12 to 15 minutes, then carefully flip each chimichanga over. Spray the second side lightly with cooking spray.
- Bake for another 10 to 12 minutes, or until the tortillas are golden brown and crispy.
- Serve immediately with your preferred toppings.
Notes
- For extra crispiness, you can brush the tortillas lightly with melted butter before spraying with oil.
- You can prepare the filling ahead of time and store it in the refrigerator for up to three days.
- These chimichangas freeze well. Assemble them, place them on a baking sheet to flash freeze, then transfer to a freezer bag. Bake from frozen, adding about 10 minutes to the total cook time.
Nutrition
- Serving Size: 1 chimichanga
- Calories: 310
- Sugar: 2
- Sodium: 450
- Fat: 11
- Saturated Fat: 5
- Unsaturated Fat: 6
- Trans Fat: 0
- Carbohydrates: 35
- Fiber: 2
- Protein: 18
- Cholesterol: 55