

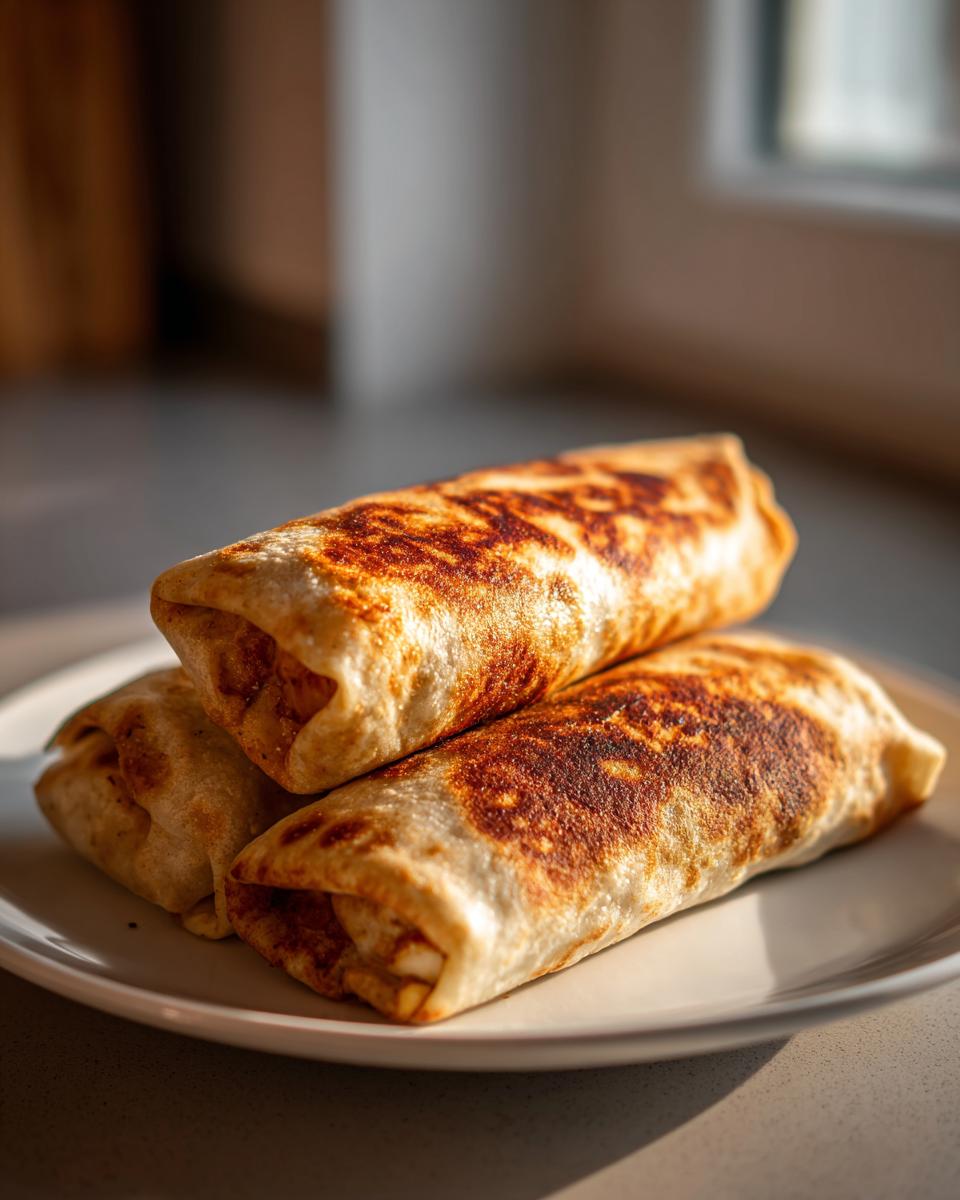
Oh, when the craving for real Tex-Mex comfort food hits, nothing quite satisfies like a chimichanga, right? That beautiful, golden-brown crunch wrapped around warm, cheesy filling—it’s pure happiness on a plate. But truth be told, I’ve always been a little hesitant about deep-frying inside my kitchen. It’s messy, and frankly, it feels heavy! So, trust me when I tell you that mastering these **Chimichangas** in the air fryer has been a game-changer for my weeknights. We get that satisfying, shattering crispiness without all the oil. If you’ve been searching for an **Easy Chimichanga Recipe** that stays true to that amazing texture while keeping things light, you’ve absolutely found it here. It’s surprisingly fast, and you won’t miss the fryer one bit!
- Why You Will Love These Crispy Air Fryer Chimichangas
- Essential Ingredients for Perfect Homemade Chimichangas
- Step-by-Step: How to Make Crispy Chimichangas at Home
- Alternative Cooking Methods for Your Chimichangas
- Expert Tips for Flavorful Beef Chimichanga Filling Ideas
- Serving Suggestions: The Best Chimichanga Toppings
- Make-Ahead and Freezer Friendly Chimichangas
- Frequently Asked Questions About Making Chimichangas
- Storage and Reheating Instructions for Leftover Chimichangas
Why You Will Love These Crispy Air Fryer Chimichangas
I really didn’t want you to think this was just another complicated Tex-Mex thing you’d save for the weekend. That’s the best part about ditching the deep fryer for the air crisp function! They are fast, they are satisfying, and they hit that craving every single time. Here’s why I think you should grab your tortillas and get rolling right now:
- They deliver that incredible, **deep fried vs baked chimichangas** crunch, but without the mess or the heavy oil—hello, air fryer magic!
- This is genuinely a **Quick Weeknight Mexican Dinner** solution; we’re talking filling made and cooked in well under 30 minutes total.
- They satisfy that deep craving for **comfort food recipes** without leaving you feeling weighed down after dinner.
- It’s an incredibly flexible recipe! If you don’t have an air fryer, you can easily use the oven, making this a great **Healthier Chimichangas Baked** alternative too.
- The assembly process is so simple, making this perfect for beginners wanting to tackle **homemade chimichangas**.
- This specific filling—shredded chicken and sharp cheese—is a winning combination for the whole family!
Essential Ingredients for Perfect Homemade Chimichangas
When you’re making **homemade chimichangas**, I want you to know that quality ingredients really shine through, especially when you’re aiming for that **Authentic Chimichanga Flavor**. Since this is such a quick recipe, there aren’t many moving parts, so don’t skimp on the flavor basics! Here’s what you’ll need to gather up:
- 1 cup cooked, shredded chicken breast (See notes—this shortcut is a lifesaver!)
- 1/2 cup shredded Monterey Jack cheese (This melts like a dream)
- 1/4 cup salsa, well-drained (This is crucial, don’t skip draining!)
- 1 teaspoon chili powder
- 1/2 teaspoon cumin
- 1/4 teaspoon garlic powder
- 8 medium flour tortillas (burrito size, make sure they are fresh!)
- Cooking spray (Essential for crisping up that shell!)
- Optional: 1 tablespoon olive oil (If you want to brush them on instead of spray)
Ingredient Notes and Substitution Options for Your Chimichangas
Making this work for a speedy **30 Minute Chimichanga Dinner** is mostly about the chicken. Using pre-cooked, shredded chicken breast means you skip a whole cooking step! Because we only use Monterey Jack, it creates that beautifully gooey texture without getting oily or stringy. Now, if chicken isn’t your thing, don’t sweat it! You can easily swap that 1 cup of chicken for browned ground beef to create a wonderfully savory and **Simple Chimichanga Filling** instead. Just make sure the beef is well-drained if you use it!
Step-by-Step: How to Make Crispy Chimichangas at Home
Alright, this is where the magic happens! Learning **how to make chimichangas at home** is easier than you think once you get the rolling down. Remember, we are aiming for that perfect seal so that glorious filling stays tucked inside while we crisp up the outside. These steps make sure you get phenomenal results every single time! For that dipping action later, you might want to check out my recipe for easy Rotel dip, though sour cream is my go-to for these!
Preparing the Simple Chimichanga Filling
First things first, we mix the filling. Just grab a bowl and toss in that shredded chicken, the cheese, and all your spices. Now, pay close attention to the salsa: you absolutely must drain it well! If the salsa is too wet, it turns your beautiful cornmeal into mush, and we want crispy **Chimichangas**, not soggy ones. Make sure everything is really well combined so every bite gets an even distribution of spice and cheese.
Rolling and Sealing Your Chimichangas
This is the key to that **Crispy Chimichangas Tutorial** success—the wrap has to be tight! Warm up your tortillas for just a few seconds in the microwave; this makes them soft and stops them from cracking when you fold them. Place your filling slightly below the center. Fold the sides in first, tucking them tightly over the edges of the filling. Then, roll that bottom edge up *firmly* over the filling and continue rolling all the way to the top. Think of it like wrapping a present really tightly! If you’re nervous about them popping open, you can use a toothpick to secure the seam.
Achieving Maximum Crispiness in the Air Fryer
Preheat that air fryer—don’t skip this if you want the best texture! I set mine to 375°F (190°C). Once your chimichangas are rolled, give them a great coat of cooking spray all over, or you can brush them gently with olive oil if you prefer. Place them seam-side down in the basket, but make sure they aren’t touching one another; we need airflow for that golden finish. Cook them for about 8 to 10 minutes, flipping halfway through. That little bit of seasoning and oil crisps up beautifully, giving you those perfect **Chimichangas**!
Alternative Cooking Methods for Your Chimichangas
I totally get it—maybe you don’t have an air fryer, or maybe you just really love that deep-fried crunch! The beauty of this simple filling is that it works beautifully across different heat methods. While my heart belongs to the air fryer for speed and texture, I promise you can still get fantastic results baking or frying.
For those who prefer the oven, you can absolutely make a **Baked Chimichangas Recipe**. We use the same process for rolling and spraying, but you’ll spread them out on a baking sheet. Pop them into a slightly hotter oven, around 400°F (200°C), and bake them for about 15 to 20 minutes. Remember to flip them halfway through so both sides get beautifully golden. It’s a wonderful middle ground between deep-frying and air frying!
Now, if you want to go old-school and debate the **Deep Fried vs Baked Chimichangas**, know that traditional frying takes the crown for pure texture. If you go that route, just heat about an inch of neutral oil to 350°F (175°C) in a sturdy skillet. Carefully place your rolled goods in the hot oil (cook in small batches!) and fry for just 2 to 3 minutes per side until they puff up and are deep golden brown. Don’t forget to drain them well on paper towels afterward! For my oven baking guide, you can always check out my baked chicken chimichangas recipe for extra tips on keeping things golden in the oven!
Expert Tips for Flavorful Beef Chimichanga Filling Ideas
While my main recipe here focuses on shredded chicken, I know so many of you are looking for those hearty **Beef Chimichanga Filling Ideas**! Ground beef is fantastic because it cooks up so fast, making it perfect for that speedy dinner goal. If you use ground beef, the trick to getting that deep, authentic savory flavor is making sure you brown it really well and drain off every bit of extra fat. I like to add a little extra splash of lime juice right when I stir in my spices to keep that bright Tex-Mex pop!
But hey, sometimes I get ambitious! If you have time for slow cooking, using shredded beef instead of ground beef makes these **Chimichangas** taste like they came from a fancy restaurant. Seriously, try a slow cooker beef recipe—the texture you get is unbeatable. If you’re looking for great slow-cooker advice, I have some neat crockpot beef tips that translate perfectly here. If you’re trying out a baked beef version, this baked beef chimichanga recipe link can give you some nice extra crust seasoning ideas!
Serving Suggestions: The Best Chimichanga Toppings
Okay, a crispy chimichanga on its own is delicious, but let’s be honest—it’s the toppings that send it over the moon! You need that cooling element, that pop of freshness, and maybe a little heat to cut through the richness of the cheese and filling. If you’re doing Taco Tuesday, you need to pull out all the stops here. These **Chimichangas** are just the vessel for all the gooey, fresh goodness you can pile on top!
Figuring out the **Best Chimichanga Toppings** is almost as much fun as making the filling. I like to keep my spread easy, so everyone can customize their own plate. Here’s my must-have list:
- Creamy Elements: Sour cream is non-negotiable! It cools things down beautifully. If you’re feeling fancy, a dollop of guacamole or a drizzle of my zesty remoulade sauce (yes, really, it’s surprisingly good here!) adds a lovely richness.
- Freshness Factor: Always chop up some crisp lettuce and fresh diced tomatoes. Shredded iceberg is traditional for that crunch!
- The Spice Kick: A small dish of your favorite salsa or some chopped jalapeños is essential for those who like the heat turned up.
- The Finishers: A sprinkle of fresh cilantro and a squeeze of lime juice over the top totally brightens up the whole plate.
My absolute favorite combination, which I highly recommend everyone tries, is a layer of refried beans underneath the chimichanga, a big spoonful of cool sour cream, and then topped with sharp cheddar cheese that melts just slightly from the heat. It’s messy, but oh my goodness, it’s the best way to eat these!
Make-Ahead and Freezer Friendly Chimichangas
One of the absolute best things about an **easy chimichanga recipe** like this is that it is completely brilliant for making ahead! Seriously, nobody wants to chop veggies and mix filling after a long day, so let’s do the messy work now and reap the rewards later. This recipe is fantastic for batch cooking, which means you can enjoy **homemade chimichangas** anytime you get a craving without having to start from scratch.
The key here is that you want to freeze them *before* they ever hit the heat. Once you’ve finished rolling and sealing your **Chimichangas**—following those careful folding instructions we talked about earlier—you stop right there. If you skip heating them, they stay totally pliable for freezing.
Here’s my little secret for keeping them neat in the deep freeze:
- Take your fully assembled chimichangas and give them a good misting with cooking spray, even though you aren’t cooking them yet. This prevents them from getting freezer-burned or sticking together.
- Wrap each one tightly in plastic wrap individually. This keeps the moisture locked in and means you only pull out what you plan to eat!
- Place the wrapped chimichangas into a heavy-duty freezer bag or an airtight container. They should keep perfectly well for up to three months.
Now for the best part: reheating! If you’re cooking from frozen, you absolutely have to account for the extra time it takes to thaw and cook through. Since this recipe is designed to be crispy, the air fryer is your best friend here again. Just pop those frozen goodies into your preheated air fryer basket and add about 3 to 5 minutes onto the original cooking time. You are looking for that same beautiful golden color and firmness. If you’re using the oven method, just add about 5 to 7 minutes to the baking time. This means you always have **freezer friendly chimichangas** ready when the **comfort food recipes** mood strikes!
Frequently Asked Questions About Making Chimichangas
I always get so many questions once people start making these at home! It makes total sense; when you’re moving away from the restaurant version, you want to make sure you’re doing it right so it burns perfectly crispy instead of tearing open. I’ve gathered up the top things I always hear about making great **Chimichangas** at home, so hopefully, this clears everything up for you!
What is the actual difference between a burrito and a chimichanga?
This is the classic question, and honestly, for our air fryer version, the difference is mostly texture! A burrito is simply a soft, rolled flour tortilla packed with fillings. A chimichanga, technically, is that same burrito that has been deep-fried or pan-fried until it’s golden brown and super crunchy all over. Since we are air-frying or baking them, we are aiming to capture that crispy chimichanga shell, which is what makes it a chimichanga and not just a fried burrito!
How do I stop my chimichangas from unrolling while cooking?
I mentioned this in the steps, but I can’t stress it enough—rolling tight is everything! You need to make sure you warm up those flour tortillas first so they are nice and soft; cold tortillas crack immediately. When you’re rolling, fold the sides in tightly over the filling first, almost like you’re wrapping a present corner, and then roll that bottom edge up *really* firmly before you finish. If you’re still nervous, using a toothpick to secure the seam works like a charm. Just remember to pull those out before you serve them!
Can I use corn tortillas or do I have to use flour?
You really need flour tortillas for this recipe, whether you are air frying, baking, or frying. Corn tortillas are just too delicate and don’t have the structure needed to hold up to the folding, spraying, and crisping process. They will likely crack or break apart when handled, and they won’t give you that satisfying, chewy-then-crispy texture we are aiming for. Stick to medium or large flour tortillas for the best results!
My filling tastes bland, what do I do next time?
Oh no, bland filling is the worst when you’re craving that Tex-Mex flavor! For next time, make sure your spices are fresh—old spices lose their punch fast. Also, if you are using leftover chicken like I suggest, make sure you toss that chicken in some extra seasoning before mixing it with the cheese. You might even want to try my recipe for the best chicken marinade to flavor the meat before you even shred it for future batches. A little extra garlic powder and cumin never hurt anyone!
Storage and Reheating Instructions for Leftover Chimichangas
If you are lucky enough to have any of these amazing, crispy **Chimichangas** left over—and honestly, I rarely do!—you want to make sure you store them correctly so they taste almost as good the next day. It’s all about keeping that beautiful fried texture intact as much as possible while safeguarding the freshness of that cheesy filling.
For immediate use, say, the next day, the refrigerator is the best spot. Let your chimichangas cool completely on a wire rack first; this prevents condensation from making the shell soggy while resting. Once they are totally cool, wrap them snugly in plastic wrap or place them in an airtight container. They will happily hang out in the fridge for about three to four days. Keep them away from anything super smelly, though, because tortillas love to soak up neighboring odors!
Reheating to Bring Back the Crunch
Now, here’s the most important bit: you cannot, I repeat, *cannot* reheat a leftover chimichanga in the microwave if you want it to taste good. The microwave gives you that rubbery, sad wrapper texture that is the opposite of what we worked so hard to achieve! We are going straight for maximum crispiness!
The air fryer is truly your best friend for leftovers. Preheat your air fryer to about 350°F (175°C). Place the cooled chimichangas in the basket, making sure they aren’t touching. Give them just 4 to 6 minutes. This quick blast of dry heat will wake up the crust and melt that cheese just enough without overcooking the filling. It’s magic, I promise!
If you don’t have an air fryer, the oven works in a pinch. Lay the chimichangas on a baking sheet lined with foil or parchment paper and bake at 375°F (190°C) for about 8 to 10 minutes. You are aiming to warm them through completely and just crisp the outside edges. If you happen to have any leftover creamy dips from when you made my easy creamy shrimp enchiladas recipe, now is the perfect time to pull those out too!
Freezing Cooked Chimichangas
If you made too many and want to save them for a true emergency meal, you can freeze cooked chimichangas, but you must do it right. After they are cooked and completely cool, wrap them individually in plastic wrap, then place them all together in a heavy-duty, freezer-safe bag. They do great for about a month this way! When you decide it’s time to eat them, add an extra 3 to 5 minutes to the reheating time in the air fryer to ensure they are heated all the way through. That way, you always have a **quick weeknight Mexican dinner** waiting for you!
PrintCrispy Air Fryer Chicken Chimichangas

Make perfectly crispy chimichangas using your air fryer. This recipe uses shredded chicken and cheese for a satisfying, lighter take on the classic Tex-Mex comfort food.
- Prep Time: 15 min
- Cook Time: 10 min
- Total Time: 25 min
- Yield: 8 chimichangas 1x
- Category: Dinner
- Method: Air Frying
- Cuisine: Tex-Mex
- Diet: Vegetarian
Ingredients
- 1 cup cooked, shredded chicken breast
- 1/2 cup shredded Monterey Jack cheese
- 1/4 cup salsa, drained
- 1 teaspoon chili powder
- 1/2 teaspoon cumin
- 1/4 teaspoon garlic powder
- 8 medium flour tortillas (burrito size)
- Cooking spray (for crisping)
- Optional: 1 tablespoon olive oil (for brushing)
Instructions
- In a medium bowl, combine the shredded chicken, Monterey Jack cheese, salsa, chili powder, cumin, and garlic powder. Mix well until the filling is evenly distributed.
- Warm the tortillas slightly in the microwave for 15-20 seconds to make them pliable and prevent tearing.
- Spoon about 1/4 cup of the filling mixture near the center of each tortilla.
- Fold the sides of the tortilla inward over the filling, then tightly roll the bottom edge up and over the filling to create a sealed package. Secure with a toothpick if necessary.
- Preheat your air fryer to 375°F (190°C).
- Lightly spray the chimichangas all over with cooking spray. For extra browning, you can lightly brush them with olive oil.
- Place the chimichangas in the air fryer basket in a single layer, ensuring they do not touch. You will need to cook in batches.
- Air fry for 8 to 10 minutes, flipping them halfway through, until they are golden brown and crispy.
- Remove toothpicks before serving. Serve your easy chimichanga recipe immediately with your favorite toppings.
Notes
- For a baked chimichangas recipe alternative, place the sprayed chimichangas on a baking sheet. Bake at 400°F (200°C) for 15-20 minutes, flipping halfway, until golden.
- You can substitute ground beef for the chicken in this simple chimichanga filling.
- Make this a freezer friendly chimichangas meal by assembling them, wrapping them individually in plastic wrap, and freezing them before cooking. Cook from frozen, adding 3-5 minutes to the air fry time.
Nutrition
- Serving Size: 1 chimichanga
- Calories: 310
- Sugar: 1
- Sodium: 450
- Fat: 11
- Saturated Fat: 5
- Unsaturated Fat: 6
- Trans Fat: 0
- Carbohydrates: 38
- Fiber: 2
- Protein: 15
- Cholesterol: 40