
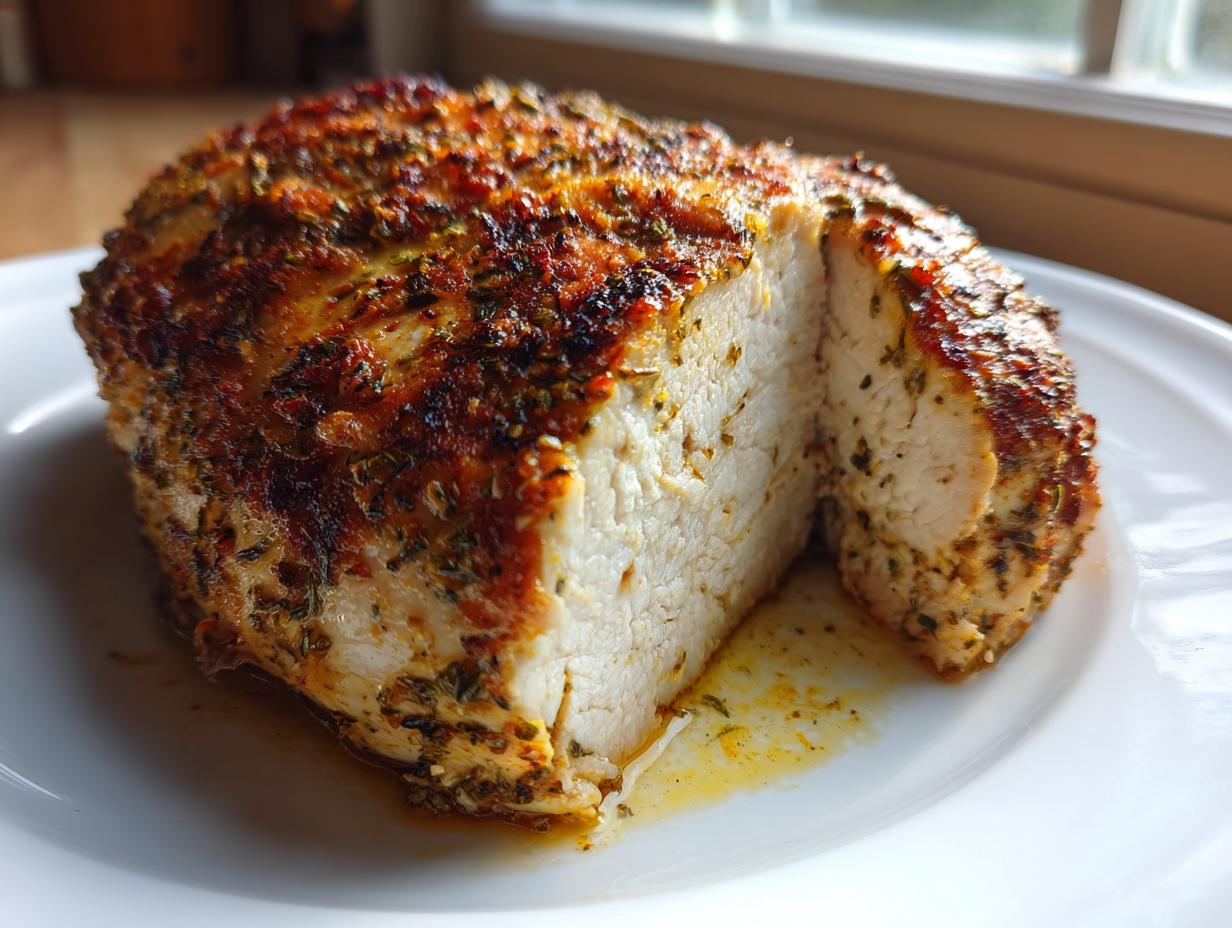
Oh, friends, come closer. Are you tired of lifting the oven door only to find that dry, stringy disaster staring back at you? I know I was! For years, the humble baked chicken breast felt like a culinary mystery—everyone said it was easy, yet mine always ended up tasting like cardboard. When I first started Cookin’ Corner, perfecting this basic protein was one of my major victories. It had to be reliable, it had to taste like real food, and it absolutely could not be dry! This recipe, the Foolproof Juicy Oven Baked Chicken Breast with Simple Seasoning, changed everything for me. It’s the foundation upon which so many of my weeknight meals were built because it guarantees moisture. That care and tested reliability you find in our family recipes? That’s exactly what we’re bringing to your dinner tonight.
- Why This Foolproof Baked Chicken Breast Recipe Works Every Time
- Ingredients for Your Juicy Baked Chicken Recipe
- How to Prepare Foolproof Baked Chicken Breast
- Tips for Success: Mastering the Baked Chicken Breast Temperature
- Variations on Your Savory Seasoned Chicken
- How to Store and Reheat Your Meal Prep Chicken Breast
- Serving Suggestions for this Easy Chicken Breast Dinner
- Frequently Asked Questions About Oven Baked Chicken Breast
- Share Your Foolproof Baked Chicken Breast Experience
Why This Foolproof Baked Chicken Breast Recipe Works Every Time
If you’ve ever been disappointed by bland or rubbery chicken, you’re not alone! We designed this baked chicken breast recipe specifically to demolish those two problems. It’s the culmination of trying—and failing—too many times until I found the perfect, simple method that never lets me down. It’s easy, dependable, and versatile enough to be the star of any meal you dream up.
- It banishes dryness using simple temperature checks and resting time.
- The savory seasoning blend adds rich depth without needing marinades or complicated steps.
- It moves from prep to plate faster than most takeout options.
We want you to feel confident serving this up any night of the week. Dive into these core elements that make this recipe truly shine.
Achieving Tender Chicken Breast in Oven Perfection
The tender chicken breast in oven magic really boils down to two things: consistency and a good thermometer. If one piece is fat and the other is thin, guess what? They cook at different rates and you end up with one dry piece and one that needs more time! That’s why pounding them to an even thickness is non-negotiable here. Also, we are relying on internal temperature, not just a timer, to tell us when it’s truly done. That little bit of precision means you save the meat from overcooking!
The Best Chicken Breast Recipe for Weeknight Chicken Dinner Idea
Seriously, you can’t beat the timing on this! When you’re looking for the best chicken breast recipe that fits into a tight schedule, this one is your champion. With only 10 minutes of prep and about 22 minutes in the heat, you are looking at a total time of just over half an hour. That timeframe makes this the ultimate easy chicken breast dinner. If you’re looking for more quick, easy recipes to add to your repertoire, this foolproof baked chicken breast style is always the starting point!
Ingredients for Your Juicy Baked Chicken Recipe
Okay, now for the really fun part—gathering our supplies! I want you to look closely at these amounts. When you’re striving for that perfect, juicy baked chicken recipe, precision in measuring your spices (and your oil!) really matters. This recipe is built around simplicity, so you probably have all the core components already sitting in your pantry, which makes this such a dependable weeknight option.
Here’s what you’ll need for four lovely servings. Remember, the chicken breasts should be good, solid pieces—about 6 to 8 ounces each—and they must be boneless and skinless!
- 4 boneless, skinless chicken breasts (about 6-8 ounces each)
- 1 tablespoon olive oil
- 1 teaspoon salt
- 1 teaspoon black pepper
- 1 teaspoon garlic powder
- 1 teaspoon onion powder
- 1/2 teaspoon paprika
- 1/4 teaspoon dried thyme
Simple Chicken Breast Seasoning Blend Components
This savory blend is what transforms plain chicken into something special. I love it because it’s savory and familiar, not spicy or fussy. We rely on classic herbs and powders here. Every single measuring spoon counts when you’re building flavor fast!
The garlic powder and onion powder do the heavy lifting for that deep flavor profile. The tiny bit of paprika gives us that beautiful, appealing color on the outside when it bakes up. And that hint of thyme? That’s my little secret touch to elevate it from basic to best chicken breast recipe material. It’s subtle, but it really works with the savory profile.
How to Prepare Foolproof Baked Chicken Breast
Alright, let’s get this marvelous, baked chicken breast into the oven without drying it out! Making something truly delicious doesn’t mean complicated steps. It means doing the simple things right, every single time. If you follow these instructions carefully, you’re going to master the art of how to cook chicken breast so it stays incredibly tender. We need to set ourselves up for success right from the moment we touch the raw meat.
Prepping for the Quick Baked Chicken
First things first: get that oven nice and toasty! We need it at 400 degrees Fahrenheit before anything else goes near it. While it’s heating up, tackle the chicken itself. If you look at your pieces, you’ll probably notice one end is thicker than the other. This is the number one killer of even cooking! Grab that plastic wrap and a rolling pin (or the flat side of a meat mallet) and just gently pound the thicker spots down until the whole thing is mostly the same thickness across. This simple trick ensures you get that beautiful, uniform tender chicken breast in oven result we are striving for.
Baking Instructions for Moist Chicken Breast Recipe
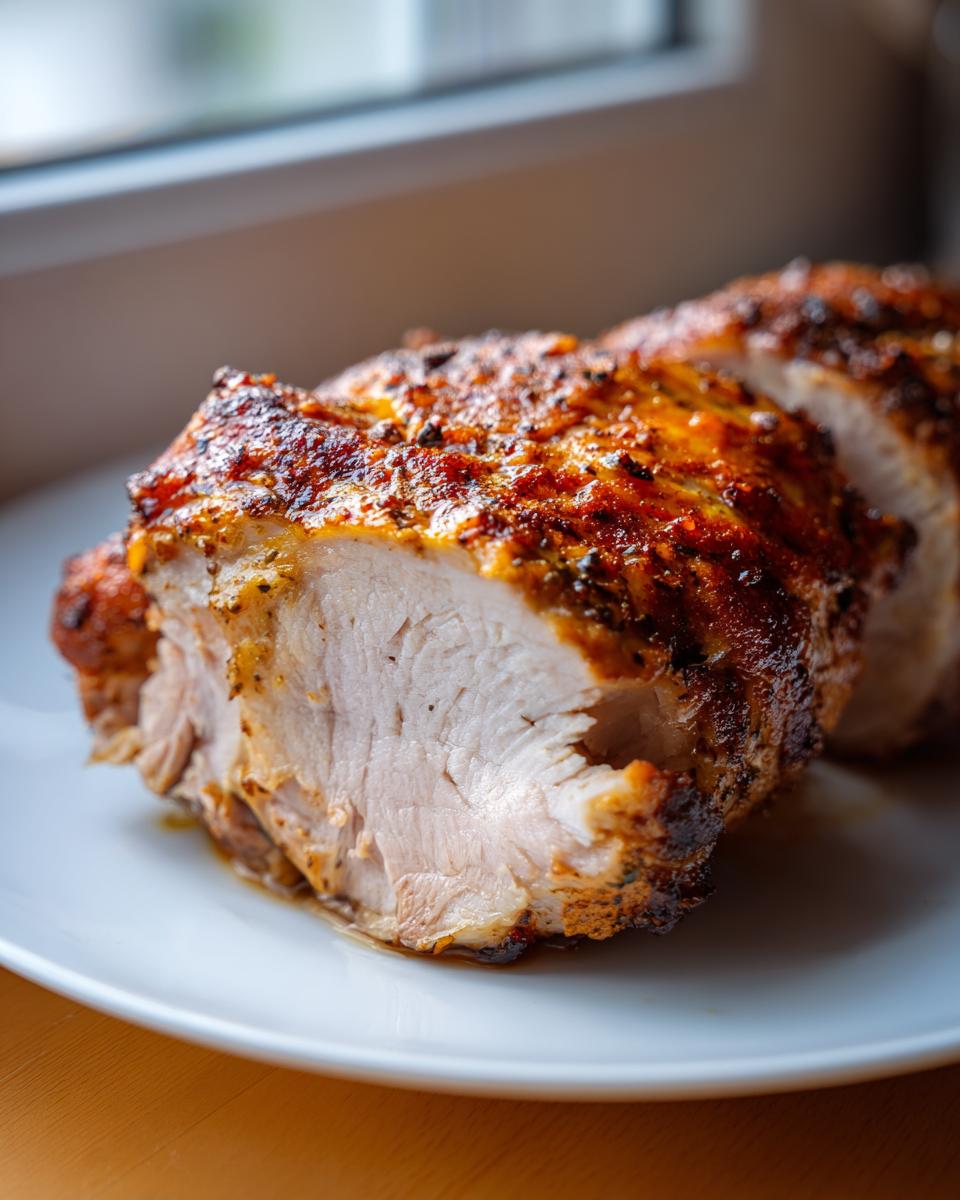
Once they are uniform, drizzle that tablespoon of olive oil over everything—it helps the seasoning stick and creates a little barrier against drying out. Now, take your beautifully mixed seasoning and sprinkle it liberally over both sides, patting it lightly so the savory herbs stay put. Place them neatly in your prepared dish. Slide them into that 400-degree oven for about 18 to 22 minutes, depending on how thick your pound job was. But listen to your meat thermometer, not just the clock! We are aiming for 165 degrees Fahrenheit in the very thickest spot to guarantee a perfectly cooked, moist chicken breast recipe.
We’ve got some great resources to help you plan the rest of your meal, too! Check out the ideas for easy dinner ideas around this main dish. Trust me, mastering this baked chicken breast is a game-changer. If you want some inspiration on other foolproof methods, folks over at Finger Licking Recipes have some great approaches to sealed baking as well.
Tips for Success: Mastering the Baked Chicken Breast Temperature
This is where we move from just following steps to truly understanding the science of juicy meat. If you want your baked chicken breast to taste like it came from a fancy restaurant, you have to respect the temperature—and what happens *after* it leaves the heat. This is a core lesson I learned early on: pulling the chicken out exactly when it hits temp isn’t enough; you have to let it finish cooking outside the oven, too!
If you want lean, healthy protein that delivers on flavor every time, check out some of my other healthy recipes, but first, let’s nail this resting technique. Honestly, if you skip this part, you might as well skip the seasoning, because that’s where most of the moisture walks right out the door.
The Non-Negotiable Resting Period for Baked Chicken Breast
I know the oven timer rings and you’re hungry, but I absolutely mean it when I say you must let the chicken rest for 5 to 10 minutes after you pull it out of the oven. When meat is actively cooking, those muscle fibers tighten up, squeezing all the delicious, flavorful juices right into the middle of the breast. If you slice it immediately, those juices rush out onto your cutting board, leaving you with dry meat.
Resting allows those tight fibers to relax and reabsorb that moisture back into the meat. Think of it like letting a sponge soak up spilled water—you need time for that redistribution! A simple trick I sometimes use, especially if the breasts are slightly uneven, is to place a few little pats of salted butter on top right as they come out of the oven, then tent them loosely with foil while they rest. That little bit of extra fat melts down and bathes the top surface, adding richness and locking in tenderness. For a guaranteed moist chicken breast recipe result, rest it!
If you’re still worried about dryness, I highly recommend checking out the tips from Fit Feastly on getting that perfect, simple bake—they cover some excellent high-heat sealing methods that work wonders for the exterior of the baked chicken breast.
Variations on Your Savory Seasoned Chicken
One thing I absolutely love about this simple base recipe is how forgiving the seasoning is. It’s our go-to, guaranteed savory hit, but once you’ve mastered the technique for getting that tender chicken breast in oven finish, you have to start playing around with the flavor profiles!
Since we used a simple oil base, switching flavors is super easy—no complex marinades needed that might interfere with the heat transfer. If you want something a little richer during the week, try swapping out that olive oil for melted butter. Using butter gives the exterior a gorgeous golden color and a satisfying richness that feels way more indulgent than the effort suggests.
For a zesty kick, you can incorporate lemon! Mix in a teaspoon of dried oregano and the zest of half a lemon right into your spice blend. It brightens everything up instantly. Or, maybe you’re craving something spicier? Add a half-teaspoon of cayenne pepper to the existing rub for a warmth that sneaks up on you.
And remember that note about garlic butter? If you melt a few tablespoons of butter and stir in some fresh minced garlic and dried parsley, you can brush that rich mixture over the chicken right before it goes into the oven—or even halfway through! It turns a simple meal into something truly special, like those quick honey garlic chicken skewers we love in the summer; it gives you a similar level of intense flavor without turning on the grill. Don’t be afraid to experiment; this method is truly robust!
How to Store and Reheat Your Meal Prep Chicken Breast
This recipe is practically built for busy folks, isn’t it? Once you’ve mastered this baked chicken breast technique, you realize you’ve unlocked the secret to quick, healthy eating all week long. I always make a double batch because I know I’ll want leftovers, and the flavor holds up beautifully!
Once the chicken has cooled completely—and I mean *completely*—you can pack it up. The trick here is using airtight containers. You want to seal out any extra air that could cause dryness or hasten spoilage. Since this recipe is so simple and savory, it holds up wonderfully. You can safely store your cooked chicken in the fridge for up to four days without noticing any real drop in quality.
Now, reheating is where people go wrong and accidentally bring back that old, dry chicken nemesis! Don’t just throw the leftovers in the microwave for a minute on high heat; that’s a fast track to tough protein. To keep that lovely juiciness we worked so hard for, you have two great options. Slicing the chicken before you store it actually helps it reheat faster and more evenly!
For the microwave, heat it up slowly, maybe 30 seconds at a time, and sprinkle just a tiny splash of water or a dab of broth over the slices before covering them loosely with a damp paper towel. That creates a little steamy environment. If you have a little more time, I prefer to reheat slices in a skillet over low heat with a teaspoon of broth until just warmed through. That way, you preserve the integrity of what we call the meal prep chicken breast; it tastes just as fantastic as when it was first cooked.
If you’re planning out your whole week, I’ve got some great strategies for using leftovers in my post about the Buffalo Chicken Bowl Recipe—it shows how just a quick toss in sauce can transform your baked chicken breast for a brand new meal! Speaking of quick meal ideas, the fine folks at Lina’s Dinner have some fantastic suggestions for integrating quick-cooked proteins like this into faster weeknight menus.
Serving Suggestions for this Easy Chicken Breast Dinner
Now that you have perfectly juicy, tender chicken—congratulations, you’ve finally beaten the dry chicken curse!—the fun part is making it a complete meal. Because this seasoning blend is so wonderfully classic and savory, this easy chicken breast dinner pairs with almost anything. It’s the perfect blank canvas for the sides you want to serve, whether you’re keeping things light or going for full comfort food.
I usually try to balance the meal by loading up on some green vegetables or filling starches since the chicken itself is so lean. Nothing complicates a simple weeknight dinner more than trying to figure out three complicated side dishes!
Here are a few of my go-to pairings that just sing alongside this savory seasoned meat:
- Roasted Root Vegetables: Toss carrots, parsnips, and Brussels sprouts with a little olive oil, salt, and pepper, and roast them right alongside the chicken (adjusting for a slightly longer cook time if they are large). The hint of thyme in the chicken complements the sweetness of roasted root veggies perfectly.
- Fluffy Basmati or Quinoa: A simple grain provides a wonderful bed for the sliced chicken, especially if you drizzle any of those resting juices over the top. Or, if you’re feeling a little more indulgent, you absolutely have to try my recipe for Twice-Baked Potato Bliss—the savory chicken paired with creamy potatoes is pure comfort!
- Simple Mixed Greens Salad: For a lighter approach, keep the salad dressing bright and acidic, like a lemon vinaigrette. The acidity cuts through the richness of the olive oil coating and makes the meal feel very fresh and healthy.
No matter what you choose, remember you already nailed the hardest part: getting the main protein absolutely perfect. Enjoy building the rest of your delicious plate!
Frequently Asked Questions About Oven Baked Chicken Breast
It’s totally normal to have questions when you’re trying a new technique, especially when we’re talking about avoiding dry meat! I always collected questions on note cards while developing my first recipes, and these are the ones that came up the most when I was first figuring out the secrets to truly juicy results. If you have specific questions about safety or timing, this is where we tackle them head-on!
Can I cook this baked chicken breast from frozen?
Oh, I know those days when dinner absolutely has to be on the table five minutes ago! While you *can* technically cook a baked chicken breast from frozen, I really don’t recommend it if you’re serious about getting that tender chicken breast in oven texture. When you put frozen chicken straight into the oven, the outside gets cooked way too quickly before the inside thaws and catches up. You end up with that classic ‘cooked on the outside but still cold/steamed in the middle’ situation.
If you absolutely must, you need to make some big adjustments. First, you’ll want to lower your oven temperature down to about 375°F, and then you have to plan for at least 50% more cook time. The absolute best thing you can do for your meal is to remember to thaw it overnight in the fridge first. That ensures the oil and seasoning adhere correctly, and you can maintain that focus on the proper internal temperature for a quick baked chicken finish.
What is the best internal temperature for a tender chicken breast in oven?
This is the million-dollar question, isn’t it? For safety, USDA recommends all poultry reach 165 degrees Fahrenheit internally. And that’s the temperature you *must* hit! However, here’s the part that guarantees you a moist chicken breast recipe every time: you need to pull the chicken out of the 400°F oven when your thermometer reads 160°F to 162°F.
Why? It’s all about carryover cooking! Those last few degrees happen while the meat is resting outside the oven, sitting on the cutting board. If you let it hit 165°F inside the oven, it’s almost guaranteed to climb up to 168°F or higher by the time you slice it, and that’s where the dryness sets in. By pulling it out early and letting it rest under foil, you ensure those fibers relax and absorb the juices right as they finish cooking to that perfect, safe spot. It’s the simplest way to achieve that incredible final texture!
If you ever need to get in touch with us about a recipe or technique, don’t hesitate to reach out through our contact page!
Share Your Foolproof Baked Chicken Breast Experience
Now that you have the full method for making a perfectly juicy, flavorful baked chicken breast—the recipe I leaned on so heavily when I was first mastering home cooking—I really want to hear from you! Trying a new technique, especially one that promises to solve the long-standing mystery of dry poultry, can feel like a big step.
Did it work? Did you finally achieve that melt-in-your-mouth texture we talked about? Your feedback is so important to me here at Cookin’ Corner. It helps me understand what is truly working for home cooks like you, and honestly, it just makes my day to hear when a classic family method brings joy to your dinner table.
Please take a moment to leave a star rating right below this section! If you have any little tweaks that you think made your seasoning even better, or if you want to share what sides you paired with this baked chicken breast, drop a comment! Hearing about your success stories—especially about how juicy the results were—is the best encouragement I could ask for. We are building this little corner of delicious memories together.
If you enjoyed learning the heritage behind these reliable recipes, make sure to check out the story of how Cookin’ Corner started and why we value classic techniques so much on the About Us page. Happy cooking, and I can’t wait to read your reviews!
PrintFoolproof Juicy Oven Baked Chicken Breast with Simple Seasoning
Learn the simple technique to bake chicken breasts in the oven so they stay incredibly juicy and tender every time. This easy recipe uses a basic savory seasoning blend perfect for quick weeknight dinners or meal prepping.
- Prep Time: 10 min
- Cook Time: 22 min
- Total Time: 32 min
- Yield: 4 servings 1x
- Category: Dinner
- Method: Baking
- Cuisine: American
- Diet: Low Fat
Ingredients
- 4 boneless, skinless chicken breasts (about 6–8 ounces each)
- 1 tablespoon olive oil
- 1 teaspoon salt
- 1 teaspoon black pepper
- 1 teaspoon garlic powder
- 1 teaspoon onion powder
- 1/2 teaspoon paprika
- 1/4 teaspoon dried thyme
Instructions
- Preheat your oven to 400 degrees Fahrenheit. Lightly grease a baking dish or line it with parchment paper.
- Prepare the chicken: If your chicken breasts are uneven, place them between two sheets of plastic wrap and gently pound the thicker end until the entire breast is an even thickness. This helps the chicken cook evenly.
- In a small bowl, mix together the salt, pepper, garlic powder, onion powder, paprika, and thyme to create your simple seasoning blend.
- Rub the olive oil over all surfaces of the chicken breasts. Sprinkle the seasoning blend evenly over both sides of the chicken, pressing gently so the spices adhere.
- Place the seasoned chicken breasts in the prepared baking dish.
- Bake for 18 to 22 minutes. The exact time depends on the thickness of the chicken.
- Use a meat thermometer to check the internal temperature. The chicken is done when it reaches 165 degrees Fahrenheit in the thickest part.
- Remove the chicken from the oven and let it rest on a cutting board for 5 to 10 minutes before slicing. This resting period is key to keeping the chicken moist.
Notes
- For extra moisture, you can place a few pats of butter on top of each breast before baking.
- This recipe is great for meal prep; store cooled, sliced chicken in airtight containers for up to four days.
- If you prefer a garlic butter flavor, substitute the olive oil with melted butter and add 1 teaspoon of dried parsley to the seasoning mix.
Nutrition
- Serving Size: 1 breast
- Calories: 220
- Sugar: 0
- Sodium: 350
- Fat: 5
- Saturated Fat: 1
- Unsaturated Fat: 4
- Trans Fat: 0
- Carbohydrates: 1
- Fiber: 0
- Protein: 40
- Cholesterol: 110