
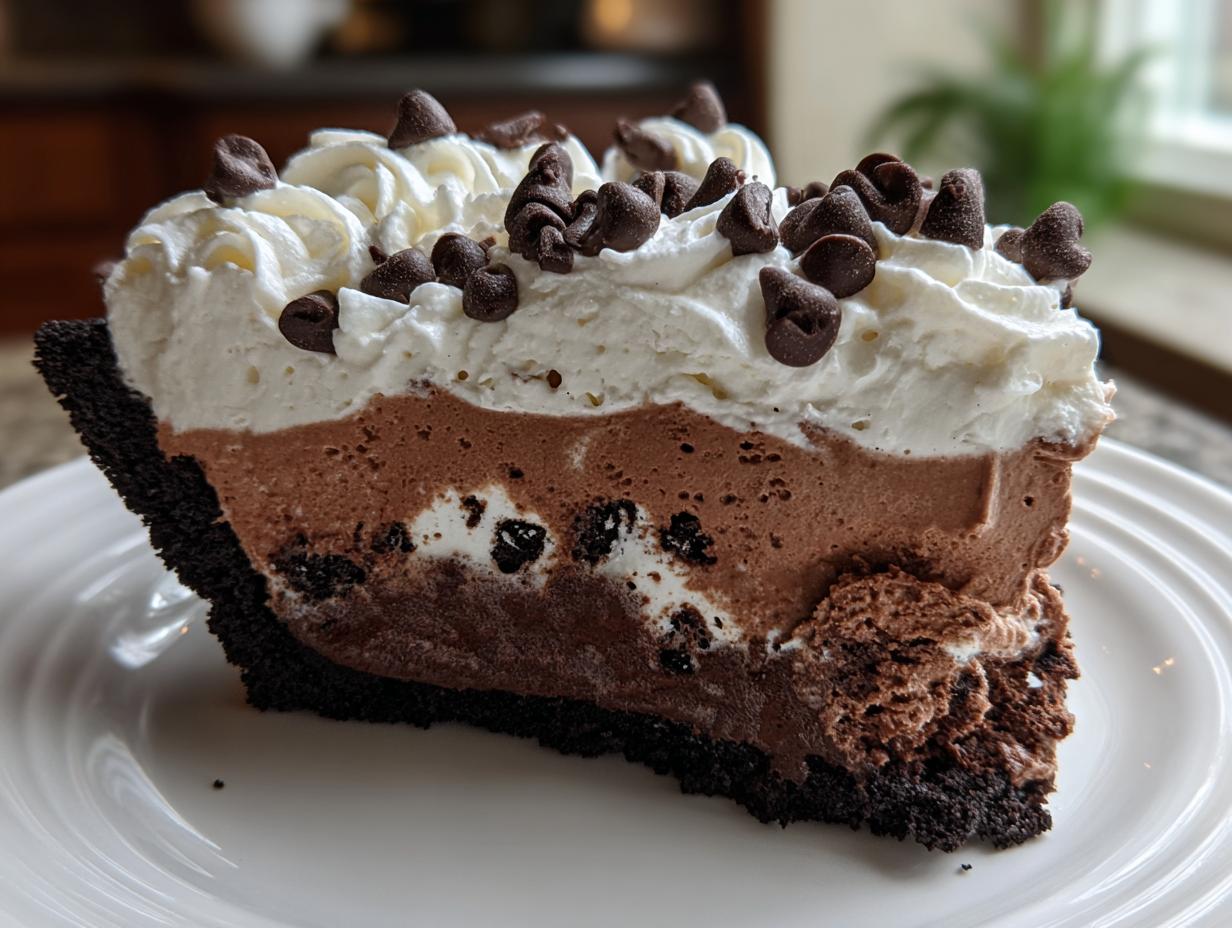
When the summer heat rolls in, honestly, my brain just screams for something cold, right? Forget firing up the oven – that’s the last thing I want to do! That’s why, here at Cookin’ Corner, we pivot straight to the ultimate crowd-pleaser: the ice cream pie. This isn’t some fussy, complicated bakery item; this is pure, unadulterated, heartwarming simplicity. I learned from my grandmother that the best food is made with care, and this recipe is proof that you can show a whole lot of care without ever turning on the stove.
If you enjoyed learning about our approach to simple, feel-good treats, you absolutely must check out our recipe for easy no-bake avalanche cookies—it has the same fuss-free spirit! We’re keeping it easy today with layers of chocolate and vanilla nestled in a perfect Oreo crust. If you’re looking for those quick, reliable recipes that build memories without sinking your whole afternoon, you’ve found the right place. Trust me, you’re going to want to save this one!
- Why This No-Bake Oreo Ice Cream Pie is Your New Family Favorite Ice Cream Pie Recipe
- Gathering Ingredients for Your Creamy Frozen Pie
- How to Prepare the Easiest Ice Cream Pie
- Tips for Success Making Your Homemade Ice Cream Pie
- Variations for Your Chocolate Peanut Butter Ice Cream Pie
- Serving Suggestions for This Indulgent Frozen Dessert
- Storage and Reheating Instructions for Your Ice Cream Pie
- Quick Frozen Treats: Answering Common Ice Cream Pie Questions
- Estimated Nutritional Data for This Layered Ice Cream Dessert
Why This No-Bake Oreo Ice Cream Pie is Your New Family Favorite Ice Cream Pie Recipe
When I tell you this is the best ice cream pie you’ll ever put together, I mean it! It’s one of those core recipes from my collection of quick and easy recipes because it just *works*. You don’t need fancy equipment or a thermometer, thank goodness. It hits all the sweet spots for a busy cook who still wants something indulgent.
Here’s why this specific ice cream pie recipe always makes the cut:
- No Oven Hassle: Absolutely zero baking required! We’re relying on freezer magic here, which is perfect when the house is already too warm.
- Lightning-Fast Assembly: Once you have the ice cream a little soft, you can layer this pie faster than you can bake a batch of cookies.
- Kid-Approved Flavor: Who doesn’t adore Oreos? This is instant happiness in a scoop.
- Make-Ahead Champion: This frozen dessert pie is actually *better* when made a day ahead. Total lifesaver for parties!
Gathering Ingredients for Your Creamy Frozen Pie
Okay, let’s talk payoff versus effort, because that’s where this ice cream pie truly shines. Since this is a no bake ice cream pie, the quality of what you put in is pretty much what you get out! I always grab my favorite ice creams—make sure they are just slightly softened so they spread like butter, but not melted soup!
Don’t stress too much; these are all simple things you probably have in the freezer or pantry already. But trust me, using good chocolate cookies for that pie with cookie crust makes all the difference in the world.
For the Oreo Ice Cream Pie Crust Ideas
This is the foundation, so treat those crumbs right!
- 1 1/2 cups crushed Oreo cookies (yes, use the filling too!)
- 1/4 cup melted butter
For the Layered Ice Cream Dessert Filling and Topping
This is where we build the height!
- 1 quart vanilla ice cream, softened slightly
- 1 quart chocolate ice cream, softened slightly
- 1 cup heavy whipping cream
- 2 tablespoons powdered sugar
- 1 teaspoon vanilla extract
- 1/2 cup mini chocolate chips or chopped peanut butter cups for topping
How to Prepare the Easiest Ice Cream Pie
Alright, now for the fun part—putting this incredible ice cream pie recipe together! The secret is working just fast enough to keep things neat, but slow enough that the layers don’t merge into one big mushy mess. Patience in the freezer stage is key, but the hands-on time here is minimal, I promise! If you need a savory break between all these sweet things, be sure to check out my recipe for easy chicken gravy recipe no drippings!
Creating and Chilling the Cookie Crust
First up, grab those mixed Oreo crumbs and melted butter we prepared. You need to press this mixture firmly into the bottom and up the sides of your 9-inch pie plate. I use the bottom of a measuring cup to really pack it down—a solid base prevents cracking later! Once it’s tight, that crust needs a good 30 minutes in the freezer. This initial freeze is what locks in that perfect structure for our stable ice cream pie.
Building the Vanilla and Chocolate Ice Cream Layers
Next, pull out your slightly softened vanilla ice cream. Gently spread that creamy layer evenly over your chilled crust. Don’t press too hard, or you’ll mess up the base! Back into the freezer it goes for another 30 minutes until that vanilla layer is firm to the touch. Then, repeat the process with the chocolate ice cream. Cover it loosely now so it doesn’t pick up any weird freezer smells, and let the whole thing freeze solid for at least 4 hours. Seriously, overnight is even better for the best results!

Finishing Touches: Whipped Cream and Toppings
Before serving, we make the glorious topping. This is where you can look like a baking genius without breaking a sweat! I always use a chilled bowl and beaters when whipping the heavy cream, powdered sugar, and vanilla until they hold stiff peaks—that’s the sign it’s ready. Pull your amazing ice cream pie out about 10 minutes before you plan to slice it. Top it generously with that homemade whipped cream and then scatter those mini chocolate chips (or peanut butter cups!) right on top for sparkle and crunch.
Tips for Success Making Your Homemade Ice Cream Pie
I’ve definitely learned a few things the hard way while perfecting this ice cream pie over the years. When you’re dealing with frozen layers, timing is everything! My biggest piece of advice here, especially if you want that perfectly smooth, scoopable texture, is to really pay attention to your ice cream softening stage.
Early on, I remember trying to rush the vanilla layer. I just plopped it straight from the deep freeze into the crust and tried to smoosh it down. Well, the edges started cracking right away! That thick, hard ice cream just wouldn’t adhere, and when I sliced into it later, the whole filling popped right out of the crust. Ugh! That’s why I always stress letting it sit on the counter for about 15 to 20 minutes until it feels soft around the edges but still holds its shape in the middle.
When you’re working with layers for your frozen dessert pie, remember that patience between steps is your best friend. Those 30-minute freezes aren’t suggestions; they are essential bonding time for your layers! If you skip the intermediate freeze after the vanilla layer, the chocolate layer will start melting into it, and you’ll lose that beautiful definition.
Also, to make sure your final slice looks magazine-worthy, take the whole ice cream pie out about 10 minutes before you plan to cut it. A rock-hard pie is impossible to serve nicely, even with the sharpest knife. If you’re making this for a big gathering, you can always cheat and run a thin metal spatula under hot water, dry it quickly, and use that to help nudge the slices out. It’s a little trick I picked up! If you’re looking for other reliably perfect recipes, you should take a look at my guide on the best sugar cookie recipe; it requires similar attention to temperature!
Variations for Your Chocolate Peanut Butter Ice Cream Pie
One of the great things about this foundation of an ice cream pie is how easy it is to switch things up. You don’t need a whole new recipe; you just need a different tub of ice cream in the freezer! This is where you can really personalize it for whatever craving hits that day, whether it’s for summer or maybe even a fun holiday dessert.
My personal favorite swap—and I know so many other families love this equally—is turning it into a full-on chocolate peanut butter ice cream pie. It’s so rich, but the crust holds up perfectly for all that flavor!
If you’re a big peanut butter fan, just swap out the chocolate ice cream layer for your favorite peanut butter flavor. Then, instead of the plain chocolate chips on top, take those chopped Reese’s Peanut Butter Cups you saw in the ingredient list and pile them on! It’s ultra-indulgent, but what’s the point of a great frozen dessert pie if you’re holding back, right?
For those of you planning ahead for a fun theme, thinking about something like a mint chocolate surprise? You can easily swap the vanilla layer for mint chocolate chip ice cream. The chocolate layer complements that mint beautifully. Or, if you’re feeling really fruity, I know some folks have had incredible luck using strawberry ice cream for a summery flavor profile. Honestly, the sky is the limit here, and you definitely want to check out my recipe for chocolate peanut butter cake if you decide you need even more of that flavor combo!
Remember that link I found while researching? If you want to see another gorgeous take on a fully loaded ice cream treat, you should definitely peek at this decadent no-bake ice cream pie recipe. It just goes to show you how flexible this concept is!
Serving Suggestions for This Indulgent Frozen Dessert
Because this ice cream pie is so rich and creamy, you really don’t need much on the side! Sometimes the best pairing is just a simple cup of coffee, especially after dinner.
If you want to dress up your plate for your next summer gathering, try a light drizzle of something tart. A little raspberry sauce cuts through the chocolate and vanilla perfectly. Or, you know what’s surprisingly delicious? A tiny dollop of my slow-cooker apple butter. It sounds odd, but the warm spice is a wonderful contrast to the cold dessert. Truly, though, this pie stands beautifully on its own!
Storage and Reheating Instructions for Your Ice Cream Pie
Good news! Since this is a no bake ice cream pie, you don’t have to worry about reheating at all—unless you like soup, which I definitely don’t recommend here! This pie is meant to stay frozen, and frankly, it’s better the next day when it’s had time to truly set up after you assembled those layers.
The most important thing is protection from freezer burn. You want that lovely whipped cream topping to stay fluffy and fresh, not crystallize into an icy mess. Once the pie is completely firm after its initial 4-hour freeze, cover it really well. I always use a layer of plastic wrap pressed directly against the top surface—this keeps the air away from the whipped cream. Then, you wrap the whole thing tightly in aluminum foil or place it in an airtight container.
I find that this ice cream pie keeps beautifully for up to two weeks, which means you can totally make it way ahead of time for holidays or big summer parties! If you need to freeze it longer, it’s still safe, but you might start noticing a slight change in the texture of the whipped topping.
When you’re ready to serve your homemade ice cream pie, the thawing time is crucial. Pull the foil and plastic off when you take it out of the deepest part of the freezer. Let it sit on the counter for about 10 to 15 minutes. This slightly softens the structure so you can actually get a clean slice without chipping the crust. If you want to check out some other great freezer meals that save you kitchen time, take a look at my easy crockpot potato soup recipe!
If you are looking for other foolproof ways to keep your desserts perfectly preserved in the cold, I saw a great technique discussed over at Beard and Bonnet. They always have clever solutions for keeping things fresh for the next day!
Quick Frozen Treats: Answering Common Ice Cream Pie Questions
It’s always the last-minute questions that pop up when you’re ready to serve something amazing, right? Since this is such a flexible, creamy frozen pie, people always wonder about the little details. I try to answer everything here so serving your next ice cream pie recipe goes off without a hitch! If you’re looking for more foundational tips on quick sweets, check out my main page on quick and easy recipes!
We’ve all been there—you pull the pie out, it’s firm, but you still worry about making a mess serving it. Don’t worry, I have the trick that makes this whole process so much easier!
How do I get clean slices of this ice cream pie?
This is probably the most common question I get about any frozen dessert! You want those perfect wedges for your guests. The secret isn’t just letting it temper for 10 minutes—it’s the knife care. Grab a long, sharp knife and dip the whole blade into a tall glass of very hot water. Wipe it completely dry with a towel so there’s no water coming into contact with the topping.
Now, press down firmly and slice through one piece. Before you cut the next slice, reheat that knife in the hot water and wipe it dry again! It sounds like extra fuss, but that hot, clean blade glides right through the frozen layers and the sturdy Oreo ice cream pie crust like it’s cake. You’ll get gorgeous, clean slices every single time.
Can I use store-bought ice cream instead of softening it?
Yes, you are using store-bought ice cream, but you still need to soften it! If you try to smash rock-hard ice cream straight from the deep freeze into your crust, you’ll end up with a cracked crust or an uneven layer. That’s the downfall of many a no bake ice cream pie attempt!
The ice cream needs to be soft enough that you can spread it gently with a spatula—think very thick mashed potatoes. This allows it to mold nicely against the crust and bond with the layer underneath it when it refreezes. If you skip that softening step, you end up with gaps and air pockets, and nobody wants a flimsy layered ice cream dessert!
What crust ideas work besides Oreos for this frozen dessert pie?
While the chocolatey depth of Oreos makes this the ultimate flavor combo, I know sometimes you might not have them on hand, or maybe you want something a little less dark for a different flavor profile. You have great options for ice cream crust ideas!
Graham crackers are a classic substitute; just use the same amount of crumbs, but you might need a tiny bit more melted butter since they are drier than Oreos. Vanilla wafers work wonders too, especially if you are leaning into a peanut butter variation. They give a sweeter, lighter base that really lets the creamy filling shine. All of these options will give you a wonderful, sturdy base for your quick frozen treats.
Estimated Nutritional Data for This Layered Ice Cream Dessert
Now, I always tell folks that when you are making an indulgent frozen dessert like this ice cream pie, you aren’t really looking at the nutrition label, are you? We’re making this because it brings joy, and joy doesn’t have a calorie count! But, because I know some of you are curious, I put together a very rough estimate based on the ingredients we used.
Please remember this is just an estimate for one slice based on the whole recipe. If you load it up with extra peanut butter cups on top, things will certainly change! For more of my genuine, vegetable-forward favorites, you can always browse my dedicated healthy recipes section where we focus on fresher finds.
For reference, here is the breakdown for one generous slice of this layered ice cream dessert:
- Serving Size: 1 slice
- Calories: 450
- Fat: 28g (Remember, a lot of this comes from the butter and ice cream fat, which makes it creamy!)
- Carbohydrates: 48g
- Protein: 6g
This creamy frozen pie is certainly a treat, not an everyday snack, but oh boy, is it worth every single bite when you need a special quick frozen treat!
PrintEasy No-Bake Oreo Ice Cream Pie

Make this easy, no-bake Oreo Ice Cream Pie for a simple, creamy frozen dessert perfect for summer gatherings or family favorites. This recipe uses a classic cookie crust and rich ice cream layers.
- Prep Time: 20 min
- Cook Time: 0 min
- Total Time: 4 hr 20 min
- Yield: 8 servings 1x
- Category: Dessert
- Method: No Bake
- Cuisine: American
- Diet: Vegetarian
Ingredients
- 1 1/2 cups crushed Oreo cookies
- 1/4 cup melted butter
- 1 quart vanilla ice cream, softened slightly
- 1 quart chocolate ice cream, softened slightly
- 1 cup heavy whipping cream
- 2 tablespoons powdered sugar
- 1 teaspoon vanilla extract
- 1/2 cup mini chocolate chips or chopped peanut butter cups for topping
Instructions
- Prepare the crust: Mix the crushed Oreo cookies and melted butter in a bowl until the crumbs are evenly moistened. Press the mixture firmly into the bottom and up the sides of a 9-inch pie plate. Freeze the crust for at least 30 minutes.
- Layer the ice cream: Spread the softened vanilla ice cream evenly over the frozen crust. Return the pie to the freezer for 30 minutes to firm up.
- Add the second layer: Spread the softened chocolate ice cream over the vanilla layer. Cover the pie loosely with plastic wrap and freeze for at least 4 hours, or until completely firm.
- Make the topping: In a separate bowl, beat the heavy whipping cream, powdered sugar, and vanilla extract until stiff peaks form.
- Assemble and serve: Remove the pie from the freezer about 10 minutes before serving. Top the pie with the whipped cream and sprinkle with mini chocolate chips or chopped peanut butter cups. Slice and serve immediately.
Notes
- For a richer chocolate flavor, use fudge ripple ice cream for the second layer.
- If you want a peanut butter variation, substitute the chocolate ice cream layer with peanut butter ice cream and top with chopped Reese’s Peanut Butter Cups.
- This is a great make-ahead dessert; it keeps well in the freezer for up to two weeks.
Nutrition
- Serving Size: 1 slice
- Calories: 450
- Sugar: 45g
- Sodium: 350mg
- Fat: 28g
- Saturated Fat: 16g
- Unsaturated Fat: 12g
- Trans Fat: 0.5g
- Carbohydrates: 48g
- Fiber: 2g
- Protein: 6g
- Cholesterol: 60mg