
There’s just something about the smell of baking sugar and peanut butter that pulls you right back to childhood, isn’t there? For me, here in the Midwest, no holiday spread—or really, no special occasion at all—feels complete without that tiny, perfect piece of chocolate nestled right on top of a cookie.
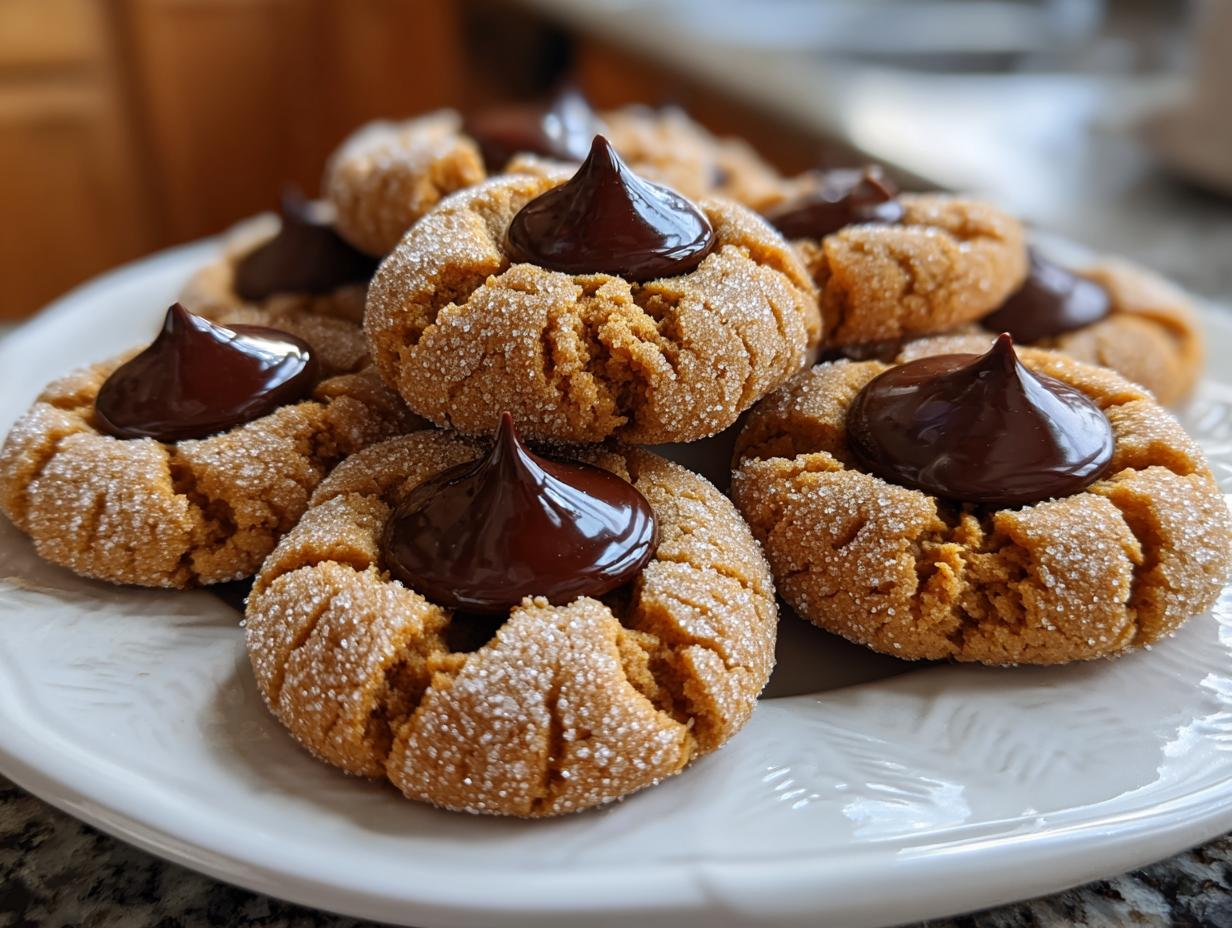
That’s why I’m sharing my very best recipe for what you might call **kiss cookies**. These are the classic Peanut Butter Blossoms we grew up on, and trust me, I’ve tweaked them over the years to get them just the way Grandma would have wanted—soft, unbelievably chewy, and those signature tops that crackle just right when they come out of the oven. If you love this kind of classic holiday flavor profile, you’ll absolutely want to check out my recipe for easy snickerdoodles too. This recipe is all about putting that care and tradition into every single batch you bake. Forget dry, crumbly cookies; we are aiming for melt-in-your-mouth goodness here!
- Why These Peanut Butter Kiss Cookies Are a Family Favorite Recipe (EEAT)
- Gathering Your Ingredients for Classic Kiss Cookies
- Step-by-Step Instructions for Making Soft Kiss Cookies
- Tips for Perfect Holiday Kiss Cookies Every Time
- Variations on Traditional Peanut Butter Kiss Cookies
- Storage and Keeping Your Kiss Cookies Fresh
- Serving Suggestions for These Festive Treats
- Frequently Asked Questions About Kiss Cookies
- Estimated Nutritional Data for These Classic Kiss Cookies
- Share Your Favorite Kiss Cookies Creations
Why These Peanut Butter Kiss Cookies Are a Family Favorite Recipe (EEAT)
I’ve baked a lot of cookies in my life, but I keep coming back to this one. It’s a true **family favorite recipe** because it just *works*, even when you’re in a huge rush around the holidays! The secret to making these the best **chewy cookie recipes** you’ve ever tried is that you absolutely, positively, do not need to chill the dough. That’s right, no waiting! They are designed to be quick cookies you can whip up right now.
When they come out of the oven, they have that wonderfully soft center that guarantees a chewy bite, which is exactly what you want before topping it with that famous little chocolate drop. For more easy baking inspiration, I’ve shared my secrets for simple peanut butter cookies that rely on similar creaming techniques.
Gathering Your Ingredients for Classic Kiss Cookies
When you’re making a classic like this, ingredients matter deeply. You want that robust peanut butter flavor balanced with the right kind of sweetness. I always try to use good quality butter and make sure my brown sugar is nicely packed—that molasses content makes a huge difference in the final chewiness!
Don’t skimp on the kisses either; you need a nice stack of them ready to go before the cookies even hit the oven. Here’s exactly what you’ll need for about four dozen of these beauties.
The Essential Components for Perfect Peanut Butter Kiss Cookies
- 1 cup unsalted butter, softened
- 3/4 cup creamy peanut butter
- 3/4 cup granulated sugar
- 3/4 cup packed light brown sugar
- 2 large eggs
- 1 teaspoon vanilla extract
- 2 1/4 cups all-purpose flour
- 1 teaspoon baking soda
- 1/2 teaspoon salt
- 1/2 cup granulated sugar, for rolling
- About 48 milk chocolate kisses (like Hershey’s Kisses), unwrapped
Step-by-Step Instructions for Making Soft Kiss Cookies
Alright, let’s get baking! Since these are designed to be such quick cookies, we can move right along without pausing for chilling. That’s one of the reasons these are my go-to for any last-minute holiday party—they come together so fast. Remember what I said about the crackle on top? That comes straight from proper creaming and getting them into the oven right when they need to be. When you see those beautiful cracks form, you’ll know you’re on the right track for truly **soft baked cookies**!
We need to work efficiently, so have your baking sheets lined and your Kisses unwrapped and waiting nearby. This method is straightforward, but paying attention to timing, especially at the end, is what separates an okay cookie from an amazing one. Here are the simple steps we follow from start to finish.
Preparing the Dough and Preheating for Your Kiss Cookies
First thing’s first: turn that oven on! You want it ready and humming at 375 degrees Fahrenheit. Line those baking sheets with parchment paper—this is the best trick I learned for easy cleanup, far better than scraping off burnt bits later!
Now for the base. In your biggest bowl, you need to cream together the softened butter, the peanut butter, the granulated sugar, and that lovely brown sugar. You’re not just mixing them; you’re beating them until they turn genuinely light and fluffy. That takes a few good minutes, but this step is where we build the air pockets for the soft texture.
Once it looks like sweet, pale whipped goodness, you beat in those two large eggs, one at a time, followed by the vanilla extract.
Mixing and Rolling the Kiss Cookies Dough
Next, we handle the dry stuff. In a separate bowl, just whisk together your flour, baking soda, and salt so everything is nicely distributed. Now, here is where you need to be gentle. Add those dry ingredients to your wet mixture little by little, mixing only on low speed. As soon as you see no more flour streaks, stop mixing! Seriously, stop. Overmixing develops gluten, and we want tender, not tough, **kiss cookies**.
Pour that remaining half-cup of granulated sugar into a shallow dish—keep it handy! Roll your dough into little one-inch balls. I try to make them uniform, but don’t stress too much; they spread beautifully. Roll each ball thoroughly in that sugar until it’s completely, thickly coated. This sugar coating is crucial for that classic textured look.

Baking and Adding the Chocolate Center to Kiss Cookies
Place the sugared dough balls on your lined sheets, leaving about two inches between them because they will expand a bit. Pop them right into that 375°F oven for 8 to 10 minutes. Don’t overbake them! You want the edges set, but the middle should still look just a touch soft. You’ll notice them start to crackle on top—that’s the magic happening!
Here’s the most important part: right as they come out of the oven, immediately press one unwrapped milk chocolate kiss straight into the center of each warm cookie. The residual heat is just enough to melt the bottom of the chocolate gently, securing it in place without making the whole thing melt into a puddle. Let them sit right there on the hot pan for about five minutes before carefully moving them over to a wire rack to cool completely. If you try to move them too soon, they’ll fall apart!
If you want more inspiration for delicious holiday treats that bake up beautifully, you might love checking out my guide to perfect sugar cookies.
Tips for Perfect Holiday Kiss Cookies Every Time
Now that you have the recipe down, let me share a few secrets I learned the hard way so your **holiday cookies** turn out flawlessly every time. Getting that beautiful crackled surface and ensuring the cookie stays soft is all about what you *don’t* do, as much as what you do! If you’ve ever wondered how to elevate your game for things like the best holiday cookie exchange ideas, these tips are key.
Also, since you’re looking for variations, you might want to try out the dough base from my easy snickerdoodles sometime! But for these peanut butter beauties, keep these essential pointers in mind.
Ingredient Quality and Dough Consistency for Kiss Cookies
Stick to creamy peanut butter for these. Crunchy gives you an uneven base and can mess with the structure we are trying to achieve for a soft center. The most important thing I want you to remember from the instructions is: resist the urge to chill the dough! This recipe is written as a quick option—a real winner when you need festive treats—and chilling the dough can make it too stiff, which leads to flatter cookies.
Mastering the Chocolate Kiss Placement
When you pull the cookies out, you have to be fast! If you wait even a minute too long, the tops firm up, and you end up struggling to press the chocolate in, sometimes cracking the cookie. If you *do* miss the window—don’t panic. Just slide the cookies back onto the hot baking tray and pop them into the turned-off oven for about 60 seconds. The low heat will soften the base just enough.
Just a heads up, if you’re planning for a big batch, I found these wonderful ideas for more easy Kiss Christmas cookies that use slightly different dough bases.
Variations on Traditional Peanut Butter Kiss Cookies
The beauty of the **kiss cookies** base is how easily it adapts to all sorts of **seasonal cookie ideas**! While the peanut butter version holds a special place in my heart, you can swap out the peanut butter for other creamy additions and get wildly different, but equally wonderful, results.
Think about swapping the peanut butter for almond butter if you have a fan of almond flavor, or even use a nice high-quality sunflower seed butter if you need to keep things strictly nut-free! The dough recipe is super forgiving, which is exactly what we love in a **from scratch cookie** recipe.
If you want to get really festive, you could try adapting my soft gingerbread base instead of the peanut butter dough entirely. You’d roll those spicy balls in cinnamon sugar instead of plain sugar, and then press the chocolate kiss in right at the end. For inspiration on turning other doughs into kiss cookies, check out what my friends are doing over at Baked by Rachel!
Storage and Keeping Your Kiss Cookies Fresh
Okay, once these are cooled, you really want to protect that beautiful, semi-melted chocolate kiss! Since these peanut butter cookies are so soft, they can go stale faster than a crisp cookie, so airtight containers are your best friend here. Try not to stack them too high, or the chocolate might smoosh into the cookie below it, which is always a sad sight.
If you’ve got them piled up for a party, keeping them in one layer under a simple cake dome works great for a day or two. For longer storage—say, a week or so—definitely use a solid, sealable container. They stay wonderfully soft this way, making them perfect **festive treats** for any occasion that pops up!
Serving Suggestions for These Festive Treats
These little gems shine all on their own, of course! They are the ultimate **festive treats** whether you’re making them for a big Christmas cookie platter or just a fun little something for Valentine’s Day. Peanut butter and chocolate are a powerhouse combo, so they pair perfectly with a nice tall glass of cold milk. Honestly, they don’t need much else to shine!
If you are setting up a dessert spread, you can offer some contrast by pairing them with fruitier or tangier things. I always lay mine out next to some of my easy non-alcoholic holiday punch. It cools everything down nicely! And hey, if you want to see another cute variation perfect for Valentine’s, you absolutely have to check out these adorable strawberry kiss cookies!
Frequently Asked Questions About Kiss Cookies
Since these are such **classic cookie recipes**, folks often have a few questions pop up when they first try making them, especially around the holidays! I want to make sure you get that perfect soft center and beautifully set chocolate top every time, so here are the answers to the questions I get asked most often about these treats.
Can I use crunchy peanut butter in these Kiss Cookies?
You absolutely *can*, but I wouldn’t recommend it if you’re going for that perfectly smooth, **soft baked cookie** texture. Crunchy peanut butter will throw off the balance of the dough a little bit because the nut pieces take up space where the smooth fat should be. Plus, it interrupts that lovely, even crackle you get on the surface. For the best, most consistent results, especially when working with a recipe meant to be a **holiday baking essential**, stick to creamy every single time!
What is the best way to store Peanut Butter Blossoms?
The key here is keeping them cool relative to the chocolate. Store your cooled **Peanut Butter Blossoms** in a single layer, or with a thin piece of wax paper between layers, inside a truly airtight container. If your kitchen is warm, or if you live somewhere humid, the chocolate kiss can get soft and get messy on your fingers or, worse, stick to the cookie underneath it. Keep them at cool room temperature, and they should stay perfect for eating for about four days!
Why are my cookies spreading too much?
This is almost always about temperature, honey. If your butter and peanut butter mixture is too warm when you roll the dough balls, they melt too fast in the oven, causing them to flatten out before they can set. Make sure that initial creamed mixture is just soft, not greasy or shiny. Also, check your oven temperature with an oven thermometer! If your oven is running cool, the cookies sit around too long before baking starts, leading to excess spreading. Remember, we want them to bake quickly for that chewy center.
Estimated Nutritional Data for These Classic Kiss Cookies
Now, I always tell folks that when we’re baking from scratch and loading up on peanut butter and real butter, we aren’t exactly aiming for a health food, right? These are meant to be enjoyed as a special treat, usually during the holidays or when you absolutely need a comforting bite of home. They bring so much joy, and sometimes that’s better than counting every calorie!
That said, I ran the numbers based on the recipe measurements we used here for our **classic Kiss Cookies**. Please remember this is just an estimate because the exact size of your cookies and even the brand of chocolate kiss can change things slightly down to the gram. But this gives a good baseline for enjoying a couple of these wonderful **chocolate topped cookies**!
- Serving Size: 1 cookie
- Calories: 150
- Sugar: 12g
- Fat: 8g
- Saturated Fat: 4g
- Carbohydrates: 18g
- Protein: 3g
- Sodium: 85mg
- Cholesterol: 25mg
If you’re cutting back on sweetness, remember that even a small reduction in the sugars used in the dough will shift these numbers quite a bit, but honestly, I urge you to bake it the way it’s written first—it’s the perfect balance for that signature soft texture!
Share Your Favorite Kiss Cookies Creations
Now that you have baked these incredible **kiss cookies**, I would absolutely love to see how they turned out! Seriously, knowing I helped bring a little bit of that sweet, nostalgic joy to your kitchen makes all the testing and perfecting completely worth it.
Did you let your kids press the kisses in? Did you use them on your holiday platter or maybe even for a Valentine’s treat? Don’t be shy! Please scroll down and leave a star rating for the recipe—it tells me what’s working best for everyone. More than that, though, leave a comment below and share a little story about your batch.
If you run into any snags or have a tweak that you think is genius, I want to hear about it! We’re all learning together here in the Cookin’ Corner family. If you ever need to send me a picture or just want to ask a follow-up question that didn’t make it into the FAQ, feel free to reach out via my contact page. Happy baking, and thank you for trusting me with your kitchen!
PrintClassic Peanut Butter Kiss Cookies (Soft & Chewy Blossoms)
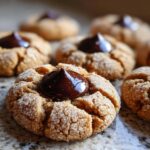
Make the classic Peanut Butter Kiss Cookies, also known as Peanut Butter Blossoms. These soft and chewy peanut butter cookies feature a crackled top and are finished with a milk chocolate kiss, making them a perfect holiday baking essential.
- Prep Time: 15 min
- Cook Time: 10 min
- Total Time: 25 min
- Yield: About 4 dozen cookies 1x
- Category: Dessert
- Method: Baking
- Cuisine: American
- Diet: Vegetarian
Ingredients
- 1 cup unsalted butter, softened
- 3/4 cup creamy peanut butter
- 3/4 cup granulated sugar
- 3/4 cup packed light brown sugar
- 2 large eggs
- 1 teaspoon vanilla extract
- 2 1/4 cups all-purpose flour
- 1 teaspoon baking soda
- 1/2 teaspoon salt
- 1/2 cup granulated sugar, for rolling
- About 48 milk chocolate kisses (like Hershey’s Kisses), unwrapped
Instructions
- Preheat your oven to 375 degrees Fahrenheit. Line baking sheets with parchment paper.
- In a large bowl, cream together the softened butter, peanut butter, granulated sugar, and brown sugar until the mixture is light and fluffy.
- Beat in the eggs one at a time, then mix in the vanilla extract.
- In a separate medium bowl, whisk together the flour, baking soda, and salt. Gradually add the dry ingredients to the wet ingredients, mixing on low speed until just combined. Do not overmix the dough.
- Pour the remaining 1/2 cup of granulated sugar into a shallow dish.
- Roll the cookie dough into balls, about 1 inch in diameter. Roll each ball thoroughly in the sugar until it is completely coated.
- Place the sugared dough balls about 2 inches apart on the prepared baking sheets.
- Bake for 8 to 10 minutes, or until the edges are set but the centers are still slightly soft. The cookies will crackle on top as they bake.
- Immediately upon removing the cookies from the oven, gently press one unwrapped chocolate kiss into the center of each warm cookie. The heat of the cookie will soften the chocolate slightly.
- Let the cookies cool on the baking sheet for 5 minutes before transferring them to a wire rack to cool completely.
Notes
- For the best texture, do not chill the cookie dough before baking; these are quick cookies.
- If the chocolate kisses seem too hard to press in after cooling slightly, return the cookies to the warm oven for 1 minute to soften the chocolate base before pressing.
- These are a family favorite recipe and excellent for cookie exchanges.
Nutrition
- Serving Size: 1 cookie
- Calories: 150
- Sugar: 12
- Sodium: 85
- Fat: 8
- Saturated Fat: 4
- Unsaturated Fat: 4
- Trans Fat: 0
- Carbohydrates: 18
- Fiber: 1
- Protein: 3
- Cholesterol: 25