

Some of the best memories made around my table involve something simple, handheld, and completely loaded with cheese and salt. Seriously, nothing beats gathering around for a big game or a family party with a platter of piping hot potato skins. Not long ago, I was always disappointed because my homemade versions felt soft, not crunchy like the ones I remember from casual get-togethers back home. Not anymore! I finally cracked the code, and I’m so excited to share The Ultimate Crispy Loaded Potato Skins Recipe (Game Day Ready) with you. Trust me, like all the best comfort foods that feel like home, these take patience, but they are worth every second. We’re focusing entirely on getting that satisfying, restaurant-quality crispiness that makes these the best party snacks. If you’re looking for other simple crowd-pleasers, check out some of my favorites for easy dinner ideas too!
- Why These Are The Best Potato Skins You Will Ever Make
- Gathering Ingredients for Classic Loaded Potato Skins
- Step-by-Step Instructions for Perfect Oven Baked Potato Skins
- Alternative Methods for Making Crispy Potato Skins
- Tips for Serving Your Homemade Potato Skins
- Storage and Reheating Instructions for Potato Skins
- Frequently Asked Questions About Potato Skins
- Understanding the Nutrition in Your Potato Skins
- Share Your Game Day Appetizer Success
Why These Are The Best Potato Skins You Will Ever Make
I know everyone claims their recipe is the best—I say that too sometimes—but when it comes to these Loaded Potato Skins, I truly mean it. They have that amazing, sturdy crunch you expect from the best pub style potato skins. They are simple, but they feel absolutely indulgent!
- They achieve that perfect crunchy, golden edge
- Seriously gooey, melted cheddar cheese pockets
- They are surprisingly quick to assemble once the potatoes are baked
If you are into getting great results without too much fuss on a busy night, stay right here! You can find more of my reliable, tried-and-true recipes whenever you have a craving for quick and easy recipes.
Achieving Maximum Crispiness in Potato Skins
The secret weapon for truly Crispy Potato Skins isn’t fancy ingredients; it’s just patience and technique. You have to start right. First, make sure we prick those Russets all over before they go into the oven. That lets the steam escape so they cook evenly and don’t explode—oops! After they bake, you absolutely must let them cool a little bit before scooping. That slight cooling helps set the structure.
The real magic happens in the double bake. Once scooped and oiled up, that first 10-minute bake (before we add the cheese) is non-negotiable. It dehydrates the shell just enough. When you brush them lightly with olive oil before that first crisping session, you’re essentially giving the outside a protective, crisp little coat before they head back in for their cheesy reward.
Gathering Ingredients for Classic Loaded Potato Skins
You don’t need a huge grocery haul for these, which is why they make such a fantastic last-minute savory bite! We are sticking close to the basics because when you nail the texture, you don’t need a ton of bells and whistles. You’ll need four large Russet potatoes—they give you the best sturdy shells for all that loading later on!
Here is what you need to pull together these incredible Cheesy Potato Skins:
- 4 large Russet potatoes
- 2 tablespoons olive oil
- 1/2 teaspoon salt and 1/4 teaspoon black pepper
- 1 cup shredded sharp cheddar cheese (get the sharp kind!)
- 8 slices bacon, cooked and crumbled up real small
- 1/2 cup sour cream
- 2 tablespoons chopped fresh green onions for color
Ingredient Substitutions and Notes for Your Potato Skins
Now, this recipe list is fantastic, but sometimes we have to work with what’s in the fridge, right? If you aren’t big on bacon, I mentioned in my notes that you can totally swap in turkey bacon or skip it entirely for a vegetarian version. If you go that route, you are left with perfectly Gooey Cheese Snacks!
For the cheese, sharp cheddar melts beautifully and gives the best flavor punch against the potato. If you only have Monterey Jack or even Colby, go for it! Just remember if you are trying to keep this one vegetarian, make sure your bacon bits are plant-based or just skip them altogether. These hold up great as vegetarian appetizers!

Step-by-Step Instructions for Perfect Oven Baked Potato Skins
Alright, let’s get these potatoes cooked! First things first: preheat that oven up to 400 degrees. You want those Russets to get tender all the way through. Give them a good scrub—you’re eating the skin, so wash off any last bits of dirt! Prick them all over with a fork. This is important so that the steam can escape while they bake; otherwise, you might have a potato explosion, and nobody wants to clean that up!
Toss them right onto the oven rack. They need a solid 50 to 60 minutes, depending on how big they are. Once they feel firm when you poke them, pull them out. Let them cool down a bit so you don’t burn your fingers! Now, don’t forget to change the oven temp down to 375 degrees for the next step. This initial bake is the foundation, so don’t rush it!
Preparing the Potato Shells for Crispy Potato Skins
Once the potatoes are cool enough to handle—warm, not piping hot—slice them right down the middle lengthwise. This next part takes a steady hand! You need to gently scoop out most of that fluffy interior flesh, but stop when you’ve left yourself about a 1/4-inch thick shell around the edges. You want these shells nice and strong!
Now, that scooped-out potato? Don’t you dare waste it! That makes the best base for mashed potatoes later, or maybe a creamy potato casserole that would pair perfectly with your loaded casserole! Back to the skins: brush the inside and outside lightly with olive oil and sprinkle everything with salt and pepper. Slide them back onto that baking sheet, cut-side up, and bake them for 10 minutes. This drying-out phase is non-negotiable for those Crispy Potato Skins!
Loading and Finishing Your Cheesy Potato Skins
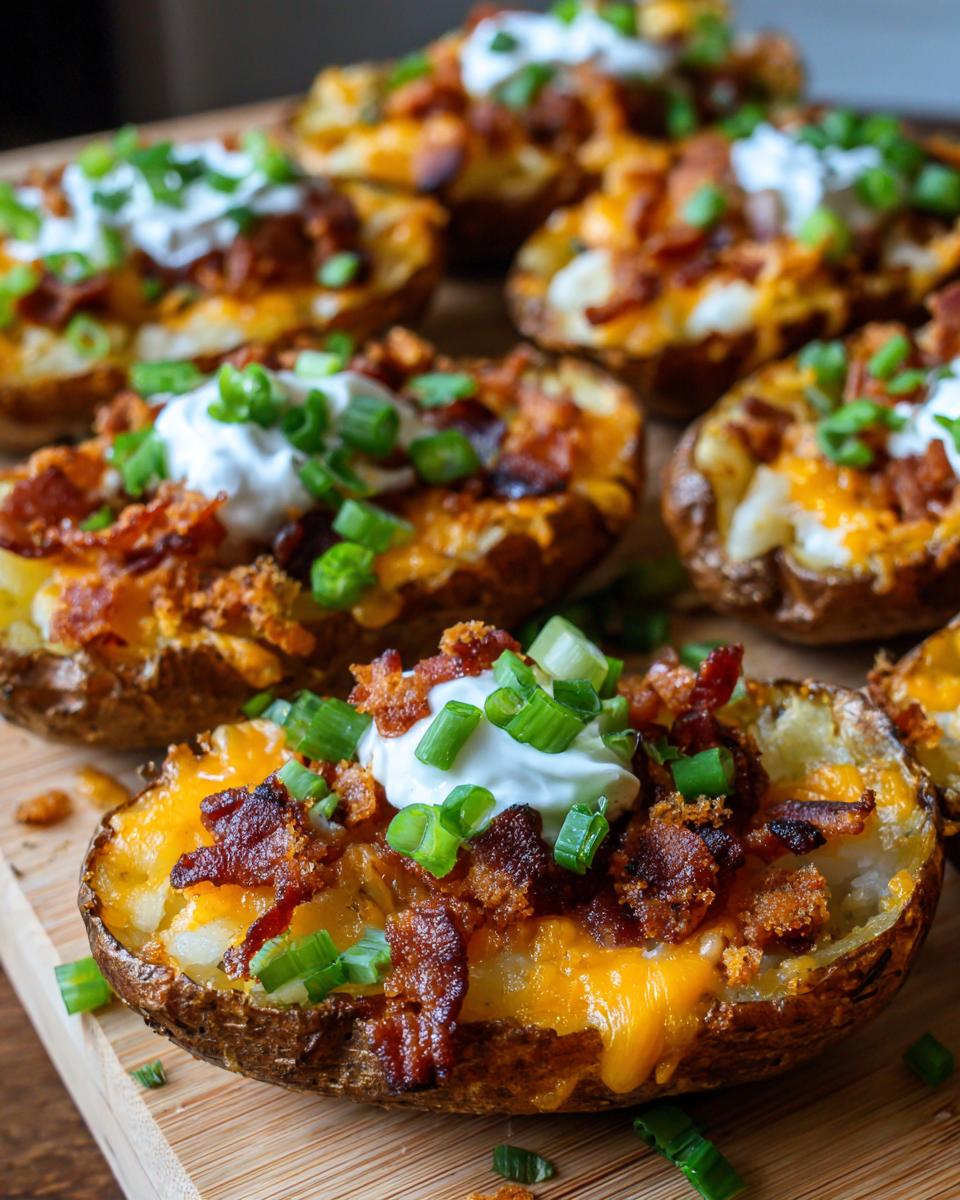
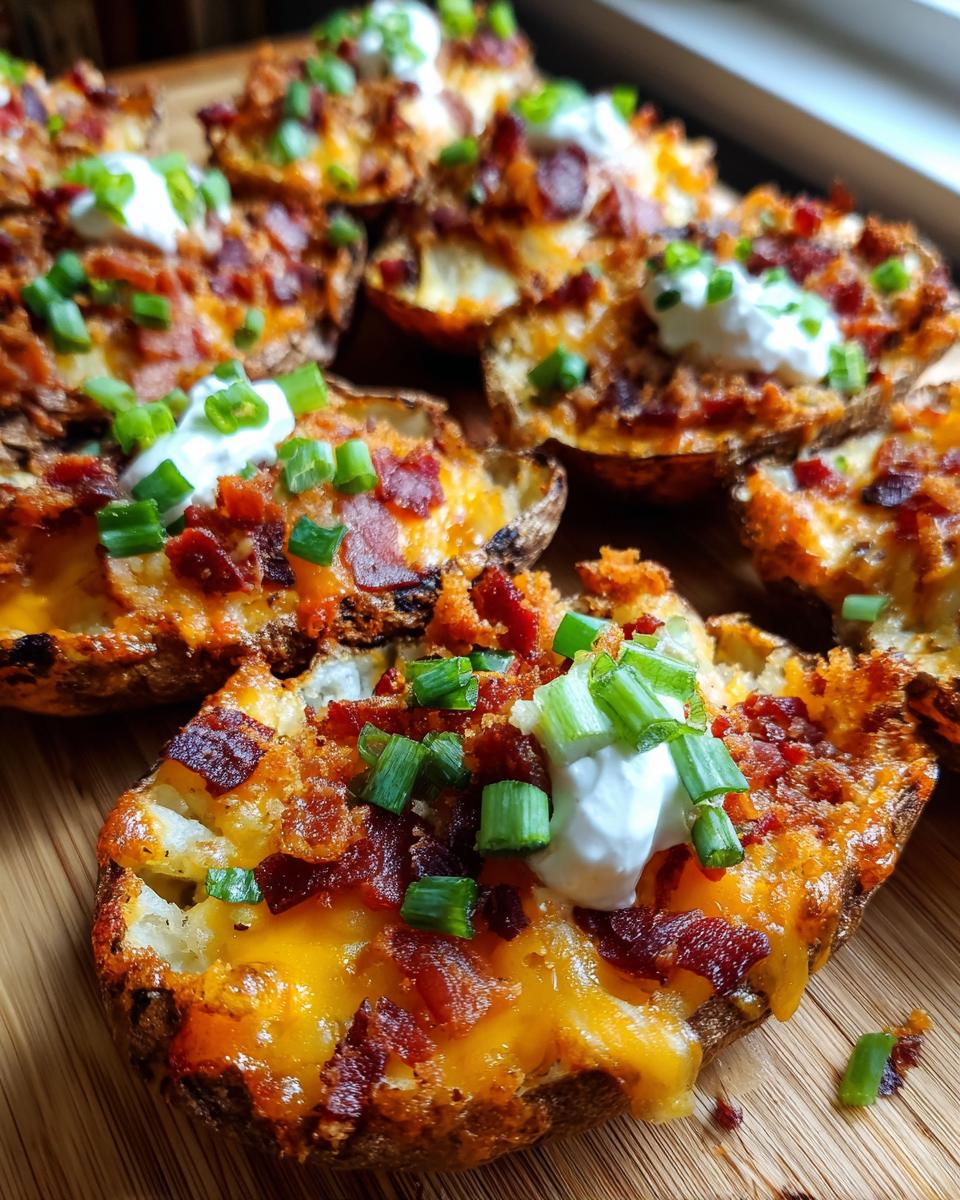
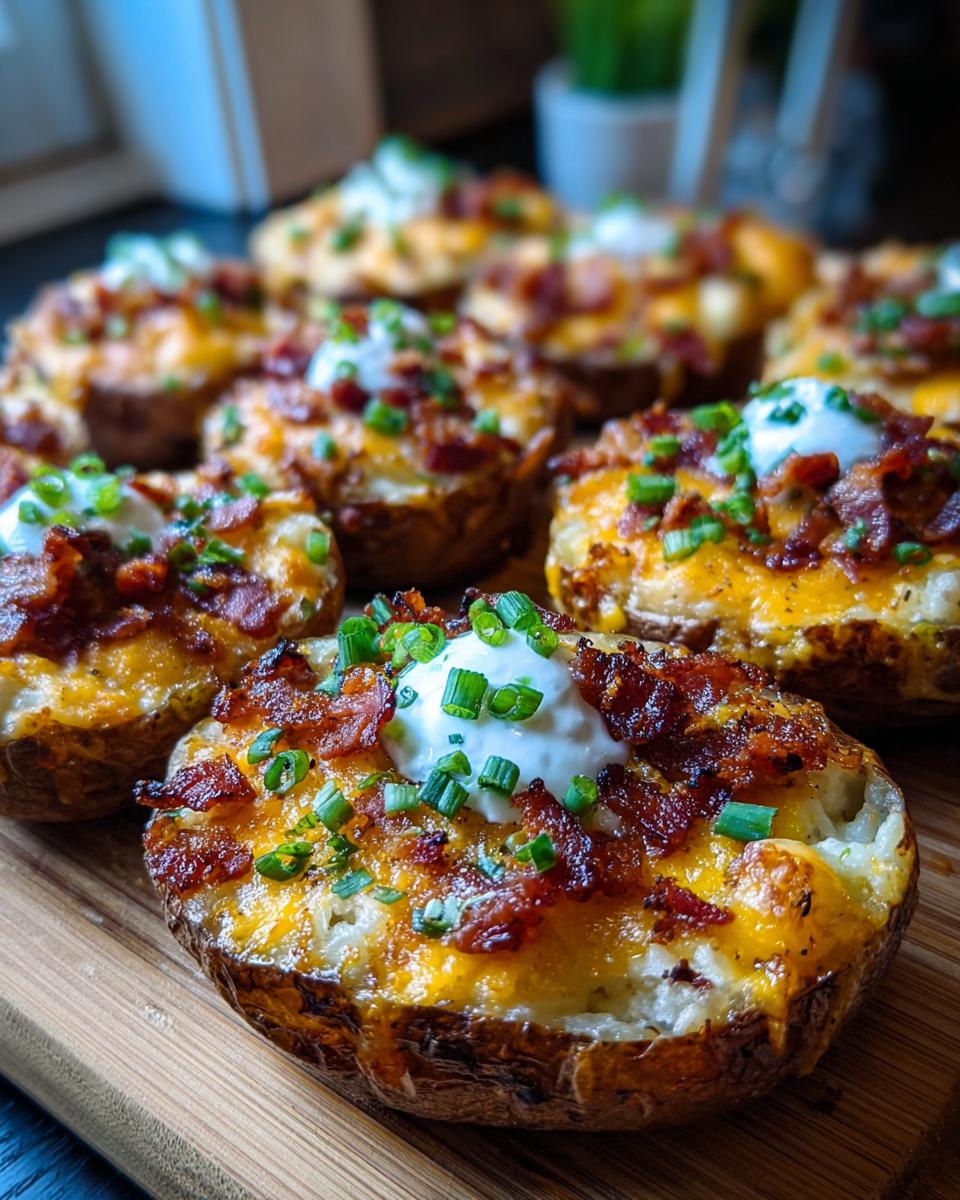
After that first blast in the oven helps dry things out, pull those shells out. Now for the best part: loading them up! Start by sprinkling the inside generously with that sharp shredded cheddar cheese. Don’t be shy here; this is what makes them truly Cheesy Potato Skins. Then, sprinkle on your crumbled bacon.
Back into the 375-degree oven they go for another 8 to 10 minutes. You are waiting until that cheese is totally melted, gooey, and maybe just starting to get those little golden brown bubbles around the edges. When they come out looking perfect, let them cool just for a minute so they don’t melt the toppings right away. Finish them with a dollop of cool sour cream and a sprinkle of those bright green onions right before you serve them warm!
Alternative Methods for Making Crispy Potato Skins
While my heart belongs to the reliable oven for creating the best Oven Baked Potato Skins, I know that sometimes the clock is ticking, especially when you’re hustling to get those Game Day Appetizers out before kickoff!
If you happen to grab your air fryer, you can certainly use it for the final step. The air fryer is fantastic for really blasting the heat onto those fillings quickly after you’ve already baked the potatoes. After you scoop and oil your shells, you can skip that first 10-minute oven bake and go straight to filling them.
Load them up with cheese and bacon as usual. Then, pop them into your air fryer basket. Set the temperature to 375 degrees Fahrenheit. They usually only need about 5 to 7 minutes to get that cheese melted and bubbly. It’s a super fast way to finish them up, though I still think the traditional oven method gives you a slightly more even overall crisp on the shell itself. If you love quick cooking tricks, you should check out my air fryer potato wedges recipe for some other easy ideas!
Tips for Serving Your Homemade Potato Skins
Once your Cheesy Potato Skins come out smelling amazing, you want to serve them right away while they are hot and the cheese is protesting wonderfully. Presentation is everything when they are Party Snacks!
I often pile them high on a big wooden board and put the sour cream and onions in cute little bowls right next to the platter. They are delicious all by themselves, but they make a fantastic partner for something hearty. I find they are the absolute perfect side item for a chilly evening when paired with my high-protein chili recipe. Who needs a boring dinner roll when you can have crispy, cheesy potato shells?
Storage and Reheating Instructions for Potato Skins
It’s tempting to eat all eight halves in one sitting—trust me, I’ve tried! But if you happen to have leftovers from your Game Day Appetizers, storing them is simple. Once they are completely cool, place any unused potato skins in an airtight container. You can keep them happily chilling in the fridge for about two or three days.
The trick is reheating them. Please, please, please skip the microwave if you want to keep that beautiful crisp! The microwave just steams everything and turns them sad. To bring back that glorious crunch, spread them out on a baking sheet and pop them back into a 375-degree oven for about 8 to 10 minutes. They’ll be hot, crispy, and ready again in no time!
Frequently Asked Questions About Potato Skins
I get so many messages asking for little clarifications on these recipes, and I totally get it! When you’re making something for a big crowd, you want it perfect. These Stuffed Potato Skins are a classic, so let’s make sure you nail the details every time. If you’re digging these ideas, remember I have a whole list of easy appetizer ideas that are just as satisfying!
Can I make the potato skins ahead of time?
Yes, you can absolutely prep ahead, which is a lifesaver on game day! Here’s what I do: Bake the potatoes completely, scoop out the insides, oil them, and that’s where I stop. Place the empty shells on a baking sheet, cover them loosely with wrap, and pop them in the fridge. Then, right before the guests arrive, you can proceed with the double-bake steps—that first short bake to dry them out, then load them up with cheese and bacon before the final melt.
What is the secret to truly crispy potato skins?
Honestly, if you take one thing away from this whole post, let it be the double-bake! That’s the difference between a slightly mushy shell waiting for Savory Bites and a truly crunchy vessel. You need that initial 10 minutes uncovered at 375 degrees after you oil them but *before* you add the cheese and bacon. This essential first step evaporates moisture trapped in the skin, ensuring you get that perfect, crunchy texture that mimics what you get in the best restaurants.
Understanding the Nutrition in Your Potato Skins
I know some of you are watching what you eat, and that’s fair! Even though these are pure comfort food, it’s good to know what you’re diving into. Based on this recipe serving size of two halves, you’re looking at around 310 calories per serving. It’s got about 20 grams of fat, 25 grams of carbs, and a solid chunk of protein at 10 grams.
Just remember, these are estimates I pulled together because of all that delicious filling! If you go heavy on the bacon or use extra cheese, these numbers will creep up a bit, but that’s part of the fun with these Comfort Food Recipes!
Share Your Game Day Appetizer Success
Alright, my friends, now it’s your turn! I truly hope these Loaded Potato Skins become a fixture at your house for football season or any time you need a delicious, gooey cheese snack. If you make them, please come back and leave a rating and tell me all about it in the comments. I love hearing what you think! If you happen to snap a photo of your platter piled high, send it over through my contact page—I’d be thrilled to see your amazing Party Food!
PrintThe Ultimate Crispy Loaded Potato Skins Recipe (Game Day Ready)

Make restaurant-style potato skins at home. This recipe focuses on techniques to achieve perfectly crispy potato shells, loaded with cheddar cheese, bacon, and classic toppings for the best game day appetizer.
- Prep Time: 20 min
- Cook Time: 70 min
- Total Time: 90 min
- Yield: 8 servings 1x
- Category: Appetizer
- Method: Baking
- Cuisine: American
- Diet: Vegetarian
Ingredients
- 4 large Russet potatoes
- 2 tablespoons olive oil
- 1/2 teaspoon salt
- 1/4 teaspoon black pepper
- 1 cup shredded sharp cheddar cheese
- 8 slices bacon, cooked and crumbled
- 1/2 cup sour cream
- 2 tablespoons chopped fresh green onions
Instructions
- Preheat your oven to 400 degrees Fahrenheit. Scrub the potatoes clean and prick them several times with a fork.
- Bake the potatoes directly on the oven rack for 50 to 60 minutes, or until the skins are firm and the insides are tender.
- Remove the potatoes from the oven and let them cool until you can handle them safely. Reduce the oven temperature to 375 degrees Fahrenheit.
- Slice each potato in half lengthwise. Carefully scoop out most of the inside potato flesh, leaving about a 1/4-inch thick shell. Save the scooped potato for another use, like mashed potatoes.
- Brush the inside and outside of each potato skin shell lightly with olive oil. Sprinkle the shells with salt and pepper.
- Place the skins cut-side up on a baking sheet. Bake for 10 minutes to start drying them out and crisping the edges.
- Remove the skins from the oven. Fill each shell generously with shredded cheddar cheese and crumbled bacon.
- Return the loaded potato skins to the oven and bake for another 8 to 10 minutes, until the cheese is melted and bubbly.
- Remove from the oven and let them cool slightly. Top each skin with a dollop of sour cream and a sprinkle of fresh green onions before serving warm.
Notes
- For extra crispy potato skins, after scooping the flesh, you can brush the shells again with a little more oil and bake them for 15 minutes before adding the fillings.
- You can substitute turkey bacon or skip the bacon entirely for a vegetarian option.
- If you own an air fryer, you can cook the filled skins at 375 degrees Fahrenheit for 5 to 7 minutes for a very quick crisp.
Nutrition
- Serving Size: 2 halves
- Calories: 310
- Sugar: 2
- Sodium: 350
- Fat: 20
- Saturated Fat: 10
- Unsaturated Fat: 10
- Trans Fat: 0
- Carbohydrates: 25
- Fiber: 3
- Protein: 10
- Cholesterol: 45