
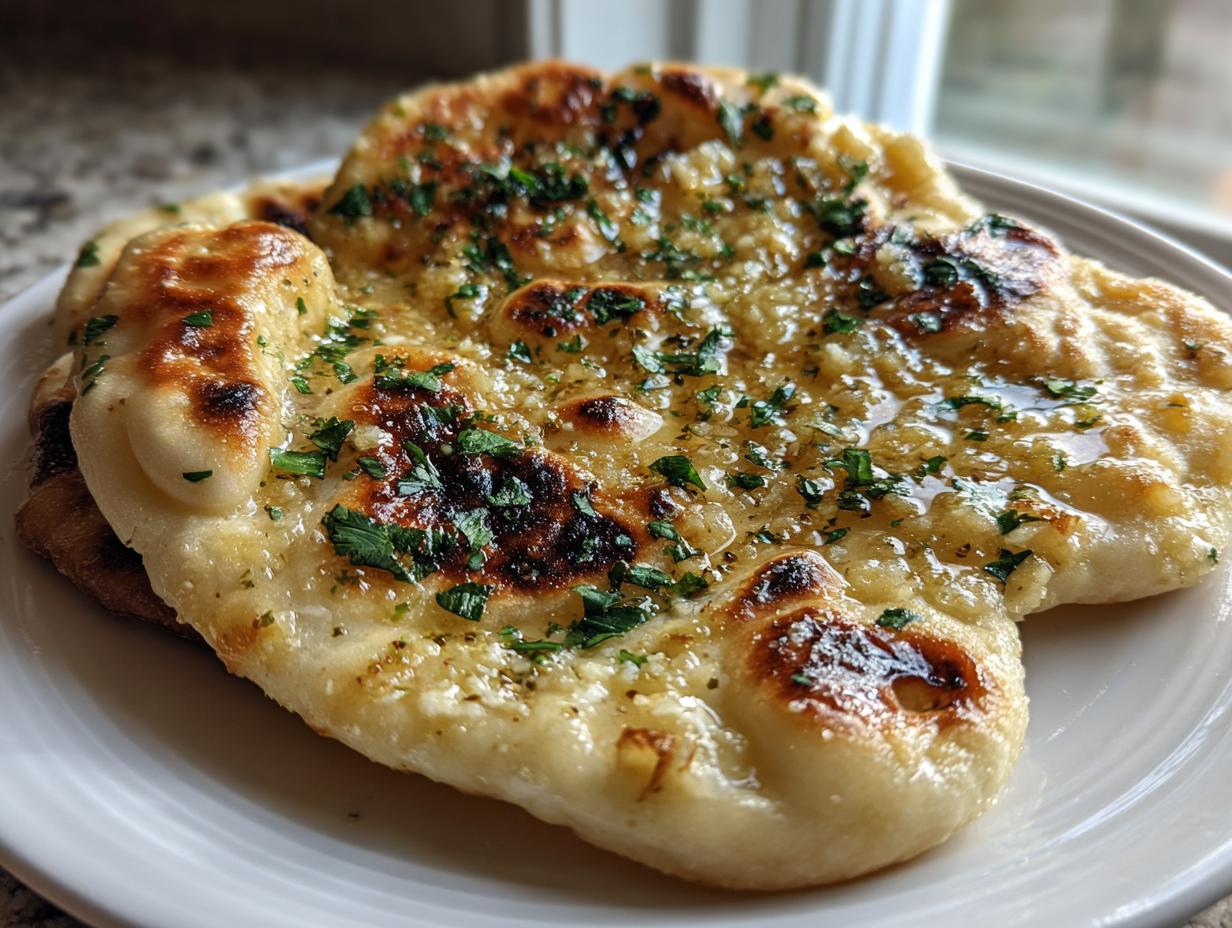
Oh, you know that feeling, right? You’re settling in with a big bowl of curry and all you can think about is ripping off a piece of warm, pillowy bread to scoop up every last drop. Forget dipping into plastic bags of stale stuff from the store! I am here to tell you that bringing that incredible, stretchy, soft, fluffy **naan bread** right into your own kitchen is so much easier than you think. This is my go-to, quick skillet recipe that skips the scary-sounding tandoor oven entirely. For me, perfecting this bread is about keeping that sense of comfort and heritage alive right where I cook? That’s the whole reason Cookin’ Corner exists, you can read more about why we cherish these traditions right here. Trust me, this homemade version wins every single time!
- Why This Easy Skillet Naan Bread Recipe Works
- Ingredients for the Best Garlic Naan Bread
- How to Prepare Your Homemade Naan Recipe Dough
- Skillet Naan Recipe: Cooking Your Soft Flatbread At Home
- Variations: Making Butter Naan Recipe or Plain Naan Bread
- Tips for Success with Your Indian Flatbread Recipe
- Serving Suggestions for This Naan Bread
- Frequently Asked Questions About Making Naan Bread
- Estimated Nutritional Data for This Naan Bread
Why This Easy Skillet Naan Bread Recipe Works
Honestly, the best part of this recipe is that you get that restaurant-quality pull and chew without needing a giant, roaring tandoor oven! We aren’t messing around with hard techniques here. This **naan bread** is designed for your regular stovetop, making it the perfect **Soft Flatbread At Home**. I know people think making **No Tandoor Bread** means sacrificing texture, but they haven’t tried this magic yet. It comes together fast enough for a weeknight dinner, too, which is essential for my busy life.
Achieving Pillowy Soft Naan Bread Texture
The secret sauce to getting that beautiful, **Pillowy Soft Bread** is twofold. First, the yogurt! That nice tang wakes up the gluten when you mix it. Second, you absolutely have to knead it properly—don’t skimp on those 5 to 7 minutes! Kneading develops the structure that gives you that ideal chewiness when the heat hits it. That’s how you get that incredible stretch in your **naan bread**.
Quick Bread Making with Simple Ingredients Bread
If time is tight, this is for you. It falls squarely into the category of **Easy Bread Recipes** because we rely on yeast and warm water to get things moving quickly. We aren’t talking about a three-day sourdough project here! Everything in this recipe uses **Simple Ingredients Bread** staples you probably already have hanging around—flour, yeast, and some yogurt. You stir it together, let it puff up for an hour or so, and boom, you are ready to cook. For those who want to skip yeast entirely, I’ve seen some interesting things people do, like checking out this yeast-free option, but I prefer the traditional rise for the best final texture on this **naan bread**.
Ingredients for the Best Garlic Naan Bread
When we are making **naan bread**, precision matters, especially because this is the foundation for that amazing **Garlic Naan Bread** flavor we all love! You don’t need anything fancy, just good quality basics mixed together right. I always lay out everything before I even start warming the water. It helps keep my mind calm, which, let’s be honest, is half the battle when baking!
Here is exactly what you need for one batch of this fantastic flatbread:
- 1 1/2 cups all-purpose flour (no need for fancy stuff here!)
- 1 teaspoon active dry yeast
- 1 teaspoon sugar (just a little snack for that yeast)
- 1/2 teaspoon salt
- 1/2 cup warm water? And I stress warm! It should be between 105–115°F. Too cold, and the yeast sleeps. Too hot, and you kill it!
- 1/4 cup plain yogurt (full-fat gives you the best richness, I find)
- 2 tablespoons olive oil, plus a little extra for oiling the bowl later
You can see more tips on getting the exact texture right over at this spot if you’re prepping your ingredients!
Components for the Garlic Butter Topping
This melted topping is what turns good **naan bread** into *great* **naan bread**. Don’t skip this part—it’s non-negotiable for that restaurant vibe!
- 2 tablespoons butter, melted until silky smooth
- 2 generous cloves garlic, minced up super fine
- 2 tablespoons fresh cilantro, chopped (make sure it’s fresh, or the flavor just isn’t the same!)
Mix those three things in a little bowl right after the naan comes off the heat. You want to brush it on while the bread is still sputtering hot!
How to Prepare Your Homemade Naan Recipe Dough
Okay, time for the fun part: making the dough for our **naan bread**! This is where you start building that essential chewiness. First thing, you need to wake up that yeast. Grab a bowl, dump in your warm water—remember, 105 to 115°F—and sprinkle in the sugar and the yeast. Give it a gentle stir and just leave it alone for about five to ten minutes. If it gets foamy and bubbly on top, you’re good to go! That yeast is happy and ready to party.
While that’s happening, mix your flour and salt in your big mixing bowl. Once the yeast looks frothy, pour it right into the dry stuff along with your yogurt and the olive oil. I usually mix it up with a spoon until it looks shaggy, like it’s barely holding itself together. Then, turn it all out onto a floured countertop. Now, for the effort part! You need to knead this **Homemade Naan Recipe** dough for a solid 5 to 7 minutes. Really push and fold it until it feels smooth and elastic—that develops the gluten structure we need for chewy flatbread!
Once it feels good, lightly oil whatever bowl you used, plop the dough in (give it a little spin so it gets coated), cover it up tight, and put it somewhere warm. If you look at our usage guidelines, we always mention sticking to the recipe’s recommended proofing times for best results!
The Rising Process for Fluffy Naan Bread
This is the waiting game, but it’s critical for **Fluffy Naan Bread**. You want to set this bowl of dough somewhere warm and let it chill out undisturbed for a full 60 to 90 minutes. It has to double in size! How do you know it’s ready? I always use my finger test: gently poke the dough. If the indent stays there and doesn’t immediately spring back, it means the little yeast beasts have done their job, and your dough is beautifully risen and ready for the next step.
Skillet Naan Recipe: Cooking Your Soft Flatbread At Home
Alright, the dough is ready, it’s all poofy, and now we get to the best part: the actual cooking! This is where the **naan bread** goes from being dough to becoming that impossibly light, chewy flatbread. You need high heat for this to work right, so let’s get that heavy-bottomed skillet—cast iron is my favorite, honestly—heating up over medium-high. The key here is that the pan needs to be totally **dry**; no oil, no butter, just pure heat.
As the pan gets screaming hot, you gently punch down that risen dough, toss it onto your counter to divide it into 6 equal pieces, and roll them into little balls. While they take a short rest, mix up your garlic butter topping since you’ll need it ready fast. Then, take one ball and roll it out to about 1/8 inch thick. Don’t make them gigantic; thinner pieces puff up better! I try to keep mine in that lovely oval or teardrop shape we see at restaurants.
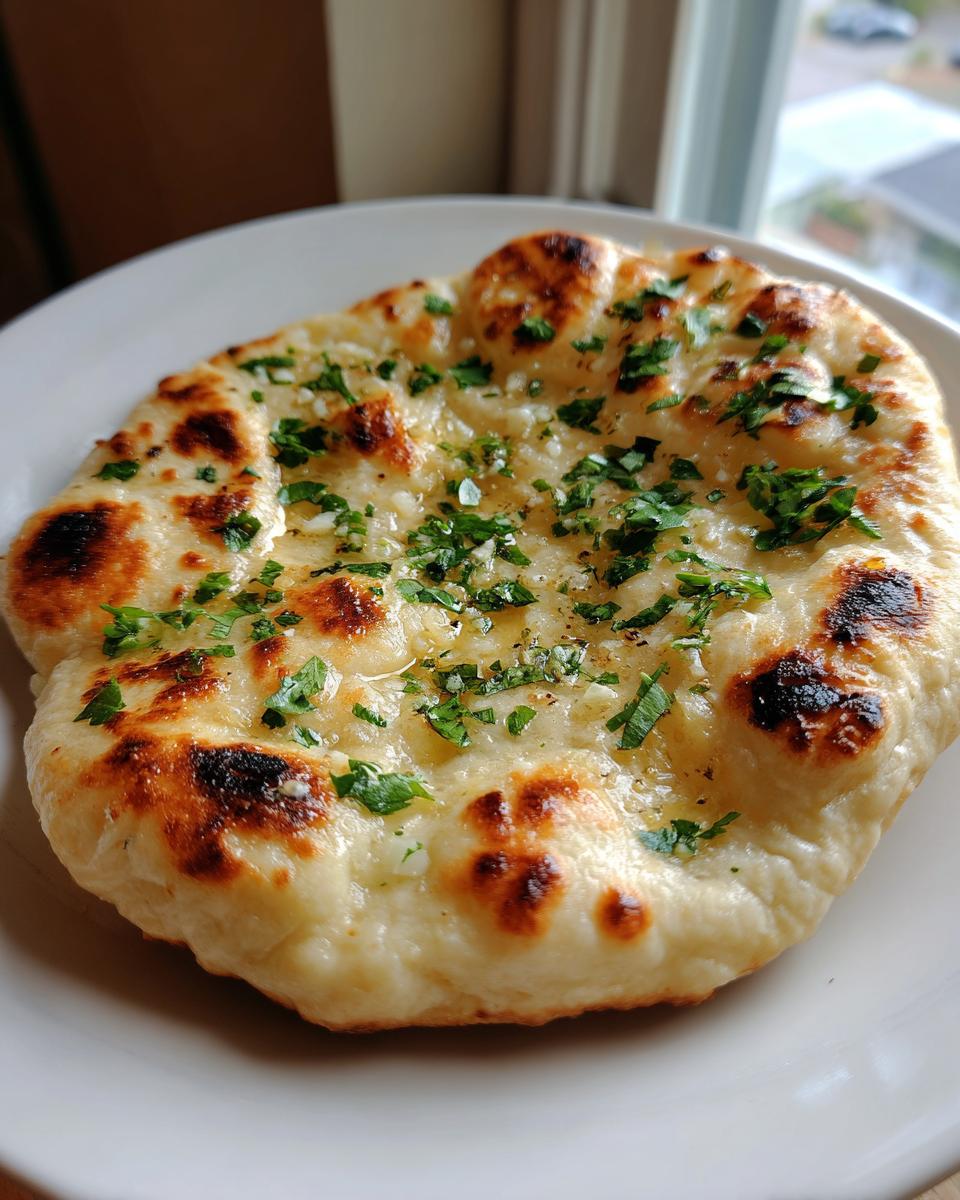
Seriously, watch the magic happen! Lay that thin piece onto the hot, dry skillet. You only need about 1 to 2 minutes on the first side. You’ll see big, beautiful bubbles start forming all over the top—that’s what you’re waiting for! When the bottom looks nicely spotted brown, carefully flip it over. The second side only needs about a minute. Because of that high heat, the whole thing should puff up wonderfully, just like magic! If you want to see how others get that perfect char, check out this great take on pan-cooked naan.

Shaping and Cooking Each Piece of Naan Bread
As soon as that second side looks golden, you have to work fast! Get that cooked **naan bread** off the skillet immediately. If you leave it sitting there, it will steam itself and lose that fresh, warm texture. The absolute next step, before anything else, is to brush it heavily with that melted garlic butter we mixed up. That coating melts right into all those hot air pockets we just made!
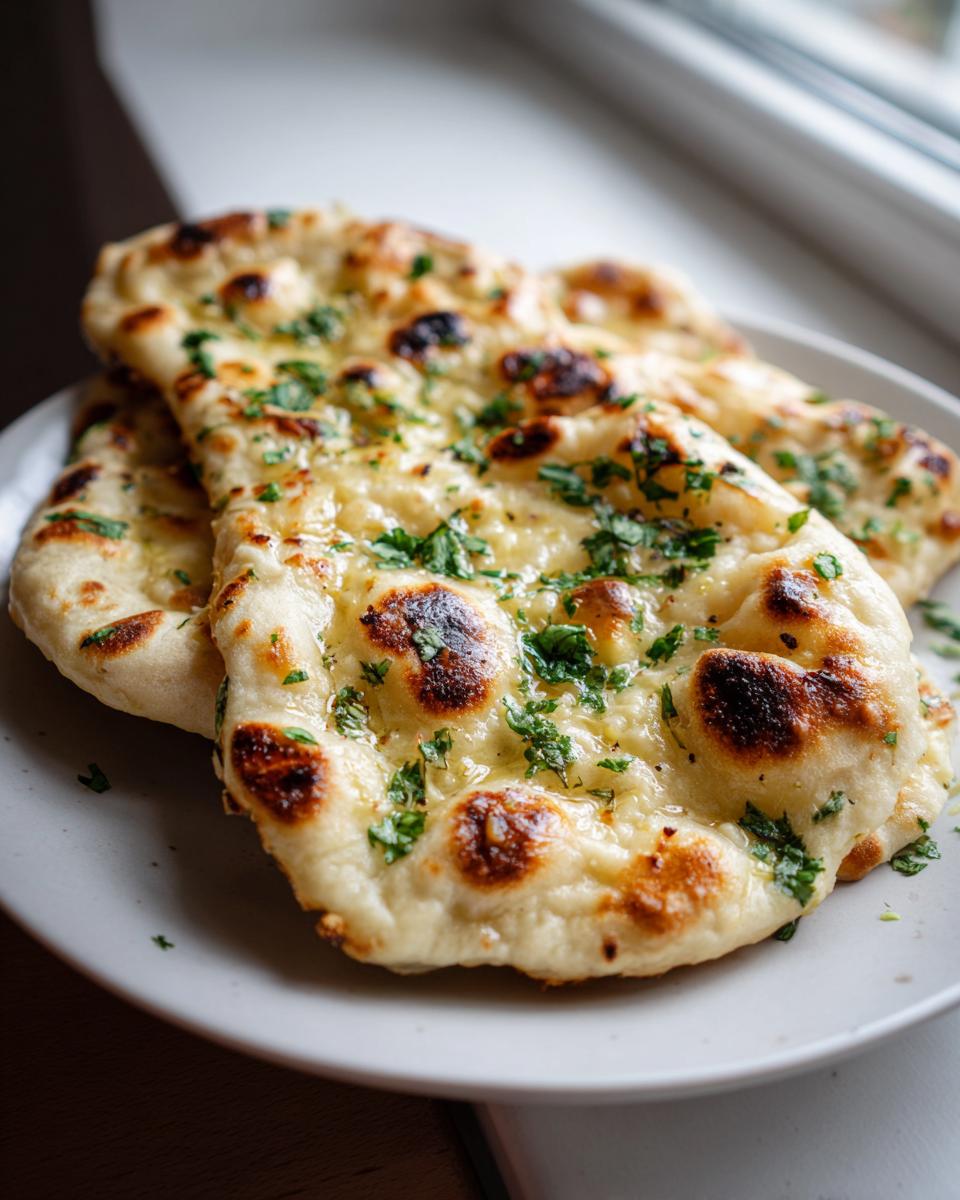
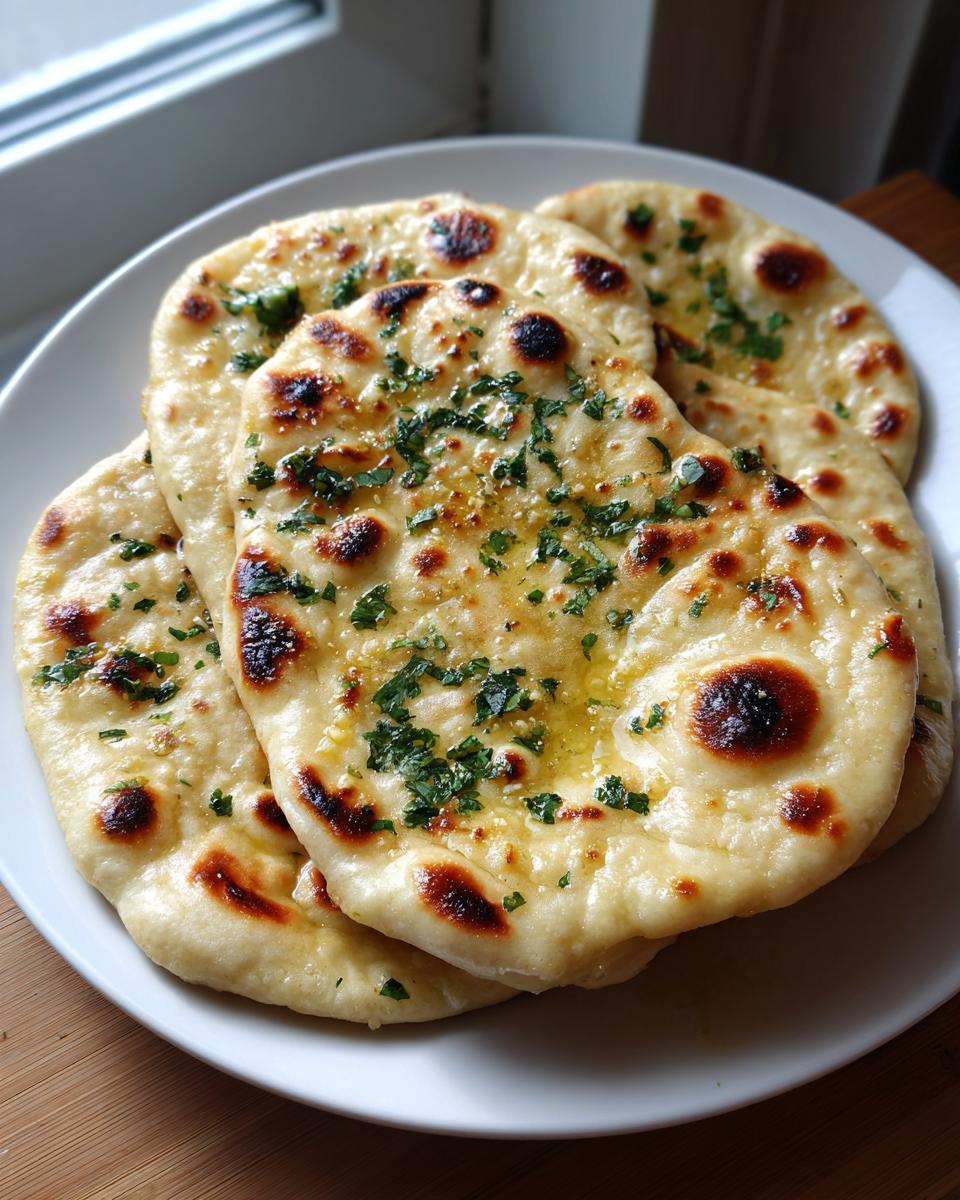
Stack your finished, brushed piece on a plate and cover the stack with a clean towel to keep them warm while you roll out and cook the next one. Consistency is everything: keep the thickness close to 1/8 inch for all the pieces, and remember, high heat means quick cooking times. You’ll be amazed at how fast you can whip out a full batch of **Soft Flatbread At Home** this way!
Variations: Making Butter Naan Recipe or Plain Naan Bread
Part of what I love so much about this **naan bread** recipe is how flexible it is! We are focusing on Garlic Naan Bread today because, well, who doesn’t love that intense flavor? But sometimes you need something simpler, maybe for a milder curry or if you just ran out of fresh garlic.
If you want to lean into a classic, plain, buttery flavor—your own perfect, soft **Butter Naan Recipe**—it’s super easy to switch gears right at the end. As I mentioned in the notes, you just skip mixing up that garlic and cilantro mixture completely. When the **naan bread** comes sizzling hot off the skillet, you brush it generously with plain melted butter instead. That’s it! It still gets those beautiful brown spots from the pan, and the yogurt in the base gives it a wonderful subtle tang that keeps it interesting even without the heavy garlic load. You can check out how other folks do a dedicated Butter Naan Recipe if you want to see classic approaches!
Need to keep it totally minimal? No problem! For truly plain **naan bread**, you can skip the topping entirely, though I really advise against it! Even a tiny brush of melted fat makes a difference in keeping the bread soft after it cools a bit. The point is, the dough itself is robust and delicious. Whether you’re making a big batch of garlic for friends or just keeping it plain for your picky eater at home, this **Indian Flatbread Recipe** delivers that soft, chewy texture we are aiming for every time you fire up that skillet.
Tips for Success with Your Indian Flatbread Recipe
Look, making **naan bread** is fun, but sometimes things don’t go perfectly the first time around, and that’s okay! That’s why I keep a little list of things Grandma taught me about dealing with dough, even when it’s feeling stubborn. These little tweaks help you build trust in your skills and ensure your **Indian Flatbread Recipe** turns out perfectly chewy every time. You want that soft, pillowy result without turning it into a hockey puck the next day, right?
If you want to make sure it’s *extra* special, I have a little trick regarding the yogurt. The recipe calls for plain yogurt, but if you want to guarantee that truly luxurious, soft texture, try swapping it out for Greek yogurt! It’s thicker and has a little more fat, which keeps the **naan bread** incredibly tender, almost melting in your mouth. I learned about that little swap from someone sharing their wisdom just like we are here at this handy cooking resource. It’s a small change that makes a huge first impression on the final softness.
Another thing people sometimes mess up is handling the dough temperature *after* it rises. Once you punch it down, don’t let the little dough balls sit out uncovered for too long while you roll the others. If they dry out on the edges, you’ll end up with tough spots on your finished **flatbread** that just won’t bubble up right when they hit that hot skillet.
Storage & Reheating Instructions for Naan Bread
So, what if you actually managed to have leftover **naan bread**? (That’s rare in my house, honestly!) You need to treat it nicely so it stays soft. Don’t just leave it on the counter in a loose pile; it will go stale instantly. Stack the cooled pieces neatly and tuck them into an airtight container or a zip-top bag. That traps the little bit of moisture left inside, keeping them nice for at least a day or two.
When you are ready to eat them again, you *must* reheat them to bring back that fresh-from-the-skillet feeling. Microwaving is fast, but it can make the **yogurt bread recipe** a bit tough if you overdo it. My favorite way is to toss it back into that hot, dry skillet for about 30 seconds per side until it’s warm through. If you don’t have a skillet handy, wrap the naan tightly in foil and pop it into a 350°F oven for about five minutes—that steams it just enough to soften it right back up!
Remember, this **Homemade Naan Recipe** is meant to be eaten fresh, but storing it right means you get the second-day leftovers are still fantastic!
Serving Suggestions for This Naan Bread
Now that you’ve mastered making the most tender **naan bread** possible on your stovetop, the real question is: what are you going to eat it with? This **Yogurt Bread Recipe** is designed to be the ultimate scoop, swipe, and wrap vehicle for all your favorite meals. If you made the Garlic Naan, it’s heavenly all on its own, but it truly shines when it acts as the perfect partner to rich, flavorful dishes.
Think of this as your essential **Side Dishes for Curry** night staple. It soaks up sauce like nothing else! You obviously need a creamy Tikka Masala or a hearty lentil Dal to justify all that buttery goodness. Seriously, serving this fresh, hot naan right alongside those dishes makes the meal feel instantly authentic, like you hired an Indian chef.
But don’t stop there! This soft flatbread is super versatile. It’s amazing just dipped into a simple bowl of homemade hummus—forget pita bread, the naan is chewier! I also love laying a piece on a plate and piling on leftover spiced pulled pork or shredded chicken the next day for an easy wrap. It feels a little bit like fusion food, but when the bread is this good, you really don’t need a strict recipe. Just grab a piece of that warm **naan bread**, tear it open, and start scooping!
Frequently Asked Questions About Making Naan Bread
When you’re diving into making **naan bread** at home, sometimes the little details trip people up. Don’t worry about it! I’ve collected the most common questions I get asked about this wonderful **Homemade Naan Recipe** to help smooth out your baking process. If you have more specific questions, feel free to reach out to us on the contact page!
Can I skip the yeast in this Homemade Naan Recipe?
That’s a great question, especially if you don’t keep yeast stocked! You absolutely can skip the yeast in this **Homemade Naan Recipe**, but you need to plan for the texture to change a bit. If you omit the yeast and the rising time, you would need to substitute it with about 1 teaspoon of baking powder mixed in with your dry ingredients. This will still result in a lift, but the bread won’t have that classic stretchy chewiness that comes from the yeast activation. It leans more toward a standard **Yogurt Bread Recipe** lift rather than authentic, bubbly **naan bread**.
What is the best pan for this Skillet Naan Recipe?
For the best results when making your **Skillet Naan Recipe**, the pan really matters for achieving those gorgeous dark, charred spots you see on restaurant-style naan. You want something that holds a lot of heat and distributes it evenly. My absolute top recommendation is a heavy-bottomed cast iron skillet. It gets screaming hot and keeps that high temperature even when you drop the cool dough onto it. A good stainless steel equivalent works too, but cast iron just transfers that heat better, giving you those lovely bubbles and slight char marks that make **naan bread** so delicious!
If you are looking for totally yeast-free options, some folks play around with other combinations, like this recipe using only two ingredients, which is a different texture altogether, but still delicious for a quick fix!
Estimated Nutritional Data for This Naan Bread
Now, I always keep things real around here—I’m a home cook, not a lab technician! So, take these numbers with a grain of salt, but usually, when I calculate things out, one piece of this wonderful **naan bread** comes out somewhere around here. It’s good to know what you are eating, especially when we are using all that butter and oil for flavor!
This information is based on the recipe yielding 6 servings, but remember, how thick you roll it or how much garlic butter you put on really changes things. These are just estimates to give you a ballpark idea of what you’re sitting down to enjoy!
- Calories: 210
- Fat: 5 grams
- Saturated Fat: 2 grams
- Trans Fat: 0 grams
- Carbohydrates: 36 grams
- Fiber: 1 gram
- Sugar: 2 grams
- Protein: 6 grams
- Cholesterol: 5 milligrams
This **Homemade Naan Recipe** is loaded with flavor, and honestly, knowing the macros is secondary to knowing how good it tastes scooped up with some spicy chickpeas, but I always try to lay it all out for you guys! Enjoy your fresh, chewy **flatbread**!
PrintEasy Skillet Garlic Naan Bread

Make soft, fluffy, restaurant-quality naan bread at home using a simple skillet method. This recipe uses basic ingredients like flour, yeast, and yogurt for a quick, chewy flatbread perfect for curries.
- Prep Time: 20 min
- Cook Time: 15 min
- Total Time: 1 hour 35 min
- Yield: 6 servings 1x
- Category: Side Dish
- Method: Skillet Cooking
- Cuisine: Indian
- Diet: Vegetarian
Ingredients
- 1 1/2 cups all-purpose flour
- 1 teaspoon active dry yeast
- 1 teaspoon sugar
- 1/2 teaspoon salt
- 1/2 cup warm water (about 105-115°F)
- 1/4 cup plain yogurt (full-fat recommended)
- 2 tablespoons olive oil, plus more for brushing
- 2 cloves garlic, minced
- 2 tablespoons fresh cilantro, chopped
- 2 tablespoons butter, melted (for brushing)
Instructions
- In a small bowl, combine the warm water, sugar, and yeast. Let it sit for 5 to 10 minutes until foamy.
- In a large bowl, whisk together the flour and salt.
- Add the yeast mixture, yogurt, and 2 tablespoons of olive oil to the dry ingredients. Mix until a shaggy dough forms.
- Turn the dough onto a lightly floured surface and knead for 5 to 7 minutes until the dough is smooth and elastic.
- Place the dough in a lightly oiled bowl, turning to coat. Cover the bowl with plastic wrap or a damp towel and let it rise in a warm place for 60 to 90 minutes, or until doubled in size.
- Gently punch down the risen dough and divide it into 6 equal pieces. Roll each piece into a ball.
- While the dough rests for 10 minutes, prepare the garlic butter: mix the melted butter, minced garlic, and chopped cilantro in a small bowl.
- Heat a heavy-bottomed skillet or cast-iron pan over medium-high heat. Do not add oil to the pan.
- Take one dough ball and roll it out into an oval or teardrop shape, about 1/8 inch thick.
- Place one piece of rolled dough onto the hot, dry skillet. Cook for 1 to 2 minutes until large bubbles form on the surface and the underside is lightly browned.
- Flip the naan and cook the second side for about 1 minute until golden spots appear. The bread should puff up.
- Remove the cooked naan from the skillet and immediately brush the top generously with the garlic butter mixture.
- Repeat with the remaining dough pieces, stacking the cooked naan and keeping them covered to stay warm.
Notes
- For softer naan, use Greek yogurt instead of regular plain yogurt.
- If you prefer plain naan, skip the garlic and cilantro mixture and brush with plain melted butter only.
- If you do not have yeast, you can substitute with 1 teaspoon baking powder and omit the rising time, though the texture will be slightly less chewy.
- If you want to make Butter Naan, simply brush with melted butter after cooking and skip the garlic and cilantro.
Nutrition
- Serving Size: 1 piece
- Calories: 210
- Sugar: 2
- Sodium: 350
- Fat: 5
- Saturated Fat: 2
- Unsaturated Fat: 3
- Trans Fat: 0
- Carbohydrates: 36
- Fiber: 1
- Protein: 6
- Cholesterol: 5