
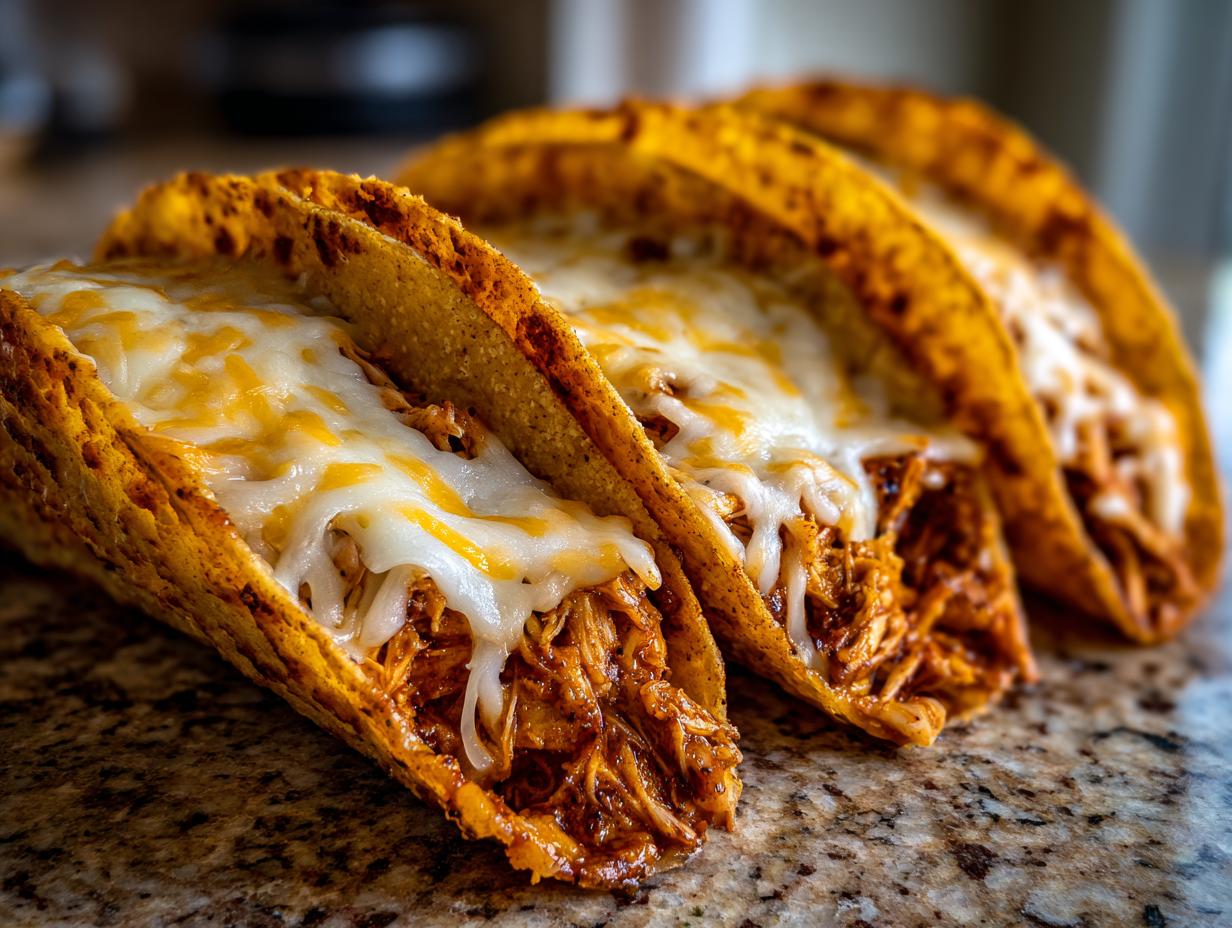
Oh, friends, if you are staring down the barrel of another busy weeknight and wondering what quick Mexican inspired meals you can pull off without a total meltdown, I have the answer! Forget fancy marinades or hours simmering chicken; we are going straight for speed and crunch today with these absolutely perfect, quick crispy chicken tacos.
This recipe is one I turn to when time is short, but the craving for something satisfying hits hard. It’s tested and true—reliable, just like my grandmother’s favorites—and shines because we lean on easy ingredients, especially if you grab a rotisserie chicken! Seriously, these baked chicken tacos come together in about 20 minutes total, and they deliver all the crunch you want.
- Why You Will Make These Quick Crispy Chicken Tacos Again and Again
- Essential Ingredients for Perfect Crispy Chicken Tacos
- Expert Tips for Making the Best Shredded Chicken Tacos Filling
- Step-by-Step Instructions for Oven Baked Tacos
- Serving Suggestions for Your Family Taco Night
- Make-Ahead and Storage Tips for Chicken Tacos
- Frequently Asked Questions About Crispy Chicken Tacos
- Estimated Nutrition Profile for These Easy Weeknight Tacos
- Share Your Experience Making These Chicken Tacos
Why You Will Make These Quick Crispy Chicken Tacos Again and Again
Honestly, these tacos have earned a permanent spot in my regular rotation. If you need maximum flavor payoff for minimal effort, this is it. Trust me, once you see how fast these come together after a long day, you’ll be hooked!
- Dinner is ready in about 20 minutes total—lightning fast!
- We use pre-cooked chicken, which cuts out all the hard work. Hello, easy weeknight tacos!
- You get that satisfying, crunchy shell texture without deep frying.
- The kids absolutely love them, making this the easiest family taco night ever.
Essential Ingredients for Perfect Crispy Chicken Tacos
The beauty of these crunchy taco shells is that you don’t need a huge grocery list. We are sticking to the basics that give us maximum flavor and that perfect built-in crispiness when baked. Remember, the quality of your main ingredients really shows through here.
Here is what we gather before we even think about turning the oven on. Keep these items handy for all your quick Mexican inspired meals!
- 2 cups of that lovely, cooked shredded chicken—don’t start without it!
- 1 cup of salsa, and yes, it MUST be drained. I repeat, drained!
- 1 teaspoon chili powder
- 1/2 teaspoon cumin
- 1/4 teaspoon garlic powder
- 12 hard taco shells (the crunchy kind!)
- 1 cup shredded Monterey Jack cheese—this melts like a dream.
- A good spray of vegetable oil.
Ingredient Notes and Substitution Tips
Okay, let’s talk specifics, because these little choices make all the difference for your Monterey Jack tacos.
If you are going the rotisserie chicken route—and please, do!—just make sure you shred a good, clean two cups. Any pre-cooked shredded chicken works just fine, but you want it quite dry before adding your flavorings.
The salsa? You have to drain it, even if it feels tedious. Any excess water seeps into the shell and prevents that nice crunch we are aiming for. We want flavor, not sogginess!
As for the cheese, Monterey Jack is my favorite because of how beautifully it melts and holds everything together, but a good sharp cheddar blend works in a pinch if cheese is your main concern.
Expert Tips for Making the Best Shredded Chicken Tacos Filling
Once you have your required two cups of chicken ready—ideally that super-speedy rotisserie chicken—mixing up the filling is where the magic starts for these shredded chicken tacos. We aren’t just making bland spiced chicken; we are building flavor structure here!
Get a good medium bowl, dump in your chicken, and then add your flavor boosters. I love this trio: chili powder for warmth, cumin for that earthy backbone, and just a little garlic powder because, well, everything is better with garlic powder, right? Mix it all together with your hands if you have to; you want everything coated evenly.

Now, let’s talk about the salsa again. I cannot overstress this: DRAIN IT! If you skip that step, your taco shells spend the entire bake time fighting off moisture, and crunchy shells just aren’t worth fighting for. You want the mixture to feel slightly dry, not wet, before it goes in the shell. I learned that the hard way when hosting a party once—ended up with half taco bowls!
My personal tip for consistency? I always mix until the spices look totally incorporated, but I stop just before I think it’s perfect. That little bit of under-mixing seems to let the flavors meld better on their own. If you’re planning ahead, you can whip up this amazing chicken filling up to three days ahead of time. So handy!
Step-by-Step Instructions for Oven Baked Tacos
Alright, let’s get these babies assembled and into the oven! This is the fast part, but precision wins the battle over sogginess here. Grab your prettiest baking sheet—even though you’re using it for support, we want nice presentation!
First things first: Crank that oven up! We need it roaring hot at 400 degrees Fahrenheit. Gotta get those shells nice and toasty.
- Take your prepped, seasoned chicken mixture and spoon it gently into each hard shell. Don’t overdo it, please! Fill them only about two-thirds full. This prevents the filling from spilling out when the cheese melts.
- Once filled, sprinkle that heavenly Monterey Jack cheese right on top of the chicken in every single shell.
- Now, this next step is non-negotiable for achieving that beautiful crispness in your oven baked tacos. Give the tops of the shells and the cheese a light but thorough misting with vegetable oil spray. Seriously, don’t skip the spray!
- Pop the whole setup into that hot oven for about 8 to 10 minutes. You are looking for two things: bubbly, melted cheese, and shells that smell perfectly hot.
Pull them out carefully, let them cool just for a minute so you don’t burn your tongue, and get ready for the easiest dinner ever.
The Secret to Crispy Chicken Tacos Shells
If you’re anything like me, you hate the structural failure of a taco shell that gives up halfway through eating. The oil spray is key for oven baked tacos because it helps the cornmeal shells dry out and get that extra-firm crunch while the cheese melts and holds the filling in place. That light mist on the cheese helps it brown up nicely, too.
But, if you want to go completely rogue and extra crispy—and you trust your oven—I have a little secret my neighbor taught me. If your oven racks are sturdy and spaced well, you can actually place the shells directly on the rack, open side up! It lets air circulate all around, giving you maximum crunch factor. Just make sure they stand up straight so your filling doesn’t escape. It’s risky, but the payoff is amazing for truly crunchy taco shells!
Serving Suggestions for Your Family Taco Night
Okay, the shells are hot, the cheese is gooey, and the chicken filling is savory—now for the fun part! These baked tacos are great on their own, but they really shine when you pile on some cool, fresh toppings. This is where you can jazz things up and make it a real event for family taco night.
I always set out a little “taco bar” situation because everyone likes things their own way. Don’t forget the crunch! Shredded romaine lettuce adds that perfect cool temperature contrast to the hot cheese. Diced tomatoes and maybe some finely chopped red onion give you a nice acidic bite.

And seriously, you need sour cream or maybe a spoonful of plain Greek yogurt if you’re watching richness—it just cools down all those spices beautifully. A sprinkle of fresh cilantro on top is non-negotiable for me; that herbaceous pop just elevates the whole experience. Enjoy that quick dinner!
Make-Ahead and Storage Tips for Chicken Tacos
One of the best secrets to making those easy weeknight tacos appear even faster? Prep ahead! I absolutely love efficiency, and luckily, the filling for these chicken tacos is perfect for making early. Remember, that seasoned shredded chicken mixture can hang out in the fridge for up to three whole days!
When you are ready to eat, just pull out the filling and your hard shells. Because we baked them the first time, we need to be smart about leftovers to keep that crunch factor alive.
For the filling, just seal it up tight in an airtight container. It reheats beautifully in the microwave for just a minute or two, or you can warm it gently in a skillet if you prefer.
The shells, though, are a different story. Never reheat pre-filled shells in the microwave, or you’ll ruin the crunch instantly! The best trick is to reheat the empty crunchy taco shells separately. Pop them on a cookie sheet in a low oven—maybe 300 degrees—for about five minutes. This basically re-toasts them. Then, fill them up right before serving. Easy peasy for leftovers!
Frequently Asked Questions About Crispy Chicken Tacos
I get so many questions whenever I share these quick dinners on social media! It’s funny how everyone has a slightly different twist they want to try, especially when it comes to achieving the perfect crunch. Here are a few things people ask most often about these easy weeknight tacos.
Can I use soft tortillas instead of hard shells?
You absolutely can, but they won’t be crispy chicken tacos in the traditional sense! If you use soft tortillas, you miss out on that guaranteed crunch we worked so hard for. However, if you want soft tacos, just warm those tortillas up briefly in a dry skillet or wrap them in a damp paper towel and microwave for thirty seconds. Then, fill them with the hot cheesy mixture. They are lovely, just not crunchy!
What is the best way to reheat leftovers?
This is crucial! To keep your crunchy taco shells tasting fresh, never try to reheat them pre-filled in the microwave. That’s a recipe for a soggy disaster. For the best results, reheat the filling—the seasoned, shredded chicken mixture—on the stovetop over medium heat until warm. Then, quickly toast the empty hard shells in a low oven (around 300°F) for about five minutes to refresh their crispness. Fill immediately!
Is Monterey Jack the only cheese I can use?
Not at all, but it’s my go-to for these oven baked tacos! I love Monterey Jack tacos because it gets nice and creamy and gooey under the broiler without separating. If you don’t have it, a Mexican four-cheese blend or even a good medium cheddar works wonderfully. The main thing is that you want a cheese that melts well. Avoid pre-grated cheese if you can, because the anti-caking agents sometimes prevent that smooth melt.
Can I freeze the chicken filling?
Yes! Freezing is slightly different than the three-day fridge storage, but totally doable for these quick meals. Make a double batch of the seasoned filling (make sure it’s fully cooked), let it cool completely, and seal it tightly in a freezer-safe bag. When thawed and reheated, it’s just as good as fresh for your next family taco night.
Estimated Nutrition Profile for These Easy Weeknight Tacos
Look, I’m not a nutritionist, and my kitchen is about comfort, not calculating macros down to the milligram! But since I know so many of you are curious about these easy weeknight tacos, here are the general numbers based on exactly three tacos per serving.
Please know these are just great estimates based on the specific ingredients in the recipe card above. If you load yours up with way more cheese or use low-fat sour cream, things will change. But for the basic recipe?
- Calories: Around 350
- Protein: A solid 30g!
- Total Fat: About 15g
- Carbohydrates: Roughly 25g
This is a fantastic, quick meal for your family taco night that actually gives you a good helping of protein without being too heavy!
Share Your Experience Making These Chicken Tacos
Now that you’ve got the speed, the crunch, and the ease locked down for your next batch of chicken tacos, I would absolutely love for you to come back and tell me all about it! Seriously, the best part of sharing these recipes is hearing how they turn out in *your* kitchen.
Did you manage to get the shells extra crispy using that rack trick I mentioned? Or maybe you loaded these up into a giant party taco bar display? Tell me everything! Did you swap out the Monterey Jack for something else? I insist you leave a star rating right below—it truly helps other home cooks decide if they should try this recipe for their own quick Mexican inspired meals.
Don’t forget to drop a comment below detailing any customizations you made or any success stories on keeping those shells crunchy. I read every single one and I’m always looking for new little twists to try next time I’m whipping up these quick, delicious shredded chicken tacos!
PrintQuick Crispy Baked Chicken Tacos

Make fast, crunchy chicken tacos using pre-cooked shredded chicken and Monterey Jack cheese. Bake them for a simple family weeknight meal.
- Prep Time: 10 min
- Cook Time: 10 min
- Total Time: 20 min
- Yield: 4 servings 1x
- Category: Dinner
- Method: Baking
- Cuisine: Mexican Inspired
- Diet: Low Fat
Ingredients
- 2 cups cooked shredded chicken
- 1 cup salsa, drained
- 1 teaspoon chili powder
- 1/2 teaspoon cumin
- 1/4 teaspoon garlic powder
- 12 hard taco shells
- 1 cup shredded Monterey Jack cheese
- Vegetable oil spray
Instructions
- Preheat your oven to 400 degrees Fahrenheit.
- In a medium bowl, combine the shredded chicken, drained salsa, chili powder, cumin, and garlic powder. Mix well until the chicken is evenly coated.
- Lightly spray a baking sheet with vegetable oil spray. Arrange the hard taco shells open-side up on the baking sheet.
- Spoon the chicken mixture evenly into each taco shell, filling them about two-thirds full.
- Top the chicken filling in each shell with shredded Monterey Jack cheese.
- Lightly spray the tops of the shells and cheese with vegetable oil spray. This helps them crisp.
- Bake for 8 to 10 minutes, or until the cheese is melted and the shells are hot and slightly crispier.
- Serve immediately with your favorite fresh toppings.
Notes
- You can use rotisserie chicken for faster prep time.
- Make the chicken filling ahead of time and store it in the refrigerator for up to 3 days.
- For extra crispiness, place the shells directly on the oven rack instead of a baking sheet, if your oven allows.
Nutrition
- Serving Size: 3 tacos
- Calories: 350
- Sugar: 3
- Sodium: 550
- Fat: 15
- Saturated Fat: 7
- Unsaturated Fat: 8
- Trans Fat: 0
- Carbohydrates: 25
- Fiber: 3
- Protein: 30
- Cholesterol: 85