
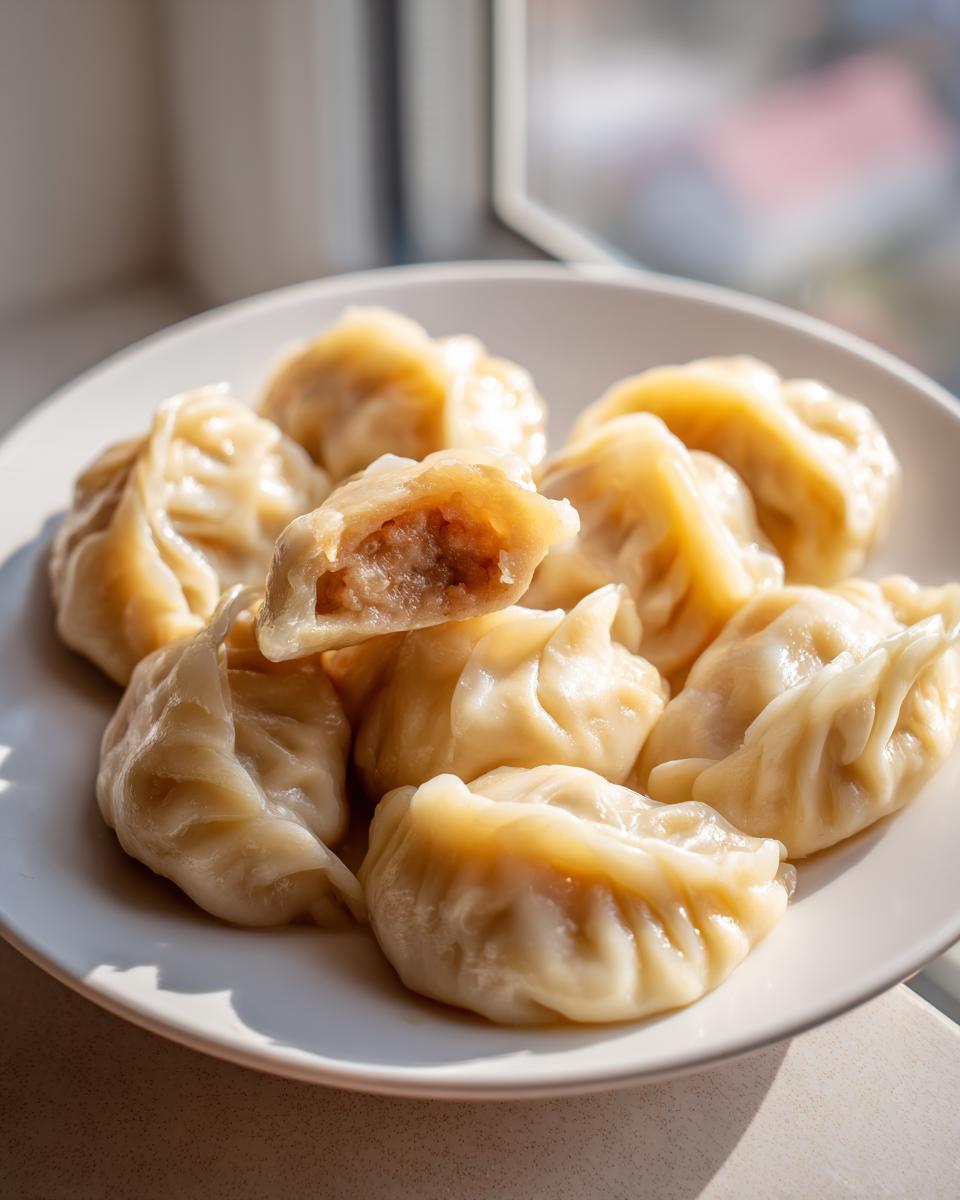
There’s nothing quite like sitting around a table piled high with warm, perfectly pleated pockets of goodness, is there? That smell just takes you right back home, even if you’ve never been there before! I’m sharing my secrets today for making truly Traditional Chinese Dumplings from scratch. Forget those chewy, sad frozen bags; we are making our own wrappers and getting that filling just right.
When I watch my hands work the dough, I feel the same sense of connection I always felt watching my grandmother’s practiced hands at work. Cooking this way—making every single component—is how we keep those cherished memories alive. Trust me, these pork and cabbage dumplings are worth the small amount of extra effort. You’ll see!
- Why This Traditional Chinese Dumplings Recipe Stands Out (Experience & Expertise)
- Gathering Ingredients for Traditional Chinese Dumplings
- Step-by-Step Guide to Making Homemade Dumpling Wrappers
- Preparing the Authentic Jiaozi Filling
- Assembling Your Traditional Chinese Dumplings: Pleating Tutorial
- Cooking Methods for Perfect Boiled Chinese Dumplings
- Storage and Making Ahead: Freezer Friendly Dumplings
- Frequently Asked Questions About Traditional Chinese Dumplings
- Understanding the Nutrition in Your Chinese Dumplings Recipe
- Share Your Lunar New Year Dumplings Experience
Why This Traditional Chinese Dumplings Recipe Stands Out (Experience & Expertise)
Honestly, you can buy wrappers, but once you try making them yourself, there’s just no going back. This recipe for Traditional Chinese Dumplings is all about that immediate satisfaction you get from home cooking. It takes a little time, sure, but the reward is immense! Homemade wraps have this wonderful chewiness that you just can’t replicate off the shelf. Plus, when you nail the filling—those perfect pork cabbage dumplings—you taste the difference in every single, savory bite.
This isn’t just dinner; it’s a connection back to real, authentic cooking methods. We honor tradition here by doing things the right way, using simple, quality ingredients that sing together beautifully.
The Secret to Perfect Homemade Dumpling Wrappers
Store-bought wrappers are often a little thick and sometimes gummy when boiled, right? That’s because they have stabilizers and preservatives. Our homemade version uses just two things: flour and water! That simplicity is what gives you a wrapper that is tender when boiled but still has enough structure to hold all that gorgeous filling. You’ll notice the dough is surprisingly pliable, which makes rolling out those 3-inch circles much easier than you expect when you’re aiming for that classic authentic jiaozi look.
Achieving the Best Pork Cabbage Dumplings Filling
My biggest piece of advice for the filling is this: don’t skip squeezing the cabbage! Seriously, do it well, press out as much liquid as you can. If you leave that water in there, your dumplings will get soggy during cooking, and nobody wants that. We want a nice, tight mixture.
Once the cabbage is dry, just mix everything until it’s uniform. You need that mixture to be slightly sticky so it holds together around the wrapper. The ginger is key here; it cuts through the richness of the pork beautifully and lights up the whole flavor profile of these pork cabbage dumplings.
Gathering Ingredients for Traditional Chinese Dumplings
Getting ready to make these is half the fun! You definitely need high-quality stuff for the best results, even though the list itself is pretty simple. We are focusing on pantry staples and fresh meat and veg here. It’s amazing how few ingredients we need to make these perfect Traditional Chinese Dumplings.
You’ll need all-purpose flour and some warm water for the dough, of course. Then for the filling, it’s all about the ground pork, that wonderfully crisp Napa cabbage, soy sauce, sesame oil, fresh ginger, salt, and white pepper. That’s it! Simple, right? But every single item plays a huge part in the final taste.
Ingredient Notes and Substitutions
Since we are starting from scratch, the quality really shows through! Make sure your Napa cabbage is super fresh before you shred it; that texture makes a huge difference in the final *pork cabbage dumplings* if you plan on freezing them later.
Now, for a little secret tip from my own testing: if you want something really luxurious, definitely try swapping out half of that ground pork for ground pork belly. Wow! It adds incredible richness and moisture that you just can’t beat. It makes them extra celebratory, perfect for Lunar New Year dumplings, though they’re certainly good enough for a Tuesday night treat, too!
Step-by-Step Guide to Making Homemade Dumpling Wrappers
This is where the real magic begins! Making the dough for homemade dumpling wrappers is actually incredibly easy, but you have to respect the resting time. Don’t rush this part; the gluten needs a little break after all that kneading!
First, get your two main ingredients—the flour and the warm water—together in a bowl. I always mix it by hand until it starts looking shaggy. Then, you need to turn it out onto a clean counter. You’ll need to knead this dough for a good 8 to 10 minutes. It might feel a little tough at first, but keep working it. When it’s ready, it should be super smooth, almost satiny.
Cover that dough ball up—I usually just put an inverted bowl over it—and let it just sit there for 30 minutes. This resting step is non-negotiable! It relaxes the gluten so it rolls out beautifully thin later. If you skip this, you’ll be fighting the dough the whole time.
Once it’s rested, divide it into about four equal chunks. Roll each chunk into a long rope, maybe an inch thick. Then, slice that rope into little one-inch pillows. Take one pillow and start rolling it out into that perfect circle. Here’s the pro tip for easy folding: try to keep the center thicker than the edges. You want a nice, solid center to hold the filling, but thin, delicate edges that seal up tight. Aim for about 3 inches across. Keep the ones you aren’t using covered so they don’t dry out while you finish rolling them all!
Preparing the Authentic Jiaozi Filling
Alright, while that dough is resting, we get to the fun part—the filling! We need to build up all that savory flavor layer by layer, and trust me, combining these simple ingredients into the perfect authentic jiaozi filling is what makes all the difference in our Traditional Chinese Dumplings.
Remember how I told you to squeeze all the water out of that shredded Napa cabbage? Now is when you appreciate that step! Once the cabbage is nice and dry, you combine it in a big bowl with your ground pork—or pork belly mix, wink, wink. Then we layer in the flavor bombs: the soy sauce for depth, the sesame oil for that signature nutty aroma, a little fresh grated ginger for brightness, and finally, the salt and white pepper.
Now, you cannot just gently stir this together casually. You need to really mix it up with your hands—wear gloves if you want to keep your hands from smelling garlicky! You’re mixing until you can feel the mixture change. It should go from crumbly to visibly uniform, and critically, it needs to feel a little bit sticky. That stickiness is the protein binding together, and it’s what keeps the filling from just falling apart inside your wrapper when you boil them. Mix until it feels dense and ready to stick to itself. That dense, springy mix is how you know your authentic jiaozi are going to hold up perfectly!
Assembling Your Traditional Chinese Dumplings: Pleating Tutorial
Okay, the dough is rested, the filling is mixed—now for the fun (and maybe scariest) part: making them look gorgeous! This is where you start transforming simple discs into beautiful Traditional Chinese Dumplings.
Take about a teaspoon of that amazing filling and put it right in the center of your wrapper. Don’t overfill them! That’s the number one mistake people make. You want just enough so the wrapper can close neatly.
Next, here’s a vital tip: use your finger to lightly wet the edges of the wrapper—the rim only—with a little bit of plain water. Don’t dunk the edges; just a light touch with your fingertip works perfectly. This water is your glue!
Fold the wrapper in half to make a half-moon shape, pinching the very center top together first so you have two neat wings of dough. Now, start creating those pleats! You’re basically folding small sections of the front edge over onto the back edge, pressing firmly as you go all the way around. You want those seals to be tight enough so they don’t pop open when they hit the hot water. When you finish, give the whole seam one last good press. You should have a beautiful, crimped edge ready for boiling!
Cooking Methods for Perfect Boiled Chinese Dumplings
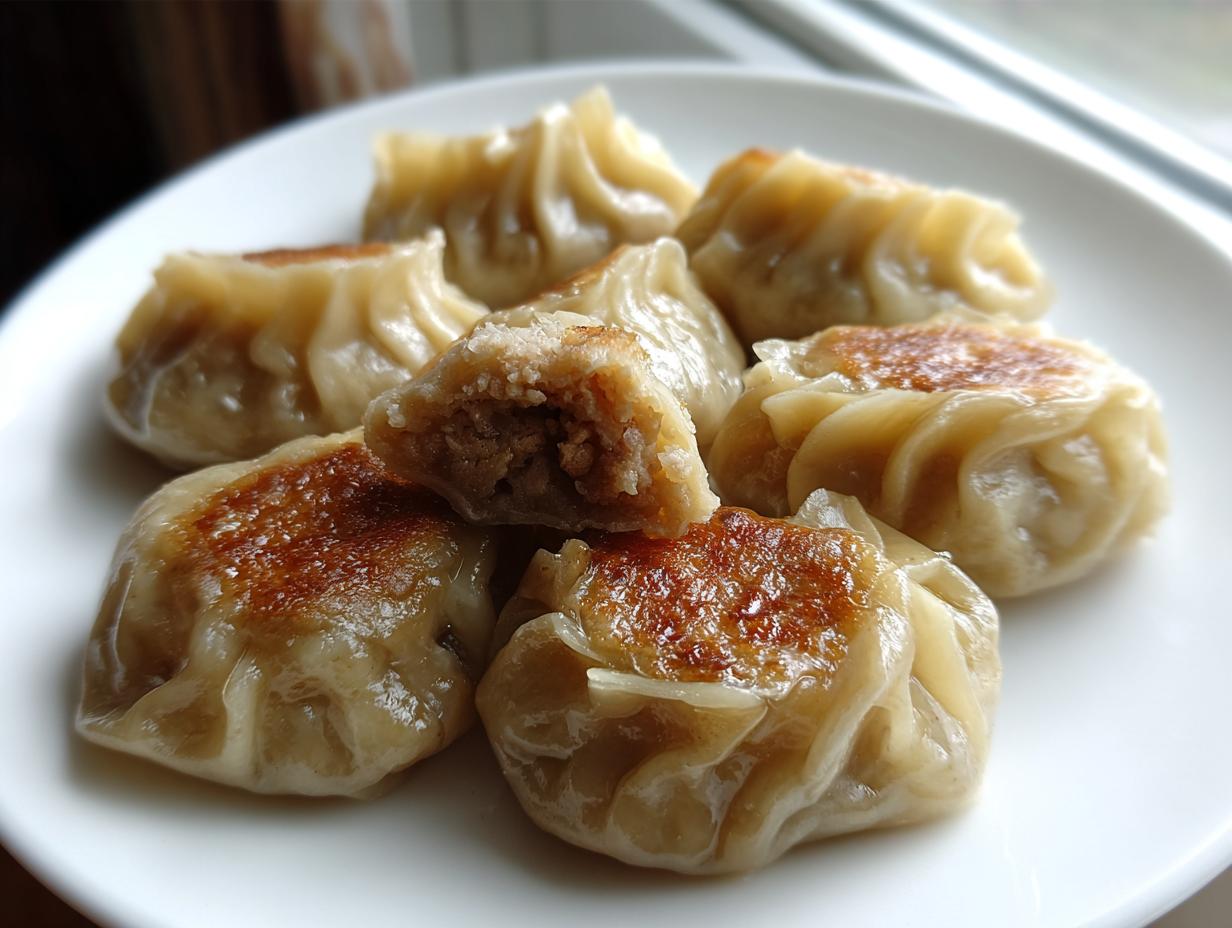
Since these are designed to be perfectly soft and slurp-able, we are sticking to boiling them today. These boiled Chinese dumplings come out incredibly tender when you treat the water right. It’s important they don’t just fall apart when they hit the heat, so timing is everything!
Get a big pot of water going until you have a rolling boil—and I mean rolling! You want that vigorous action because it keeps the dumplings separated and moving as soon as they go in. Gently drop your fresh dumplings into the water, maybe five or six at a time so you don’t overcrowd the pot and drop the temperature too much.
The absolute key here is stirring gently right away. Use a spoon or a ladle to just nudge them away from the bottom of the pot for the first minute. If they stick, they’ll tear, and all that savory filling will escape! Don’t stir vigorously, just enough to keep them dancing in the water.
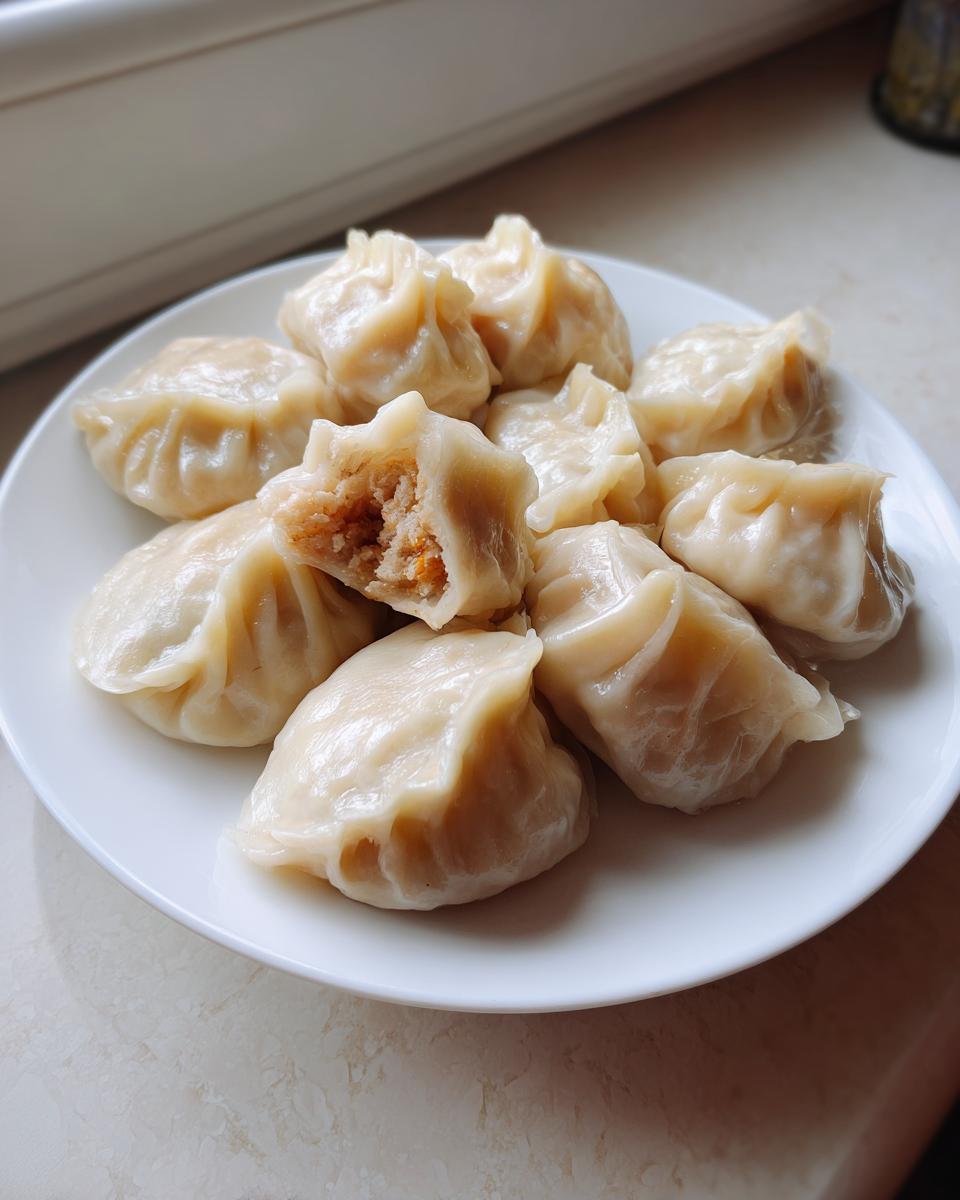
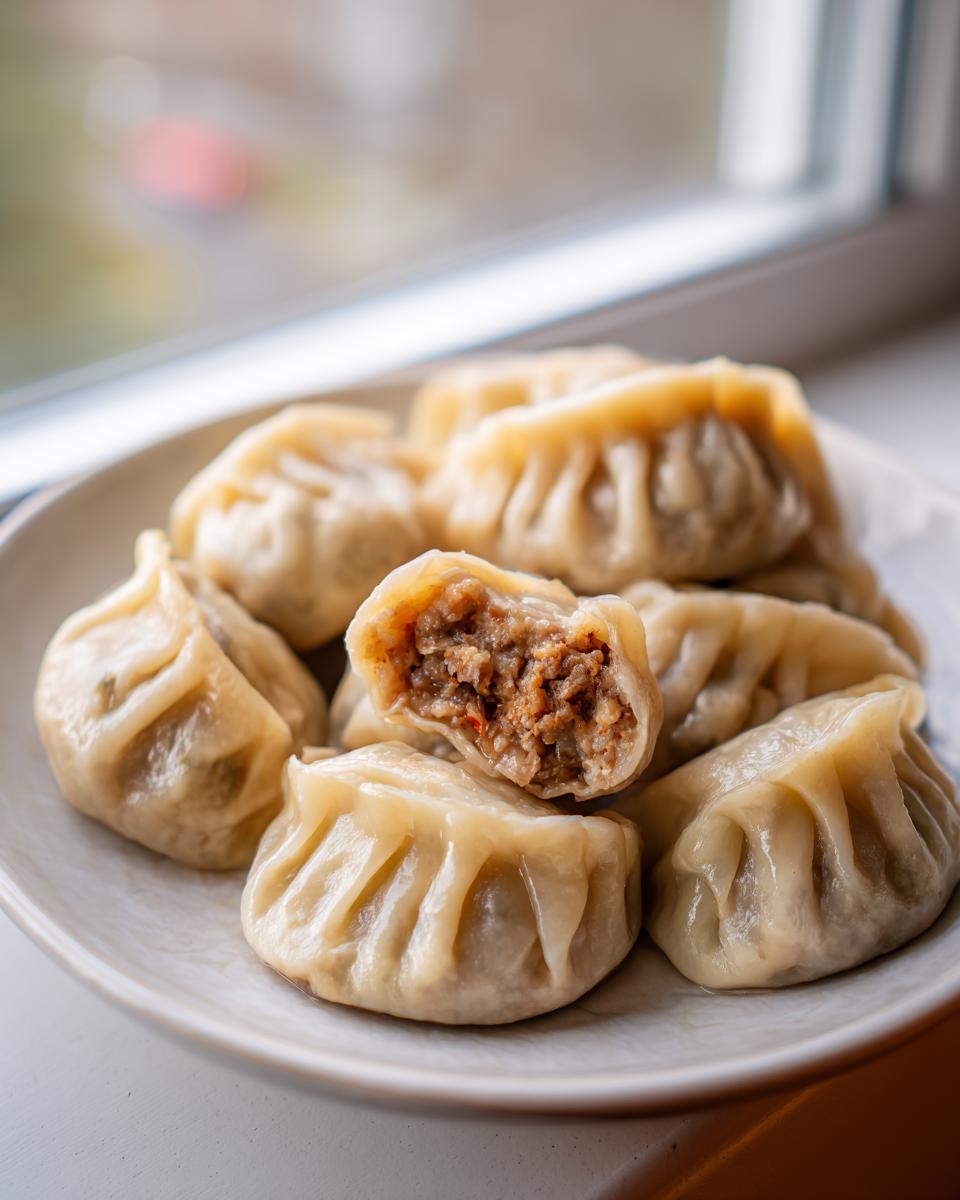
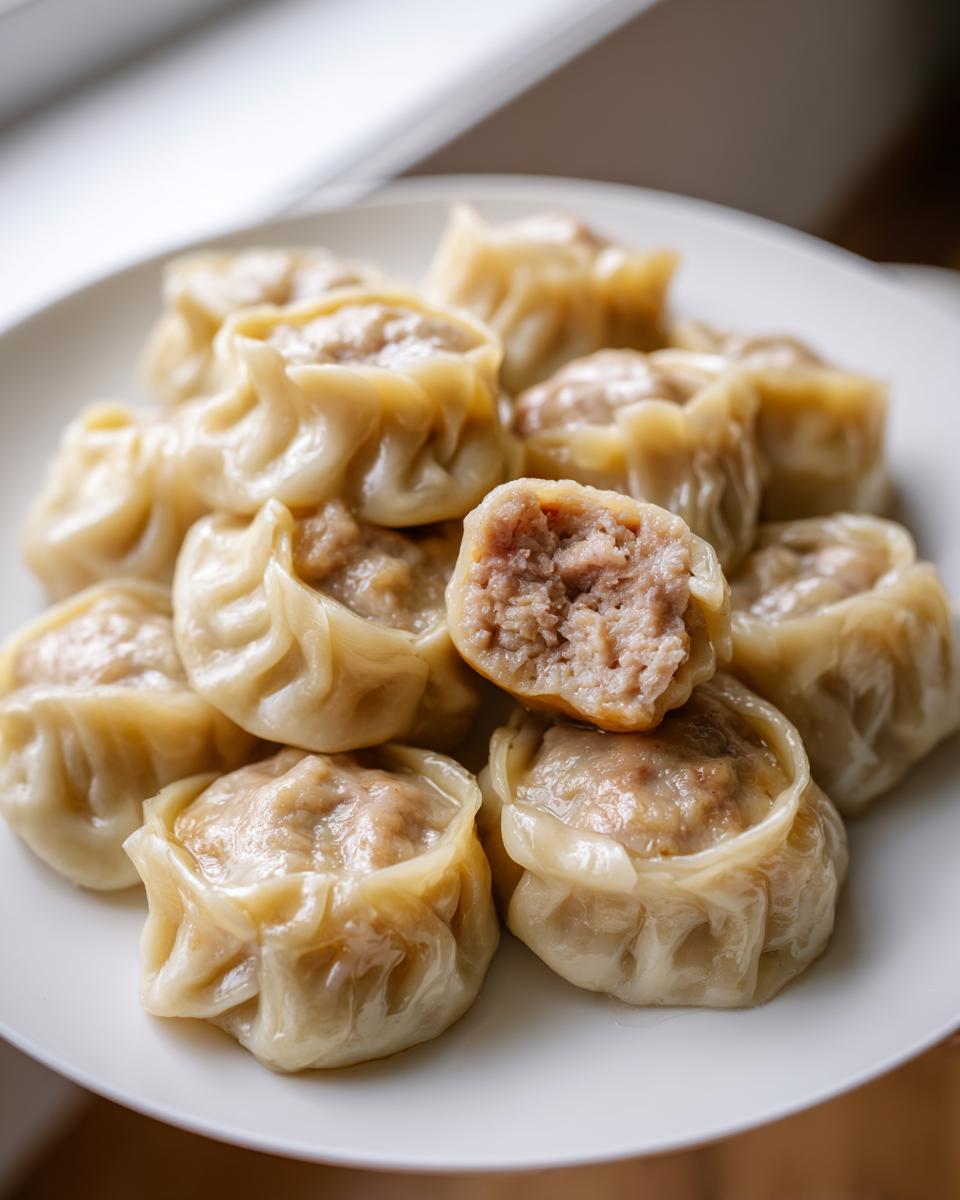
They’ll cook for about 5 to 7 minutes. You’ll know they are ready because they will float right to the top! Once floating, give them one more minute just to make sure that pork filling is cooked all the way through. Scoop them out with a slotted spoon and serve them hot with whatever sauce you love!
Tips for Cooking Frozen Traditional Chinese Dumplings
One of the great things about taking the time to make a huge batch of these Traditional Chinese Dumplings is that you can freeze them! They make the best backup meal because you don’t even have to thaw them. Seriously, if you’re short on time, these are your new best friend.
When you want to cook the freezer friendly dumplings, just drop them straight from the freezer into that vigorously boiling water. Do not let them sit out on the counter for even a minute! You’ll need to add just a little bit more time to the process. Since they are frozen solid, they usually take about 2 to 3 extra minutes on top of the fresh cooking time. Just wait until they float, and then give them that extra time to ensure the center is perfect and piping hot. Easy peasy storage and dinner!
Storage and Making Ahead: Freezer Friendly Dumplings
This is the part that makes all the hard work worth it, I promise! Once you’ve gone to all the trouble of making the dough and folding up a mountain of Traditional Chinese Dumplings, you absolutely must make extra to freeze. Having these tucked away means you have an authentic, ready-to-go meal on hand for those crazy weeknights when you don’t have time for anything else.
To make them truly freezer friendly dumplings, you can’t just toss them in a bag; they’ll stick into one giant frozen dumpling brick, and then you’re in trouble! You need to line a rimmed baking sheet with some parchment paper first. This keeps them from sticking to the tray.
Place your uncooked, freshly sealed dumplings onto that prepared sheet in a single layer. Make sure there is a little bit of space between each one. Then, slide that tray into the freezer until they are rock solid. This usually takes an hour or two, depending on how cold your freezer runs. Once they’re totally frozen, you can just scoop them all off the sheet and toss them into an airtight, freezer-safe bag. Label it with the date, and they are good to go for months!
This freezer stash is my secret weapon for Chinese New Year gatherings. When guests arrive unexpectedly, I just pull out a bag of these beautiful authentic jiaozi, boil them up, and suddenly I’m the hostess hero! It makes serving homemade food so much less stressful.
Frequently Asked Questions About Traditional Chinese Dumplings
I know you might have a few lingering questions after tackling homemade dough and custom fillings! It happens every time I teach someone to make these Traditional Chinese Dumplings for the first time. But don’t worry, that’s what this FAQ is for! Getting these little details right is what turns a good dumpling night into an amazing one. If you have more questions, just send them over through my contact page!
Can I pan-fry these pork cabbage dumplings instead?
Oh yes, you absolutely can! While this recipe is for the lovely, soft boiled Chinese dumplings, these are fantastic pan-fried too—they become classic potstickers! Here is how you do it: You use a medium-hot skillet with a splash of oil. Place the dumplings in the pan flat side down and brown them for about 2 minutes until the bottoms are golden. Then, pour in about a quarter cup of water (or a watery cornstarch mix) and immediately cover the pan tightly. Let them steam for about 5 to 7 minutes until the water evaporates. When the water is gone, let them sit uncovered for 30 seconds to crisp up that bottom again. Perfection!
What is the best dipping sauce for authentic jiaozi?
Listen, you could buy a bottle, but trust me, the dipping sauce for authentic jiaozi is just as important as the filling! It has to be quick, though. My staple sauce is super simple. It’s three parts soy sauce, one part Chinese black vinegar (that’s the richer, slightly sweeter dark kind), a drizzle of sesame oil, and maybe a few drops of chili oil if you like heat. I also love grating a tiny bit of fresh ginger right into the sauce just before serving. That bright, zesty kick really lifts the flavor of the pork and cabbage beautifully.
How far in advance can I make the dough for homemade dumpling wrappers?
This is such a good question for people who like to prep for big events, like Lunar New Year dumplings! The dough is fairly resilient. After you knead it (Step 1 in the main recipe), you must let it rest for that 30 minutes. After that initial rest, you can wrap that smooth ball tightly in plastic wrap and keep it in the refrigerator for up to 24 hours. When you want to roll them out, take the dough out about 30 minutes before you plan to use it so it softens up just enough to roll easily. If the dough gets too hard from the fridge, it will crack when you try to stretch those homemade dumpling wrappers thin!
Understanding the Nutrition in Your Chinese Dumplings Recipe
Now, I know everyone’s watching what they eat these days, and it’s great that you’re making these from scratch because you control every single ingredient! That’s a huge win over restaurant versions. These estimations give you a rough idea, but since we’re using fresh pork and homemade dough, your results might vary slightly based on the fat content of your meat or even how thin you managed to roll those homemade dumpling wrappers.
These numbers are based on about five **boiled Chinese dumplings** per serving size, assuming you aren’t totally drowning them in sauce (which, let’s be honest, is the real challenge!). Take a peek, but remember, the best part about this Chinese dumplings recipe is the flavor and the love baked right in!
Here’s a quick breakdown of the estimated nutrition:
- Serving Size: 5 dumplings
- Calories: 280
- Fat: 12g
- Saturated Fat: 4g
- Carbohydrates: 28g
- Protein: 16g
- Sodium: 350mg
We keep the sodium down intentionally, so make sure your dipping sauce isn’t too heavy on the salt! If you’ve gone the extra mile and used leaner pork or added more cabbage to your pork cabbage dumplings, your numbers might even look a little better. As always, if you have specific dietary needs or questions about ingredients, please check out my privacy policy page for more info on sourcing, though specific nutritional analysis isn’t part of that!
Share Your Lunar New Year Dumplings Experience
Wow! We did it! We made beautiful, authentic Traditional Chinese Dumplings entirely from scratch—wrappers and all! I honestly hope you had as much fun making them as I did writing this down for you. This entire process, especially making things like these Lunar New Year dumplings by hand, is such a joy and a real connection to heritage cooking.
I absolutely live for hearing how your batches turned out! Did the pleating go smoothly for you this time around, or are you saving that skill for next time? Please take a moment to leave a comment down below and tell me about your experience. Did you try using the pork belly trick? I need to know if it was as delicious as I remember!
If you snapped any pictures of your beautiful, golden-bottomed potstickers or your delicate steamed dumplings, please tag me on social media! It truly warms my heart to see my recipes ending up on your family tables. Don’t forget to give this recipe a star rating if it earned a spot in your regular rotation. Happy cooking, and check out my terms of use if you have any questions about sharing your creations!
PrintTraditional Pork and Cabbage Chinese Dumplings (Jiaozi)
Make authentic Chinese pork and cabbage dumplings from scratch, including instructions for making homemade wrappers and freezing the finished jiaozi.
- Prep Time: 45 min
- Cook Time: 10 min
- Total Time: 55 min
- Yield: 4 servings 1x
- Category: Dinner
- Method: Boiling
- Cuisine: Chinese
- Diet: Low Fat
Ingredients
- 2 cups all-purpose flour
- 1 cup warm water (plus extra for sealing)
- 1 pound ground pork
- 3 cups finely shredded Napa cabbage
- 1 tablespoon soy sauce
- 1 teaspoon sesame oil
- 1 teaspoon grated fresh ginger
- 1/2 teaspoon salt
- 1/4 teaspoon white pepper
Instructions
- Make the dough: Combine flour and warm water in a bowl. Mix until a shaggy dough forms. Knead on a lightly floured surface for 8-10 minutes until smooth. Cover and let rest for 30 minutes.
- Prepare the filling: Squeeze excess water from the shredded cabbage. In a large bowl, combine ground pork, cabbage, soy sauce, sesame oil, ginger, salt, and white pepper. Mix well until the mixture is uniform and slightly sticky.
- Roll the wrappers: Divide the dough into four equal pieces. Roll each piece into a long rope about 1 inch thick. Cut the rope into 1-inch pieces. Roll each piece into a thin circle, about 3 inches in diameter, keeping the edges slightly thinner than the center.
- Assemble the dumplings: Place about 1 teaspoon of filling in the center of a wrapper. Moisten the edges with water. Fold the wrapper in half to form a half-moon shape. Pleat the edges together to seal securely.
- Cook the dumplings: Bring a large pot of water to a rolling boil. Gently drop the dumplings into the water, stirring gently so they do not stick to the bottom. Cook for 5-7 minutes, or until the dumplings float and the filling is cooked through.
- Serve immediately with your preferred dipping sauce.
Notes
- To freeze: Place uncooked dumplings in a single layer on a baking sheet lined with parchment paper. Freeze until solid. Transfer frozen dumplings to an airtight, freezer-safe bag.
- To cook frozen dumplings: Do not thaw. Boil directly from frozen, adding 2-3 minutes to the cooking time.
- For a richer flavor, substitute half the ground pork with ground pork belly.
Nutrition
- Serving Size: 5 dumplings
- Calories: 280
- Sugar: 1
- Sodium: 350
- Fat: 12
- Saturated Fat: 4
- Unsaturated Fat: 8
- Trans Fat: 0
- Carbohydrates: 28
- Fiber: 2
- Protein: 16
- Cholesterol: 55